Skip to content
tossedflavors.com
  • Home
  • Appetizers
  • Desserts
  • Salads
  • Breakfast
  • Dinner
  • Privacy Policy
  • Contact
  • About

Chef Evan

Carrot Apple Zucchini Bread Deliciously Simple Recipe

June 17, 2025 by Chef Evan
- 1 cup finely grated zucchini - 1 cup grated carrots - 1 cup grated tart apple - 1/2 cup granulated sugar - 1/2 cup brown sugar - 1/2 cup chopped walnuts or pecans - 1/2 cup raisins or dried cranberries - 1 1/2 cups all-purpose flour - 1 teaspoon baking soda - 1 teaspoon baking powder - 1 teaspoon ground cinnamon - 1/2 teaspoon ground nutmeg - 1/4 teaspoon salt To create my Carrot Apple Zucchini Bread, I focus on fresh, vibrant ingredients. The main players are zucchini, carrots, and tart apples. Each adds moisture and flavor. Grating them finely helps blend them into the batter. I also use both granulated and brown sugar. The granulated sugar adds sweetness, while brown sugar gives a rich flavor. For those who like extra texture, I suggest adding chopped nuts or dried fruit. Walnuts or pecans give a nice crunch. Raisins or dried cranberries add a touch of sweetness. Finally, I include key baking essentials. All-purpose flour forms the base, while baking soda and baking powder help the bread rise. Ground cinnamon and nutmeg add warmth and comfort. A pinch of salt balances the sweetness. This combination makes for a delicious and moist bread. You can find the full recipe to enjoy this delightful treat! - Preheat your oven to 350°F (175°C). - Prepare a 9x5 inch loaf pan by greasing it or lining it with parchment paper. - Take one medium zucchini and grate it finely. - In a clean kitchen towel, squeeze out extra moisture from the grated zucchini. - In a medium bowl, whisk together the following wet ingredients: - 1/2 cup granulated sugar - 1/2 cup brown sugar - 1/2 cup vegetable oil - 3 large eggs - 1 teaspoon vanilla extract - Pour the wet mix into the bowl with the grated zucchini, carrots, and apple. - Stir gently with a spatula until just combined. - In another bowl, whisk together: - 1 1/2 cups all-purpose flour - 1 teaspoon baking soda - 1 teaspoon baking powder - 1 teaspoon ground cinnamon - 1/2 teaspoon ground nutmeg - 1/4 teaspoon salt - Gradually add this dry mixture to the wet mixture. - Carefully fold them together without overmixing. - If desired, fold in 1/2 cup chopped walnuts or pecans and 1/2 cup raisins or dried cranberries. - Pour the batter into the prepared loaf pan, smoothing the top. - Bake for 55-65 minutes. Check for doneness by inserting a toothpick into the center. - Once done, let it cool in the pan for 10 minutes. Then, transfer the bread to a wire rack. This simple process helps create a moist and flavorful carrot apple zucchini bread that you will love! For the complete details, see the Full Recipe. - Squeeze zucchini properly: Always use a clean towel to press out excess water. This step is key. If you skip it, your bread may turn out soggy. - Avoid overmixing the batter: Mix just until combined. Overmixing can make the bread tough. - Experiment with spices: A pinch of nutmeg or ginger can elevate the taste. These spices add warmth and depth. - Try different mix-ins: You can add nuts like walnuts or pecans for crunch. Dried fruits like raisins or cranberries also add sweetness. - Serve with powdered sugar: A light dusting on top looks beautiful and adds a touch of sweetness. - Use cream cheese frosting: Spread a thin layer on warm slices for a rich finish. This makes each bite extra special. For the complete recipe, check out the Full Recipe link. {{image_4}} You can make some smart swaps to boost health. A great idea is to use applesauce instead of oil. This change cuts fat and adds natural sweetness. You can also switch to whole wheat flour. Whole wheat flour brings more fiber and nutrients. This simple change makes your bread even better for you. Want to add a fun twist? Try adding chocolate chips to the batter. The rich chocolate pairs well with the sweet flavors. You can also incorporate citrus zest, like orange or lemon. The zest brightens up the bread and adds a fresh taste. These small changes can make a big difference in flavor. If you need a gluten-free option, use gluten-free flour blends. Many brands work well in this recipe. For a vegan version, swap the eggs for flax eggs. Mix one tablespoon of flaxseed meal with three tablespoons of water. Let it sit for a few minutes until it thickens. These adaptations let everyone enjoy this tasty bread. If you want to learn more, check the Full Recipe for details. To keep your carrot apple zucchini bread fresh, store it in an airtight container. This will lock in moisture and flavor. You can use a plastic wrap or a zip-top bag if you don't have a container. Keep the bread at room temperature for the best taste. For long-term storage, freeze the bread. Wrap it tightly in plastic wrap or foil before placing it in a freezer bag. This helps prevent freezer burn. When you want to enjoy it, take it out and let it thaw in the fridge overnight. You can also reheat slices in the microwave for a quick treat. At room temperature, this bread lasts about 3 to 5 days. If you see any mold or notice a funny smell, it's time to toss it. Always check for signs of spoilage. If the bread feels very dry or hard, it may not taste good. Store it properly to enjoy every slice. To avoid soggy bread, control moisture from your ingredients. Start by squeezing out excess water from the grated zucchini. Use a clean kitchen towel for this. You can also dry the grated apple lightly with a paper towel. This step helps keep your bread light and fluffy. Yes, you can make this bread in advance. Bake it and let it cool completely. Then, wrap it in plastic wrap or foil. Store it in the fridge for up to a week. You can also freeze it for longer storage. Just make sure to slice it first for easy thawing. For great flavor, add spices like cinnamon and nutmeg. They bring warmth to your bread. You can also mix in chopped walnuts or pecans for crunch. For a fruity twist, add raisins or dried cranberries. These add sweetness and texture to every bite. Yes, you can easily turn this recipe into muffins. Use a muffin tin and line it with paper cups. Pour the batter into each cup, filling them about two-thirds full. Bake them for around 20-25 minutes. Check with a toothpick to see if they are done. Enjoy your tasty Carrot Apple Zucchini muffins! You learned how to make delicious Carrot Apple Zucchini Bread. We covered essential ingredients and tasty add-ins. Remember to control moisture by squeezing zucchini and avoid overmixing. You can try fun variations, like adding chocolate chips or using whole wheat flour. Store it well to keep it fresh, and feel free to freeze extras for later. This recipe adapts easily to muffins too. Enjoy baking your new favorite treat and sharing it with loved ones.

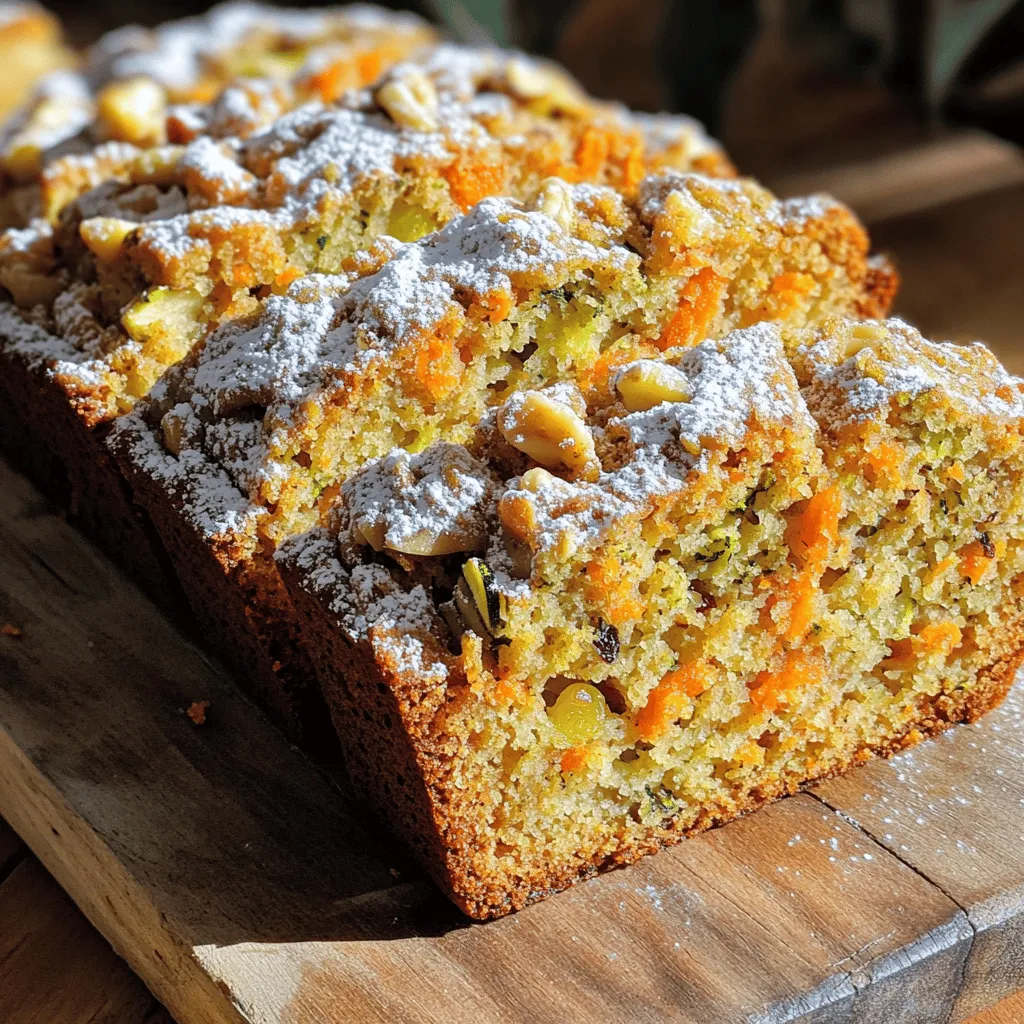
Are you ready to indulge in a deliciously simple Carrot Apple Zucchini Bread? This recipe blends fresh fruits and veggies into a moist treat that’s perfect for any occasion. With …

Read more

Categories Desserts Leave a comment

Copycat Honey Pepper Chicken Mac and Cheese Delight

June 17, 2025 by Chef Evan
- 2 cups elbow macaroni - 2 cups cooked chicken breast, diced - 1 cup sharp cheddar cheese, shredded - 1 cup mozzarella cheese, shredded - 2 tablespoons unsalted butter - 1/4 cup all-purpose flour - 2 cups milk - 1/4 cup honey - 1 tablespoon freshly cracked black pepper - 1 teaspoon garlic powder - 1 teaspoon onion powder - Salt to taste - 1/2 cup breadcrumbs (optional, for topping) - Fresh parsley, finely chopped (for garnish) I love using simple, fresh ingredients for this dish. The elbow macaroni gives it that classic comfort food feel. Cooked chicken adds protein and a nice texture. Cheese brings creaminess, while honey adds a sweet touch. Black pepper gives it a little kick. - Large pot - Colander - Whisk - Baking dish (optional) You need a large pot to boil the macaroni. A colander helps drain it well. A whisk is essential for mixing the sauce smoothly. If you want a crispy topping, a baking dish is great for the oven. - Calories per serving: Approximately 500 - Protein: 30g - Carbs: 50g - Fats: 20g This dish is filling and packed with flavor. Each serving offers a good mix of protein and carbs. The fats come mainly from cheese and butter, adding richness. I always check the nutritional values to keep my meals balanced and healthy. You can find the full recipe in the article. - Bring salted water to a boil. - Add elbow macaroni and cook for 7-9 minutes. Cooking macaroni is simple. The salted water helps flavor the pasta. Stir it a few times to keep it from sticking. When it’s al dente, drain it in a colander. Set it aside while you make the cheese sauce. - Melt butter and prepare a roux with flour. - Gradually add milk and thicken. In the same pot, melt the butter over medium heat. Once it’s bubbly, add the flour. Whisk it for about one minute until it’s light and golden. Then, slowly pour in the milk. Keep whisking to avoid lumps. Cook this mix for 4-5 minutes until it thickens into a creamy sauce. - Incorporate cheeses and seasonings. - Fold in cooked macaroni. Now, lower the heat and add the sharp cheddar and mozzarella. Add them a little at a time, stirring until each melts. Once the sauce is smooth and cheesy, add the cooked chicken, honey, black pepper, garlic powder, onion powder, and salt. Stir until everything blends well. Then, gently fold in the macaroni. Make sure every piece is coated in that delicious sauce. - Preheat oven and add breadcrumb topping. - Bake until golden and bubbly. If you want a crispy top, preheat your oven to 350°F (175°C). Transfer the mac and cheese to a greased baking dish. Sprinkle breadcrumbs on top. Bake for about 15 minutes until the top is golden brown and the mix is bubbling. - Cool slightly and garnish with parsley. After baking, let it cool for a few minutes. This makes it easier to serve. Finally, sprinkle fresh parsley for a pop of color. Enjoy your copycat honey pepper chicken mac and cheese delight! For the complete recipe, you can refer to the Full Recipe. To make a great cheese sauce, start by avoiding lumps when adding milk. Pour the milk slowly and whisk continuously as you go. This helps create a smooth and creamy base. The best cheeses for a rich texture are sharp cheddar and mozzarella. They melt well and blend nicely. You can customize sweetness in your dish by adding honey. Adjust the amount based on your taste. For balance, use freshly cracked black pepper. It adds a nice kick without overpowering the dish. Serving style matters. You can serve the mac and cheese in individual bowls for a cozy feel. For family-style, use a large serving dish. Adding a drizzle of honey on top enhances the appeal. Finish with fresh parsley for a pop of color. This makes the dish inviting and fun. Check out the Full Recipe for more details! {{image_4}} You can change the protein in this dish. Shrimp works great. Just cook them until pink and tender. Sausage is another tasty choice. Slice it up and cook it with the cheese sauce. For a vegetarian option, try tofu. Firm tofu holds up well. Just cube it and sauté until golden. Each protein adds a unique flavor twist. Cheese is key to mac and cheese. You can mix it up here too! Try gouda or pepper jack for a fun taste. Each cheese brings something special. Adding cream cheese makes it super creamy. It melts well and adds richness. Don't be afraid to experiment with flavors! Want some heat? Add a splash of hot sauce. It gives a spicy kick that contrasts well with the honey. You can also try different herbs. Basil or thyme adds freshness. Mix and match spices to find your perfect balance. These small changes can elevate your dish to new heights! To keep your Copycat Honey Pepper Chicken Mac and Cheese fresh, follow these steps: - In the fridge: Allow the dish to cool completely. Transfer it to an airtight container. Store it in the fridge for up to three days. Make sure to label it with the date for easy tracking. - Best practices for freezing: If you want to save it longer, freeze it. Use a freezer-safe container or a heavy-duty freezer bag. Remove as much air as possible to prevent freezer burn. It can last up to three months in the freezer. When ready to eat, thaw it in the fridge overnight before reheating. Reheating your mac and cheese is simple. Here are my tips for a smooth process: - Tips for reheating smoothly: Reheat it slowly to keep it creamy. If using the microwave, place the mac and cheese in a microwave-safe bowl. Add a splash of milk to help with moisture. Cover it to keep it from drying out. - Using the oven vs. microwave: The oven is great if you want a crispy topping. Preheat the oven to 350°F (175°C). Place the mac and cheese in an oven-safe dish. Cover it with foil to keep it moist. Bake for about 20 minutes until heated through. The microwave is quicker but may not give you the same texture. Choose what fits your time best! This dish lasts about 3 to 5 days in the fridge. Make sure to store it in an airtight container. This keeps it fresh and tasty. If you see any signs of spoilage, discard it. You can also reheat it easily when you want to enjoy leftovers. Yes, you can make this dish ahead of time. Prepare it fully and then store it in the fridge. Just cover it well. When you're ready to eat, you can bake it or reheat it in the microwave. This will save you time on busy days. If you don’t have elbow macaroni, you can use any small pasta. Penne, shells, or fusilli work great. These shapes hold the cheese sauce well. Feel free to experiment with what you have on hand. Yes, you can make a gluten-free version. Use gluten-free pasta in place of elbow macaroni. Also, swap the all-purpose flour for a gluten-free flour blend. This way, you can enjoy the dish without gluten. Absolutely! Pre-cooked chicken is a great time-saver. Just make sure it’s diced into bite-sized pieces. This helps it mix well with the sauce and pasta. You can use rotisserie chicken or any leftover cooked chicken you have. Feel free to check out the Full Recipe for more details on how to make this dish! This blog post covered a delicious Honey Pepper Chicken Mac and Cheese recipe. We explored the needed ingredients, step-by-step cooking guides, and useful tips for perfecting flavors. I shared variations to suit different tastes and how to store leftovers for later. In my experience, this dish strikes a balance of richness and comfort. I hope you feel inspired to try it out. Enjoy each bite and get creative with your versions!

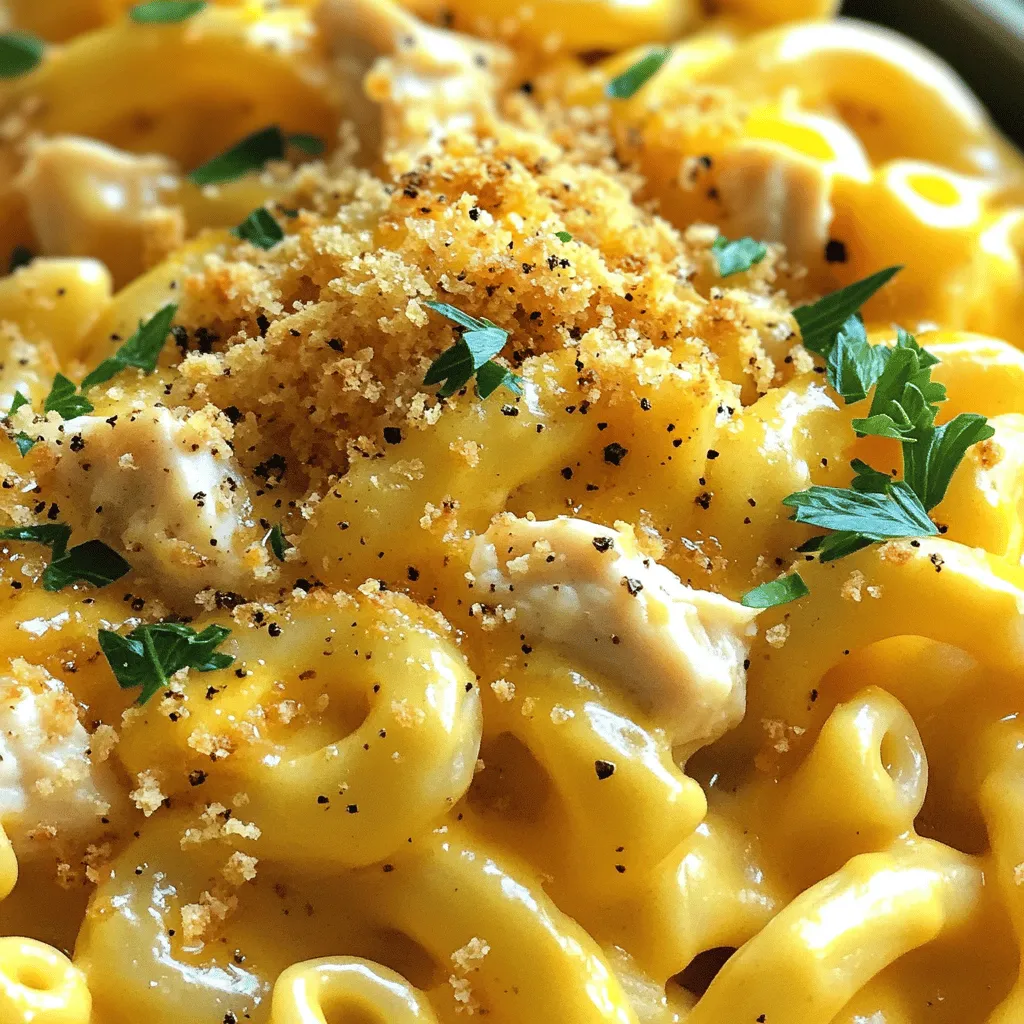
If you love creamy mac and cheese with a twist, you’re in for a treat! This Copycat Honey Pepper Chicken Mac and Cheese combines rich cheese with sweet honey and …

Read more

Categories Dinner Leave a comment

Zucchini Cheese Bread Hearty and Flavorful Delight

June 17, 2025 by Chef Evan
- 2 medium zucchinis, grated - 1 cup shredded cheddar cheese - 1 cup all-purpose flour - 1/2 teaspoon baking powder - 1/2 teaspoon baking soda - 1/2 teaspoon salt - 1/2 teaspoon black pepper - 2 large eggs - 1/4 cup olive oil - 1/4 cup Greek yogurt - 1 clove garlic, minced - 1 tablespoon fresh dill, chopped (or 1 teaspoon dried dill) - 1/4 cup grated Parmesan cheese (for topping) Gathering the right ingredients is key to making zucchini cheese bread. Start with fresh zucchinis. Grate them and squeeze out any extra moisture. This step keeps your bread from getting soggy. Next, use shredded cheddar cheese for a rich flavor. For the dry mix, combine all-purpose flour, baking powder, baking soda, salt, and black pepper. These ingredients help the bread rise and add a nice taste. In another bowl, whisk together the wet ingredients. Mix eggs, olive oil, Greek yogurt, and minced garlic. This blend adds moisture and depth to the bread. Lastly, consider adding fresh dill or grated Parmesan. These optional enhancers give your bread a unique twist. You can find the full recipe for more detailed steps and tips. - Preheat the oven to 375°F (190°C). - Grease or line a 9x5-inch loaf pan. - In a bowl, combine grated zucchini and shredded cheddar cheese with the dry ingredients. - In a separate bowl, whisk the eggs, olive oil, Greek yogurt, and garlic until smooth. Mix this with the dry mix. - Stir in the fresh dill and transfer the thick batter to the loaf pan. - Generously top with grated Parmesan cheese for a nice crust. - Bake for 45-50 minutes until the top is golden and a toothpick comes out clean. - Let the bread cool for 10 minutes before slicing into hearty pieces. For the full recipe, check the previous section. To get the best taste from your zucchini cheese bread, start by squeezing out the extra moisture from the zucchini. This step keeps your bread from being too wet. You can also try different cheese options. Mozzarella adds a creamy texture, while feta brings a nice tang. Both can enhance the overall flavor. Mix your batter just enough. Overmixing can make your bread tough instead of light and fluffy. After baking, let the bread cool for a bit. Cooling helps it slice better. You’ll enjoy nice, clean cuts instead of crumbles. Serve warm slices with a side of Greek yogurt. This adds a nice creaminess that pairs well with the bread. To elevate your dish, garnish with fresh dill or lemon slices. These add a pop of color and a burst of flavor that makes each bite special. For the full recipe, check back to the main section. {{image_4}} You can play with different cheeses to make your zucchini cheese bread stand out. Cheddar is great, but try mozzarella for a gooey texture. If you want a sharper taste, add feta cheese. Its tangy flavor gives your bread a nice kick. Herbs can change the whole taste. If dill is not your favorite, try parsley or chives. Both will add a fresh note. You can also mix in sundried tomatoes or spinach for extra flavor and nutrients. These additions make the bread colorful and healthy. If you need a gluten-free version, it’s easy! Just swap out regular flour for a gluten-free flour blend. This way, you can enjoy the same delicious taste without the gluten. This variation keeps everyone happy at the table. Explore more ideas in the Full Recipe. You can store zucchini cheese bread in an airtight container. Keep it at room temperature for up to 3 days. This keeps it fresh and tasty for quick snacks. For longer storage, refrigerate the bread. It stays good for up to 1 week. You can also freeze it for up to 3 months. Wrap slices individually to make thawing easy. This way, you can enjoy a slice whenever you want. Reheat slices in a toaster or oven. This gives the bread a nice, crisp finish. If you need a quick warm-up, use the microwave. However, this might make the bread lose some crunch. Enjoy your warm zucchini cheese bread just how you like it! Yes, but ensure it's fully thawed and excess moisture is removed before using. Frozen zucchini can work well in this recipe. Just remember to squeeze out the water. This step helps keep your bread from getting soggy. A toothpick inserted in the center should come out clean, and the top should be golden. The baking time is key, so keep an eye on it. If you see a nice golden color, you’re on the right track. Yes, you can make this recipe vegan. Substitute eggs with flax eggs and use plant-based yogurt and cheese alternatives. This way, you can enjoy the same great taste while keeping it plant-based. Pair with a fresh salad or soup for a complete meal. The bread is hearty and flavorful, making it a great side. A light salad or warm soup can balance the dish nicely. In this post, we explored how to make tasty zucchini cheese bread. We covered key ingredients, step-by-step mixing, and baking methods. I shared tips to boost flavor and texture, plus fun variations. You can also store your bread and enjoy it later. Remember, cooking offers a chance to be creative. Make this recipe yours by trying new flavors. Enjoy the baking process, and happy cooking!

If you’re looking for a recipe that blends comfort and flavor, you’ll love this Zucchini Cheese Bread. It’s a hearty, savory delight that makes a perfect snack or side dish. …

Read more

Categories Dinner Leave a comment

Easy Saucy Ramen Noodles Quick and Flavorful Meal

June 17, 2025 by Chef Evan
- Instant ramen noodles - Soy sauce - Sesame oil - Chili garlic sauce - Mixed vegetables - Green onions - Creamy peanut butter - Fresh ginger - Garlic - Rice vinegar - Sesame seeds - Medium saucepan - Large skillet or wok - Whisk - Bowls for serving To make Easy Saucy Ramen Noodles, you need the right ingredients and tools. First, grab instant ramen noodles. They cook fast and taste great. Next, gather soy sauce, sesame oil, and chili garlic sauce. These add depth and heat. You will also need mixed vegetables. I love using carrots, bell peppers, and snap peas. They make the dish colorful. Green onions give a fresh crunch. Don’t forget creamy peanut butter. It adds richness. For flavor, use fresh ginger and garlic. Rice vinegar adds a nice tang. Lastly, sesame seeds give a tasty finish. For tools, you need a medium saucepan to boil water for the noodles. A large skillet or wok is perfect for stir-frying. A whisk helps mix the sauce well. Lastly, have bowls ready to serve your tasty creation. You can find the complete instructions in the Full Recipe. To start, take a medium saucepan and fill it with water. Bring the water to a strong boil. Add 2 packets of instant ramen noodles and cook them for 3-4 minutes. You want them tender but still firm. Once done, drain the noodles and place them in a bowl. Set them aside so they are ready for later. Next, grab a large skillet or wok. Heat 1 tablespoon of sesame oil over medium heat. Once hot, add in 1 teaspoon of minced garlic and 1 teaspoon of grated ginger. Stir continuously for about 1 minute. This step brings out a lovely aroma that makes your kitchen smell inviting. Now, it's time to add some color and crunch. Toss in 1 cup of mixed vegetables. You can use julienned carrots, sliced bell peppers, and snap peas. Stir-fry these veggies for about 3-4 minutes. You want them to be crisp-tender and keep their bright colors. In a separate bowl, mix together 2 tablespoons of soy sauce, 1 tablespoon of chili garlic sauce, 2 tablespoons of creamy peanut butter, and 1 tablespoon of rice vinegar. Whisk until it is smooth. Taste it and adjust the spice level if you want more heat by adding more chili garlic sauce. Add your drained ramen noodles back into the skillet with the sautéed vegetables. Pour the sauce over everything. Toss gently but thoroughly so every noodle gets coated in that yummy sauce. This is where the flavors really come together! Finally, fold in 2 chopped green onions. Toss everything for another minute to heat through. Serve the saucy ramen noodles in bowls while they are hot. For a lovely finish, sprinkle sesame seeds on top for extra flavor and crunch. Enjoy your delicious meal! For the complete recipe, check out the Full Recipe. To speed up your cooking, try these quick tips: - Cooking time: Instant ramen cooks in just 3-4 minutes. Keep an eye on it to avoid overcooking. - Frozen vegetables: Use frozen veggies instead of fresh. They save time and still taste great. You can make your ramen unique by adding: - Protein options: Chicken, tofu, or shrimp work well. Add them when cooking the veggies. - Sauce experiments: Try teriyaki or hoisin sauce for a new flavor. Mixing different sauces can also be fun! Make your dish look as good as it tastes: - Plating: Serve noodles in deep bowls. This adds height and keeps everything neat. - Garnishes: Add green onions and sesame seeds on top. You can also sprinkle some chili flakes for a kick. For the full recipe, check out Flavorful Saucy Ramen Noodles. {{image_4}} To spice things up, you can adjust the heat in your ramen. There are two easy ways to do this: - Increasing chili garlic sauce: Add more chili garlic sauce to the recipe. Start with a half tablespoon more and taste. You can keep adding until you reach your perfect spice level. - Adding fresh chilies: Slice fresh chilies and toss them in while cooking. Red or green chilies work well. They add great flavor and heat. For a more colorful dish, add extra vegetables. This not only boosts nutrition but also enhances flavor. Here's how: - Extra vegetables to incorporate: Try adding sliced mushrooms, baby corn, or snap peas. These veggies blend well with the noodles. - Seasonal vegetable suggestions: Use what’s fresh! In spring, add peas or asparagus. In fall, use butternut squash or kale. It makes the dish fun and seasonal! Switching up the sauce can change the whole vibe of your ramen. Here are some tasty options: - Using teriyaki or hoisin sauce: Replace the soy sauce with teriyaki or hoisin. This gives a sweet twist to the dish. - Creamy variants with different nut butters: Try using almond or cashew butter instead of peanut butter. This adds a rich and creamy taste that you will love. Explore these variations to find your favorite twist on this easy saucy ramen. You can create your own version with the Full Recipe! To keep your leftover ramen fresh, store it in an airtight container. This will help prevent moisture loss and keep the noodles from drying out. Make sure the noodles and sauce are mixed well before storing. Ramen stays fresh in the fridge for about 2-3 days. After this time, the noodles may become mushy. When reheating ramen, avoid using high heat. This can make the noodles rubbery. Instead, use a low to medium setting. You can reheat in a skillet over medium heat. Add a splash of water or broth to help steam the noodles back to life. For quick reheating, the microwave works too. Place the ramen in a bowl, cover it with a damp paper towel, and heat for about 1-2 minutes. Stir halfway through to ensure even heating. If you need a nut-free option, try using sunflower seed butter or tahini. Both options work well in this recipe. They add creaminess and flavor without nuts. If you want a lighter choice, you can use soy yogurt. It’s smooth and adds a nice taste. Yes, you can use regular ramen noodles. They take longer to cook, usually about 5-7 minutes. Keep an eye on them to ensure they do not get too soft. Drain them once they are just right, and follow the rest of the recipe as normal. To make this dish vegan, simply replace the creamy peanut butter with a vegan nut butter. Ensure the soy sauce is labeled vegan too. You can also add more vegetables for extra nutrition, making it a hearty meal. For a gluten-free version, use gluten-free ramen noodles or rice noodles. Make sure the soy sauce is gluten-free as well. Check that all other ingredients are also gluten-free. This way, you can enjoy the same great flavors without worrying about gluten. This post covered how to make a tasty ramen dish with ease. We listed the key ingredients and necessary equipment. You learned step-by-step instructions to cook the noodles, sauté aromatics, and combine flavors. We also shared tips for making it easier and ways to customize your meal. Whether you want it spicy or veggie-loaded, there are plenty of options to explore. Remember, the best ramen is the one made just for you. Enjoy experimenting with flavors!

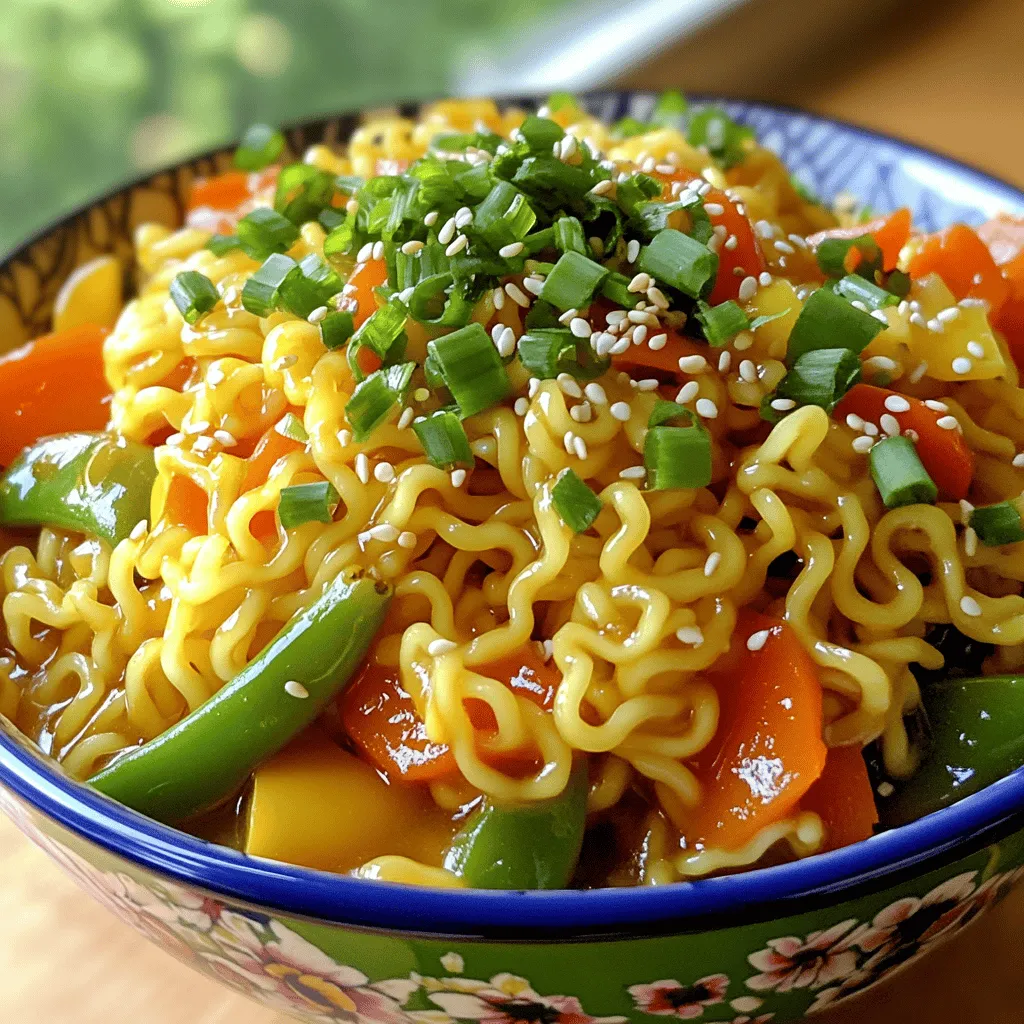
Craving a delicious meal that’s quick and easy? Look no further! My Easy Saucy Ramen Noodles will satisfy your taste buds without taking all day to prepare. With just a …

Read more

Categories Dinner Leave a comment

Black Pepper Chicken Flavorful and Easy Recipe

June 17, 2025 by Chef Evan
- 500g chicken breast - 2 tablespoons freshly cracked black pepper - 3 tablespoons soy sauce The main ingredients set the stage for a tasty dish. Using fresh chicken breast ensures tender meat. The black pepper adds a bold kick, while soy sauce brings depth. - 1 tablespoon oyster sauce - 1 tablespoon sesame oil You can elevate the dish with optional ingredients. Oyster sauce adds a sweet umami flavor. Sesame oil gives a nutty aroma that enhances your meal. - 1 bell pepper (any color) - 1 onion - 2 green onions Fresh vegetables bring color and crunch. Bell peppers add sweetness, while onions provide a savory base. Green onions are a bright garnish that finishes the dish. By using these ingredients, you create a well-rounded meal. They work together to deliver a bold flavor and vibrant look. For the full recipe, check out the detailed steps. - Start by slicing 500g of chicken breast into thin strips. - In a bowl, mix the chicken with 2 tablespoons of freshly cracked black pepper, 1 tablespoon of cornstarch, and 3 tablespoons of soy sauce. - If you like, add 1 tablespoon of oyster sauce for a richer taste. - Let the chicken marinate for at least 20 minutes. This helps the flavors soak in. - Make sure the cornstarch coats the chicken evenly. This will give it a nice texture when cooked. - Heat 2 tablespoons of vegetable oil in a large skillet over medium-high heat. - Wait until the oil shimmers before adding the chicken. - Place the marinated chicken in a single layer. Cook for about 4-5 minutes. - Stir occasionally to brown the chicken evenly. - Ensure the chicken is fully cooked before moving it to a plate. Set it aside while you cook the veggies. - In the same skillet, add 1 sliced bell pepper and 1 sliced onion. - Stir-fry these for about 3-4 minutes until they are soft but still have a crunch. - Next, add 3 minced cloves of garlic and 1 teaspoon of minced ginger. Stir everything together. - This step boosts the dish’s aroma and flavor. - Once the veggies are tender, return the cooked chicken to the skillet. Stir it all together. - Finish by drizzling 1 tablespoon of sesame oil over the mix, enhancing the taste. For the full recipe, check out the detailed instructions on how to combine these steps for a delicious meal! To get the best flavor, marinate your chicken for at least 20 minutes. This allows the black pepper and soy sauce to soak into the meat. You can also try coconut aminos or tamari as soy sauce alternatives. Both bring a unique taste without gluten. Heat your skillet or wok over medium-high heat until it shimmers. This is a sign it's hot enough for cooking. To keep the chicken from sticking, add enough oil and don’t overcrowd the pan. Cook in batches if needed, which helps maintain that nice, golden brown color. Pair your Black Pepper Chicken with fluffy jasmine rice for a classic combo. The rice absorbs the sauce and enhances the meal. For a vibrant dish, use colorful vegetables. Arrange the chicken and veggies in a bowl, and sprinkle green onions on top for a fresh look. Don't forget to check the [Full Recipe] for detailed steps on preparation! {{image_4}} You can swap chicken for beef or tofu. Beef gives a rich flavor. Use thin strips of beef and cook them the same way as chicken. Tofu is great for a plant-based dish. Just press and cube it, then marinate as usual. Seafood can add a fun twist. Shrimp works well with black pepper. Cook shrimp for just a few minutes until pink. Fish can also work, but choose firmer types like salmon. Want more heat? Increase the black pepper. This dish can handle a punch of spice. Start with 1 tablespoon, then taste and add more if you like. You can also add chili flakes or fresh chilies. For extra flavor, mix in sliced jalapeños or serranos. This will make your dish exciting and fiery! Black Pepper Chicken has many styles. The Chinese version is popular in restaurants. It usually includes soy sauce and garlic for a savory taste. Other cultures have their takes too. In some Asian countries, they add different spices and herbs. Each version brings a new flavor profile. Feel free to explore and make it your own! Check out the Full Recipe for more details on how to make this dish. To store leftovers, put the Black Pepper Chicken in an airtight container. Allow it to cool first. This helps keep the chicken juicy and tasty. When you refrigerate, eat it within three days for the best flavor. After that, the taste and texture may change. You can freeze Black Pepper Chicken if you want to save it for later. First, let it cool completely. Next, place it in a freezer-safe bag or container. Try to remove as much air as possible. When you’re ready to eat, thaw it in the fridge overnight. To reheat, warm it on the stove or in the microwave. Add a splash of water to keep it moist. Refrigerated, Black Pepper Chicken lasts about three days. If frozen, it can stay good for up to three months. Always check for signs it has gone bad. Look for any off smells or changes in color. If it doesn’t look or smell right, it’s best to throw it away. Black Pepper Chicken is a savory dish, rich in flavor. It features tender chicken, fresh veggies, and a bold seasoning of cracked black pepper. The main ingredients include: - 500g chicken breast - 2 tablespoons freshly cracked black pepper - 3 tablespoons soy sauce This dish has roots in Chinese cuisine but has gained global popularity. It represents comfort food that many enjoy. The balance of spice and savory notes makes it a favorite for many. Yes, you can prepare Black Pepper Chicken ahead of time. Here are some tips: - Marinate the chicken and store it in the fridge for up to 24 hours. - Cook the chicken and veggies, then cool them before storing. For best storage, use an airtight container. This keeps the flavors fresh. You can easily modify Black Pepper Chicken to fit your needs. For a gluten-free option: - Use tamari instead of soy sauce. - Check labels on sauces for hidden gluten. If you want a low-sodium dish: - Use low-sodium soy sauce or coconut aminos. - Reduce the amount of added salt in the recipe. This recipe serves about 4 people, depending on portion sizes. For larger gatherings, you can: - Double the amount of chicken and veggies. - Adjust the sauce amounts to keep the flavors balanced. With these tips, you can enjoy Black Pepper Chicken any time! For the complete recipe, check out the [Full Recipe]. Black Pepper Chicken is a tasty and simple dish. You learn the key ingredients, cooking steps, and helpful tips. You can even explore fun variations like different proteins or spice levels. Remember to store leftovers properly to keep them fresh. This dish is perfect for any meal and easy to adapt. Enjoy cooking and sharing this delicious recipe with friends and family. It will surely impress everyone!

Looking to spice up your dinner game? My Black Pepper Chicken recipe delivers bold flavors with just a few simple steps. Using fresh ingredients like chicken, black pepper, and soy …

Read more

Categories Dinner Leave a comment

Creamy Chicken Alfredo Lasagna Roll Ups Delightful Meal

October 28, 2025June 15, 2025 by Chef Evan
- 9 lasagna noodles - 2 cups cooked chicken, shredded - 2 cups ricotta cheese - 1 cup mozzarella cheese, shredded - 1/2 cup Parmesan cheese, grated - 2 cups Alfredo sauce (store-bought or homemade) - 1 teaspoon garlic powder - 1 teaspoon Italian seasoning - Salt and pepper to taste - Fresh parsley, chopped (for garnish) Gathering the right ingredients is key to making delicious creamy chicken Alfredo lasagna roll-ups. Start with nine lasagna noodles; these are the base of your dish. You will need two cups of cooked chicken, shredded into bite-sized pieces. This adds protein and flavor to your meal. Next, grab two cups of ricotta cheese. It gives a creamy texture and richness. One cup of shredded mozzarella cheese will add a gooey, melty layer. Don't forget half a cup of grated Parmesan cheese. This cheese adds a sharp taste. For the sauce, use two cups of Alfredo sauce, which can be store-bought or homemade. If you love garlic, add one teaspoon of garlic powder for a savory touch. One teaspoon of Italian seasoning will bring warmth and depth to your dish. Season with salt and pepper to taste. Finally, fresh parsley, chopped, will make a beautiful garnish. It adds color and a fresh taste. These ingredients come together to create an amazing meal that’s fun to eat and easy to share! {{ingredient_image_1}} 1. Preheat the oven to 375°F (190°C). This step warms the oven for even baking. 2. Cook the lasagna noodles. Boil them until they are al dente, following the package directions. After cooking, drain the noodles. Lay them flat on a kitchen towel to avoid them sticking together. 3. Mix the filling ingredients. In a bowl, combine shredded chicken, ricotta cheese, half of the mozzarella cheese, grated Parmesan, garlic powder, Italian seasoning, salt, and pepper. Stir until everything is well combined. 1. Spread Alfredo sauce. Pour some Alfredo sauce on the bottom of a 9x13 inch baking dish. Make sure it coats the bottom nicely. 2. Fill the noodles. Take one cooked lasagna noodle. Place about 1/4 cup of the chicken and cheese mixture along one edge. Roll the noodle up carefully to keep the filling inside. Place the roll seam-side down in the baking dish. Repeat this step with all the noodles and filling. 3. Arrange in the baking dish. Once all roll-ups are in the dish, pour the rest of the Alfredo sauce over them. Top with the remaining mozzarella cheese. 1. Cover and bake. Cover the dish with aluminum foil. If you want to avoid sticking, spray the foil with cooking spray. Bake for 20 minutes. 2. Final baking to achieve golden cheese. Remove the foil and bake for an additional 10-15 minutes. Look for bubbly and golden cheese on top. 3. Let it cool. Allow the lasagna roll-ups to cool for a few minutes before serving. This helps the filling set a bit. Garnish with fresh parsley for a lovely finish. To prevent your lasagna noodles from sticking, lay them flat on a kitchen towel after cooking. This quick trick helps keep them ready for rolling. If you want a twist on the Alfredo sauce, try a homemade version. Blend heavy cream, butter, garlic, and Parmesan for a fresh taste. When serving, plate the roll-ups and drizzle extra Alfredo sauce on top. This adds flavor and makes a lovely presentation. A sprinkle of fresh parsley gives a pop of color. Pair your roll-ups with garlic bread for a tasty side. The crunchy bread complements the creamy dish perfectly. To store leftover roll-ups, place them in an airtight container. They will stay fresh in the fridge for up to three days. For reheating, use the oven for best results. Cover the dish with foil to keep them moist. Heat at 350°F (175°C) for about 20 minutes. Enjoy your meal again! Pro Tips Cook Noodles Al Dente: Cooking the lasagna noodles until they are al dente will ensure they hold up well when rolled and baked, preventing them from becoming too soft. Use Rotisserie Chicken: For a quick and convenient option, use store-bought rotisserie chicken. It saves time and adds great flavor! Customize the Filling: Feel free to add your favorite vegetables, such as spinach or mushrooms, to the chicken and cheese mixture for added nutrition and flavor. Let it Rest: Allow the lasagna roll-ups to rest for a few minutes after baking. This helps the filling set, making it easier to serve without falling apart. {{image_2}} Healthier alternatives can make this dish even better. You can use whole wheat or gluten-free noodles. Whole wheat noodles add fiber and nutrients. Gluten-free options cater to those with dietary needs. For cheese, try low-fat versions. They melt well and cut calories. You still get that creamy taste without the extra fat. Flavor variations keep things exciting. You can add spinach or other veggies. Chopped spinach boosts nutrition and adds color. Mushrooms or bell peppers also work well. You can change the seasonings and sauces, too. Add a pinch of nutmeg for warmth. Or, swap Alfredo for a tomato sauce for a twist. Different proteins make this dish unique. You can use turkey instead of chicken. Ground turkey works great for a lighter meal. If you want vegetarian options, beans or tofu are good choices. Tofu absorbs flavors and adds protein. Black beans offer a hearty bite, perfect for meatless meals. These variations let you customize your Creamy Chicken Alfredo Lasagna Roll Ups. You can cater to your tastes or dietary needs while enjoying a delicious meal. Bake the roll-ups for 20 minutes covered with foil. Then, bake for an extra 10 to 15 minutes. This helps the cheese melt and bubble nicely. Yes, you can prepare the roll-ups a day before. Just cover them and store in the fridge. Bake them when you're ready to eat. You can use a homemade white sauce or a simple cream sauce. You may also try a tomato sauce for a different taste. Yes, you can freeze them. Wrap each roll-up tightly in plastic wrap. Store in a freezer-safe container for up to three months. Add fun toppings like extra cheese or let kids pick their favorite veggies. You can also serve it with a side of garlic bread for a fun touch. This recipe takes about 20 minutes to prep. You will cook the noodles, mix the filling, and get everything ready. It’s quick and easy! The total time for this dish is around 50 minutes. This includes both the prep time and cooking time. You will bake the roll-ups for about 30 minutes. This recipe makes 4 servings. It’s perfect for a small family or a cozy dinner for two. You can always double the recipe if you need more! This blog post covered a simple and tasty recipe for creamy chicken Alfredo lasagna roll-ups. We discussed the ingredients, cooking steps, and tips for success. You learned how to make this dish your own with different flavors and healthy swaps. Remember, these roll-ups are perfect for sharing and can be stored for later. Enjoy your meal! Cook with joy, and don’t forget to try your own twists on this recipe. Happy cooking!

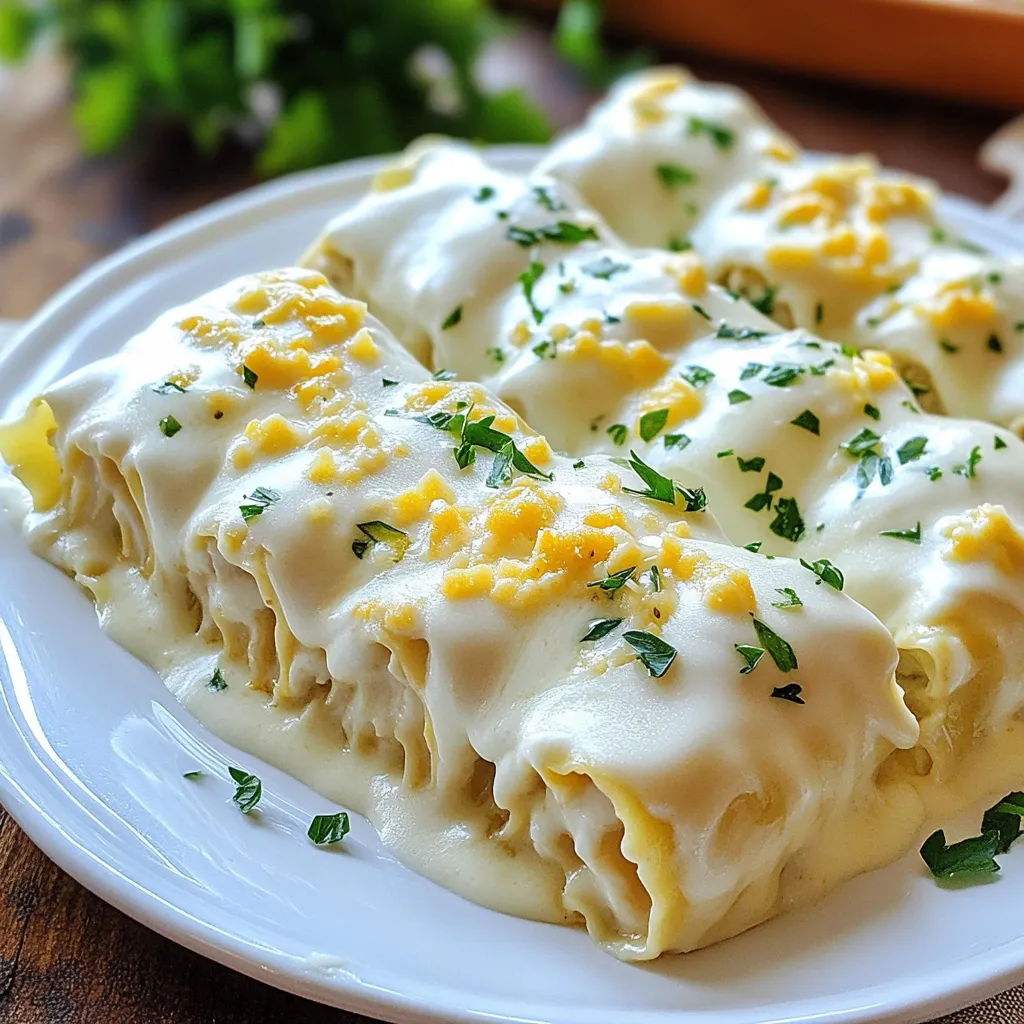
Craving a hearty meal that’s easy to make and full of flavor? Look no further! These Creamy Chicken Alfredo Lasagna Roll Ups combine tender pasta with rich cheese and savory …

Read more

Categories Dinner Leave a comment

Irresistible Apple Cinnamon French Toast Bake Recipe

December 23, 2025June 15, 2025 by Chef Evan
- 6 slices of thick bread (like challah or brioche) - 3 large eggs - 1 cup milk - 1/2 cup heavy cream - 1/4 cup maple syrup - 1 teaspoon vanilla extract - 1 teaspoon ground cinnamon - 1/2 teaspoon nutmeg - 2 medium apples, peeled, cored, and diced (preferably Granny Smith) The main ingredients create a rich base for this dish. Thick bread gives it a soft texture. Eggs, milk, and heavy cream make a creamy custard. The apples add sweetness and a nice bite. Spices like cinnamon and nutmeg add warmth and comfort. - 1/2 cup chopped walnuts - 1 tablespoon butter (for greasing the dish) - Powdered sugar (for dusting) While these ingredients are optional, they can enhance the dish. Chopped walnuts add a nice crunch. Butter helps to prevent sticking and adds flavor. Dusting with powdered sugar adds a sweet touch and looks pretty on the plate. These ingredients together create a delightful treat. You can adjust them to fit your taste and preferences. {{ingredient_image_1}} 1. Preheat your oven to 350°F (175°C). This will get it ready for baking. 2. Grease a 9x13 inch baking dish with butter. This helps prevent sticking. 3. Tear the slices of thick bread into large chunks. You can use challah or brioche for the best results. 4. Layer these bread chunks in the greased baking dish. Make sure to fill it well. 5. Dice the apples and sprinkle them over the bread. Use Granny Smith for a nice tartness. 6. If you want, add chopped walnuts on top of the apples for extra crunch. 1. In a mixing bowl, whisk together the eggs. Add the milk and heavy cream next. 2. Pour in the maple syrup and vanilla extract for sweetness. 3. Add ground cinnamon and nutmeg for that warm spice flavor. Mix everything until well combined. 1. Pour the custard mixture evenly over the bread and apple layers. Make sure every piece gets some liquid. 2. Press down gently to help the bread soak up the custard. 3. Cover the baking dish with aluminum foil. Let it sit for about 30 minutes at room temperature. You can also chill it in the fridge for later. 4. Bake covered for 30 minutes. Remove the foil and bake for an additional 15-20 minutes. The top should be golden and the custard set. 5. Let it cool slightly before slicing. Dust with powdered sugar just before serving. For the best texture, use thick bread like challah or brioche. These types hold the custard well and stay soft. If you have stale bread, that works great too! Stale bread soaks up the custard better than fresh bread. Just make sure to tear it into large chunks, so it doesn't get too mushy. To ensure an even soak, whisk the eggs, milk, and cream well. This helps mix all the flavors. Pour the custard over the bread slowly. Press down gently to soak every piece. You can adjust the sweetness by adding more or less maple syrup. If you love spice, feel free to add more cinnamon or nutmeg to suit your taste. For a great presentation, dust the baked dish with powdered sugar. You can also drizzle extra maple syrup on top. Sliced fresh apples make a lovely garnish. Serve it warm with whipped cream for a treat! This dish pairs well with coffee or a warm cup of tea, making it perfect for brunch or a cozy breakfast. Pro Tips Use Stale Bread: For the best texture, use slightly stale bread. It soaks up the custard without falling apart. Customize Your Apples: While Granny Smith apples are tart and hold up well, feel free to mix in sweeter varieties like Fuji or Honeycrisp for added flavor. Make Ahead: Assemble the dish the night before and refrigerate it. This allows the flavors to meld and saves time in the morning. Perfectly Set Custard: To ensure a perfectly set custard, bake until the edges are golden and the center is just slightly jiggly; it will continue to set as it cools. {{image_2}} You can switch up the apples in this bake. Try sweet apples like Fuji or tart ones like Honeycrisp. For a berry twist, sprinkle in some fresh blueberries or raspberries. They add color and a burst of flavor. Dried fruits are great, too! Toss in some raisins or cranberries for a chewy texture. They pair well with the soft bread and sweet apples. If you want to change the nuts, swap walnuts for pecans or almonds. Both add a nice crunch and flavor. If you prefer a nut-free dish, just skip them altogether. You can replace the nuts with seeds like sunflower or pumpkin seeds. They still give you that extra crunch without the nuts. Get creative with your spices! Try adding ginger or allspice for a warm twist. These spices can really elevate the taste. If you love chocolate, mix in some chocolate chips for a sweet surprise. For a richer flavor, drizzle caramel on top before serving. It makes each bite even more delightful! To keep your Apple Cinnamon French Toast Bake fresh, let it cool first. Then, cover it tightly with plastic wrap or foil. This helps keep moisture in and prevents it from drying out. You can also store it in an airtight container. It lasts about 3 to 4 days in the fridge. If you want to enjoy it later, you can freeze it. To reheat, you have two great options: the oven or the microwave. For the oven, preheat to 350°F (175°C). Place the French toast bake in an oven-safe dish and cover it with foil. Heat for about 15 to 20 minutes. This keeps the texture nice and fluffy. If you prefer the microwave, cut a slice and place it on a microwave-safe plate. Heat it for about 30 seconds to 1 minute. The microwave is fast but may make it a bit soggy. So, the oven is the better choice if you want the best texture. Yes, you can prepare this dish the night before. After you layer the bread and apples, pour the custard over them. Cover the dish tightly with plastic wrap. Store it in the fridge overnight. In the morning, simply bake it as directed. This saves you time and makes breakfast easy! You can freeze this dish, but it’s best to freeze it before baking. Wrap it tightly with plastic wrap and then aluminum foil. It can last in the freezer for up to three months. When you are ready to bake it, thaw it in the fridge overnight. Then, bake it as you normally would. I recommend using Granny Smith apples. They are tart and hold their shape well during baking. You could also try Honeycrisp for a sweeter flavor. Mixing apple types can add depth to your dish. Choose firm apples for the best texture in your bake. You now have a simple guide to making a great Apple Cinnamon French Toast Bake. We covered key ingredients like thick bread, eggs, and spices. The steps to assemble and bake this dish are easy to follow. Remember, using the right bread and perfecting the custard makes a big difference. Feel free to experiment with variations and serve it with your favorite drinks. Enjoy this dish as a delicious breakfast or brunch treat!

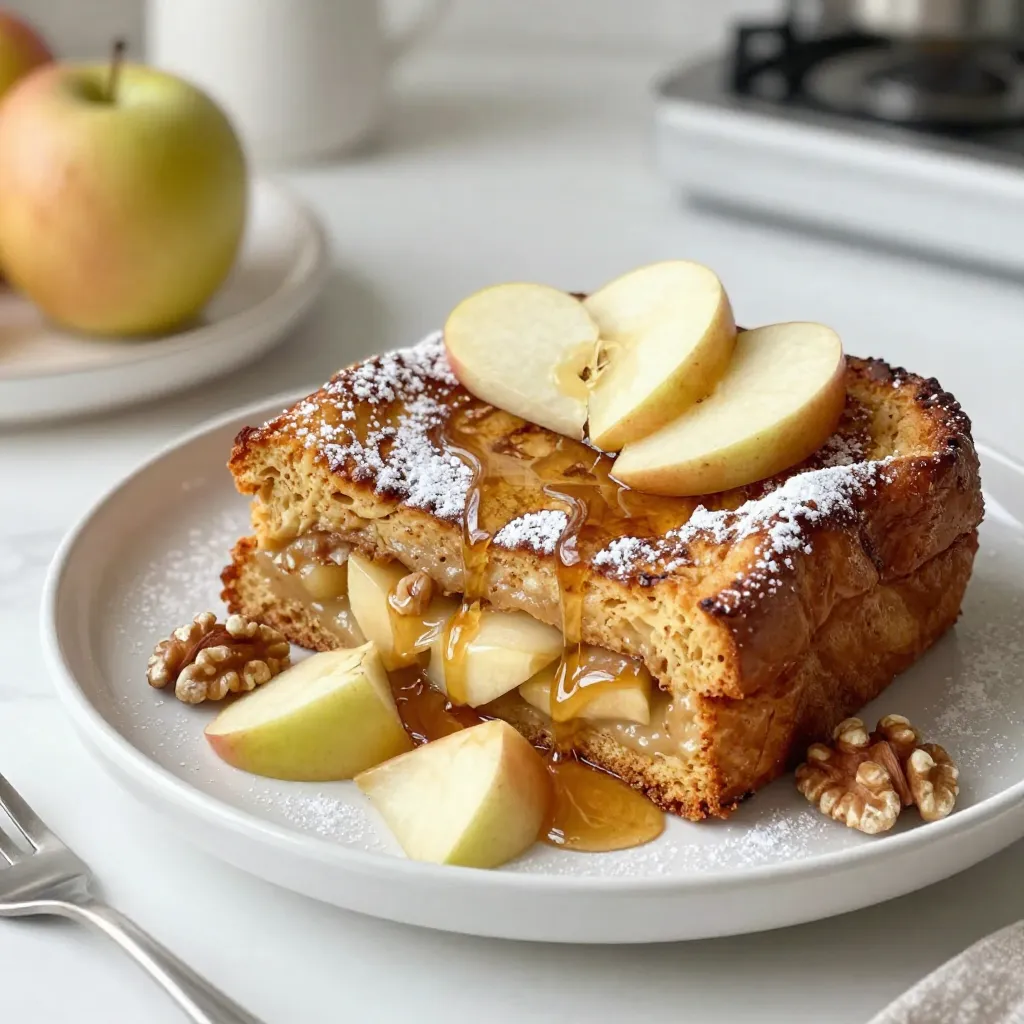
Want to impress your family with an easy, delicious breakfast? This Irresistible Apple Cinnamon French Toast Bake is your answer! Imagine warm, gooey bread layered with sweet apples and a …

Read more

Categories Breakfast Leave a comment

Sweet Chili Tofu Stir-Fry Simple and Flavorful Meal

November 15, 2025June 14, 2025 by Chef Evan
- Firm Tofu (1 block, drained and pressed) - Vegetables (1 red bell pepper, sliced; 1 yellow bell pepper, sliced; 1 cup snap peas) - Aromatics (2 cloves garlic, minced; 1 tablespoon ginger, minced) - Sweet Chili Sauce (1/4 cup) - Soy Sauce (2 tablespoons) - Sesame Oil (1 tablespoon) - Green Onions (for garnish) - Sesame Seeds (for garnish) For this sweet chili tofu stir-fry, you need fresh and bright ingredients. Start with firm tofu. It holds its shape well and soaks up flavors. Make sure to drain and press it. This helps keep the tofu crispy. Next, add vibrant vegetables. I love using red and yellow bell peppers for color. Snap peas give a nice crunch. They cook quickly and stay crisp. Don't forget the aromatics! Garlic and ginger add a strong flavor. They make the dish aromatic and delicious. Now, let’s talk sauces. Sweet chili sauce gives a sweet and spicy kick. Soy sauce adds saltiness and depth. A little sesame oil at the end brings a nutty aroma. Lastly, garnishes are key. Chopped green onions add freshness. A sprinkle of sesame seeds adds crunch and beauty. Gather these ingredients, and you're ready to make a colorful meal! {{ingredient_image_1}} First, cut the block of firm tofu into 1-inch cubes. Make sure to drain and press it well. This helps remove extra water. Pressing is key for crispy tofu. After cutting, toss the tofu cubes in cornstarch until they are evenly coated. The cornstarch adds a nice crunch when cooked. Next, heat 2 tablespoons of vegetable oil in a large non-stick skillet or wok over medium-high heat. Once the oil is hot, add the coated tofu cubes. Cook them for about 8-10 minutes. You want them golden and crispy on all sides. This step is important for texture. When done, remove the tofu from the pan and set it aside. In the same pan, add sliced red and yellow bell peppers along with snap peas. Stir-fry these veggies for 3-4 minutes. You want them to soften just a bit. Then, add 2 cloves of minced garlic and 1 tablespoon of minced ginger. Stir-fry for another 1-2 minutes. This will make your kitchen smell amazing! Now it’s time to bring it all together. Return the crispy tofu to the pan. Pour in 1/4 cup of sweet chili sauce and 2 tablespoons of soy sauce. Toss everything to coat well in the sauce. After that, drizzle 1 tablespoon of sesame oil over the stir-fry. Toss again for about a minute to heat through. Finally, remove from heat and enjoy the vibrant mix! To make your tofu crispy, start by draining and pressing it. This step removes extra water. You want your tofu dry for the best texture. Cut the tofu into 1-inch cubes. Toss these cubes in cornstarch. This coating helps them become golden and crisp when cooked. To boost flavor, consider adding a pinch of salt and pepper. You can also sprinkle some crushed red pepper for heat. When cooking the veggies, use high heat. This helps keep them crisp and vibrant. Stir-frying quickly locks in flavors and nutrients. Serve your stir-fry with jasmine rice or quinoa for a filling meal. For a lovely look, arrange the stir-fry in a bowl. Top it with green onions and sesame seeds. This adds color and crunch, making your dish appealing. Pro Tips Press Tofu Well: Ensure you press the tofu adequately to remove excess moisture, which will help it achieve a crispier texture when cooked. Use High Heat: Stir-frying requires high heat to sear the ingredients quickly, locking in flavors and maintaining their vibrant colors. Customize Your Veggies: Feel free to swap out the bell peppers and snap peas for your favorite vegetables, such as broccoli or carrots, based on what you have on hand. Make It Spicy: If you love heat, consider adding sliced fresh chili or a dash of sriracha to the stir-fry for an extra kick! {{image_2}} If you want to switch up the protein, try using chicken or shrimp. Both add great flavor. For a vegetarian option, you can use tempeh or seitan. They both absorb sauces well and add a hearty texture. You can add other veggies to your stir-fry. Broccoli and carrots are excellent choices. They both add crunch and color. Seasonal veggies like zucchini or asparagus can also work well. Feel free to use what you have on hand. Want more heat? Add sliced chili peppers or a dash of sriracha to the sauce. You can also make a homemade sweet chili sauce. Mix sugar, vinegar, and chili flakes for a quick version. Adjust the sweetness to your taste. To store leftovers, let the stir-fry cool down first. Place it in an airtight container. This keeps it fresh. You can store it in the fridge for up to three days. After that, the taste may fade. The best way to reheat stir-fry is on the stove. Just place it in a pan over medium heat. Stir it often to keep it from burning. You can also use a microwave, but it may not keep the texture as nice. If you use the microwave, heat it in short bursts, stirring in between. Yes, you can freeze Sweet Chili Tofu Stir-Fry. To do this, let it cool completely. Then, place it in a freezer-safe bag or container. Be sure to remove as much air as you can. It can stay good in the freezer for up to two months. When ready to eat, thaw it overnight in the fridge before reheating. Making Sweet Chili Tofu Stir-Fry takes about 30 minutes. You need about 15 minutes to prep. Cooking the dish takes around 15 minutes. Yes, you can make this stir-fry ahead of time. Cook it and let it cool. Store it in the fridge for up to three days. When ready, just reheat in a pan. This saves time on busy days. Firm tofu is best for stir-fry. It holds its shape well during cooking. Soft tofu can break apart easily. For this recipe, use one block of firm tofu. It gives a nice texture and absorbs flavors well. You now have a complete guide to making Sweet Chili Tofu Stir-Fry. We covered the key ingredients, cooking steps, and helpful tips. Remember, firm tofu offers the best texture and flavors shine through with fresh veggies and sauces. Feel free to mix and match proteins and veggies to suit your taste. With these storage tips, you can enjoy your stir-fry later. Cooking can be fun and easy when you follow these steps. So, grab your pan and get started!

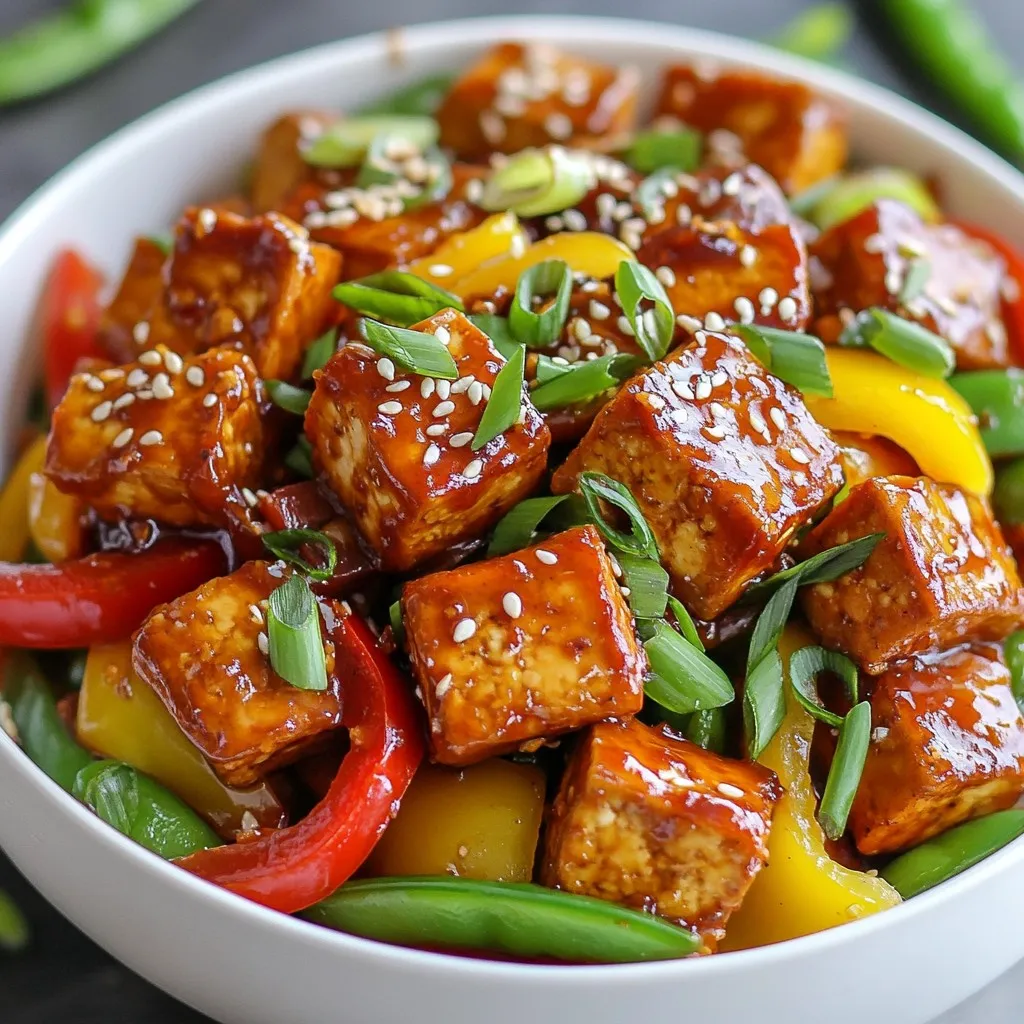
Are you ready to whip up a fun and quick meal? This Sweet Chili Tofu Stir-Fry is not only simple but packed with flavor that will amaze your taste buds. …

Read more

Categories Dinner Leave a comment

Bruschetta Chicken Pasta Flavorful and Easy Dish

June 13, 2025 by Chef Evan
To make Bruschetta Chicken Pasta, gather these simple items: - 2 boneless, skinless chicken breasts - 8 ounces of pasta (penne or rotini are excellent choices) - 2 cups cherry tomatoes, halved - 2 cloves garlic, minced - 1 tablespoon balsamic vinegar - 1 tablespoon extra virgin olive oil - 1 teaspoon dried basil - 1 teaspoon dried oregano - Salt and pepper, to taste - Fresh basil leaves, for garnish - ½ cup shredded mozzarella cheese You can swap some ingredients if you like. Use chicken thighs instead of breasts for a juicier bite. Whole wheat or gluten-free pasta works great for those who need it. For a twist, try sun-dried tomatoes instead of fresh ones. If you want a dairy-free meal, skip the cheese or use a vegan version. This dish is high in protein due to the chicken. It also offers carbs from pasta, perfect for energy. If you're looking for a lighter option, use less pasta and more veggies. Each serving gives you a good amount of vitamins from the tomatoes and basil. You can feel good about enjoying this dish! For the full recipe, check out the [Full Recipe]. 1. Boil the Water: Start by bringing a large pot of salted water to a boil. This will cook the pasta. 2. Cook the Pasta: Add 8 ounces of your chosen pasta and cook it until it's al dente. This usually takes about 8 to 10 minutes. 3. Drain and Save Water: Once cooked, drain the pasta but save ½ cup of the pasta water. Set the pasta aside. 4. Season the Chicken: Take 2 boneless, skinless chicken breasts. Sprinkle salt, pepper, dried basil, and dried oregano on both sides for great flavor. 1. Heat the Skillet: Warm a large skillet over medium heat. Add 1 tablespoon of extra virgin olive oil. 2. Cook the Chicken: Place the seasoned chicken in the skillet. Cook for 6-7 minutes on each side. The chicken should not be pink inside. 3. Slice the Chicken: Once cooked, move the chicken to a cutting board. Let it rest for a few minutes, then slice it into thin strips. 4. Sauté the Garlic: In the same skillet, add 2 cloves of minced garlic. Cook for 30 seconds, making sure it doesn't brown. 5. Add Tomatoes and Vinegar: Toss in 2 cups of halved cherry tomatoes and 1 tablespoon of balsamic vinegar. Stir well and let it cook for 3-4 minutes. 6. Combine Pasta: Add the drained pasta to the skillet. Toss everything together. If it looks dry, add some of the reserved pasta water. 7. Mix in Chicken: Layer the sliced chicken on top of the pasta. Mix gently. 8. Melt the Cheese: Sprinkle ½ cup of shredded mozzarella cheese over the dish. Cover the skillet for 1-2 minutes to melt the cheese. 9. Taste and Season: Taste your dish and adjust with more salt and pepper if needed. 10. Serve: Enjoy your Bruschetta Chicken Pasta hot. Add fresh basil leaves on top for a nice touch. - Always cook chicken to an internal temperature of 165°F. - Wash your hands after handling raw chicken. - Store leftovers in the fridge within two hours of cooking. - Reheat leftovers thoroughly before serving. Following these steps ensures you create a delicious and safe meal! For the full recipe, check out the detailed instructions above. - Use fresh ingredients for the best taste. Fresh basil and ripe tomatoes make a big difference. - Always salt your pasta water. This step adds flavor right from the start. - Let the chicken rest after cooking. This keeps it juicy and tender. - Cook your pasta just until al dente. This keeps it firm and prevents mushiness. - When sautéing garlic, watch it closely. Burnt garlic can ruin the dish. - Experiment with the amount of balsamic vinegar. It adds a nice tang but can overpower. - Serve the pasta in large, shallow bowls. This showcases the beautiful colors of the dish. - Garnish with fresh basil leaves. They add a pop of color and fresh flavor. - A drizzle of balsamic glaze on top elevates the dish's appearance and flavor. For more details, check out the Full Recipe. Enjoy making this tasty meal! {{image_4}} You can swap chicken for other proteins. Grilled shrimp adds a nice flavor. You can also use turkey breast for a leaner option. For a heartier choice, try diced steak or pork. Each protein changes the dish's taste and texture. If you want a meatless meal, go for grilled eggplant or zucchini. They add a great bite. You can also use chickpeas for protein and a creamy texture. Another option is to add sautéed mushrooms. They bring a rich flavor that pairs well with the tomatoes. To elevate the dish, try adding some crushed red pepper for heat. A sprinkle of fresh lemon juice brightens the flavors. You can also mix in some olives or sun-dried tomatoes for extra zest. Don’t forget fresh herbs like parsley or chives for a fresh twist. For the full recipe, check out the main section. After you make Bruschetta Chicken Pasta, let it cool. Place it in an airtight container. It stays fresh in the fridge for up to three days. Make sure to seal it tightly. This helps keep the flavors intact. You can freeze Bruschetta Chicken Pasta if you want to save some for later. First, let it cool completely. Then, place the pasta in a freezer-safe container. It can last for up to three months in the freezer. When you're ready to eat, just thaw it in the fridge overnight. To reheat your pasta, use a skillet for the best results. Add a splash of water or olive oil to keep it moist. Heat it over medium-low heat. Stir occasionally until it's hot. You can also use the microwave. Just cover it to keep moisture in and heat for one to two minutes. Bruschetta Chicken Pasta stays fresh for about 3 to 5 days in the fridge. Store it in an airtight container to keep it safe. The flavors often blend better after a day in the fridge. Yes, you can use various types of pasta. I suggest penne or rotini, but you can try spaghetti or farfalle too. Just make sure to cook it al dente for the best texture. This dish pairs well with a simple salad or garlic bread. A light green salad with lemon vinaigrette adds a fresh touch. You can also enjoy it with roasted vegetables for added color and taste. Absolutely! You can prepare the chicken and pasta in advance. Just store them separately in the fridge. When ready to serve, heat them together, then add the fresh tomatoes and cheese. This keeps everything fresh and tasty. For the full recipe, check the recipe section above. In this blog post, we explored the ingredients, steps, and tips for making Bruschetta Chicken Pasta. I shared essential cooking methods and food safety advice, plus ways to adapt the meal based on your needs. Remember, you can switch ingredients or try different proteins to make this dish yours. So, embrace your kitchen skills and make this delicious meal your own. Happy cooking!

Looking for a tasty meal that’s easy to make? Bruschetta Chicken Pasta combines fresh flavors and simple steps. This dish is a crowd-pleaser and perfect for busy nights. You’ll enjoy …

Read more

Categories Dinner Leave a comment

Easy Keto Egg Cups Simple and Delicious Recipe

June 13, 2025 by Chef Evan
For the Easy Keto Egg Cups, you'll need the following ingredients: - 6 large eggs - 1/2 cup heavy cream - 1 cup fresh spinach, finely chopped - 1/2 cup cherry tomatoes, cut in half - 1/2 cup sharp cheddar cheese, grated - 1/4 cup bell pepper, diced (choose your favorite color) - 1/2 teaspoon garlic powder - 1/2 teaspoon onion powder - Salt and black pepper to taste - Fresh herbs (such as parsley or chives), chopped, for garnish If you're looking for alternatives, you can use almond milk instead of heavy cream for a lighter option. For a dairy-free version, try nutritional yeast instead of cheese. Presentation matters! I suggest garnishing your egg cups with fresh herbs. They add color and flavor. You can also serve them on a rustic platter. Adding avocado slices on the side makes this meal even better. This recipe is easy and perfect for meal prep. It takes just 10 minutes to prep and 35 minutes total. Get ready to enjoy your tasty keto egg cups! You can find the full recipe above. 1. Preheat your oven and prepare the muffin tin. Start by setting your oven to 350°F (175°C). Lightly grease each cup of your muffin tin with cooking spray or a bit of oil. This helps the egg cups come out easily after baking. 2. Mixing the egg base and seasoning adjustments. In a large bowl, crack open 6 large eggs. Add in 1/2 cup of heavy cream. Whisk them together until the mixture is smooth. This step is key for a creamy texture. Next, add 1/2 teaspoon of garlic powder, 1/2 teaspoon of onion powder, and salt and black pepper to taste. Stir well. Always taste the mix and adjust the seasoning if you want more flavor. 3. Incorporating veggies and cheese into the mixture. Now, gently fold in 1 cup of finely chopped spinach, 1/2 cup of halved cherry tomatoes, 1/4 cup of diced bell pepper, and 1/2 cup of grated sharp cheddar cheese. Make sure everything is mixed well. The veggies should be coated in the egg mixture for even flavor. 1. Pouring the mixture into the muffin tin. Carefully pour the egg mixture into the greased muffin tin. Fill each cup about three-quarters full. This allows room for the egg cups to rise and puff up while baking. 2. Baking time and checking for doneness. Place the muffin tin in the preheated oven. Bake for 20-25 minutes. The egg cups will puff up and turn a nice golden color. To check if they are done, insert a toothpick into the center. If it comes out clean, they are ready. 3. Cooling and serving the egg cups. Once baked, take the muffin tin out of the oven. Let the egg cups cool for a few minutes. To remove them, run a butter knife around the edges. This helps them pop out easily. Before serving, sprinkle some fresh chopped herbs on top. This adds a nice touch of color and flavor. For the full recipe, check the details above. To make your egg cups fluffy, whisk the eggs well. This step adds air, which helps them rise. Use a fork or whisk and beat until the mixture is smooth. The more you whisk, the fluffier your egg cups will be. Seasoning is key to making these egg cups taste great. I use salt and black pepper, but you can add more. Try garlic or onion powder for extra flavor. Taste the mixture before baking to adjust the seasoning. You can make these egg cups ahead of time. Prepare them on the weekend for quick breakfasts. After baking, let the cups cool and store them in an airtight container. They last about five days in the fridge. Reheating is easy. Use a microwave for quick meals. Heat for 30 seconds, then check if it’s warm. If you prefer, use the oven to keep the texture. Bake them at 350°F for about 10 minutes. This way, they stay nice and fluffy. {{image_4}} You can change up the veggies in your egg cups to keep things fresh. Here are some low-carb vegetables you can include: - Zucchini, grated - Broccoli, finely chopped - Mushrooms, diced - Cauliflower, riced Each of these adds flavor and texture. You can also mix and match to find your favorite blend. For cheese, try different options for added flavor: - Feta, crumbled - Mozzarella, shredded - Goat cheese, soft - Pepper jack, for a spicy kick Using various cheeses can change the taste and make your egg cups more exciting. To customize taste, adding spices or herbs can take your egg cups to another level. Consider these ideas: - Paprika for warmth - Basil for a fresh twist - Oregano for an Italian flair - Cumin for a smoky flavor You can also boost protein by adding: - Cooked bacon, crumbled - Diced ham or turkey - Cooked sausage, crumbled Top with avocado slices or salsa for a zesty finish. Let your creativity shine and make these cups your own! To keep your cooked egg cups fresh, store them in the fridge. Place the egg cups in an airtight container. They will stay good for up to five days. If you want a longer shelf life, freezing is a great option. Wrap each egg cup in plastic wrap. Then, place them in a freezer-safe bag. They can last for up to three months in the freezer. When it's time to enjoy your egg cups again, you can reheat them in the oven or microwave. For the oven, preheat it to 350°F (175°C). Place the egg cups on a baking sheet and heat for about 10 minutes. In the microwave, heat one cup at a time for 30 to 45 seconds. To prevent sogginess, cover the egg cups with a paper towel when microwaving. This helps absorb excess moisture. Enjoy your tasty keto egg cups warm and fresh! Can I use egg substitutes for this recipe? Yes, you can use egg substitutes. Flax eggs or commercial egg replacers work well. Just keep the same ratio. However, using real eggs gives the best taste and texture. How long do keto egg cups last in the refrigerator? Keto egg cups last about 4 to 5 days in the fridge. Store them in an airtight container. They taste great reheated for a quick meal. Can I make egg cups without a muffin tin? Yes, you can use ramekins or silicone molds. Just ensure they are greased well. Adjust baking time as needed for different sizes. What can I serve with keto egg cups for a complete meal? You can serve avocado slices or a fresh salad. Bacon or sausage also pair nicely. They add protein and flavor, making your meal more filling. In this blog post, we explored how to make Easy Keto Egg Cups. We covered the ingredients needed, from egg base to garnishes. I shared step-by-step instructions, tips for perfecting your egg cups, and clever storage methods. You learned about ingredient swaps and flavor enhancements for variety. Finally, I answered common questions to help you succeed. Enjoy these egg cups as a quick meal or snack. They are tasty and easy to prepare. Now go ahead and make your own delicious version!

Looking for a quick and tasty breakfast that fits your keto diet? You’ve come to the right place! I’m here to share my simple and delicious Easy Keto Egg Cups …

Read more

Categories Breakfast Leave a comment
Older posts
Newer posts
← Previous Page1 … Page57 Page58 Page59 … Page124 Next →

TOSSED FLAVORS

Where flavors are fresh, vibrant, and ready to toss! 🥗

PAGES

Home About Contact Privacy Policy Terms & Conditions Cookie Policy GDPR Policy Copyright Policy Disclaimer

CATEGORIES

Appetizers Desserts Salads Breakfast Dinner

Contact

  • Pinterest
  • Mail
Copyright © 2026 Tossed Flavors. All rights reserved.