Garlic Dill Pickles Flavorful and Simple Recipe Guide
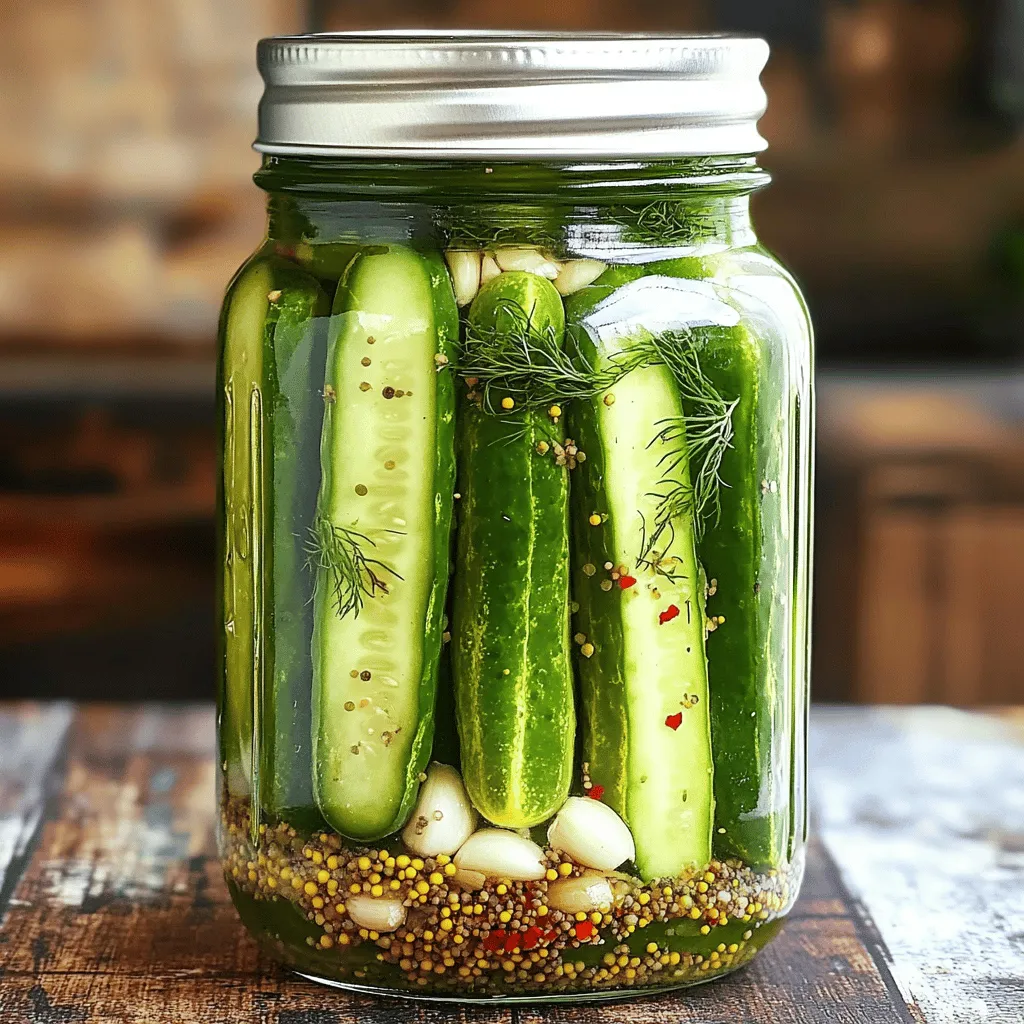
Are you ready to turn fresh cucumbers into crunchy garlic dill pickles? This simple recipe guide will help you master the art of pickling with ease. You’ll learn not just …
Are you ready to turn fresh cucumbers into crunchy garlic dill pickles? This simple recipe guide will help you master the art of pickling with ease. You’ll learn not just …

Enjoying a warm slice of homemade apple cobbler is one of life’s simple pleasures. In this guide, I’ll teach you how to whip up this delightful dessert, using fresh apples …
![- 2 lbs chicken wings or drumsticks - 1 cup all-purpose flour - 1/2 cup cornstarch - 1 teaspoon baking powder - 1 teaspoon garlic powder - 1 teaspoon onion powder - 1 teaspoon black pepper - Salt, to taste - Oil for frying - 1/4 cup gochujang (Korean chili paste) - 1/4 cup honey - 2 tablespoons soy sauce - 2 tablespoons rice vinegar - 1 tablespoon sesame oil - 2 cloves garlic, minced - 1 tablespoon ginger, minced - 1 tablespoon sesame seeds - Chopped green onions for garnish For this recipe, you will need both chicken and sauce ingredients. The chicken gives a crispy base, while the sauce adds flavor. I love using wings or drumsticks since they are juicy and perfect for frying. The coating mix is simple yet effective. Flour and cornstarch create a crunchy crust. Baking powder helps the chicken puff up. Garlic and onion powder give a savory kick. Don’t forget to add salt and pepper to enhance the taste. For the sauce, gochujang is the star. It brings heat and depth. Honey balances the spice with sweetness. Soy sauce adds umami, while rice vinegar gives a tangy touch. Sesame oil adds richness, and garlic and ginger give a fresh burst. Lastly, sesame seeds add a nice crunch. Chopped green onions make a bright garnish. They add color and a fresh taste, making your Sweet & Spicy Korean Fried Chicken truly shine. For more detailed steps, check out the Full Recipe. - Rinse and dry chicken pieces. - Coat chicken with the flour mixture. Start by rinsing your chicken pieces under cold water. This step ensures your chicken is clean and ready to cook. After rinsing, pat the pieces dry with paper towels. It’s important to remove all excess moisture. This helps the chicken get crispy when frying. Next, we’ll make the coating. In a large bowl, mix together the all-purpose flour, cornstarch, baking powder, garlic powder, onion powder, black pepper, and a pinch of salt. Toss the chicken pieces in this mixture. Make sure every piece gets an even coat. This will give you that perfect crunch when frying. - Heat oil to 350°F (175°C). - Fry chicken in batches until golden brown. Now it’s time to heat the oil. Pour enough oil into a deep pot or heavy skillet to fill it about 3 inches deep. Heat the oil over medium-high heat until it reaches 350°F (175°C). You can test the oil by dropping in a small bit of the flour mixture. If it bubbles and rises, the oil is ready. Carefully lower the coated chicken pieces into the hot oil. Do this in small batches to avoid overcrowding. Fry each batch for about 8-10 minutes. You want them to be golden brown and cooked through. Once done, place the chicken on a plate lined with paper towels. This helps drain any excess oil. - Combine sauce ingredients in a saucepan. - Heat and stir until sauce thickens. For the sauce, grab a medium saucepan. Over low heat, combine gochujang, honey, soy sauce, rice vinegar, sesame oil, minced garlic, and ginger. Stir this mixture often as it heats. You want the flavors to blend well and the sauce to thicken. This should take around 5-7 minutes. Just before you finish, add sesame seeds for an extra crunch. - Coat fried chicken with sauce. - Arrange on a serving platter and garnish. Time to coat the chicken! You can dip each piece into the warm sauce. Alternatively, place all the fried chicken in a large bowl and pour the sauce over it. Gently toss to ensure every piece is covered in that sweet and spicy goodness. Finally, arrange your beautifully glazed chicken on a serving platter. For a pop of color, sprinkle chopped green onions on top. Enjoy every bite of your delightful creation! For the full recipe, check [Full Recipe]. - Dry chicken thoroughly before coating - Avoid overcrowding the frying pan To get your chicken nice and crispy, start by drying it well. Use paper towels to remove all moisture. Wet chicken will steam instead of fry, and you want that golden crisp! Next, be careful not to crowd the frying pan. Fry in small batches, so the chicken has room to cook evenly. This keeps the oil hot and gives you that perfect crunch. - Adjust sweetness and spice levels to taste - Allow sauce to cool slightly before coating When making the sauce, taste as you go. If you want more sweetness, add extra honey. For more heat, add a bit more gochujang. It’s all about your taste! After cooking the sauce, let it cool for a few minutes. A warm sauce coats the chicken better. If it’s too hot, it can make your chicken soggy. - Use fresh green onions for garnish - Serve with lettuce for an attractive presentation For a pretty plate, sprinkle fresh green onions on top of the chicken. This adds color and flavor. You can also serve the chicken over a bed of sliced lettuce. This not only looks great but also adds crunch. Your Sweet & Spicy Korean Fried Chicken will impress everyone at the table! {{image_4}} You can switch up the sauce for your chicken if you want. Here are two great ideas: - Honey garlic sauce: This sauce adds a sweet touch with a hint of garlic. Mix honey with minced garlic and a bit of soy sauce. Heat it until it thickens. It makes the chicken sweet and tasty. - Spicy BBQ sauce: A smoky flavor can bring a new twist. Combine your favorite BBQ sauce with some gochujang for that Korean kick. This will make your chicken extra spicy and fun! You don’t have to fry your chicken! Here are some other ways to cook it: - Oven-baking alternative: Preheat your oven to 425°F (220°C). Coat the chicken pieces as usual. Place them on a baking tray lined with parchment paper. Bake for 25-30 minutes until golden and crispy. This method is healthier and less messy. - Air fryer instructions: If you have an air fryer, it’s easy! Set it to 375°F (190°C). Coat the chicken, then place them in the fryer basket. Cook for about 25 minutes, flipping halfway through. The chicken will be crispy and delicious! Need to make some changes? You can easily swap ingredients to suit your needs: - Gluten-free coating options: Use almond flour or rice flour instead of all-purpose flour. You can also use a gluten-free bread crumb blend. This will keep your chicken crispy without gluten! - Chicken alternatives: If you want to try something different, use chicken thighs instead of wings. They stay juicy and tender. For a vegetarian option, use tofu cubes. Coat and fry them the same way for a tasty treat! For the full recipe, you can always refer back to the detailed steps! After enjoying your Sweet & Spicy Korean Fried Chicken, let it cool down. This step helps keep your chicken crispy. Once cooled, place the chicken in airtight containers. Make sure to seal them tight. This keeps your chicken fresh and prevents it from drying out. When it comes to reheating, the oven is your best friend. Set it to 350°F (175°C). Place the chicken on a baking sheet. Heat for about 10-15 minutes. This method keeps the chicken crispy. The microwave, while faster, may make your chicken soggy. If you must use the microwave, try a short time on low power. You can freeze the fried chicken for later. Wrap each piece in plastic wrap. Then, place the wrapped chicken in a freezer bag. This prevents freezer burn. When you’re ready to eat, take the chicken out. Let it thaw in the fridge overnight for the best results. This method helps keep your chicken juicy and tasty. To keep your fried chicken crispy, you must dry it well. After washing the chicken, use paper towels to remove all moisture. Moisture can make the coating soggy. A dry surface helps the flour stick better, leading to crispy chicken. When frying, avoid overcrowding the pot. This helps keep the oil hot, which also adds to the crispiness. Yes, you can make parts of this recipe ahead of time. You can prepare the sauce a day before. Just store it in the fridge. For the chicken, you can coat it and keep it in the fridge until you're ready to fry. This allows the flavors to soak in. Some great side dishes pair well with this chicken. Here are a few ideas: - Steamed rice - Pickled vegetables - Kimchi - Cucumber salad - Garlic bread These sides balance the heat and enhance the meal's flavors. To adjust the spice level, modify the gochujang in the sauce. If you want it milder, use less gochujang. You can also mix in more honey to balance the heat. For a spicier kick, add some chili flakes or extra gochujang. Taste as you go to find your perfect level of spice. If you're looking for authentic Sweet & Spicy Korean Fried Chicken, check out these restaurants: - Ktown BBQ - Seoul Chicken - Bonchon These places are known for their fried chicken and offer a great taste of Korea. Enjoy the full recipe to try making it at home! This blog post shared how to make Sweet & Spicy Korean Fried Chicken. We covered ingredients for the chicken, the sauce, and tips for cooking. I shared steps for frying and coating the chicken for maximum crispiness. You can try different sauces and cooking methods to suit your taste. Remember to store leftovers properly to keep them tasty. Enjoy making this dish, and don't forget to share it with friends and family. Your cooking skills will shine with this tasty recipe!](https://tossedflavors.com/wp-content/uploads/2025/06/e6542b9f-90fa-4145-9886-4710305c9f07.webp)
Craving a dish that packs a punch and delights your taste buds? Let me introduce you to Sweet & Spicy Korean Fried Chicken! This recipe combines crispy chicken with a …
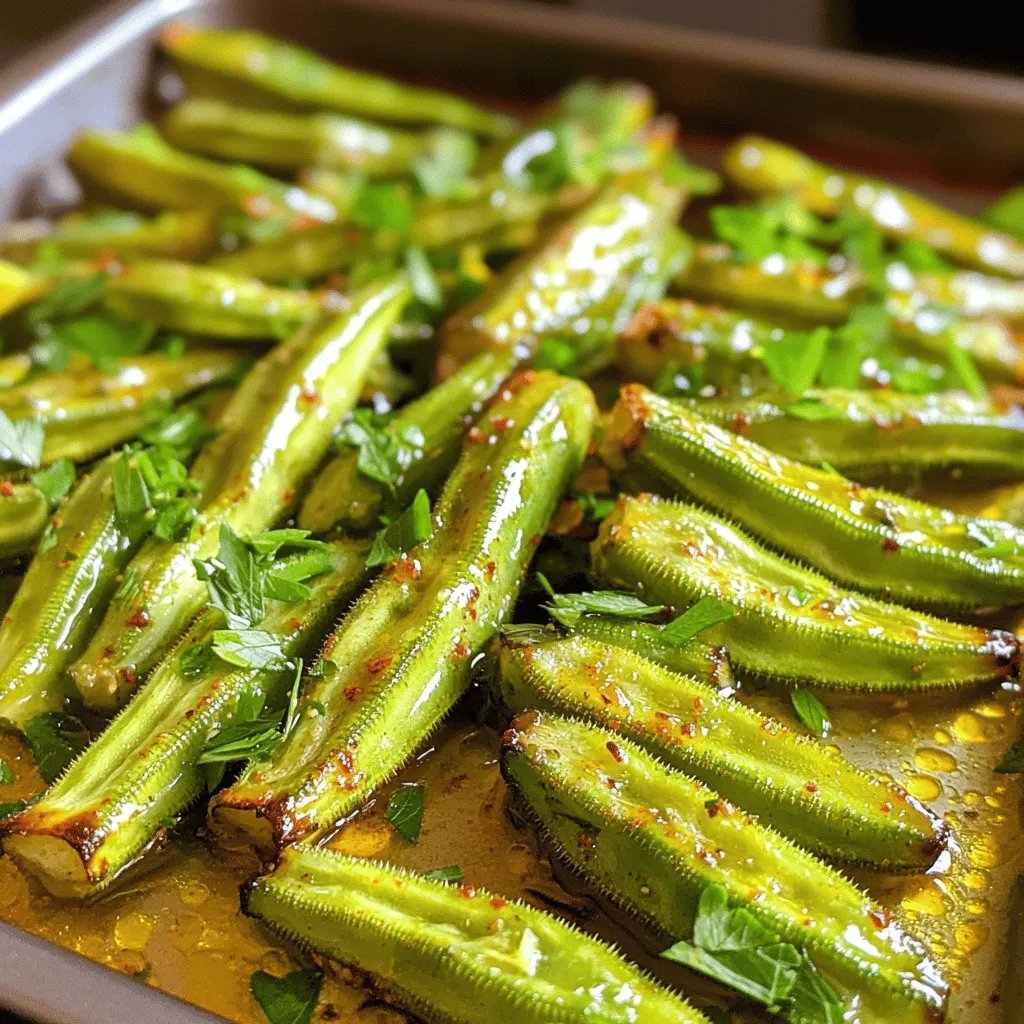
If you’re looking for an easy and tasty side dish, I’ve got the perfect recipe for you: roasted okra. This simple, healthy treat is not only crispy but also packed …
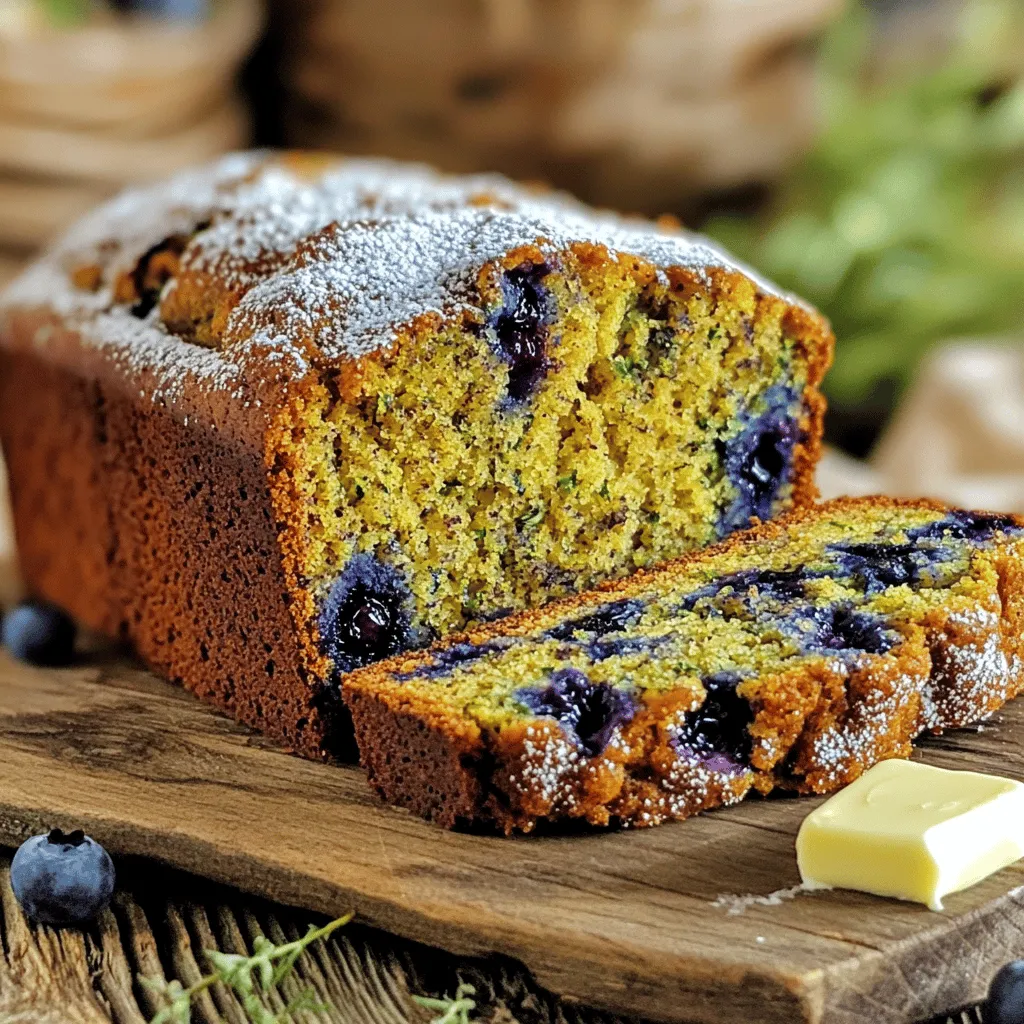
Looking for a delicious way to use up summer zucchini? This Blueberry Zucchini Bread recipe is both tasty and easy to make. With fresh blueberries and a hint of cinnamon, …

Are you ready to try a cookie that’s both tasty and good for you? These Healthy Zucchini Oatmeal Cookies combine flavor and nutrition in a simple, fun recipe. Packed with …
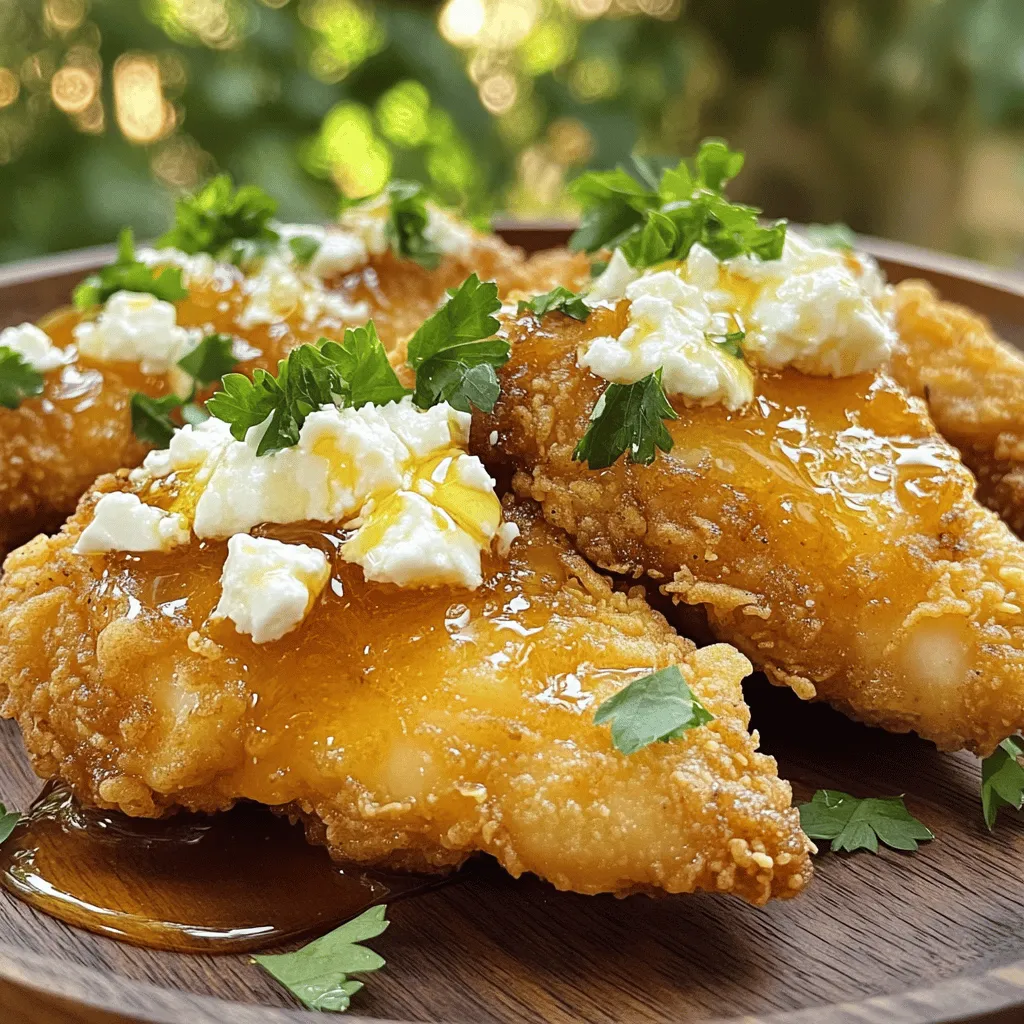
Craving a dinner that’s both crispy and packed with flavor? Let me introduce you to Crispy Hot Honey Feta Chicken. This dish combines tender chicken, crispy coating, and a delightful …
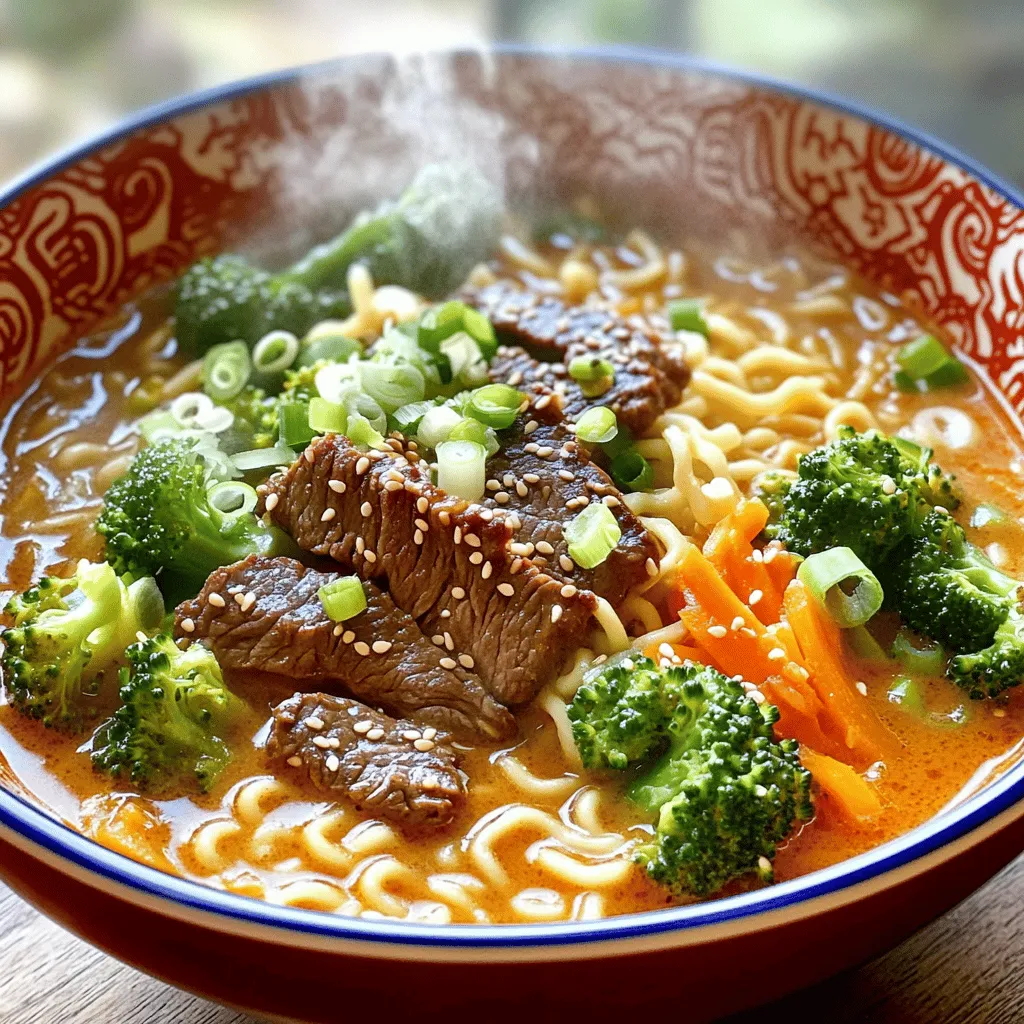
Are you ready to spice up your dinner? In this blog post, I’ll walk you through making Spicy Korean Ramen with Grilled Beef and Creamy Sauce. This dish combines bold …
![The heart of this dish lies in its simple yet rich ingredients. Here’s what you need: - 1 lb boneless, skinless chicken breasts, cut into bite-sized pieces - 1 cup fresh or frozen gnocchi - 1 cup heavy cream - 1 cup grated Asiago cheese - 2 tablespoons olive oil - 3 cloves garlic, minced - 1 cup fresh spinach, roughly chopped - 1 teaspoon Italian seasoning - Salt and black pepper, to taste - Fresh basil leaves, for garnish These ingredients create a creamy, savory meal that warms your heart. You can make this dish your own with a few swaps and additions: - Use chicken thighs instead of breasts for more flavor. - Swap the heavy cream with half-and-half for a lighter sauce. - Try adding sun-dried tomatoes for a tangy kick. - For spice lovers, red pepper flakes can add heat. These options keep it fun and personal. To make cooking easier, use these tools: - A large skillet for cooking the chicken and sauce. - A cutting board and sharp knife for prep work. - A wooden spoon for stirring the sauce. - Measuring cups and spoons for accuracy. Having the right tools makes the process smooth and enjoyable. For the full recipe, click here. Start by heating the olive oil in a large skillet over medium heat. Once hot, add the bite-sized chicken pieces. Season them with salt, black pepper, and Italian seasoning. Sauté the chicken for about 5-7 minutes. Cook until the pieces are fully done and nicely browned. After cooking, remove the chicken from the skillet and set it aside. In the same skillet, add the minced garlic. Sauté it for about 1 minute, until it smells nice but doesn’t brown. Next, pour in the heavy cream, stirring gently. Bring the cream to a gentle simmer. Gradually stir in the grated Asiago cheese. Keep stirring until the cheese melts and the sauce is smooth and silky. Carefully add the gnocchi to the creamy sauce. If you are using fresh gnocchi, cook them in the sauce for 2-3 minutes until they float. For frozen gnocchi, follow the package instructions for cooking time. Once the gnocchi is ready, return the cooked chicken to the skillet. Add the chopped spinach and stir everything together. Cook until the spinach wilts and everything is warm, about 2-3 minutes. Taste the dish and adjust seasoning as needed. For a full and delicious experience, check out the Full Recipe. To make a creamy sauce, use heavy cream. This gives richness and smoothness. Stir in the Asiago cheese slowly. This helps it melt evenly. If the sauce is too thick, add a splash of chicken broth. For a thinner sauce, keep stirring and let it simmer longer. Fresh gnocchi cooks faster than frozen ones. If you use fresh, they usually float after 2-3 minutes. For frozen gnocchi, follow the package instructions. They might take a bit longer. Always test a piece to make sure they’re tender. This way, you avoid overcooking and losing flavor. Serve the dish in shallow bowls for a nice look. Add fresh basil leaves on top. They give a bright color and fresh taste. You can also sprinkle extra Asiago cheese for more flavor. Pair with a light salad or crusty bread to round out the meal. {{image_4}} You can make this dish lighter by using low-fat cream. Swap the heavy cream for half-and-half. You can also use olive oil spray instead of regular oil. This reduces fat without losing flavor. Choose lean chicken cuts, like chicken thighs, for a tasty change. Adding vegetables can boost nutrition and flavor. Try mixing in cherry tomatoes or bell peppers. You can also use broccoli or zucchini for extra crunch. Spinach is great, but feel free to add kale or arugula instead. These veggies add color and nutrients. To change the flavor, play with spices. Adding crushed red pepper gives a nice kick. You can also try fresh herbs like thyme or rosemary for a fragrant twist. For a tangy touch, add lemon juice or zest. This brightens the dish and enhances the creamy sauce. To keep your Asiago chicken and gnocchi fresh, let it cool first. Place the leftovers in an airtight container. Store them in the fridge for up to three days. Make sure the container is sealed well to prevent any odors from mixing. When you’re ready to eat, you can reheat your leftovers easily. Use a skillet over low heat. Add a splash of cream or broth to keep it moist. Stir occasionally until everything is heated through. You can also use the microwave. Heat in a bowl and cover it with a damp paper towel to retain moisture. This method takes about 2-3 minutes. If you want to save some for later, freezing works well. Portion out the dish into freezer-safe containers. Leave some space at the top for expansion. Label the containers with the date. You can freeze it for up to three months. To enjoy it again, thaw overnight in the fridge before reheating. This keeps the flavors intact and the meal delicious. For the complete recipe, check out the [Full Recipe]. Serve Asiago Chicken & Gnocchi in shallow bowls. This lets the sauce shine. Add a sprinkle of grated Asiago on top. Fresh basil leaves make a nice touch. You can pair it with a side salad or some crusty bread. This adds texture and flavor to your meal. Yes, you can prepare Asiago Chicken & Gnocchi ahead of time. Cook the chicken and sauce, then store them separately. Keep the gnocchi in the fridge as well. When ready to eat, combine everything and reheat gently. This keeps the gnocchi from getting mushy. You can make a vegetarian version easily. Replace the chicken with sautéed mushrooms or zucchini. Use vegetable broth instead of chicken broth. Keep the cream and Asiago to maintain flavor. This way, you can enjoy the same comforting dish without meat. You now understand the key ingredients and steps to make Asiago Chicken & Gnocchi. We covered the main ingredients, optional substitutions, and cooking tips. I shared how to perfect your sauce texture and highlighted serving suggestions. There are variations to try, plus storage and reheating tips for leftovers. Asiago Chicken & Gnocchi is simple, tasty, and adaptable. You can create a dish that suits your taste and diet. Enjoy cooking this delicious meal and make it your own!](https://tossedflavors.com/wp-content/uploads/2025/06/b1cfa3d3-e013-493f-b00f-3e3794db4572.webp)
Looking for a cozy meal that bursts with flavor? Asiago Chicken & Gnocchi is just what you need! This dish combines tender chicken, soft gnocchi, and a rich, creamy sauce …
![Cooking is a joy, especially when you have the right ingredients. For Easy Chicken Garlic Parmesan Pasta, gather these key items for a tasty meal. - Chicken and Pasta - 2 boneless, skinless chicken breasts, cut into bite-sized pieces - 8 oz pasta (penne or fettuccine for ideal texture) - Sauce Ingredients - 4 cloves garlic, finely minced - 1 cup heavy cream (for luscious richness) - 3/4 cup freshly grated Parmesan cheese (plus extra for serving) - 2 tablespoons extra virgin olive oil - Seasonings and Garnishes - Salt and freshly ground black pepper to taste - 1/2 teaspoon red pepper flakes (optional, for a hint of heat) - Fresh parsley, chopped (for a vibrant garnish) These ingredients blend to make a rich sauce that coats the pasta and chicken perfectly. Each part plays a role in creating a meal that shines. The garlic adds depth, while the Parmesan gives that creamy touch. You will love how easy it is to pull this dish together with these items. Check out the Full Recipe for more details! To start, bring a large pot of salted water to a boil. This step adds flavor to your pasta. Once boiling, add 8 oz of your chosen pasta, like penne or fettuccine. Cook it according to the package directions, usually around 8-10 minutes, until it’s al dente. Before draining, reserve about 1/2 cup of the starchy pasta water. This water helps thicken your sauce later. After reserving the water, drain the pasta in a colander and set it aside. Next, heat 2 tablespoons of extra virgin olive oil in a large skillet over medium-high heat. Add the bite-sized chicken pieces, making sure to season them well with salt and freshly cracked black pepper. This step is crucial for flavor. Cook the chicken for about 5-7 minutes. It should turn golden brown and be cooked through. Once done, remove the chicken from the skillet and place it on a plate. In the same skillet, add 4 cloves of finely minced garlic along with optional red pepper flakes. Sauté them for about 1 minute while stirring. You want the garlic to smell fragrant but not brown. If garlic burns, it can taste bitter, ruining your sauce. Now, pour in 1 cup of heavy cream. Stir continuously to mix it with the garlic. Let the mixture simmer gently for 2-3 minutes until it thickens slightly. Gradually add in 3/4 cup of freshly grated Parmesan cheese. Whisk it until it melts into a rich and creamy sauce. Return the cooked pasta and chicken to the skillet. Toss them gently with the creamy sauce until every piece is coated. If the sauce seems too thick, add the reserved pasta water a little at a time. This helps reach your desired sauce consistency. Before serving, taste your pasta and adjust the seasoning with extra salt and pepper as needed. For a lovely finish, garnish with freshly chopped parsley and a sprinkle of extra Parmesan cheese. Serve the pasta in large bowls. Drizzle with a bit more olive oil and add a sprinkle of red pepper flakes for color. Enjoy your delicious creation! To get the best pasta texture, cook it until just al dente. This means it should have a slight bite. Always use a large pot of boiling, salted water. The salt adds flavor and helps the pasta cook evenly. I recommend using penne or fettuccine for this dish. They hold the creamy sauce well. You can add extra ingredients for variation. Try sun-dried tomatoes or spinach for pops of color and taste. For spice adjustments, consider adding more red pepper flakes or fresh herbs like basil. This can elevate the dish and make it your own. Use a large skillet for cooking the chicken and sauce. A non-stick skillet works best to prevent sticking. For utensils, keep a wooden spoon handy for stirring. A whisk is great for mixing the sauce smoothly. Don't forget to have measuring cups and spoons for accuracy. For the Full Recipe, follow the detailed steps above. Enjoy your cooking journey! {{image_4}} You can make some simple swaps to lighten up this dish. - Alternative cream options: Use Greek yogurt or low-fat cream. These give you creaminess without extra fat. - Using whole grain pasta: Switch to whole grain pasta for more fiber and nutrients. It makes the dish heartier and healthier. Want a meatless version? It's easy to swap the chicken. - Substituting chicken: Use mushrooms or tofu instead. Both are great at soaking up flavors. - Additional vegetables to include: Add spinach, bell peppers, or zucchini. They boost the nutrients and add color. To give your pasta a new twist, try these flavor boosts. - Adding different herbs: Fresh basil or thyme can brighten up the dish. Just toss in some at the end for a fresh taste. - Incorporating other cheeses: Mix in mozzarella or goat cheese. They add unique flavors and textures to your creamy sauce. For the full recipe, check out the Full Recipe section. To keep Easy Chicken Garlic Parmesan Pasta fresh, use proper storage containers. Glass or BPA-free plastic containers work well. Make sure the pasta cools before sealing. This helps prevent steam build-up, which can make it soggy. Store in the fridge for up to three days. When you reheat, add a splash of water or extra cream. This helps restore the creamy texture. Stir well to mix everything evenly. To freeze this dish, let it cool completely first. Then, place it in a freezer-safe container. You can also use freezer bags. Remove as much air as you can before sealing. It stays good in the freezer for up to three months. When you’re ready to eat, thaw it in the fridge overnight. Reheat on the stove over low heat. Stir often and add a bit of cream if needed. This keeps it creamy and delicious. Enjoy your meal later with that fresh taste! For the full recipe, check out the [Full Recipe]. Making Easy Chicken Garlic Parmesan Pasta takes about 30 minutes. You will spend 10 minutes preparing and 20 minutes cooking. This is quick for a tasty meal. Yes, you can use frozen chicken! Just make sure to thaw it first. To thaw, place it in the fridge overnight. If you're short on time, you can use the microwave. Cook the chicken fully before adding it to the pasta. If you want a lighter dish, you can try using milk mixed with butter. This gives a similar creamy texture. You can also use Greek yogurt for a tangy twist. Just mix it in after the sauce thickens. Yes, you can make this meal ahead! Cook the pasta and chicken, then store them separately. When you are ready to eat, heat them up and mix with the sauce. This keeps everything fresh and tasty. For the full recipe, check the earlier section. In this post, we explored how to make Easy Chicken Garlic Parmesan Pasta. We covered each step, from gathering ingredients to cooking and storing leftovers. Remember, using quality chicken and perfecting your garlic sauce makes all the difference. Don't hesitate to try variations to suit your taste. This dish is simple yet rich in flavor, making it a great choice for any meal. With these tips and tricks, you'll impress yourself and others. Enjoy cooking and sharing this delicious pasta!](https://tossedflavors.com/wp-content/uploads/2025/06/a7b8bdd8-ee88-4a06-83a9-31e180b776d2.webp)
Looking for a quick and tasty dinner? I’ve got just the dish for you—Easy Chicken Garlic Parmesan Pasta! This creamy delight is packed with flavor and uses simple, fresh ingredients. …