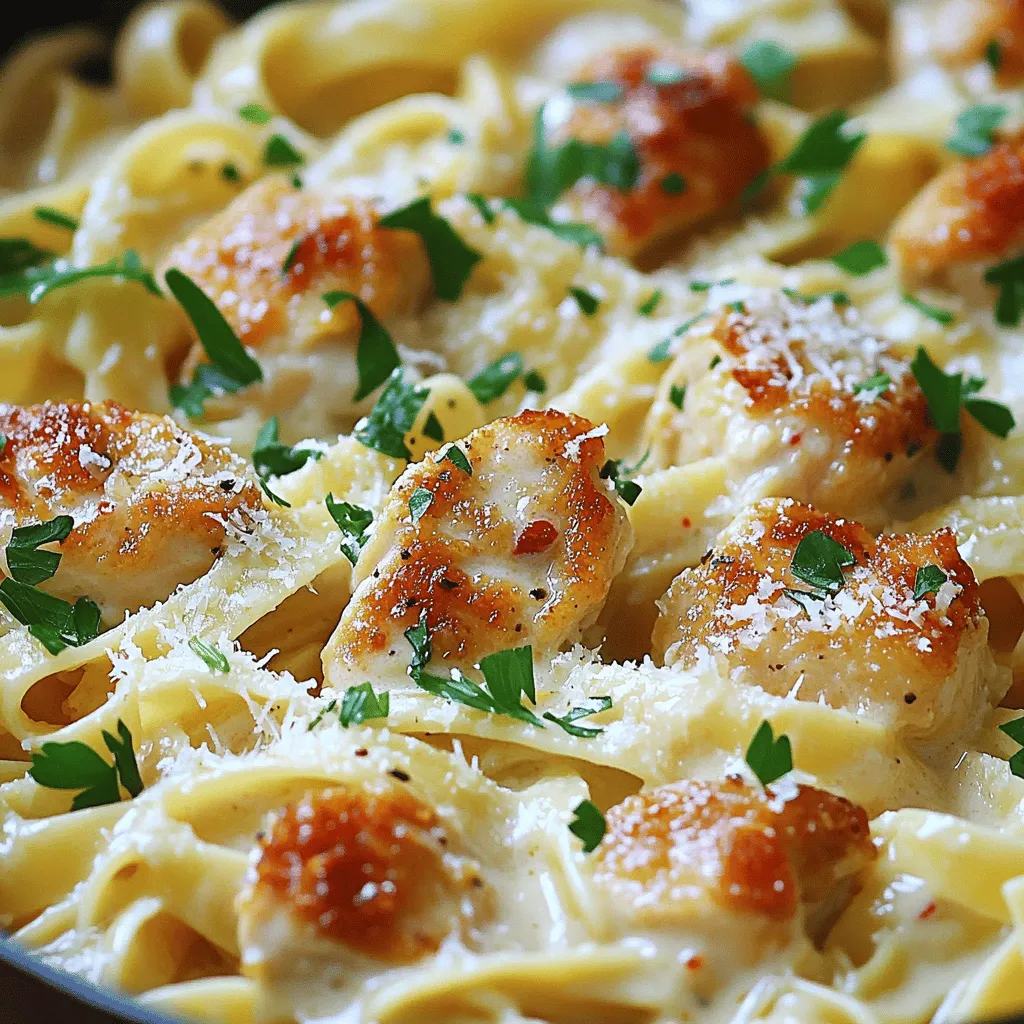
Pinchos Puerto Rican Chicken Skewers Flavor Explosion
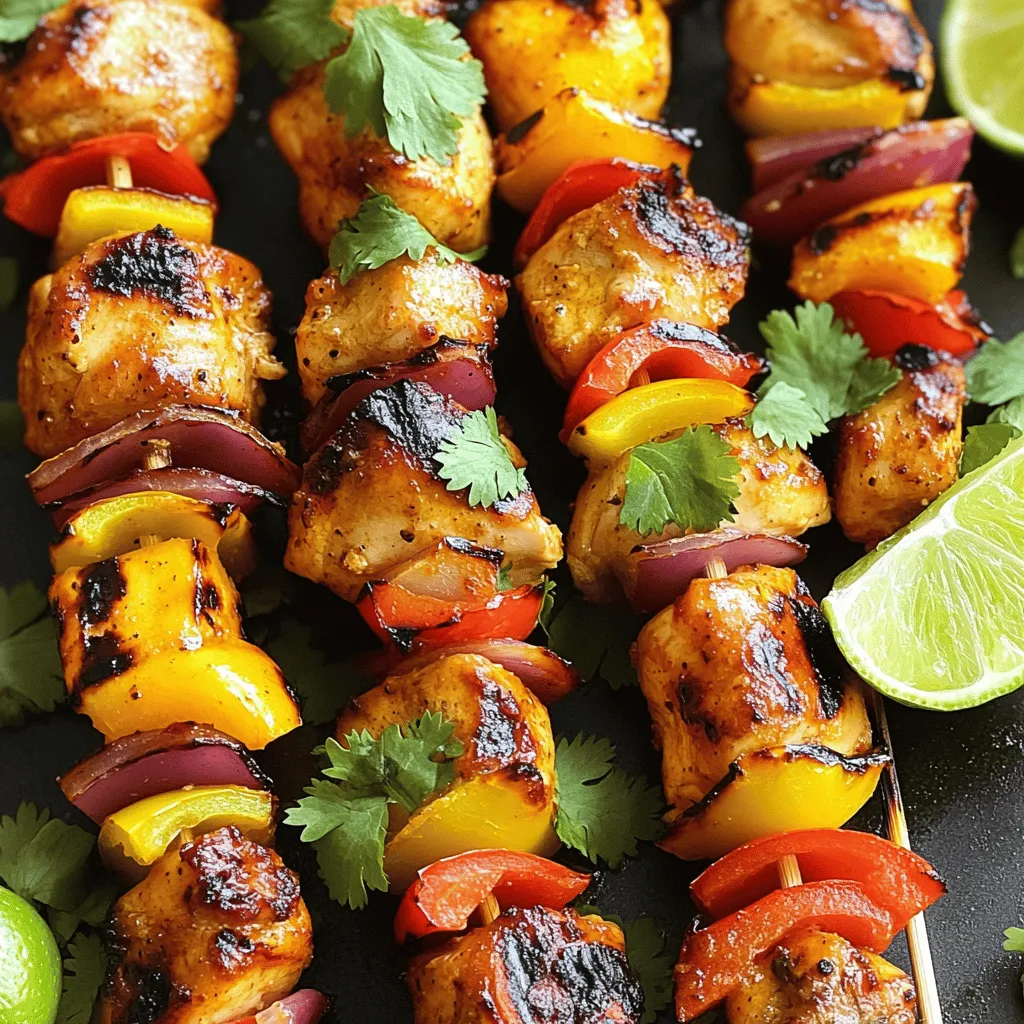
Are you ready to fire up your grill and impress your guests? Pinchos, Puerto Rican chicken skewers, offer a flavor explosion that’s hard to resist. Juicy chicken thighs seasoned with …
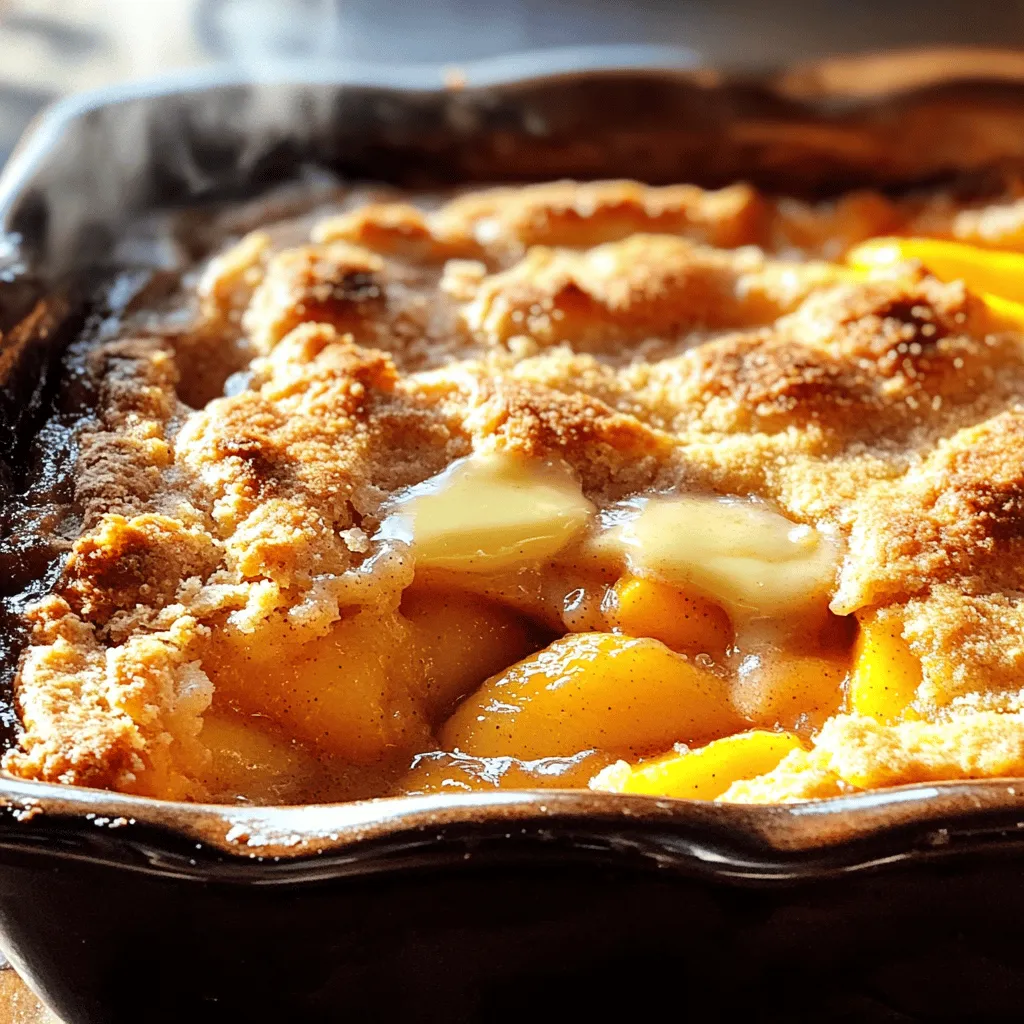
![- 4 cups fresh peaches, sliced (or 2 cans of peaches, drained and rinsed) - 1 cup granulated sugar, divided - 1 tablespoon fresh lemon juice - 1 teaspoon pure vanilla extract - 1 cup all-purpose flour - 1 tablespoon baking powder - ½ teaspoon fine salt - 1 cup milk, preferably whole - ½ cup unsalted butter, melted and slightly cooled - 1 teaspoon ground cinnamon - Whipped cream for serving - Vanilla ice cream for serving You can swap fresh peaches for canned ones in a pinch. Just make sure to drain and rinse the canned peaches. If you want less sugar, reduce the sugar by a third. For a dairy-free option, use almond milk instead of whole milk. You can also use coconut oil instead of butter for a dairy-free fat. Enjoy customizing this peach cobbler to fit your taste! Plus, if you want a fun twist, try adding a splash of almond extract in place of vanilla. Start with fresh peaches. You need four cups of sliced peaches. If fresh peaches are not available, you can use two cans of peaches. Just drain and rinse them well. In a large bowl, mix the peaches with half a cup of sugar, lemon juice, and vanilla extract. Toss gently, ensuring every peach slice is coated. Pour this mixture into a greased 9x13 inch baking dish. In another bowl, whisk together the flour, the rest of the sugar, baking powder, and salt. Slowly add the milk to the dry mix. Stir until just combined; it’s fine if some lumps remain. This is where the magic begins. Pour the batter over the peaches. Do not stir; let the baking do the work. Preheat your oven to 350°F (175°C). This is key for even baking. Once your batter is in the dish, drizzle melted butter evenly over the top. Then, sprinkle ground cinnamon for that warm, cozy flavor. Bake for 35-40 minutes. You’ll know it's ready when the top is golden brown and a toothpick comes out clean from the center. Let the cobbler cool for a few minutes before serving. This helps all the flavors blend well. For a delightful touch, serve it warm in individual bowls. Top with whipped cream or a scoop of vanilla ice cream. The warm cobbler and cold ice cream create a lovely contrast. Garnish with a slice of fresh peach or a sprinkle of cinnamon for extra flair. Enjoy this heavenly dessert! For the complete details, check the Full Recipe. When making peach cobbler, avoid undercooking or overcooking. Check your cobbler often. The top should be golden brown, and the filling should bubble slightly. Another common mistake is mixing the batter too much. A few lumps are okay. They help keep your cobbler light and fluffy. Lastly, don’t forget to grease your baking dish well. This prevents sticking and makes serving easier. Use fresh, ripe peaches for the best flavor. If you can’t find fresh ones, canned peaches work too. Just make sure to drain and rinse them. Always measure your ingredients carefully. This ensures your cobbler turns out as expected. When adding the melted butter, pour it slowly over the batter. This helps create a nice crust. Lastly, allow your cobbler to cool slightly before serving. This helps the flavors blend and makes it easier to scoop. To enhance the flavor of your peach cobbler, try adding spices. A pinch of nutmeg or a splash of almond extract can elevate the taste. Consider mixing in other fruits too. Berries or apples can add great depth. For a fun twist, sprinkle a little brown sugar on top before baking. This gives your cobbler a nice caramelized crust. Serve with a scoop of vanilla ice cream or whipped cream for the perfect touch. You can find the full recipe [here]. {{image_4}} Peach cobbler is a classic dish, but you can mix it up! Here are some fun ways to change your cobbler and keep it exciting. You can swap peaches for other fruits. Try using: - Apples - Blueberries - Cherries - Pears Each choice gives a new taste. For apples, slice them thin. For berries, just wash and toss them in. The fruit should be ripe for the best flavor. Want a gluten-free version? Use a gluten-free flour blend. Many work well as a one-to-one swap. For a vegan cobbler, replace the milk with almond, soy, or coconut milk. Use coconut oil or vegan butter instead of regular butter. These changes keep the flavor while meeting your diet needs. Add some extra flavor with spices or herbs. Try: - Nutmeg for warmth - Ginger for a kick - Lemon zest for brightness You can also add a splash of bourbon or rum for a fun twist. Just remember, small amounts go a long way. Enjoy your unique peach cobbler using these variations! For a detailed recipe, check out the Full Recipe section. To keep your peach cobbler fresh, let it cool first. Cover it tightly with plastic wrap or aluminum foil. You can also transfer it to an airtight container. Store it in the fridge for up to four days. This keeps the flavors intact and the texture nice. When you're ready to enjoy leftovers, preheat your oven to 350°F (175°C). Place the cobbler in an oven-safe dish. Cover it with foil to prevent it from drying out. Heat for about 15-20 minutes. You can also microwave slices for about 30 seconds. Just make sure they are warm all the way through. If you want to save some for later, freezing works great! First, let the cobbler cool completely. Then, cut it into portions. Wrap each piece in plastic wrap, then in foil. Place them in a freezer bag or container. It can last in the freezer for up to three months. When you're ready to eat, thaw it in the fridge overnight before reheating. For best results, enjoy it fresh, but freezing can keep it tasty for a long time! You can tell peach cobbler is done when the top is golden brown. A toothpick should come out clean when you test the center. The peaches will bubble up through the batter, creating a lovely look. If the cobbler looks firm and smells sweet, it’s ready! Yes, you can use frozen peaches! Just thaw them first and drain excess juice. This keeps your cobbler from being too watery. Frozen peaches can be just as tasty as fresh ones, making them a great option. Peach cobbler is delicious on its own but pairs well with many treats. I suggest serving it warm with whipped cream or vanilla ice cream. You can also add a sprinkle of cinnamon for extra flavor. A scoop of ice cream melts perfectly on top, creating a warm and cold delight. Check out the Full Recipe for more ideas! This blog post covers everything you need for the perfect peach cobbler. You learned about required and optional ingredients, as well as substitutions. The step-by-step guide made baking easy, and the tips helped avoid common mistakes. Various options let you personalize your cobbler with fruit, diets, and flavors. Plus, I shared how to store and reheat leftovers. The joy of baking peach cobbler lies in its delicious results. Now, you're ready to create a dessert that will impress everyone!](https://tossedflavors.com/wp-content/uploads/2025/06/c0364465-3ad7-4341-b16a-7b7a68057566.webp)
![This dish shines because of its simple yet tasty ingredients. You will need: - 4 boneless, skinless chicken breasts - 1/4 cup unsalted butter, melted - 2 tablespoons honey - 1 tablespoon Cajun seasoning - 1 teaspoon garlic powder - 1 teaspoon smoked paprika - 1/2 teaspoon cayenne pepper (adjust according to your spice preference) - Salt and freshly ground black pepper to taste - Fresh parsley, finely chopped (for garnish) These ingredients work together to create a rich and flavorful meal. The chicken breasts are tender and juicy, while the honey butter adds a sweet kick. The spice blend is the heart of this dish. Cajun seasoning brings warmth and depth, while garlic powder and smoked paprika add layers of flavor. The cayenne pepper gives it a nice kick, but you can adjust the amount to suit your taste. The honey balances the spices with a touch of sweetness. This mix creates a dish that is both spicy and savory. It’s perfect for those who love bold flavors. For a finishing touch, you can use fresh parsley. It adds a pop of color and a hint of freshness. You can also add lemon wedges for a zesty twist. This simple garnish elevates the dish's look and taste. You might even consider serving it with a side of steamed vegetables or fluffy rice. These additions create a well-rounded meal that everyone will enjoy. For the complete recipe, check out the Full Recipe. Start by preheating your oven to 400°F (200°C). This step is key for even cooking. Take your chicken breasts and pat them dry with paper towels. Drying the chicken helps it sear better. Place the chicken in a large baking dish, leaving some space between each piece. This helps the heat circulate, ensuring they cook evenly. In a small bowl, combine the melted butter, honey, Cajun seasoning, garlic powder, smoked paprika, and cayenne pepper. Add a pinch of salt and pepper for taste. Whisk everything together until the mixture is smooth and creamy. This sauce is where the magic happens. It brings flavor and moisture to the chicken. Pour the honey butter mixture over the chicken, ensuring each piece is well-coated. Turn the chicken as needed to cover all sides. Now, cover the baking dish tightly with aluminum foil and place it in your preheated oven. Bake for 20 minutes. After that, carefully remove the foil. Return the dish to the oven and bake for another 15-20 minutes. The chicken should reach an internal temperature of 165°F (74°C) and have a lovely golden-brown color. Once done, take the chicken out of the oven and let it rest for about 5 minutes. This resting time allows the juices to settle. Drizzle any leftover honey butter sauce from the dish over the chicken before serving. For a nice touch, sprinkle freshly chopped parsley on top for brightness and flavor. Enjoy your Spicy Cajun Honey Butter Chicken! For the complete recipe, check out the Full Recipe. To make your Spicy Cajun Honey Butter Chicken shine, focus on temperature control. Preheat your oven to 400°F (200°C) to ensure even cooking. This heat helps the chicken brown nicely while keeping it juicy. Always pat the chicken dry before cooking. This simple step helps achieve a great sear. Juicy chicken depends on how you cook it. Bake the chicken covered for the first part. This traps steam and keeps moisture in. After 20 minutes, remove the foil. Let the chicken get that nice golden color. Always check the internal temperature. It should reach 165°F (74°C) for safe eating. Avoid overcooking your chicken. This can make it dry and tough. Use a meat thermometer to check for doneness. Another mistake is skipping the resting time after baking. Letting the chicken rest for 5 minutes helps the juices settle. Lastly, don’t rush the honey butter mixture. Mix it well to blend all those wonderful flavors. For more details, refer to the Full Recipe. {{image_4}} You can easily change the taste of your Spicy Cajun Honey Butter Chicken. Try using different types of meats. Chicken thighs add richness and moisture. You can also swap the honey with maple syrup for a unique twist. If you want a different flavor, go for brown sugar instead. This dish shines when served with tasty sides. I love pairing it with garlic mashed potatoes or sweet corn. You can also serve it with a fresh salad for a light touch. Another great option is fluffy rice or quinoa, which soak up the sauce well. Adjusting the spice level is easy. If you love heat, add more cayenne pepper to the mix. You can also try adding diced jalapeños for extra kick. For less spice, reduce the cayenne or leave it out. Remember, spice can be personal, so feel free to make it your own! For the complete recipe, check the [Full Recipe]. To keep your spicy Cajun honey butter chicken fresh, place leftovers in an airtight container. Make sure the chicken cools down before sealing the container. Store it in the fridge for up to three days. This way, you can enjoy the flavors later without losing quality. When you want to reheat your chicken, use the oven or stovetop. For the oven, preheat it to 350°F (175°C). Place the chicken on a baking dish and cover it with foil. Heat for about 15 minutes or until warm. This keeps the chicken juicy. If using the stovetop, add a splash of water in a pan. Heat over medium-low and cover it. Stir it gently until warm. If you want to save some chicken for later, freezing is a great option. Wrap each piece in plastic wrap, then place them in a freezer bag. Remove as much air as possible to prevent freezer burn. You can freeze the chicken for up to three months. When you're ready to eat it, thaw it in the fridge overnight before reheating. This method helps maintain its flavor. For the full recipe, check out the Spicy Cajun Honey Butter Chicken Delight. Cajun seasoning is a blend of spices from Louisiana. It often includes paprika, garlic powder, onion powder, black pepper, and cayenne pepper. This mix adds a bold, spicy flavor to dishes. It is perfect for meats and seafood. Using Cajun seasoning in your cooking brings warmth and depth to meals. You can find it in stores or make your own at home. Yes, you can use chicken thighs instead of breasts. Thighs have more fat, which makes them juicy and tender. They absorb flavors well, too. Cooking time might be slightly longer, so check the internal temperature. Aim for 165°F (74°C) for safe eating. Using thighs can add richness to your spicy Cajun honey butter chicken. To make the dish spicier, add more cayenne pepper or a dash of hot sauce. You can also mix in some chopped jalapeños. If you prefer a milder flavor, reduce the cayenne or leave it out completely. You can also use less Cajun seasoning. Adjusting these elements lets you tailor the dish to your taste. Enjoy exploring flavors with this spicy Cajun honey butter chicken! For the full recipe, check out the cooking instructions above. In this article, I covered the key ingredients for Spicy Cajun Honey Butter Chicken and how to prepare it step-by-step. We looked at tips to get juicy chicken and avoid common mistakes. I also shared variations and storage tips to maximize your dish's flavors. This dish is simple and full of flavor. Dive in, try the recipe, and enjoy a delicious meal!](https://tossedflavors.com/wp-content/uploads/2025/06/a597867f-5ad2-4112-9503-a1975b5b732d.webp)
![To make the best garlic steak bites, you need simple and fresh ingredients. Each item adds flavor and texture. This recipe is quick and easy. You can whip it up in under 40 minutes. Serve it hot for a tasty meal. - 1 lb sirloin steak, cut into 1-inch cubes - 4 cloves garlic, finely minced - 2 tablespoons extra virgin olive oil - 1 tablespoon fresh rosemary, finely chopped - 1 teaspoon smoked paprika - Salt and freshly ground black pepper, to taste - 1 tablespoon unsalted butter - Fresh parsley, chopped, for garnish Each ingredient plays a key role. The sirloin steak gives a juicy bite. Garlic adds a strong flavor. Olive oil keeps everything moist. Rosemary brings a fresh touch. Smoked paprika adds depth. Salt and pepper balance the dish. The butter creates a rich sauce. A sprinkle of fresh parsley makes your steak bites pop. It adds color and freshness. You can also serve with lemon wedges for a zesty touch. This brightens the flavors and adds a nice contrast. Enjoy these steak bites as a main dish or appetizer! Start by cutting your sirloin steak into 1-inch cubes. This size helps the steak cook evenly. Take a medium bowl and add the steak cubes. Next, finely mince four cloves of garlic. Add the garlic to the bowl. Then, pour in two tablespoons of extra virgin olive oil. This oil adds richness to the flavor. Now, chop one tablespoon of fresh rosemary and sprinkle it in. Add one teaspoon of smoked paprika for a hint of warmth. Don’t forget to season with salt and black pepper to taste. Mix everything well, so each piece is covered. Let this marinate for at least 30 minutes. If you have time, refrigerate for two hours. This will deepen the flavor. Heat a large cast-iron skillet over medium-high heat. Once the skillet is hot, add the marinated steak bites. Make sure not to overcrowd the pan. This helps them get a nice sear. Cook the steak for about 2-3 minutes on each side. You want to see a rich, brown crust form. For medium-rare, aim for a temperature of 135°F. Use a meat thermometer if you have one. When the steak is done, remove it from the skillet and set it aside. Now, lower the heat to medium-low. Add one tablespoon of unsalted butter to the same skillet. Let this melt, mixing it with the tasty juices left in the pan. This creates a rich garlic butter sauce. Toss the cooked steak bites back into the skillet. Stir them in the garlic butter for about one minute. This allows them to soak up the flavors. Finally, take the skillet off the heat and transfer the steak bites to a platter. Garnish with fresh parsley for color. Serve hot for the best taste. Enjoy your delicious garlic steak bites! For the full recipe, see above. Marinating your steak is key for flavor. I suggest marinating for at least 30 minutes. This time allows the garlic and herbs to soak in. For the best taste, try to marinate for up to 2 hours. If you have more time, refrigerate overnight. This makes each bite burst with flavor. The right doneness makes all the difference. For medium-rare, aim for 135°F. Use a meat thermometer for accuracy. Cook the steak bites for 2-3 minutes on each side. This gives them a nice brown crust. If you like your steak more done, just add a minute or two. Always let the steak rest for a few minutes before serving. To boost the flavor, try different herbs. Fresh thyme or oregano works well. You can also add a splash of Worcestershire sauce to the marinade. For a little heat, mix in red pepper flakes. These small changes can turn good steak bites into great ones. For more tips on making these steak bites shine, check the full recipe. {{image_4}} You can use many cuts for garlic steak bites. Sirloin is great, but try flank or ribeye for more flavor. Each cut has its own texture and taste. Flank steak is lean and cooks fast, while ribeye is rich and juicy. Adjust your cooking time based on the cut you choose. Adding vegetables can make your dish more colorful and healthy. You can toss in bell peppers, zucchini, or mushrooms. Cut them into bite-sized pieces, and add them to the skillet with the steak. They will soak up the garlic flavor and add a nice crunch. Experiment with different seasonings to change the taste. Try adding soy sauce for an Asian twist or chili powder for some heat. You can also use herbs like thyme or oregano. Mix and match to find your favorite flavor combo. Each change makes the dish unique and exciting. For the full recipe, check the section above. After you enjoy your garlic steak bites, store any leftovers in a safe way. Place them in an airtight container. Try to use a container that fits the amount you have. Keep the container in the fridge. The steak bites will stay fresh for about three days. Make sure to cool them down before sealing the container. This helps keep them tasty. When you're ready to eat your leftovers, reheating them is easy. The best way is to use a skillet. Heat it over medium heat. Add a little olive oil or butter to the pan. Once hot, add the steak bites. Cook for a few minutes until they get warm. Stir them often to avoid burning. You can also use a microwave. Just put them on a plate and cover with a damp paper towel. Heat them for about 30 seconds, check, and repeat until warm. If you want to save steak bites for later, freezing them is a great option. First, let them cool completely. Then, put them in a freezer-safe bag. Try to remove as much air as possible. This helps prevent freezer burn. You can freeze them for up to three months. When you're ready to eat, thaw them overnight in the fridge. After thawing, reheat them using the skillet method for the best taste. Enjoy your delicious garlic steak bites even after some time! You should marinate the steak for at least 30 minutes. This time helps the meat soak up the flavors. For even better taste, you can marinate it for up to 2 hours in the fridge. The longer you marinate, the more flavor your steak will have. Just remember to take it out of the fridge 30 minutes before cooking. This brings the meat to room temperature, which helps it cook evenly. Yes, you can use frozen steak, but it's best to thaw it first. Thaw the steak overnight in the fridge for safety. This keeps the texture nice and tender. If you are in a hurry, you can use a microwave on the defrost setting. Just be careful not to start cooking it. Once thawed, you can follow the recipe as usual. This will ensure your garlic steak bites turn out juicy and flavorful. Garlic steak bites pair well with many sides. Some great options are: - Garlic mashed potatoes - Steamed broccoli - Grilled asparagus - A fresh garden salad - Rice or quinoa These sides balance the rich flavors of the steak. You can also serve them in tacos or on a bed of greens for a tasty twist. For the full recipe, check out the [Full Recipe]. To sum up, this blog post covered how to make delicious garlic steak bites. We explored essential ingredients, step-by-step cooking instructions, and helpful tips. You learned about marinating, cooking time, and flavoring your steak. We also discussed variations like different cuts and added veggies. Finally, we talked about storing and reheating leftovers. I hope you feel ready to cook these steak bites soon. Enjoy every bite and share your results!](https://tossedflavors.com/wp-content/uploads/2025/06/f875a3fd-7f15-44b4-9e97-03716fa97a98.webp)