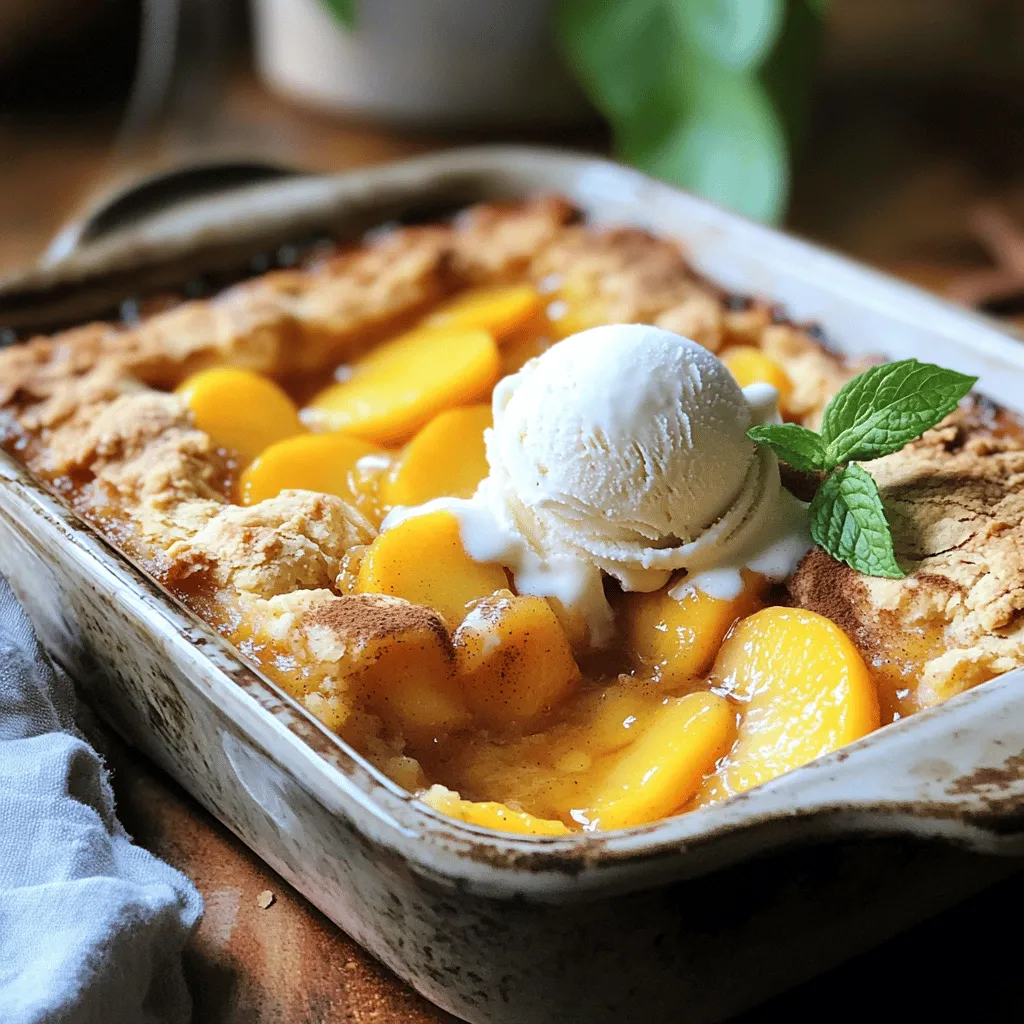
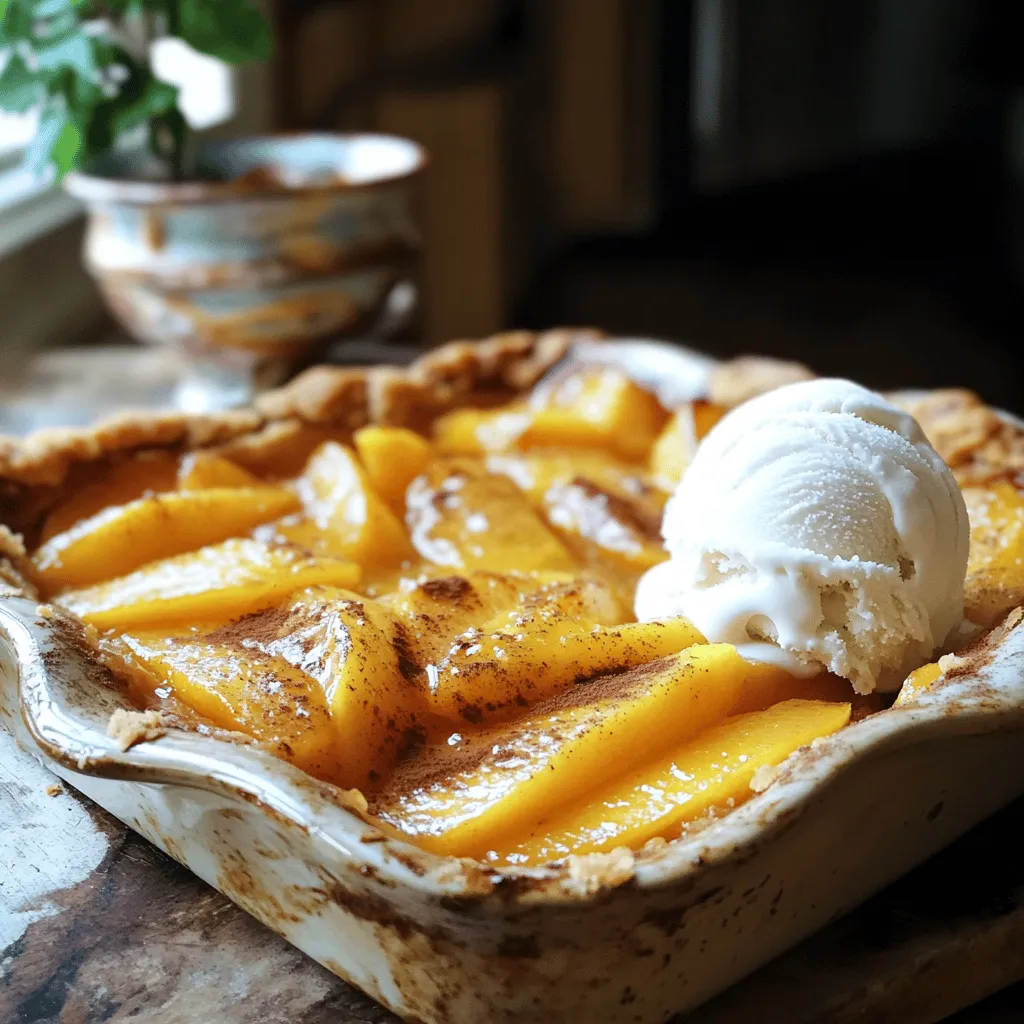
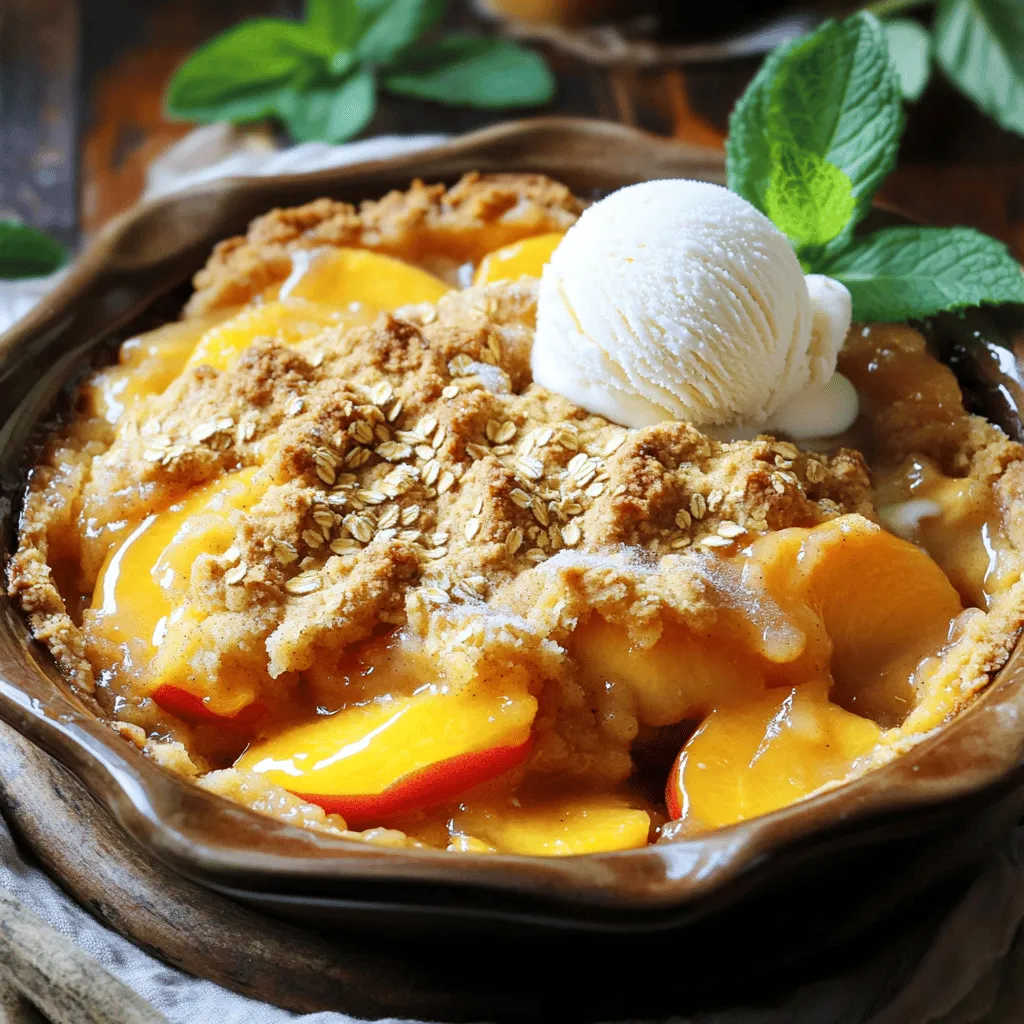
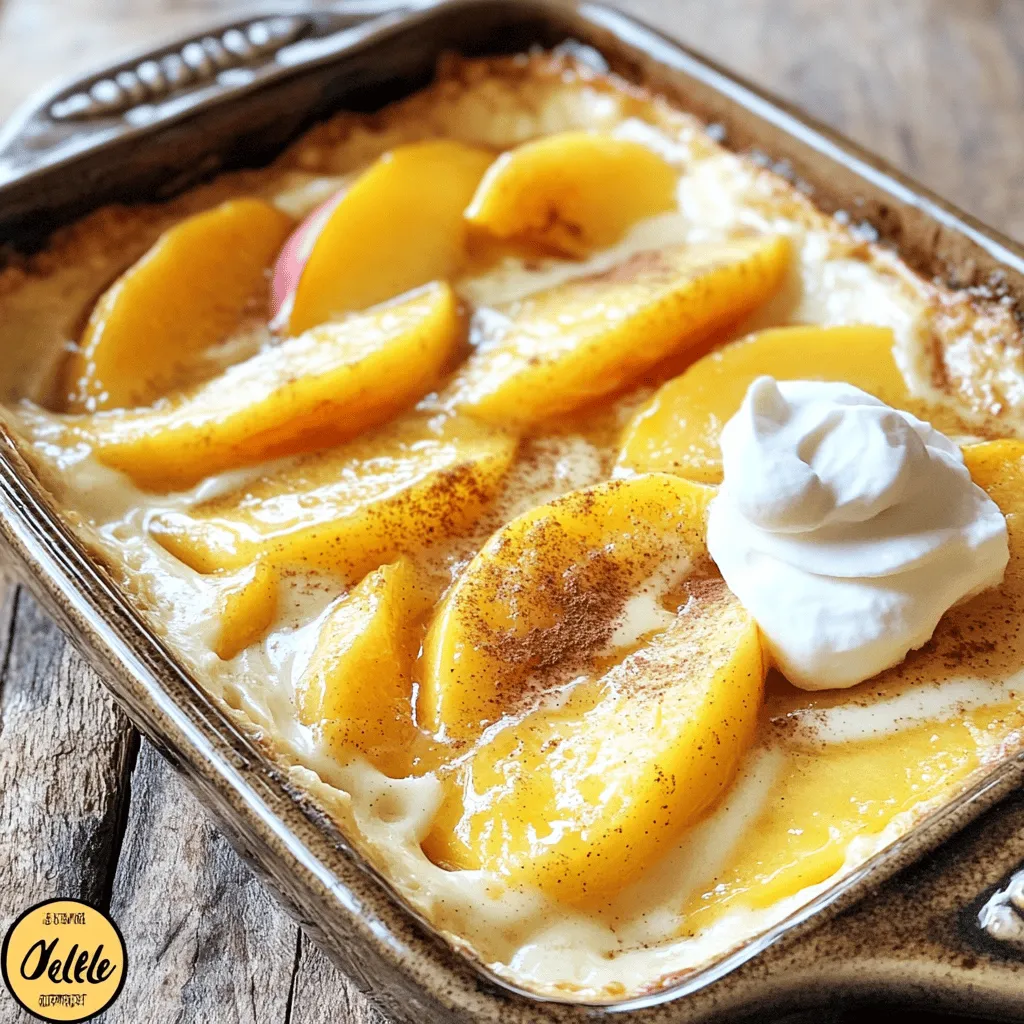
Instant Pot Peach Cobbler Delightful and Easy Recipe
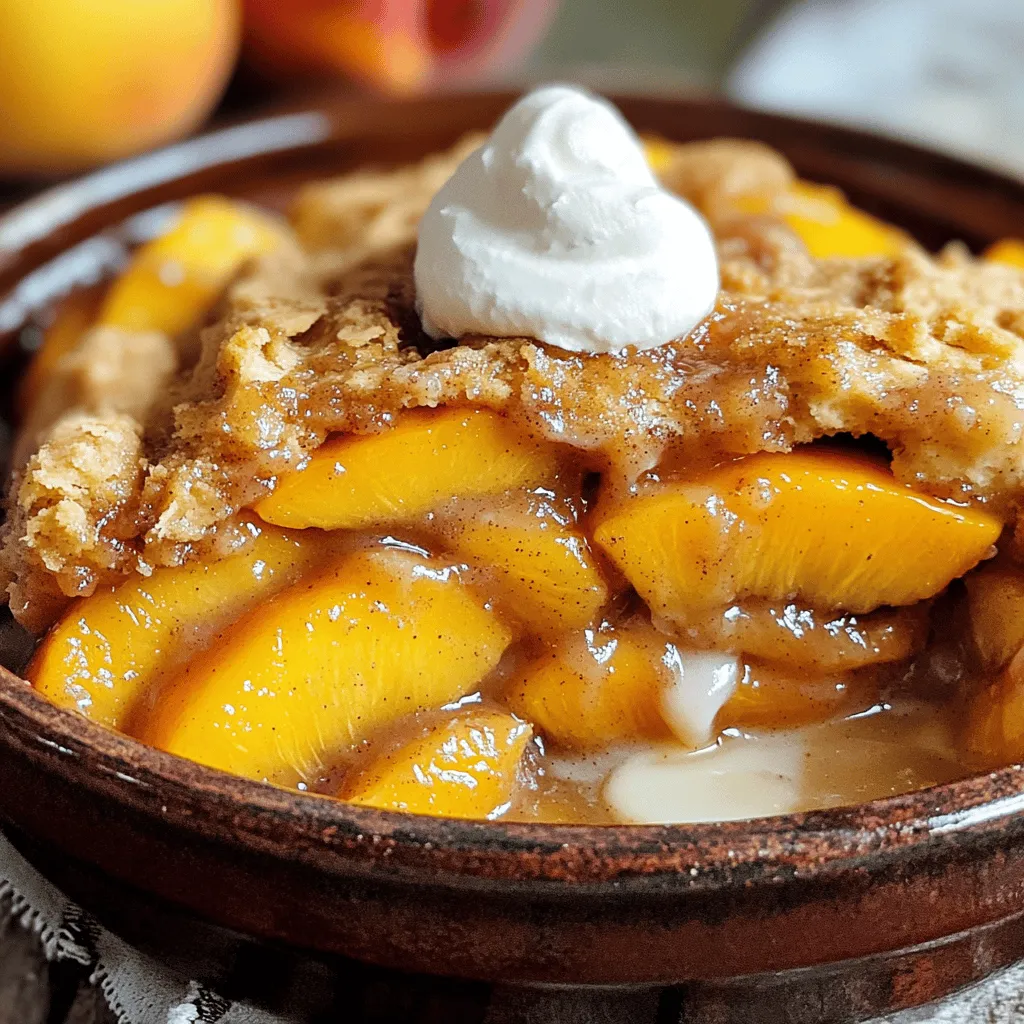
Looking for a dessert that’s both delightful and simple? This Instant Pot Peach Cobbler recipe is your answer! With fresh peaches, a few basic ingredients, and easy step-by-step instructions, you …
![- Bell Peppers - Apple Cider Vinegar - Water - Sugar - Sea Salt - Crushed Red Pepper Flakes - Fresh Dill Sprigs - Sweet Bell Peppers - Spicy Peppers - Mixed Color Peppers When making easy pickled peppers, you need just a few key ingredients. The main star is bell peppers. I love using a mix of colors for a bright look. The apple cider vinegar adds a nice tang. Water balances the flavors. Sugar gives it a hint of sweetness, while sea salt enhances the taste. You can also add some optional ingredients. If you enjoy heat, crushed red pepper flakes will spice things up. Fresh dill sprigs can add a nice touch of flavor and beauty to the jars. For the types of peppers, sweet bell peppers are always a hit. You can also use spicy peppers if you want more heat. Mixing colors like red, yellow, and green makes the dish pop. For the full recipe, check out the complete guide. This gives you all the steps to create these tasty pickled peppers! - Washing and Cutting Start by washing the bell peppers. Rinse them well under cool water. This step removes any dirt or wax. Next, cut off the tops. Remove the stems so you can slice easily. - Slicing Techniques You can slice the peppers into rings or strips. Rings give a fun look and work great on sandwiches. Strips are perfect for dipping. Choose the shape you like best! - Mixing Ingredients In a medium saucepan, mix the apple cider vinegar, water, sugar, salt, mustard seeds, black peppercorns, garlic powder, and red pepper flakes. This mix will give your peppers a tangy flavor. - Heating and Dissolving Place the saucepan on medium heat. Stir the mix gently as it heats up. Bring it to a gentle simmer. Keep stirring until all the sugar and salt dissolve in the liquid. - Jar Preparation While the brine cools, grab clean, sterilized jars. Pack the sliced peppers tightly inside. Mix up the colors for a pretty look. Fill the jars to the top, but leave some space. - Pouring the Brine Once the brine cools for about 10 minutes, carefully pour it over the peppers. Make sure they are fully covered. Leave about half an inch at the top of each jar. This space allows for any expansion. Now, you’re almost ready to enjoy your easy pickled peppers! For more details, check out the Full Recipe. To make your pickled peppers truly shine, consider adding more spices. You can use: - 1 teaspoon coriander seeds - 1 teaspoon dill seeds - 1 teaspoon turmeric for color These spices add depth to the flavor. For a sweet and spicy twist, add more sugar or crushed red pepper flakes. Adjust these to create your perfect mix! When serving your pickled peppers, use a clear glass bowl. This lets their bright colors show off. You can layer the colors for a stunning look. Garnishing with fresh dill sprigs adds a nice touch. Dill brings a fresh scent and makes your dish more inviting. If your brine is too salty, add water to dilute it. Taste as you go. You can also add more sugar to balance the saltiness. Choosing the right jar is key. Use clean, sterilized jars to keep your peppers fresh. Wide-mouth jars are great for easy packing. Make sure they seal well to keep the flavors locked in. For the full recipe, check out the details above. Enjoy making your pickled peppers! {{image_4}} You can change the taste of your pickled peppers easily. Try a sweet and tangy mix. This adds a hint of fruitiness. Just add more sugar to the brine. You can also use honey for a natural sweetness. Another fun option is the garlic-infused version. To do this, add fresh garlic cloves to the brine. You can crush them slightly to release more flavor. This twist makes the peppers savory and rich. Do you like mild or spicy? You can adjust the heat level with ease. For mild peppers, stick to sweet bell peppers. If you want heat, use jalapeños or serranos. Slice them thinly or leave them whole for a bolder bite. You can also play with crushed red pepper flakes. Add more for an extra kick. Just remember to taste as you go. There are two main ways to pickle. Quick pickling is fast and easy. It takes just a few hours. Traditional methods use longer soaking times, often days. This gives deeper flavors. Choose what suits your time and taste. Another fun idea is to use different vinegars. Apple cider vinegar is great, but you can try rice or white wine vinegar. Each type adds a unique twist. Experiment with what you have at home. For the full recipe, check out the zesty quick pickled peppers. Store your pickled peppers in the fridge. This keeps them fresh and safe to eat. Use clean, airtight containers. Glass jars work best, as they do not react with the brine. Make sure the jars are tightly sealed to avoid air exposure. In the fridge, your pickled peppers last about two weeks. After this time, they may lose flavor and crunch. Signs of spoilage include a bad smell, mold, or changes in color. If you see these signs, it’s best to throw them away. You can freeze pickled peppers for longer storage. First, let them cool completely. Use freezer-safe bags or containers. Remove as much air as you can before sealing. This prevents freezer burn. When you're ready to use them, thaw the peppers in the fridge overnight. You can also soak them in cold water for a quick thaw. Enjoy your pickled peppers later in salads or on sandwiches! For the best taste, let your pickled peppers sit for 24 hours. This time helps the flavors blend well. If you are in a hurry, you can eat them sooner, but they will taste better after a day. The longer they sit, the more tangy and flavorful they become. You can keep them in the fridge for up to two weeks, but they are best enjoyed within the first week. Yes, you can use other types of vinegar for pickling. White vinegar works well and gives a sharp taste. Red wine vinegar adds a nice color and flavor. Rice vinegar is milder and sweeter. Each type changes the flavor of the peppers slightly. So feel free to try different vinegars to find your favorite. Pickled peppers shine as a side dish or topping. They add a nice crunch to sandwiches and burgers. You can also serve them with cheese and crackers for a fun snack. If you want to spice up salads or tacos, these peppers are perfect. Their bright colors and tangy taste make any dish more appealing. For a great look, serve them in a clear bowl and add fresh dill on top. Want the full recipe? Check out the [Full Recipe]. You've learned how to pickle peppers with ease. We covered the key ingredients, like bell peppers and vinegar. You now know how to prepare the brine and pack the jars perfectly. Plus, we explored fun variations to make your pickled peppers unique. Remember to follow storage tips so they last longer. Pickling is not just about taste; it’s also fun and creative. Enjoy your delicious pickled peppers and impress your friends with your new skills. Happy pickling!](https://tossedflavors.com/wp-content/uploads/2025/06/c8e551db-b3c4-431e-ad77-24747c35b331.webp)
. First, wash the fresh okra well. This step is key to remove any dirt. Next, trim the stems carefully. Avoid cutting into the pods so they stay whole. This helps the okra hold its shape while pickling. To make the brine, take a medium saucepan. Combine 2 cups of distilled white vinegar and 1 cup of water. Add in 3 tablespoons of kosher salt and 1 tablespoon of sugar. Heat this mixture over medium heat. Stir until both the salt and sugar dissolve completely. Once they dissolve, take the saucepan off the heat. Let it cool down to a mild temperature before using it. Now, grab your sterilized jars. I like to use pint-sized mason jars for this. Place 4 cloves of peeled garlic, 2 teaspoons of mustard seeds, 1 teaspoon of black peppercorns, 1 teaspoon of red pepper flakes, and 3-4 sprigs of fresh dill at the bottom of each jar. These spices will give the okra a great flavor. Next, pack the okra upright into the jars. Make sure to leave enough space for the brine. You don’t want to crush the pods. Pour the cooled brine over the okra, ensuring every piece is fully submerged. If the okra isn’t fully covered, add a bit more vinegar. Seal the jars tightly. This keeps air out and helps the okra pickle well. Allow the jars to cool to room temperature. After they cool, put them in the fridge. Let the okra pickle for at least 48 hours before tasting. They can stay in the fridge for up to 3 months. For a full recipe, check out the details above. To get that ideal crunch, choose fresh okra. Look for okra that is bright green and firm. Avoid any that feels soft or looks dull. Trim the stems carefully without cutting into the pods. This keeps them from getting mushy. When packing the jars, stand the okra upright. This helps them stay crisp by allowing the brine to flow around each pod evenly. One mistake is using old or overripe okra. This can lead to a soggy texture. Another error is not cooling the brine properly before pouring it over the okra. Hot brine can cook the okra slightly, ruining the crispness. Also, don’t skip the salt. It helps draw out moisture and keeps the okra crunchy. Lastly, ensure you seal the jars tightly to keep air out. Clean all your jars and lids with hot soapy water. This helps prevent spoilage. Use a vinegar with a high acidity level. This ensures safe pickling and great flavor. Let the okra pickle for at least 48 hours before tasting. The flavors deepen as they sit. For the best taste, try to use your pickled okra within three months. You can find the Full Recipe online for detailed steps. {{image_4}} To make your pickled okra spicy, add more heat. Use extra red pepper flakes or include sliced fresh jalapeños. A teaspoon of cayenne pepper can also boost the heat level. Mix these spicy ingredients with the garlic and mustard seeds in the jar. This will give each bite a fiery kick. For a sweet twist, increase the sugar in your brine. Try adding two tablespoons instead of one. You can also mix in brown sugar for a deeper flavor. Another option is to add sliced onions or bell peppers with the okra. They will add a nice sweetness and texture to the mix. Pickling is not just for okra. You can pickle other veggies too. Try adding carrots, cucumbers, or green beans. Make sure to cut them to size so they fit in the jars. Each vegetable will absorb the brine and add its unique flavor to the mix. This variety will make your pickled okra even more exciting. Check out the Full Recipe for more tips on combining flavors. To store crisp pickled okra, keep it in the fridge. Use clean, airtight jars. Make sure the okra is fully submerged in the brine to stay fresh. This helps maintain its crunch. Always choose a cool spot in your fridge for storage. Crisp pickled okra lasts about three months in the fridge. After that, it may start to lose its flavor and texture. Always check the date you made it. If you eat it within this time frame, it will taste best. Look for changes that mean your okra is spoiled. Signs include a sour smell, cloudy brine, or visible mold. If the okra looks mushy, it is time to throw it away. Always trust your senses. If it doesn’t seem right, don’t eat it. Pickled okra tastes best after it sits for at least 48 hours. This time allows the flavors to blend well. You can eat it after this period, but the taste improves the longer it sits. If you wait a week, it gets even better! The brine seeps into the okra, giving it a tangy kick. I do not recommend using frozen okra for pickling. Frozen okra has a different texture and can become mushy. Fresh okra stays crisp during the pickling process. If you want that crunchy bite, always choose fresh. It's worth the extra effort! Crisp pickled okra pairs well with many dishes. You can serve it as a side with fried chicken or barbecue. It also makes a great topping for salads. Try adding it to sandwiches for a tasty crunch. For a fun twist, use it in cocktails like a Bloody Mary. The options are endless! Crisp pickled okra is easy to make and full of flavor. You need the right ingredients, a well-prepared brine, and smart storage tips to get it just right. Remember to avoid common mistakes for that perfect crunch. Try different variations for fun flavors. With proper care, it’ll last a while. Enjoy this tasty treat in salads or on its own. Happy pickling!](https://tossedflavors.com/wp-content/uploads/2025/06/45a0bdfc-7792-41ff-9530-5e0ce4a2bf2e.webp)