Easy Zucchini Puffs Crunchy and Delicious Snack
![- 2 medium zucchinis, finely grated - 1 cup all-purpose flour - ½ cup freshly grated Parmesan cheese - 2 large eggs, lightly beaten - 1 teaspoon garlic powder - 1 teaspoon onion powder - ½ teaspoon baking powder - Salt and freshly ground black pepper, to taste - ¼ cup finely chopped fresh herbs (such as parsley, basil, or dill) - Olive oil, for frying Gathering the right ingredients sets you up for success. First, choose fresh zucchinis. They should be firm and bright. Grating them finely helps to mix well and cook evenly. All-purpose flour creates a nice base. It binds the mixture and helps give it structure. Parmesan cheese adds a rich flavor and a bit of saltiness. Using freshly grated cheese is key; it melts better and tastes fresher. The eggs help bind everything together. They add moisture and richness, making your puffs tender. Seasoning is important. Garlic and onion powder add depth. Baking powder makes your puffs light and airy. Don’t forget to season with salt and pepper. Adjust these to your taste. For an extra kick, consider adding fresh herbs. They brighten the dish with color and flavor. Olive oil is essential for frying. It gives your puffs that golden, crispy exterior. For the full recipe, be sure to check the instructions. To start, you need to grate the zucchini. Use a box grater for this task. After grating, take a clean kitchen towel. Place the grated zucchini in the center and gather the corners. Twist the towel to squeeze out excess moisture. This step is crucial. If the zucchini is too wet, the puffs won’t be crispy. Aim for a dry mixture. This helps the puffs hold together well. Next, grab a large mixing bowl. Combine the dried zucchini, all-purpose flour, and Parmesan cheese. Add the beaten eggs, garlic powder, onion powder, baking powder, salt, and pepper. Mix everything until it forms a cohesive mixture. This ensures each puff has great flavor. If you see lumps, keep mixing until smooth. Gently fold in the fresh herbs. This adds a burst of flavor to every bite. Now, it’s time to cook! Preheat a large skillet over medium heat. Pour in a thin layer of olive oil. Wait until the oil shimmers, but don’t let it smoke. Use a tablespoon to drop spoonfuls of the zucchini mixture into the skillet. Flatten each puff slightly with the back of the spoon. Cook the puffs for about 3-4 minutes on each side. Look for a golden color and crispy texture. If needed, add more oil between batches. Once done, place them on a paper towel-lined plate. This helps absorb any excess oil. Enjoy your crunchy and delicious snack! For the full recipe, check out the previous section. To make your zucchini puffs crispy, it’s key to squeeze out moisture. After grating the zucchini, use a clean kitchen towel. Gather the towel and twist until the zucchini feels dry. A dry mixture helps the puffs hold their shape and crisp up nicely. When it comes to seasoning, feel free to adjust based on your taste. If you love garlic, add more garlic powder. Like heat? A pinch of cayenne pepper can spice things up. Experimenting helps you find your perfect flavor blend. For presentation, arrange the puffs on a platter while warm. Garnish with fresh herbs and a sprinkle of Parmesan for added flair. This not only looks nice but also enhances the taste. Pair your zucchini puffs with a tasty dip. I recommend tzatziki for a refreshing touch. A zesty yogurt dip also works well, adding a creamy contrast to the crispy puffs. One common mistake is over-squeezing the zucchini. While it’s important to remove moisture, too much squeezing can dry out the mixture. On the flip side, under-squeezing may leave your puffs soggy. Another mistake is cooking at the wrong heat. If the heat is too high, the outside burns before the inside cooks. If the heat is too low, they won’t crisp up. Aim for medium heat for golden, crunchy puffs. For the full recipe, check out the [Full Recipe]. {{image_4}} You can change up the taste of your zucchini puffs easily. Try adding different cheeses like feta or cheddar. Each cheese brings its own unique flavor. You can also add spices like paprika or chili powder for a kick. Don't stop there! Try mixing in vegetables like sweet corn or fresh spinach. These veggies add color and nutrition. They make each bite even better. If you need gluten-free options, you can swap the all-purpose flour. Use a gluten-free flour blend instead. It works well and keeps the puffs light. For those who avoid eggs, try using flaxseed meal. Mix one tablespoon of flaxseed with three tablespoons of water. Let it sit until it thickens, then add it to the mix. This simple swap makes the recipe vegan-friendly while keeping the puffs delicious. You can prepare zucchini puffs in various ways. Frying gives a classic crispy texture. Just be sure to watch the heat, so they don’t burn. For a healthier choice, consider baking them. Preheat the oven to 400°F and place the puffs on a baking sheet. Bake them for about 20 minutes, flipping halfway through. If you're looking for a crisp finish, use an air fryer. Set it to 375°F and cook for around 10 minutes, checking for the golden color. Each method offers a tasty result. To keep your zucchini puffs fresh, store them in an airtight container. Place a paper towel inside to absorb moisture. This helps keep them crispy. You can keep them in the fridge for up to three days. After that, they may lose their texture. To reheat and keep the puffs crunchy, use the oven or a skillet. Preheat the oven to 350°F (175°C). Place the puffs on a baking sheet and heat for about 10 minutes. If using a skillet, heat a little oil over medium heat. Add the puffs and cook for about 3 minutes on each side. This method keeps them crispy. You can freeze zucchini puffs for long-term storage. First, let them cool completely. Then, place them in a single layer on a baking sheet and freeze until solid. Once frozen, transfer them to a freezer bag. Use within three months for best taste. To thaw, place them in the fridge overnight. Reheat as mentioned above for a tasty snack. For the full recipe, check out the link provided. Enjoy your crunchy and delicious zucchini puffs! To make zucchini puffs crispy, start by squeezing out moisture. Use a clean towel to remove as much water from the grated zucchini as possible. A drier mixture means better texture. Next, ensure you use enough oil in your skillet. The oil should be hot but not smoking. This helps the puffs fry evenly and become golden. Flip each puff only once during cooking. This will help them stay intact and crisp on both sides. Yes, you can prepare zucchini puffs in advance. Mix all the ingredients and form the puffs. Place them on a baking sheet lined with parchment paper. Cover them with plastic wrap and store them in the fridge for up to 24 hours. When ready to cook, simply heat your oil and fry them as directed. This way, you can enjoy fresh zucchini puffs without much hassle. Zucchini puffs pair well with various sides and dips. Here are some tasty options: - Tzatziki sauce - Spicy yogurt dip - Marinara sauce - Fresh salsa - A simple green salad These options enhance the flavor and provide a nice contrast to the crunchy puffs. You can also serve them on a platter with fresh herbs for a fun look. For the full recipe, check out the details provided above. Zucchini puffs are easy, tasty, and fun to make. We covered key ingredients like zucchini, flour, and cheese. Each step matters, from mixing to cooking. I shared tips for great texture and flavor. You can even customize them with different spices. Store leftovers right for later meals. Remember, avoid common mistakes for the best results. Enjoy your cooking journey and impress your friends with these delicious puffs!](https://tossedflavors.com/wp-content/uploads/2025/07/446eb881-989f-4e07-a353-fb9d7edb873b.webp)
Looking for a crunchy, delicious snack? You’ll love these Easy Zucchini Puffs! Perfect for any time, these tasty bites are simple to make with just a few ingredients. Plus, they …
Looking for a crunchy, delicious snack? You’ll love these Easy Zucchini Puffs! Perfect for any time, these tasty bites are simple to make with just a few ingredients. Plus, they …
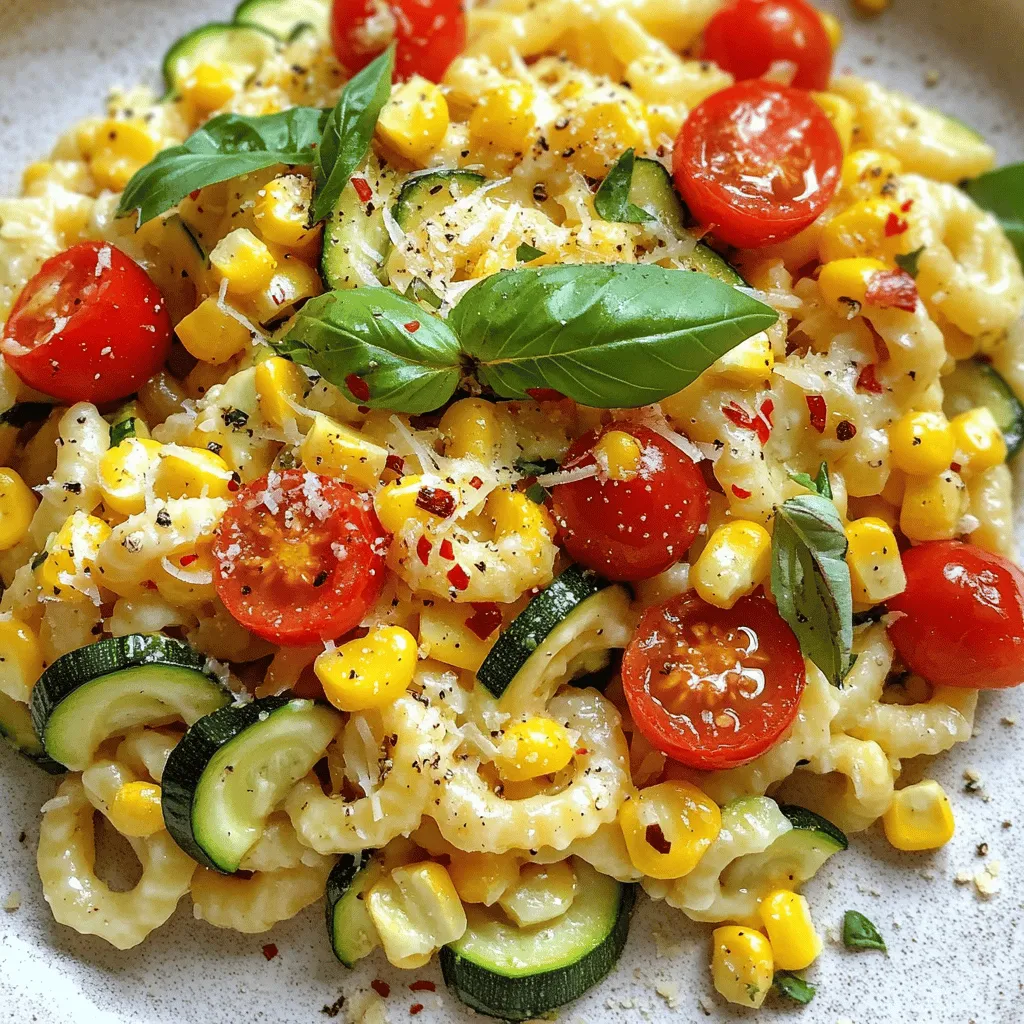
Looking for a fresh and vibrant dish for summer? Dive into my recipe for Summer Cavatelli with Corn, Tomatoes, and Zucchini Delight! This colorful pasta meal bursts with flavor and …

Looking for a simple and tasty dish that showcases the best of summer squash? You’re in the right place! This Kentucky Squash Casserole recipe combines fresh yellow squash, sharp cheddar …
![- 2 medium zucchinis - 1 cup all-purpose flour - 1/2 cup grated Parmesan cheese To make tasty zucchini breadsticks, you need a few simple ingredients. Start with two medium zucchinis. They give your breadsticks a great flavor and moisture. Grate them, but remember to squeeze out the extra moisture. Next, grab one cup of all-purpose flour. This will help bind everything together. Lastly, use half a cup of grated Parmesan cheese for that savory kick. - Marinara sauce for dipping - Additional herbs and spices While the main ingredients are vital, you can add some fun extras. Marinara sauce is perfect for dipping. It adds a lovely tang and balances the flavors. You can also mix in herbs and spices if you like. Basil, thyme, or garlic powder can really amp up the taste. - Mixing bowl - Baking sheet - Parchment paper You need a few tools to make this recipe easy. A mixing bowl is essential for combining ingredients smoothly. Use a baking sheet to hold your breadsticks while they bake. Line it with parchment paper to prevent sticking and make cleanup a breeze. To start, grate your zucchinis. I like to use a box grater for this. After grating, squeeze out the excess moisture. This step is key. Too much water can make the breadsticks soggy. Once you’ve done that, combine the grated zucchini with the dry ingredients in a big mixing bowl. Next, add the egg and olive oil. The egg helps bind everything together. Stir well to mix these ingredients. Then, stir in the spices. I love using garlic powder and oregano for flavor. These spices bring a nice kick to the breadsticks. Now, it’s time to bake! Spread the mixture onto your baking sheet. Make sure it’s about half an inch thick. This helps them cook evenly. Bake in a preheated oven at 400°F (200°C) for 20-25 minutes. Look for golden edges and a firm center. After baking, let them cool for a few minutes. Then, use a knife to cut them into stick-sized pieces. For extra crispiness, pop them back in the oven for another 5 minutes. Serve warm with marinara sauce for dipping! For the full recipe, check out [Full Recipe]. Squeezing the zucchini is key. This step removes extra moisture that can make your breadsticks soggy. Use a clean kitchen towel or cheesecloth to wring out the grated zucchini. You want it dry, but not too dry. Check for doneness by looking at the edges. They should turn golden brown. The center should feel firm when you touch it. If it feels soft, bake it a bit longer. Each oven can be different, so keep an eye on your breadsticks. You can adjust the spices to fit your taste. If you love garlic, add more garlic powder. Want a bit of heat? Increase the red pepper flakes. You can also try adding different herbs like basil or thyme. Before baking, consider adding toppings. Sprinkle more cheese on top for extra flavor. You can also add fresh herbs for a pop of color and taste. For serving, arrange the warm breadsticks on a large platter. This makes them look inviting. Garnish with fresh basil or a sprinkle of Parmesan cheese. It adds a nice touch. Serve with marinara sauce for dipping. This tangy sauce pairs well with the warm breadsticks. It enhances the overall flavor and makes for a fun snack. {{image_4}} To make zucchini breadsticks gluten-free, swap all-purpose flour for gluten-free flour. Use a cup of almond flour or a gluten-free blend. You might need to add one more egg to help bind the mixture. This keeps the dough from being too dry or crumbly. You can jazz up your zucchini breadsticks with cheese and herbs. Try adding 1/2 cup of cheddar or feta cheese for a different taste. Fresh herbs like basil or thyme add great flavor. Chop them finely and mix them in. If you love heat, spice up your breadsticks! Add more red pepper flakes or a dash of hot sauce. You can also mix in jalapeños for a kick. Pair these spicy breadsticks with a cool dip, like ranch sauce, to balance the heat. To keep your breadsticks fresh, use airtight containers. Glass or plastic containers work well. Make sure the breadsticks are cool before sealing. This prevents moisture buildup. Refrigerate them right away. If you want to keep them for longer, freezing is a great option. Wrap each breadstick in plastic wrap, then place them in a freezer bag. This keeps them from getting freezer burn. When you want to enjoy your breadsticks again, the oven is best. Preheat it to 350°F (175°C). Place the breadsticks on a baking sheet. Heat them for about 10 minutes. This helps them stay crispy. If you're short on time, the microwave works too. Just heat them for 30 seconds. Check to see if they're warm enough. Be careful not to overheat, as they can become chewy. In the fridge, your zucchini breadsticks will last about 3 to 5 days. If you freeze them, they can stay good for up to 3 months. Just remember to label your bags with the date. This way, you won’t forget how long they’ve been stored. Enjoy your tasty snack anytime with these simple storage tips! Yes, you can make zucchini breadsticks ahead of time. First, prepare the breadsticks as usual. Once they cool, store them in an airtight container. Keep them in the fridge for up to three days. For longer storage, freeze them. Place them in a freezer bag, and they can last for up to three months. When you want to enjoy them, simply thaw and reheat. To keep your breadsticks crispy, squeeze out the moisture from the zucchini well. Use a clean dish towel or paper towel to absorb excess water. Mixing the dough properly helps too. Avoid overbaking, but ensure they are cooked through. For extra crunch, return cut sticks to the oven for a few more minutes. Zucchini breadsticks pair well with various dips. Marinara sauce is a classic choice. You can also try ranch dressing or hummus. For a twist, serve them with a spicy aioli. Consider a side salad or a soup to make a complete meal. Zucchini breadsticks are simple and fun to make. You need fresh zucchini, flour, cheese, and a few basic tools. Remember to squeeze out extra moisture for the best texture. Feel free to get creative with spices and cheeses. You can also try different ways to serve them for added flair. These tasty sticks are great for snacks or meals. Enjoy making and sharing them with family and friends. You’ll impress everyone with these delicious treats!](https://tossedflavors.com/wp-content/uploads/2025/07/0c40b465-1f32-442f-b969-30717f244bca.webp)
Are you ready to try a snack that’s both tasty and healthy? Let me introduce my easy Zucchini Breadsticks recipe! Packed with flavor and simple to make, these breadsticks are …
![For the Moist Pineapple Zucchini Bread, you will need the following ingredients: - 1 cup grated zucchini - 1 cup crushed pineapple, well-drained - 1/2 cup granulated sugar - 1/2 cup brown sugar, packed - 1/2 cup vegetable oil - 2 large eggs - 1 teaspoon vanilla extract - 1 1/2 cups all-purpose flour - 1 teaspoon baking soda - 1/2 teaspoon baking powder - 1/2 teaspoon salt - 1 teaspoon ground cinnamon - 1/2 teaspoon ground nutmeg - Optional: 1/2 cup chopped walnuts or pecans - Optional: 1/2 cup shredded coconut This mix gives you a tasty blend of flavors. The zucchini adds moisture, while the pineapple brings sweetness. The sugars help create that soft texture you’ll love. If you want a crunch, try adding walnuts or pecans. For extra flavor, coconut is a great choice! All these ingredients work together to make a perfect loaf. Don’t skip the spices! They really enhance the taste. You can find the complete recipe for this delightful treat in the [Full Recipe]. Enjoy making this easy and moist bread! - Preheat the oven to 350°F (175°C). - Prepare the loaf pan with grease or parchment. This step helps the bread slide out easily. - Combine zucchini, pineapple, sugars, oil, eggs, and vanilla in a large bowl. - Mix them until smooth. The zucchini adds moisture, while pineapple gives sweetness. - In a separate bowl, whisk together flour, baking soda, baking powder, salt, cinnamon, and nutmeg. - This blend gives the bread its structure and flavor. - Gently incorporate dry ingredients into wet ingredients. - Stir until no dry flour is visible. Overmixing can make the bread tough. - Fold in walnuts or pecans and shredded coconut if desired. - These add crunch and extra flavor to your bread. - Pour the batter into your prepared pan and smooth the top. - Bake for 50-60 minutes. Check with a toothpick; it should come out clean or with a few moist crumbs. Enjoy the process! Each step brings you closer to a delicious loaf of pineapple zucchini bread. For the full recipe, check the details above. To get the best texture, avoid overmixing the batter. Mix just until the flour disappears. This will keep your bread light and fluffy. Make sure to drain the pineapple very well. Excess moisture can make the bread soggy. You can add coconut or nuts for an extra touch. Walnuts or pecans give a nice crunch. Shredded coconut adds moisture and flavor too. Always use fresh zucchini for better taste. Fresh zucchini brings out the natural sweetness in this bread. To check if the bread is done, use a toothpick. Insert it into the center of the loaf. It should come out clean or with a few moist crumbs. If it comes out wet, bake a little longer. Remember, a toothpick is your best friend here. For more details, refer to the Full Recipe. {{image_4}} You can make your bread even sweeter by adding other fruits. Bananas work great in this recipe. They add a soft texture and a rich flavor. Apples are another good choice. They bring a nice crunch and a hint of tartness. Just make sure to chop them into small pieces. This keeps the bread moist and tasty. If you want a gluten-free version, you can easily switch the flour. Use a gluten-free flour blend instead of all-purpose flour. This keeps the bread just as moist and delicious. Look for a blend that contains xanthan gum. It helps with the bread's texture and rise. Many brands offer great mixes. Want to add a kick to your bread? Try adding spices. Ginger gives a warm flavor that pairs well with the pineapple. Allspice adds a nice depth and warmth too. You can start with a half teaspoon of each. Adjust to your taste as you mix. These spices can make your bread stand out even more. For the full recipe, refer to the earlier section. Store your leftover bread in an airtight container at room temperature. This keeps it fresh and moist. If you notice it getting too dry, you can place a slice of bread in the container to help retain moisture. To freeze your bread, wrap it securely in plastic wrap first. Then, cover it with aluminum foil. This method prevents freezer burn and keeps the flavor intact. You can freeze the bread for up to three months. When you want to enjoy your bread again, warm slices in the microwave for about 15 seconds. Alternatively, use a toaster oven at medium heat until warm. This way, you bring back the fresh-baked taste. For the best flavor, serve it warm with a bit of butter. Yes, you can use frozen zucchini. Just make sure to thaw it first. Drain any extra water after thawing. Frozen zucchini works well but may change the bread's texture slightly. Fresh zucchini has a firmer bite and better flavor. When stored properly, the bread can last for about 3 to 5 days at room temperature. Keep it in an airtight container to keep it moist. If you notice any signs of mold, it's best to toss it. You can prepare the batter a day ahead. Just store it in the fridge until you are ready to bake. This helps the flavors blend nicely. You can also bake the bread ahead and store it. If you want to make this recipe vegan, you can use applesauce or mashed bananas as a substitute. Use 1/4 cup of either for each egg. Flaxseed meal mixed with water is another option. This recipe makes about 8 servings. Each slice is a nice portion for a snack or breakfast. You can slice it thicker or thinner based on your preference. To check for doneness, insert a toothpick into the center. If it comes out clean or with a few moist crumbs, your bread is ready. The top will also look golden brown, and the edges should start to pull away from the pan. This blog post shared a simple and tasty recipe for pineapple zucchini bread. You learned about the ingredients, step-by-step instructions, and tips for the best results. We also explored variations to customize your bread to your taste. Finally, we covered storage options to keep your bread fresh. Enjoy making this bread, experimenting with flavors, and sharing it with others. It’s a treat you will love every time!](https://tossedflavors.com/wp-content/uploads/2025/07/0d72f8ec-b2ac-4049-be04-fa249f130b47.webp)
Are you ready to bake a treat that’s both sweet and wholesome? This Moist Pineapple Zucchini Bread is not just delicious, but it’s also super easy to make. Combining juicy …
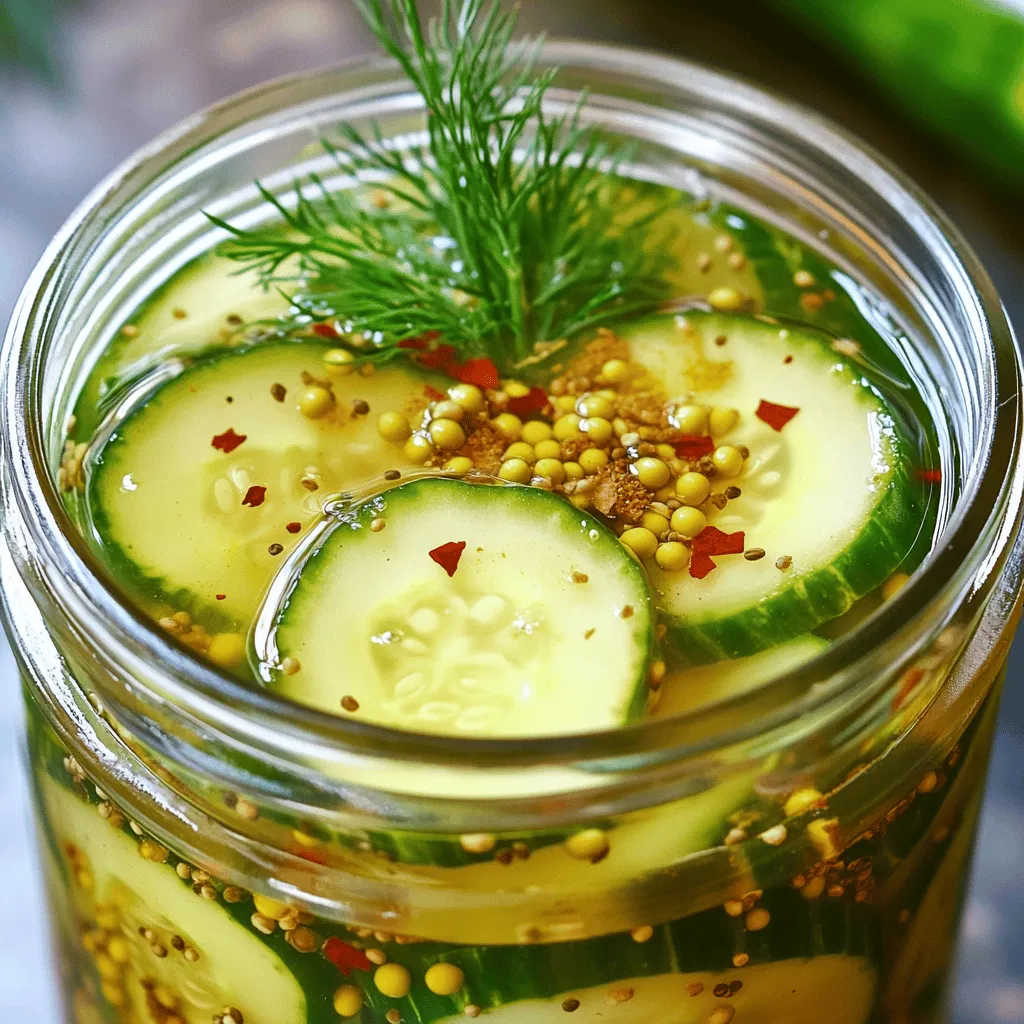
Are you ready to add a burst of flavor to your meals? Quick and Easy Refrigerator Pickles are the perfect solution! With just a few simple steps, you can create …
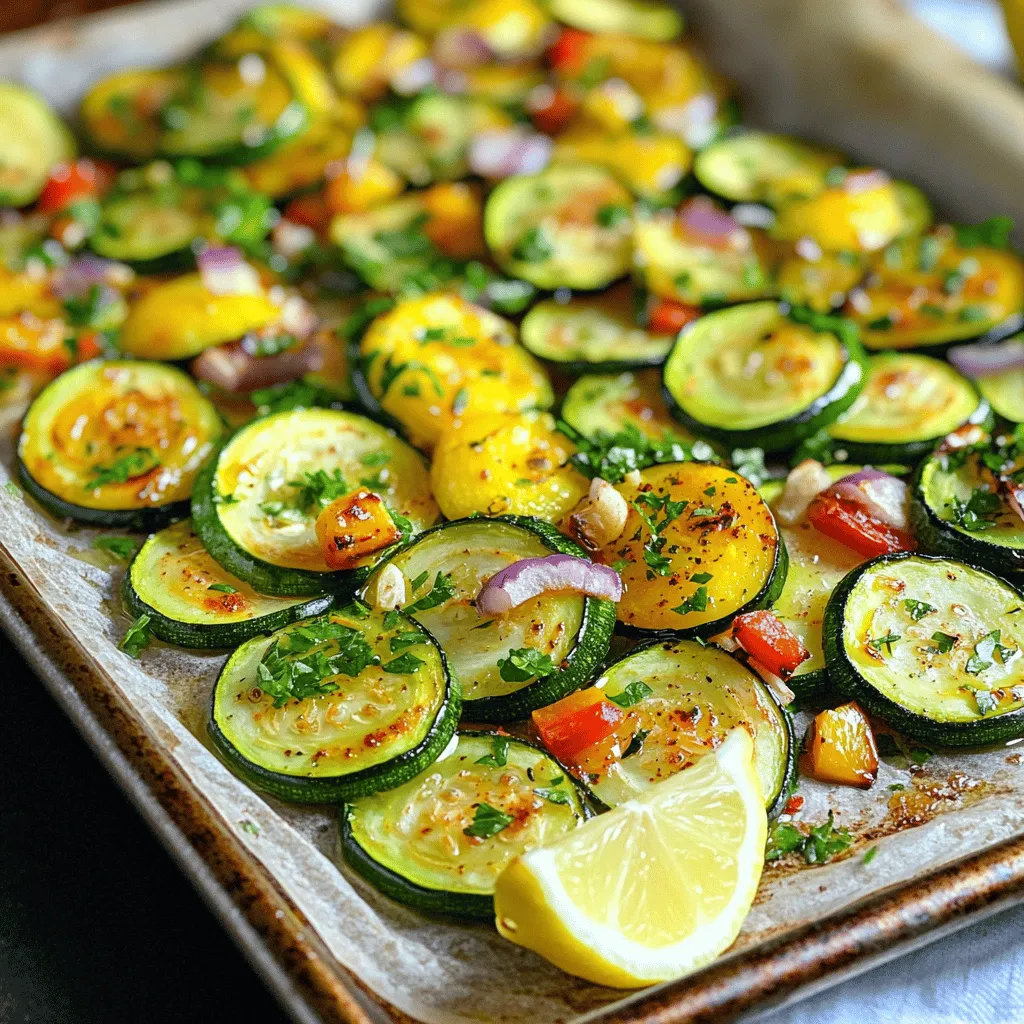
Looking for a quick and tasty side dish? Roasted zucchini and squash can brighten any meal! This dish is simple, fresh, and packed with flavor. You will learn how to …
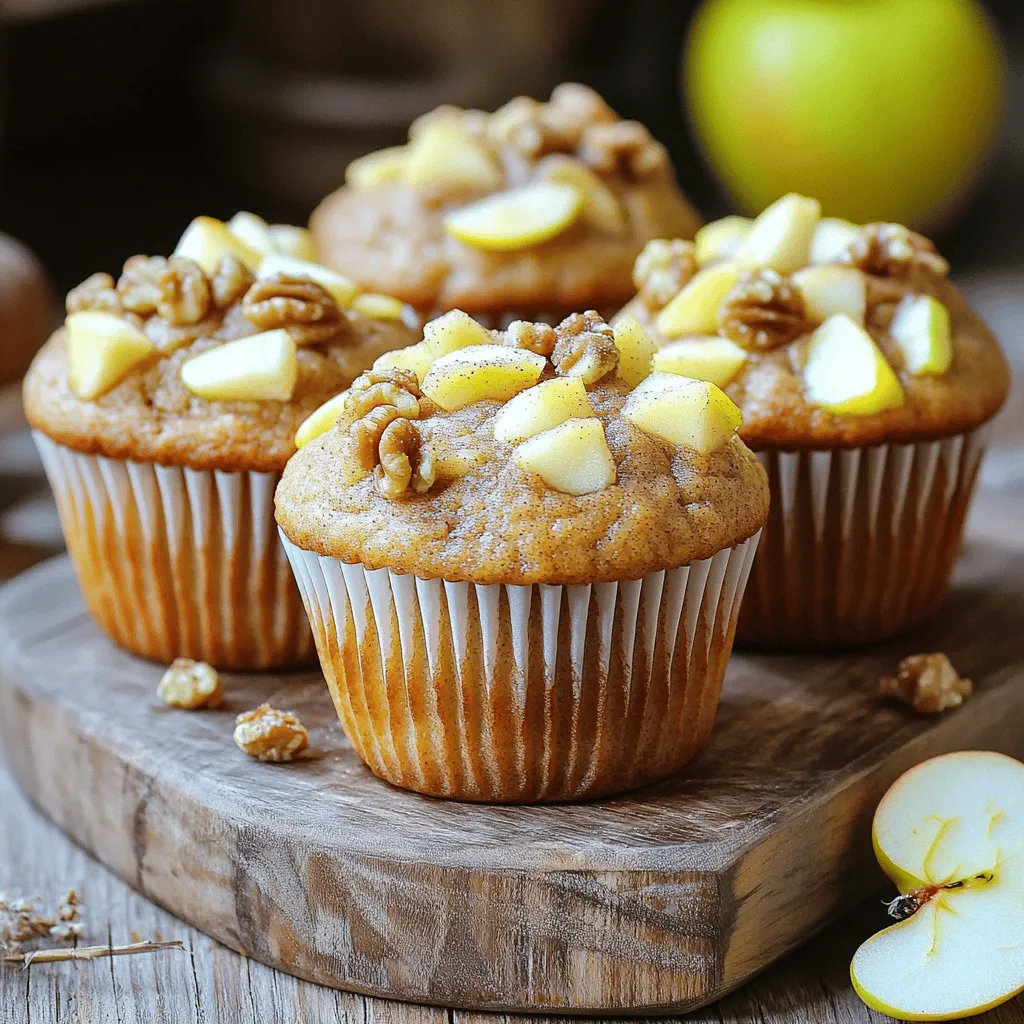
Are you ready to enjoy the warm, comforting scent of freshly baked Apple Cinnamon Muffins? This simple recipe offers a delightful mix of sweet and spicy flavors, perfect for any …
![- Zucchini and Yellow Squash I love using zucchini and yellow squash in this dish. They add a nice texture. Their mild flavor lets the other ingredients shine through. - Diced Bell Peppers and Onions Diced bell peppers bring color and crunch. I use red, green, or yellow for a vibrant look. The onions add sweetness and depth to the mix. - Cheeses and Eggs The cheese melts beautifully, creating a creamy taste. I often use cheddar for its sharp flavor. Eggs bind the casserole, making it rich and filling. - Ground Cumin and Smoked Paprika Ground cumin gives warmth to the dish. Smoked paprika adds a hint of smokiness. These spices make the casserole pop with flavor. - Chili Powder, Salt, and Pepper Chili powder brings heat, but you can adjust it. Salt enhances all the flavors. Black pepper adds a nice kick that complements the dish. - Fresh Cilantro or Parsley Fresh herbs add color and brightness. I like cilantro for its bold taste, but parsley works too. It makes the dish look fresh and inviting. - Additional Cheese for Topping Topping the casserole with more cheese creates a bubbly crust. It adds extra flavor and richness. You can never have too much cheese! For the full recipe, check out the detailed instructions. 1. Preheat Oven and Prepare the Skillet Start by preheating your oven to 375°F (190°C). This ensures a nice bake. While your oven heats, grab a large skillet and add a splash of olive oil. 2. Sauté Onions and Garlic Heat the skillet over medium heat. Add the finely diced onion and minced garlic. Sauté for about 3-4 minutes. You want the onions to turn clear and fragrant. 3. Add Bell Peppers and Squash Next, toss in the diced bell peppers. Cook for an additional 2-3 minutes. Stir occasionally until they soften. Then, add in the sliced zucchinis and yellow squash. Cook for about 5-6 minutes until they are just tender but still colorful. 4. Mix Eggs and Cream with Seasonings In a large bowl, whisk together the eggs and heavy cream. Ensure they mix well. Then, add the diced tomatoes, ground cumin, smoked paprika, chili powder, salt, and black pepper. Mix thoroughly for even seasoning. 5. Transfer to Casserole Dish and Top with Cheese Gently fold the sautéed veggies into the egg mixture. Add half of the shredded cheddar cheese, mixing well. Now, transfer this mixture into a greased 9x13 inch casserole dish. Spread it evenly. Top with the remaining shredded cheese for a cheesy crust. 6. Determine Baking Time and Temperature Place the casserole in the oven. Bake for 25-30 minutes. Look for the cheese to bubble and turn golden brown. This means your dish is ready to enjoy! For the full recipe and more details, check the [Full Recipe]. To get the best texture in your casserole, avoid overcooking your veggies. Cook them just until they are tender but still firm. This keeps their color bright and their taste fresh. For cheese, I recommend using a mix of cheddar and Monterey Jack. Cheddar gives a strong flavor, while Monterey Jack adds creaminess. Mixing these will make your dish rich and tasty. You can boost flavor by adding spices and fresh herbs. Try using cumin and smoked paprika for warmth. Fresh cilantro or parsley adds a nice touch, too. If you prefer more heat, adjust the chili powder to fit your taste. Start with one teaspoon, then add more if you want extra spice. When serving, consider offering individual portions. This makes it easy for guests to enjoy. Garnish with fresh herbs, and maybe add a dollop of sour cream or avocado. For a pretty look, arrange the casserole with a sprinkle of additional cheese on top. This can create an inviting golden crust that draws people in. {{image_4}} Gluten-Free Options This Tex-Mex Keto squash casserole is naturally gluten-free. Use fresh ingredients and avoid any processed sauces that may contain gluten. Check labels when buying cheese or other packaged items. Dairy-Free Alternatives For a dairy-free option, swap the cheese and cream. Use almond milk or coconut milk instead of heavy cream. Nutritional yeast can add a cheesy flavor. Vegan cheese works well, too. Other Vegetables to Include Feel free to mix in other vegetables. Spinach, mushrooms, or cauliflower can add great flavor and nutrients. Just chop them small so they cook evenly. Using Different Cheeses You can experiment with different cheeses. Monterey Jack or pepper jack adds a nice kick. Cream cheese can add a creamy texture. Try a blend for extra flavor. Incorporating Different Spices Add more spices to make it your own. Cumin and coriander can enhance the flavor. A pinch of cayenne pepper adds heat for spice lovers. Adding Protein Options For more protein, add cooked ground beef or turkey. Shredded chicken is also a great choice. This makes the dish heartier and more filling. You can explore more options and find the Full Recipe for detailed steps on making this delicious dish. Enjoy experimenting with your Tex-Mex Keto squash casserole! To store your Tex-Mex Keto Squash Casserole, let it cool first. Use an airtight container. Place it in the fridge within two hours of cooking. This keeps it fresh and safe. - How Long Can It Last? In the fridge, the casserole lasts about 3 to 5 days. Always check for any signs of spoilage before eating. If it looks or smells off, throw it away. You can freeze the casserole for later. Cut it into portions for easy use. Wrap each piece tightly in plastic wrap. Then, place them in a freezer bag. - Tips for Freezing and Reheating Make sure to label your bags. Note the date and contents. When you want to eat it, take it out of the freezer. Let it thaw in the fridge overnight for best results. - Best Practices for Maintaining Flavor To keep flavors fresh, avoid freezing with toppings. You can add fresh cheese when you reheat it. When it's time to enjoy your casserole, you have options. You can use the oven or the microwave. - Oven vs. Microwave For the oven, preheat it to 350°F (175°C). Put the casserole in for about 20 to 25 minutes. This method keeps the texture nice and firm. If using the microwave, heat it in bursts of one to two minutes. Stir in between to warm it evenly. - Maintaining Texture and Flavor If you use the microwave, cover it lightly with a paper towel. This helps keep moisture in. If using the oven, you can cover it with foil to avoid drying out. Enjoy your tasty meal again! You can easily make this casserole vegetarian. Just leave out the eggs and cream. For a vegan option, use plant-based alternatives. Replace the heavy cream with coconut milk or cashew cream. Use a vegan cheese that melts well. You can also add more veggies, like mushrooms or spinach, for added flavor and texture. Yes, using pre-cooked ingredients can save time. You can find pre-cooked squash or bell peppers in stores. Just make sure they are not overly soft. If you use canned tomatoes, drain them well to avoid excess moisture. Adjust your cooking time, as pre-cooked items may need less time in the oven. Pair this casserole with a simple salad for freshness. A side of avocado slices adds creaminess. You can also serve it with a dollop of sour cream or guacamole. For drinks, try a light beer or a refreshing iced tea. These sides enhance the Tex-Mex flavors and make for a complete meal. You can find the Full Recipe with detailed instructions and tips online. This blog post shared a simple recipe for a delicious Tex-Mex keto squash casserole. We covered the main ingredients like zucchini, bell peppers, and cheeses. I provided step-by-step cooking tips to help you get the best texture and flavor. You can customize this dish with different vegetables or spices to fit your taste. Remember, proper storage is key for leftovers. With these insights, you can make a tasty and satisfying meal at home. Enjoy creating your own version of this comforting dish!](https://tossedflavors.com/wp-content/uploads/2025/07/038efa6f-755a-4418-9e18-023a0de765b2.webp)
Are you ready to enjoy a tasty meal that fits your keto diet? This Tex-Mex Keto Squash Casserole is packed with flavor and easy to make! You’ll love how zucchini …
![To make crispy pan-fried zucchini, you need fresh ingredients. Here is the list of required ingredients: - 2 medium zucchinis, sliced into rounds - 1/2 cup all-purpose flour - 1 large egg - 1 cup breadcrumbs (panko recommended) - 1/2 cup grated Parmesan cheese - 1 teaspoon garlic powder - 1/2 teaspoon paprika - Salt and pepper to taste - 3 tablespoons olive oil - Fresh parsley for garnish These ingredients are simple and easy to find. The zucchini gives a fresh taste. The flour helps create a nice crust. The egg binds everything. The breadcrumbs add crunch, and the cheese brings richness. Garlic and paprika add flavor. Seasoning with salt and pepper makes it perfect. Don't forget the olive oil for frying. Finally, fresh parsley adds a bright touch to the dish. This recipe makes a tasty delight that’s simple to prepare. You can find the full recipe above for clear steps on how to use these ingredients. Start by washing the zucchinis under cold water. Use a scrub brush to remove any dirt. Next, slice them into rounds that are about 1/4 inch thick. This size helps them cook evenly. After slicing, pat each round dry with a paper towel. Drying the zucchini helps achieve that perfect crispy texture. Now, let’s create a three-part breading station. In one shallow bowl, place the all-purpose flour and season it with salt and pepper. In the second bowl, whisk the egg until it is smooth. In the third bowl, combine the breadcrumbs with grated Parmesan cheese, garlic powder, and paprika. Mix this well for even flavor. This setup makes breading easy and fun. Heat a large skillet over medium heat and pour in the olive oil. Wait until the oil shimmers, showing it’s hot but not smoking. Take each zucchini round and first dip it into the flour. Make sure it is lightly coated, then shake off the excess. Next, dip it into the beaten egg, letting any extra drip back into the bowl. Finally, press the zucchini into the breadcrumb mixture. Press down slightly so the crumbs stick well. Carefully place the breaded zucchini rounds in the hot skillet. Avoid adding too many at once; this helps them fry well. Cook each side for about 2-3 minutes, until they are golden brown and crispy. Once they are done, use a slotted spatula to transfer them to a plate lined with paper towels. This absorbs any leftover oil. Now, sprinkle some freshly chopped parsley on top to add color and flavor. Serve these crispy delights hot from the pan! You can find the full recipe for more details. To make your zucchini crispy, drying is key. After slicing, pat each round dry with a paper towel. This step removes moisture and allows for that perfect crunch. Next, heat your oil correctly. It should shimmer but not smoke. A hot oil temperature cooks the zucchini fast, keeping them crispy. Coating the zucchini evenly is vital. Start with flour, then dip in egg, and finish with breadcrumbs. Make sure to shake off any excess flour before the egg. This prevents clumps in your breadcrumbs. When you press the zucchini into the breadcrumb mix, do it firmly. This helps the crumbs stick well. For the best taste, serve your crispy zucchini with dips like marinara or ranch. These add flavor and fun. To present your dish, arrange the zucchini beautifully on a platter. Garnish with fresh parsley for color. This simple touch makes your dish more appealing and exciting. For the full recipe, check the earlier section. {{image_4}} You can change the flavor of crispy pan fried zucchini easily. Try adding various spices. For a kick, use cayenne pepper or chili powder. If you prefer a savory touch, consider adding dried oregano or thyme. Each spice can change the taste of your dish. For a cheesy twist, you can swap out the Parmesan. Use cheddar or mozzarella for a different flavor. Both melt nicely and give a rich taste. Mixing different cheeses can create a fun flavor combo too. If you want a lighter option, consider baking instead of frying. Preheat your oven to 425°F (220°C). Place the breaded zucchini on a baking sheet. Spray them with a little olive oil. Bake for about 20 minutes, flipping halfway. This way, you can enjoy a crispy treat with less oil. For gluten-free options, replace all-purpose flour with almond flour. It gives a nutty flavor and works well for breading. You can also use gluten-free breadcrumbs for the coating. Crispy zucchini pairs well with many main dishes. Serve it alongside grilled chicken or fish for a balanced meal. It also complements pasta dishes, adding a crunchy element. For side salads, try a simple mixed green salad with vinaigrette. A tomato and cucumber salad also works great. As an appetizer, serve your crispy zucchini with a tangy marinara sauce. It makes a tasty dip and enhances the flavor. For the full recipe, check out the details above. To store your crispy pan-fried zucchini, follow these tips: - Let the zucchini cool completely. This prevents steam from making them soggy. - Use an airtight container to keep them fresh. - Place a paper towel in the container to absorb moisture. This keeps them crispy longer. - Refrigerate the zucchini within two hours of cooking for food safety. Reheating fried zucchini can be tricky. Here’s how to keep them crispy: - Preheat your oven to 375°F (190°C). Place the zucchini on a baking sheet. - Bake for 10-15 minutes. This method helps restore their crunch. - You can also use an air fryer. Set it to 350°F (175°C) for 5-7 minutes. - Avoid the microwave. It can make them soft and chewy. For more detailed instructions, check out the Full Recipe. To make your fried zucchini extra crispy, moisture control is key. Start by slicing the zucchini and patting each piece dry with a paper towel. This step helps remove excess water. When frying, ensure your oil is hot enough. If the oil is too cool, the zucchini will absorb oil and turn soggy. Aim for a shimmering surface in the oil before adding the zucchini. Fry in small batches to avoid crowding. This lets each piece cook evenly and become crisp. Yes, you can use other vegetables! Bell peppers, eggplant, and mushrooms are great alternatives. Prepare them in the same way as zucchini. Cut them into similar sizes for even cooking. Each vegetable offers a unique taste and texture, so feel free to experiment. Absolutely! You can prep the zucchini ahead of time. Slice and bread the zucchini, then store them in an airtight container in the fridge. They stay fresh for up to two days. When ready to cook, fry them straight from the fridge for a quick meal. Crispy pan-fried zucchini pairs well with various dips. Marinara sauce, ranch dressing, or garlic aioli work wonderfully. Garnish with fresh herbs like parsley for added flavor and color. Arrange the zucchini on a platter for an appealing presentation. Leftovers can last up to three days in the fridge. Store them in an airtight container to keep them fresh. When reheating, use an oven or air fryer to maintain crispiness. Avoid microwaving, as it may make them soggy. Enjoy your leftovers with a tasty dip! [Full Recipe] This blog post covered everything you need for crispy fried zucchini. We discussed essential ingredients, step-by-step cooking instructions, and helpful tips for extra crunch. You also learned about fun variations and how to store and reheat leftovers. Enjoy making this dish with your favorite dips and spices. Don’t hesitate to experiment with different veggies, too. Your cooking journey starts here! Embrace creativity and have fun in the kitchen.](https://tossedflavors.com/wp-content/uploads/2025/07/768945b7-ce23-43fb-9ab7-e824ea76f7af.webp)
Looking for a quick and tasty dish? Crispy pan-fried zucchini is your answer! In this article, I’ll show you how to create golden, crunchy rounds using simple ingredients from your …