Blackberry Cobbler Skillet Irresistible and Simple Recipe

Craving a dessert that’s easy and delicious? Look no further! This Blackberry Cobbler Skillet is a treat you can whip up in no time. Fresh blackberries shine in this warm, …
Craving a dessert that’s easy and delicious? Look no further! This Blackberry Cobbler Skillet is a treat you can whip up in no time. Fresh blackberries shine in this warm, …

Are you ready to spice up your breakfast routine? This Spinach Feta Breakfast Quesadilla is both easy and tasty! Packed with fresh spinach, creamy feta, and delicious mozzarella, it’s a …
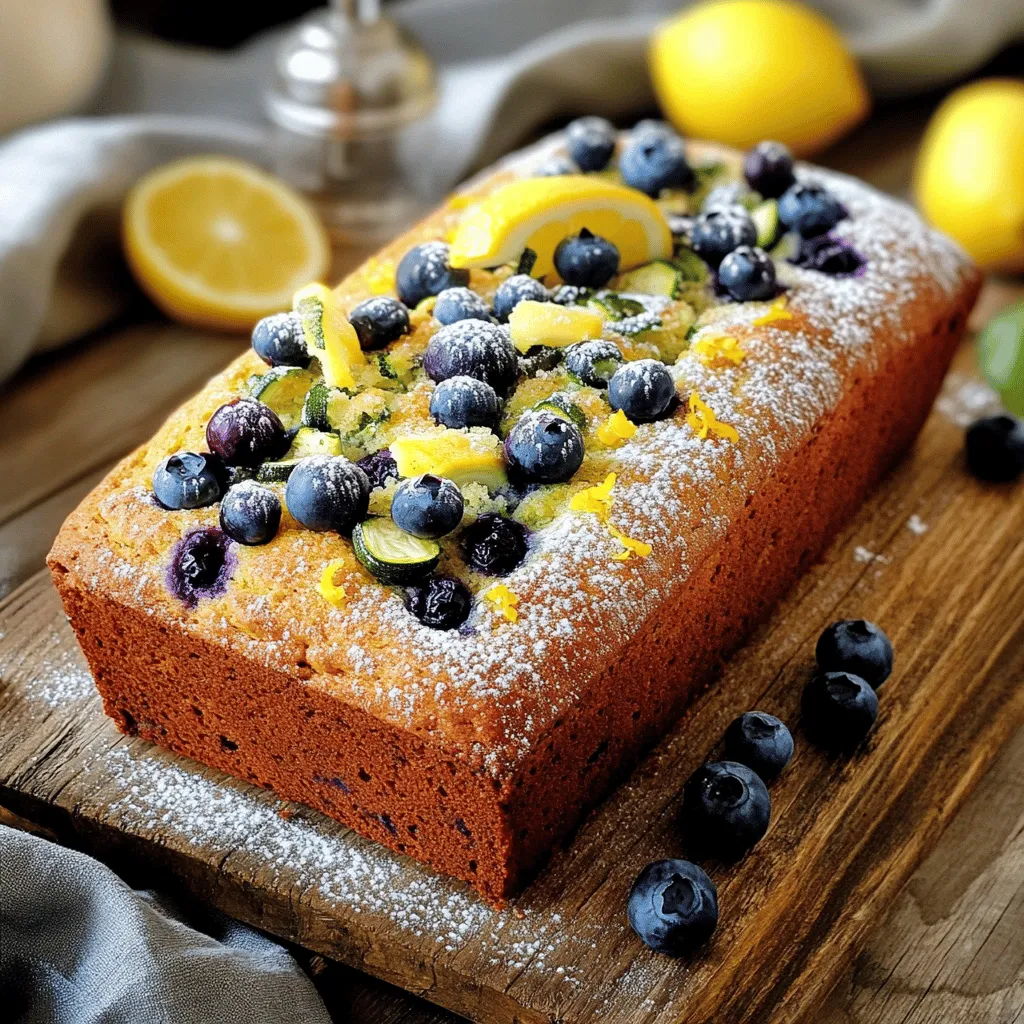
Do you crave a baked delight that bursts with flavor? Lemon Blueberry Zucchini Bread offers a tasty twist on your classic loaf. I’ll guide you through simple steps to make …

Looking for a tasty, healthy snack? Air fryer zucchini chips are your answer! With just a few simple ingredients, you can create a crunchy delight that satisfies your cravings without …
![To make this delicious blueberry zucchini bread, gather these simple ingredients: - 1 medium zucchini (yields about 1 cup shredded) - 1 cup fresh blueberries (frozen is acceptable if fresh is unavailable) - 1 cup all-purpose flour - 1/2 cup whole wheat flour - 1 teaspoon baking soda - 1/2 teaspoon baking powder - 1 teaspoon ground cinnamon - 1/4 teaspoon salt - 1/2 cup granulated sugar - 1/4 cup packed brown sugar - 1/2 cup unsweetened applesauce - 1/4 cup vegetable oil - 2 large eggs - 1 teaspoon vanilla extract - Optional: 1/2 cup chopped walnuts or pecans Fresh vs. Frozen Blueberries Using fresh blueberries gives the best flavor and texture. If you cannot find fresh ones, frozen blueberries work well too. Just be sure to add them straight from the freezer to the batter. This prevents them from turning mushy. Zucchini Preparation Tips Zucchini adds moisture and nutrition. Grate the zucchini using a box grater. After grating, place it in a fine mesh colander. Let it drain for a bit to remove excess water. This step helps prevent your bread from becoming too soggy. Optional Ingredients and Enhancements For added texture and flavor, try mixing in 1/2 cup of chopped walnuts or pecans. You can also sprinkle some oats on top before baking for a crunchy finish. If you like spice, feel free to add a pinch of nutmeg or cardamom to the dry mix. For the full recipe, check the detailed steps in the [Full Recipe]. First, set your oven to 350°F (175°C). This will ensure even baking. Next, take a 9x5 inch loaf pan and grease it well. Use butter or cooking spray to coat the bottom and sides. This helps the bread slide out easily after baking. In a large bowl, combine the following dry ingredients: - 1 cup all-purpose flour - 1/2 cup whole wheat flour - 1 teaspoon baking soda - 1/2 teaspoon baking powder - 1 teaspoon ground cinnamon - 1/4 teaspoon salt Sift these together. Sifting breaks up lumps and ensures even mixing. Make sure the mixture is uniform in color. In another bowl, whisk together: - 1/2 cup granulated sugar - 1/4 cup packed brown sugar - 1/2 cup unsweetened applesauce - 1/4 cup vegetable oil - 2 large eggs - 1 teaspoon vanilla extract Mix until smooth. Then, pour this wet mixture into your dry ingredients. Gently fold them together. Do not overmix; this keeps the bread tender. Before you finish, squeeze excess moisture from the shredded zucchini. Then, add it along with 1 cup of fresh blueberries. If you want, toss in 1/2 cup of chopped walnuts or pecans. Fold these in gently. Finally, pour your batter into the greased loaf pan. Smooth the top with a spatula. Now, you’re ready to bake! For the full recipe, check out the details above. When I pick zucchini, I look for ones that are firm and smooth. They should be medium-sized, about 6 to 8 inches long. Smaller zucchinis taste sweeter and have fewer seeds. Avoid those with soft spots or blemishes. The skin should be shiny and bright green. If you find yellow zucchini, it’s also good, but I prefer green for this recipe. One common mistake is not draining the zucchini. Shredded zucchini contains a lot of water. If you don’t drain it, your bread might be soggy. After grating, let it sit in a colander for a few minutes. Another mistake is overmixing the batter. Mix just until the ingredients combine. This keeps the bread light and fluffy. Lastly, make sure to check the doneness with a toothpick. If it comes out wet, give it more time in the oven. Adding spices can really boost the flavor of your blueberry zucchini bread. I love using ground cinnamon because it pairs well with both blueberries and zucchini. You might also try adding nutmeg for warmth or ginger for a little kick. A hint of vanilla extract enhances the sweetness too. Feel free to experiment with your favorite spices to make the bread uniquely yours. For the complete recipe, check out the Full Recipe provided above. {{image_4}} You can add chocolate chips to your blueberry zucchini bread for a sweet twist. Use about 1 cup of semi-sweet or dark chocolate chips. Fold them in with the blueberries and zucchini. This option adds a rich flavor and a fun texture. Kids love this variation, and it works great for dessert! If you want a vegan version, swap the eggs for flax eggs. Mix 1 tablespoon of ground flaxseed with 3 tablespoons of water. Let it sit for a few minutes to thicken. Replace the applesauce with mashed bananas for extra moisture and sweetness. Use plant-based oil in place of regular oil. This way, you can enjoy a tasty treat that fits your diet! To make gluten-free blueberry zucchini bread, use a gluten-free flour blend. Look for a mix that includes xanthan gum for better texture. You can also use almond flour or coconut flour. Remember to adjust the liquids since these flours absorb moisture differently. This way, everyone can enjoy this delicious recipe! For the full recipe, check out the details provided earlier. To keep your blueberry zucchini bread fresh, wrap it tightly in plastic wrap or foil. This seals in moisture and prevents it from drying out. Store the wrapped bread at room temperature for up to three days. If you want to keep it longer, the fridge works too, but it may change the texture. For longer storage, you can freeze the bread. First, let it cool completely. Then, wrap it tightly in plastic wrap, followed by aluminum foil. This double layer helps avoid freezer burn. You can freeze it for up to three months. When ready to enjoy, just thaw it overnight in the fridge. To reheat your bread, preheat your oven to 350°F (175°C). Remove the plastic wrap and place the bread in the oven for about 10-15 minutes. This warms it through and revives its soft texture. If you're in a hurry, you can slice it and microwave it for about 20-30 seconds. Enjoy it warm for the best taste! Yes, you can use other berries. Raspberries, strawberries, or blackberries work great. Each berry adds its own taste. Just keep the same amount as you would for blueberries. Remember, some berries are juicier. This can change the bread's texture. To ripen zucchini, place it at room temperature. Zucchini will soften over a few days. You can also store it in a paper bag. This helps trap gases that speed up ripening. If you have firm zucchini, it’s ready for baking. This bread uses whole wheat flour and applesauce. Whole wheat flour adds fiber and nutrients. Applesauce cuts down on sugar and fat. Zucchini adds moisture and vitamins. These ingredients make the bread tasty and healthy. You can enjoy it guilt-free! For the full recipe, check out the detailed instructions above. To make Blueberry Zucchini Bread, gather fresh or frozen blueberries and prepare your zucchini well. Follow the steps for mixing dry and wet ingredients for a great batter. Use tips for choosing zucchini and avoiding common mistakes to enhance your bread. Consider fun variations like chocolate chip or vegan options. Store your bread properly and use our reheating tips to enjoy it fresh. Baking is fun, healthy, and rewarding! Now, get started and delight in your tasty creation!](https://tossedflavors.com/wp-content/uploads/2025/07/953bfbc7-d55f-48db-8fec-066243969656.webp)
Looking for a tasty twist on classic bread? This Delicious Blueberry Zucchini Bread recipe is packed with flavor and nutrition. You get juicy blueberries, fresh zucchini, and simple steps to …
![- 2 medium yellow squash, sliced into 1/4-inch rounds - 1 cup buttermilk - 1 cup cornmeal - 1/2 cup all-purpose flour - 1 teaspoon garlic powder - 1 teaspoon onion powder - 1/2 teaspoon paprika - Salt and black pepper, to taste - Vegetable oil, for frying Fresh ingredients make a big difference. Choose bright yellow squash for the best taste. Fresh squash ensures a crisp, tender bite. For flour, you can swap in gluten-free options like almond or chickpea flour. These can add unique flavors while keeping the dish gluten-free. Just remember, the texture may change slightly. You want that crunchy outside, so choose what works best for you. Check out the Full Recipe to see how these ingredients come together for a delicious dish! Soaking the Squash in Buttermilk Start by slicing the yellow squash into 1/4-inch rounds. Place these slices into a bowl and pour in 1 cup of buttermilk. Let the squash soak for about 30 minutes. This step helps the squash stay moist and adds flavor. Preparing the Coating Mixture In a shallow dish, mix together the following ingredients: - 1 cup cornmeal - 1/2 cup all-purpose flour - 1 teaspoon garlic powder - 1 teaspoon onion powder - 1/2 teaspoon paprika - Salt and black pepper, to taste Stir well to combine everything. This mixture creates a crispy coating for the squash. Heating the Oil Correctly Pour about 1/4 inch of vegetable oil into a large frying pan. Heat the oil over medium heat. To check if the oil is ready, sprinkle a bit of the cornmeal mixture into it. If it sizzles, the oil is hot enough. Dredging the Squash Take the squash slices from the buttermilk. Let any excess liquid drip off. Dredge each slice in the cornmeal mixture. Press gently to ensure the coating sticks well. Frying Method and Timing When the oil shimmers, carefully lay the coated squash slices in the pan. Make sure not to crowd the pan. Fry for about 2-3 minutes on each side. Look for a golden brown color and a crispy texture. Draining Excess Oil Once fried, use a slotted spoon to remove the squash from the pan. Place them on a plate lined with paper towels. This step helps absorb any extra oil. Seasoning for Extra Flavor While the fried squash is still warm, sprinkle a little extra salt if desired. This adds a nice touch to the flavor. Enjoy your Southern Fried Squash as a side dish or a snack! For the full recipe, check out the earlier section. Ideal Oil Temperature The right oil temperature is key. Aim for 350°F to 375°F. This range ensures a crispy crust without burning. To test the oil, drop in a small piece of the coating. If it sizzles right away, you're set. How to Avoid Soggy Squash To keep your squash crispy, follow these steps: - Soak the squash in buttermilk for 30 minutes. This adds flavor and moisture. - Drain excess buttermilk before dredging in the coating. - Fry in small batches. Too many pieces can cool the oil, leading to soggy squash. Presentation Tips Serve your crispy fried squash in a rustic basket. Line it with parchment paper for a homey touch. Garnish with fresh parsley for color and brightness. This makes your dish look as good as it tastes. Pairing with Dipping Sauces Enhance the flavor by pairing your fried squash with dips. Classic ranch dressing works well. For a kick, try spicy aioli. These dipping sauces will add extra fun to your meal. {{image_4}} You can make Southern fried squash even more exciting with a few simple tweaks. - Adding Spices for Extra Heat: If you like some spice, try adding cayenne pepper or crushed red pepper flakes to your cornmeal mix. Start with a small amount, about 1/4 teaspoon, and adjust to your taste. This small change adds a nice kick to each bite and makes your squash stand out. - Incorporating Cheese: For a cheesy twist, mix grated parmesan or cheddar into your coating. About 1/4 cup works well. The cheese melts and gives a rich flavor and a crispy texture. You’ll love how it elevates the dish! There are ways to adapt this recipe to fit your dietary needs. - Gluten-Free Options: You can easily make this dish gluten-free. Swap the all-purpose flour for a gluten-free blend or almond flour. This keeps the crispy texture while catering to gluten-sensitive eaters. Make sure your cornmeal is also labeled gluten-free. - Vegan Alternatives: To make this dish vegan, skip the buttermilk. Instead, soak the squash in a mix of plant-based milk and a splash of lemon juice for about 30 minutes. This mimics the effect of buttermilk. Use a gluten-free flour blend and adjust the spices to your liking. These variations allow you to enjoy Southern fried squash in new ways while keeping it delicious! For the full recipe, check out the complete cooking process. To store your leftover Southern fried squash, let it cool first. Place the cooled squash in an airtight container. This keeps it fresh for up to three days. If you want to keep it longer, you can freeze it. Just remember to wrap each piece in plastic wrap and then place it in a freezer bag. This helps prevent freezer burn. When it’s time to enjoy your leftovers, you want them crispy again. The best way to reheat is in the oven or an air fryer. Preheat your oven to 400°F (200°C). Lay the squash on a baking sheet in a single layer. Heat for about 10-15 minutes until golden and crispy. If you use an air fryer, set it to 375°F (190°C) and cook for about 5-7 minutes. This keeps the squash crunchy and tasty, just like when you first made it. For more details on making this delicious dish, check the [Full Recipe]. What is the best type of squash to use? I recommend using yellow squash. Its soft texture cooks well. Zucchini is another option but may have a different taste. Yellow squash gives a sweet and mild flavor, perfect for frying. How can I make the coating stick better? To help the coating stick, soak the squash in buttermilk for 30 minutes. This adds moisture and flavor. After soaking, let excess buttermilk drip off before dredging in the cornmeal mix. Press down gently to ensure a good coating. Can I double the recipe efficiently? Yes, you can double the recipe easily. Just use twice as much squash and other ingredients. Fry in batches to avoid overcrowding the pan. This keeps the squash crispy and golden. What should I serve with Southern Fried Squash? Southern fried squash pairs well with dips like ranch or spicy aioli. It also complements burgers, sandwiches, and salads. Serve with a side of coleslaw for a classic Southern meal. Calories and Dietary Considerations Each serving of Southern fried squash has about 150 calories. It is a tasty side dish, but watch the oil used for frying. This can add extra calories. Healthier Cooking Methods and Alternatives If you want to make it healthier, try baking instead of frying. Coat the squash and place it on a baking sheet. Bake at 400°F for about 20-25 minutes until crispy. This method keeps the flavor but cuts down on fat. For a gluten-free option, use almond flour instead of all-purpose flour in the coating. For the full recipe, check out the detailed instructions above. In this blog, we explored how to make Southern Fried Squash, from ingredients to cooking tips. Fresh ingredients are key for the best taste and texture. Remember to soak the squash in buttermilk for great flavor. Use the right oil temp to avoid soggy results. Feel free to try variations like adding cheese or spices. Store leftovers properly to keep them crispy. Enjoy this delicious dish and impress your friends with your cooking skills!](https://tossedflavors.com/wp-content/uploads/2025/07/eca47dd2-ea6a-4e57-b8fb-b8006f69f8a0.webp)
Are you ready to treat your taste buds to something special? Southern Fried Squash is a crispy and flavorful delight that will have everyone asking for more. In this guide, …
![To make a delicious corn and zucchini chowder, gather these fresh ingredients: - 2 cups fresh corn kernels (or substitute with frozen corn) - 2 medium zucchinis, diced into bite-sized pieces - 1 medium onion, finely chopped - 2 cloves garlic, minced - 3 medium potatoes, peeled and diced into cubes - 4 cups vegetable broth (homemade or store-bought) - 1 cup coconut milk (adds a rich creaminess) - 2 tablespoons olive oil - 1 teaspoon thyme (can use dried or fresh) - Salt and black pepper, to taste - Fresh parsley, chopped (for garnish) These ingredients create a hearty and tasty chowder that warms your soul. Fresh corn gives the chowder a bright flavor and crisp texture. If fresh corn is not available, frozen corn works well too. It retains the sweet taste and is easy to use. Just add it straight into the pot without thawing. Both options will make your chowder delicious. Personally, I prefer fresh corn when it’s in season for that extra burst of sweetness. You can easily swap out some ingredients based on what you have. Here are a few ideas: - Use yellow squash instead of zucchini for a different flavor. - Swap coconut milk for heavy cream or almond milk if you prefer. - For a protein boost, add cooked chicken or white beans. - If you don’t have thyme, try oregano or basil for a fresh twist. These substitutions can help you tailor the chowder to your taste or what you have at home. The recipe is flexible, so feel free to get creative! First, gather all your ingredients. You will need fresh corn, zucchini, onion, garlic, potatoes, vegetable broth, coconut milk, olive oil, thyme, salt, and pepper. Start by washing and chopping the vegetables. Dice the zucchini and onion, mince the garlic, and peel and cube the potatoes. This prep helps the cooking go smoothly. To cook the chowder, heat olive oil in a large pot over medium heat. Add the chopped onion first. Sauté it for about 5-7 minutes until it softens. Stir regularly to avoid burning. Next, add the minced garlic. Cook it just for a minute. This step builds a strong base for flavor. Then, add the diced potatoes. Pour in the vegetable broth and bring it to a boil. Once boiling, reduce the heat and let it simmer for about 10 minutes. You want the potatoes to be fork-tender. After that, stir in the corn and zucchini. Pour in the creamy coconut milk and add thyme. Season with salt and pepper. Let it simmer for another 10-15 minutes. The zucchini should be tender but still bright. For a creamier chowder, you can blend part of it. Use an immersion blender to blend a portion of the soup. This gives you a nice mix of smooth and chunky textures. If you don’t have an immersion blender, you can transfer a bit to a regular blender. Just be careful with the hot liquid. Stir the blended soup back into the pot. Taste it and adjust the seasoning if needed. Now, your Corn and Zucchini Chowder is ready to serve! For complete details, check out the Full Recipe. To make your Corn and Zucchini Chowder burst with flavor, I recommend a few simple tricks. Use fresh herbs like thyme or basil. Fresh herbs add a bright taste that dried herbs can't match. Adding a squeeze of lemon juice at the end enhances the flavors and adds freshness. A pinch of smoked paprika can give it a subtle warmth. If you enjoy a little heat, a dash of cayenne pepper can spice things up. One common mistake is overcooking the zucchini. Cook it just until it's tender. This keeps it vibrant and crunchy. Another mistake is not seasoning well. Taste as you cook and adjust the salt and pepper. Also, don’t skip blending part of the chowder. Blending adds a creamy texture. However, leave some chunks for a hearty feel. Lastly, use low-sodium broth if you’re watching your salt intake. Serve your chowder hot in warm bowls. Garnish with fresh parsley for color and taste. You can also drizzle a bit of coconut milk on top for extra creaminess. Pair it with crusty bread for a satisfying meal. A simple side salad can add freshness. If you want a fun twist, serve it in hollowed-out bread bowls. This makes for a great presentation and a tasty treat. For the full recipe, check out the [Full Recipe]. {{image_4}} You can easily make this chowder vegetarian or vegan. To do this, simply use vegetable broth instead of chicken broth. You already have coconut milk in the recipe. It adds a creamy texture without dairy. If you want more flavor, add nutritional yeast. This ingredient gives a cheesy taste without the cheese. If you want more protein, chicken, bacon, or tofu are great options. For chicken, use rotisserie chicken for ease. Just shred it and add it to the chowder while it simmers. Bacon adds a smoky flavor. Cook it first, then crumble it in before serving. If you prefer tofu, use firm tofu and sauté it until golden. It absorbs flavors well and adds a nice texture. You can make this chowder your own by adding spices. If you like heat, add red pepper flakes or diced jalapeños. For a more savory taste, try smoked paprika or cumin. Fresh herbs like basil or cilantro can also brighten the flavor. Experiment with these options to find your perfect combination. Each twist makes your chowder unique and exciting. For more ideas, check out the Full Recipe to discover how to make the most of this dish! To store leftover chowder, let it cool first. Use an airtight container for best results. Make sure to seal it tightly. Place it in the fridge. It will stay fresh for up to three days. When you are ready to eat, reheat the chowder on the stove. Use low to medium heat. Stir it often to prevent burning. If it is too thick, add a splash of vegetable broth or water. This keeps the texture creamy. You can also use a microwave. Heat in short bursts, stirring in between. You can freeze corn and zucchini chowder for future meals. First, cool it completely. Then, pour it into freezer-safe bags or containers. Leave some space at the top as it may expand. Label the bags with the date. It will keep for up to three months. When ready, thaw it in the fridge overnight before reheating. For best results, do not freeze garnishes like parsley. Enjoy a warm bowl of chowder anytime! For the full experience, try the Full Recipe. Yes, you can make this chowder ahead of time. It keeps well in the fridge for about three days. Just store it in an airtight container. When you are ready to eat, reheat it on the stove over low heat. Stir it often to keep it from sticking. If it seems too thick, add a bit of broth or water. This will help bring back its creamy texture. This chowder pairs well with many sides. Here are some ideas: - Crusty bread for dipping - A fresh side salad with greens - Grilled cheese sandwiches for a cozy touch - Cornbread for a sweet twist These options add flavor and texture to your meal. To make sure your chowder is creamy, use coconut milk. It adds richness and smoothness to the dish. Another tip is to blend a part of the chowder. Use an immersion blender to puree some of it. This creates a nice texture while keeping some chunky bits. Lastly, avoid cooking it too long after adding the coconut milk. This keeps it creamy and prevents separation. Corn and zucchini chowder is easy and fun to make. We covered all the ingredients, like fresh corn or substitutes. You learned how to prep, cook, and blend the chowder just right. With tips to boost flavor and avoid mistakes, you can serve it perfectly. Remember, you can customize it with proteins or spices. Lastly, proper storage and reheating keep your chowder tasty. Enjoy your chowder adventure!](https://tossedflavors.com/wp-content/uploads/2025/07/5899b623-22a4-4097-b688-5baf71485c96.webp)
Looking for a warm, hearty meal? My Corn and Zucchini Chowder is both flavorful and easy to make! This tasty recipe combines sweet corn and fresh zucchini for a comforting …

If you’re looking for a dish that packs a flavor punch without too much fuss, Trisha Yearwood’s Squash Casserole is the perfect choice. This simple recipe combines fresh yellow squash, …
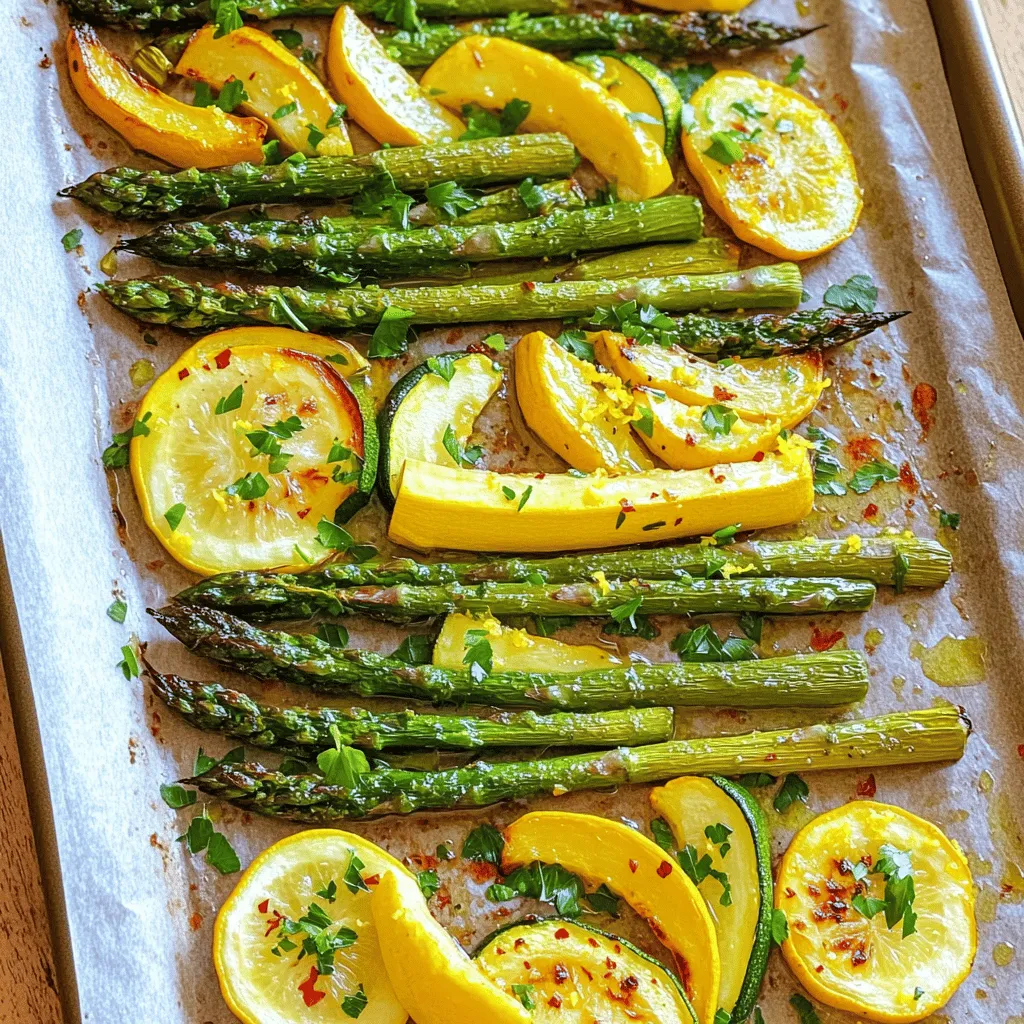
Are you ready to enjoy a colorful and tasty dish? This Flavorful Asparagus with Zucchini and Squash recipe brings fresh veggies to your table in a fun way. With the …

Looking for a tasty snack that’s both healthy and easy to make? You’ll love these Crispy Garlic Parmesan Squash Chips! With just a few simple ingredients and steps, you can …