Easy Blueberry Zucchini Bread Simple and Tasty Treat
Have you ever craved a sweet treat that’s both tasty and healthy? Let me introduce you to Easy Blueberry Zucchini Bread, a simple and delightful snack. Packed with fresh blueberries …
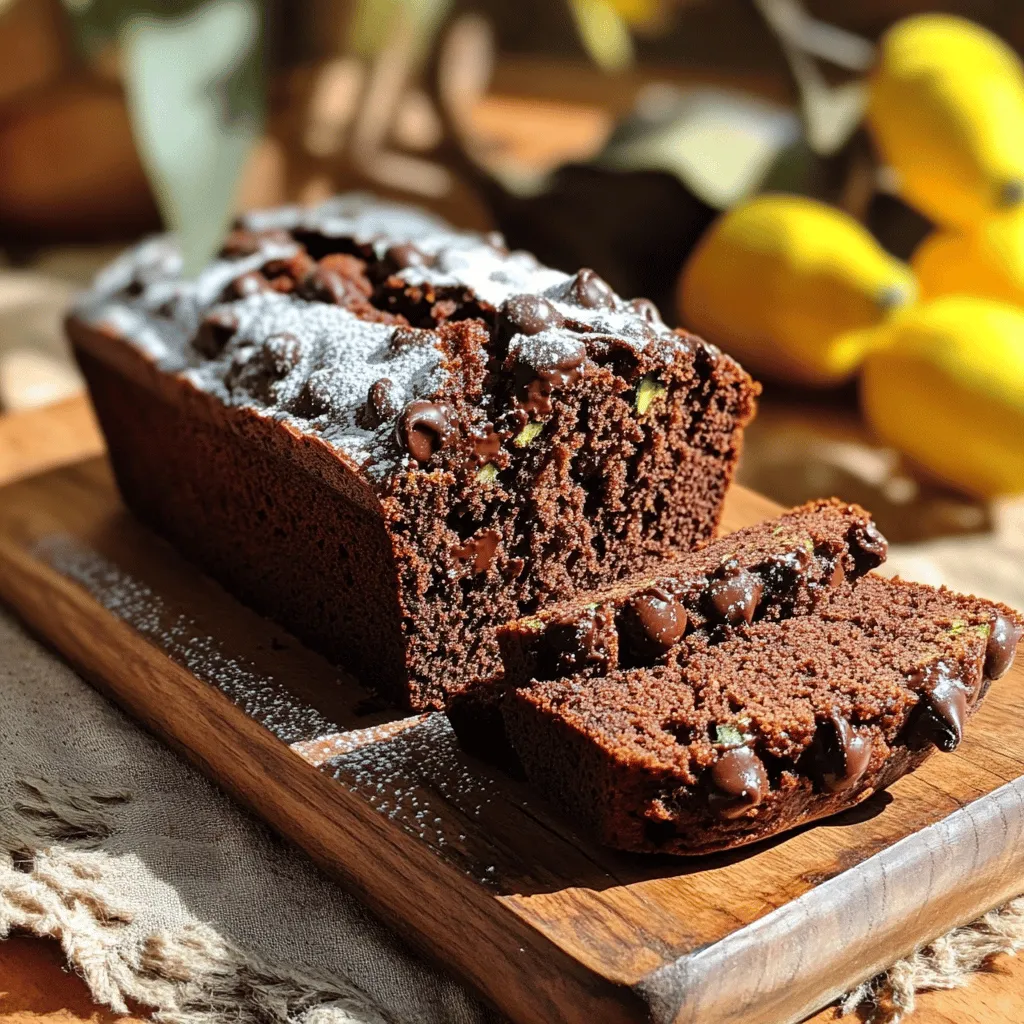
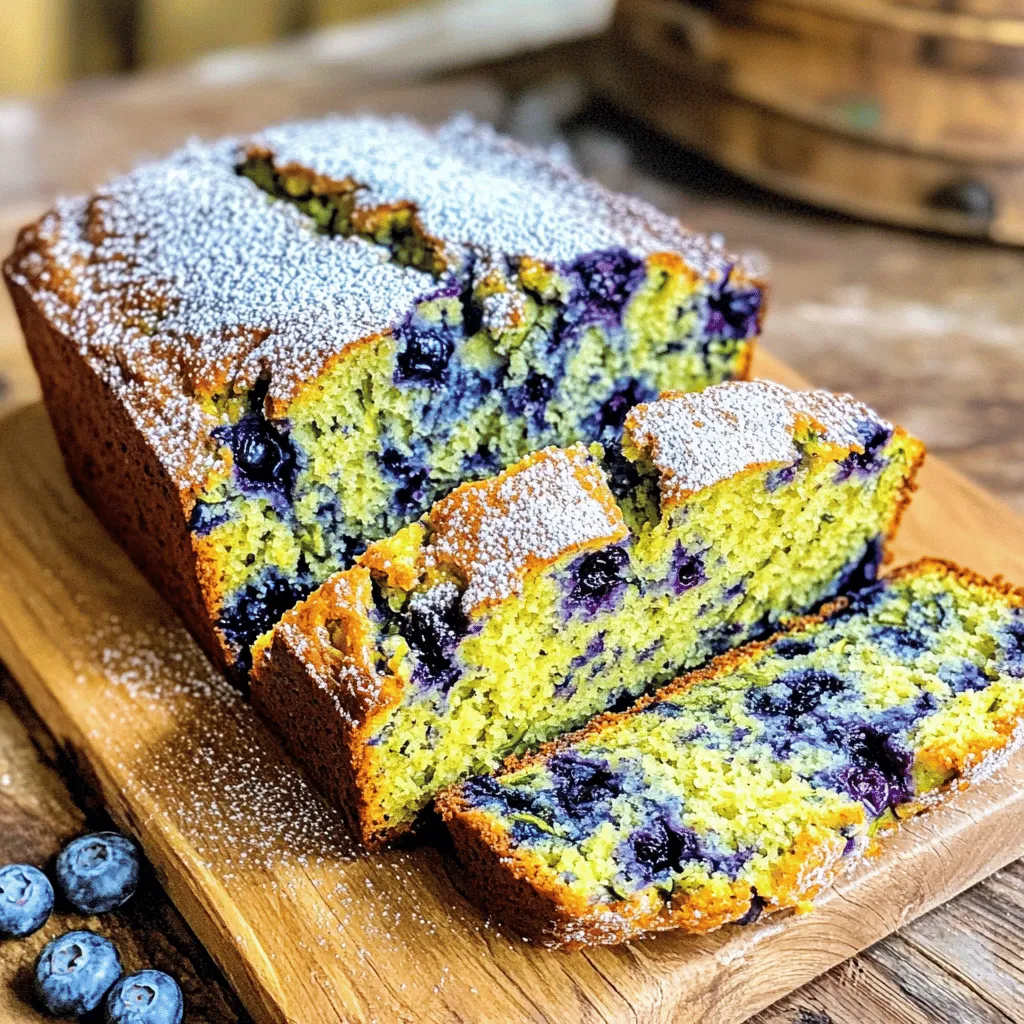
![- 2 cups grated zucchini - 1 ½ cups all-purpose flour - 1 cup granulated sugar - ½ cup packed brown sugar - 1 teaspoon baking soda - 1 teaspoon baking powder - 1 teaspoon ground cinnamon - ½ teaspoon ground nutmeg - ½ teaspoon salt - ¾ cup vegetable oil - 3 large eggs - 2 teaspoons pure vanilla extract - Optional: 1 cup chopped walnuts or pecans - Optional: 1 cup unsweetened shredded coconut - Cream cheese frosting for topping Gather these ingredients to create your delicious zucchini cake. The grated zucchini keeps the cake moist and adds a nice texture. You can use about two medium zucchinis to get the two cups you need. The sugars help in balancing the flavors. Brown sugar adds a hint of caramel flavor. The spices, like cinnamon and nutmeg, make it warm and inviting. If you want to take it up a notch, consider adding walnuts or pecans for crunch. Shredded coconut can add sweetness and chewiness. Don't forget the cream cheese frosting; it brings everything together with its creamy richness. You can find the full recipe for this delightful dish in the earlier section. Happy baking! - Preheat your oven to 350°F (175°C). Prepare a 9x13 inch baking pan by greasing and flouring it, or line it with parchment paper for easy removal later. This step makes sure your cake comes out clean and easy to serve. - In a large bowl, combine 2 cups of grated zucchini, 1 cup of granulated sugar, and ½ cup of brown sugar. Let this mix sit for about 10 minutes. This helps the zucchini release moisture, giving you a moist cake. - In another bowl, mix 1 ½ cups of all-purpose flour, 1 teaspoon of baking soda, 1 teaspoon of baking powder, 1 teaspoon of ground cinnamon, ½ teaspoon of ground nutmeg, and ½ teaspoon of salt. Whisk until everything is well combined. - Add ¾ cup of vegetable oil, 3 large eggs, and 2 teaspoons of pure vanilla extract to the zucchini mixture. Stir gently until everything blends well and is smooth. - Gradually fold the dry mix into the wet mix with a wooden spoon. Stop mixing once you see no dry flour. If you want, fold in 1 cup of chopped walnuts or pecans, and 1 cup of unsweetened shredded coconut. - Pour the batter into the prepared baking pan. Use a spatula to spread it evenly. - Place your pan in the oven and bake for 30-35 minutes. Check if a toothpick comes out clean. If it does, your cake is ready! - Let it cool in the pan for about 15 minutes. After that, transfer the cake to a wire rack to cool completely. - Once cooled, spread cream cheese frosting on top for a tasty finish. For the complete recipe, refer to the [Full Recipe]. - Ensuring a moist cake: To keep your zucchini cake moist, grate the zucchini finely. This helps it blend better into the batter. Always measure the zucchini after grating. Too much or too little can change the texture. - Choosing the right spices: Use fresh ground spices for the best flavor. Ground cinnamon and nutmeg add warmth and depth. You can also mix in a pinch of ginger for a hint of spice. - Importance of resting the zucchini mixture: Letting the zucchini and sugars sit for ten minutes allows the zucchini to release moisture. This step is key to a moist cake. Don’t skip it! - Best cream cheese frosting practices: For a smooth frosting, soften the cream cheese first. Mix it well with butter until fluffy before adding sugar. This creates a light and creamy texture. - Alternatives if you prefer a different frosting: If cream cheese isn't your style, try a simple glaze. Mix powdered sugar with a bit of milk and vanilla. It adds sweetness without being heavy. You can also use chocolate ganache for a rich twist. For the full recipe, follow the instructions carefully, and you’ll create a delightful zucchini cake that impresses everyone! {{image_4}} You can make zucchini cake fit your diet. For gluten-free needs, use almond flour or coconut flour instead of all-purpose flour. These options keep the cake moist and tasty. If you want to swap sugars, try coconut sugar or honey. Both add sweetness without the guilt. Remember, honey is liquid, so reduce other liquids in the recipe. Want to make your cake even better? Add chocolate chips! They melt and create pockets of gooey goodness. Use semi-sweet or dark chocolate for a rich taste. You can also experiment with nuts. Chopped walnuts or pecans add crunch and flavor. If you want something different, try hazelnuts or almonds. They give your cake a unique twist. For the full recipe, check the earlier section. Enjoy creating your own delicious zucchini cake! To keep your zucchini cake fresh, store it properly. - Room temperature storage: If you plan to eat the cake within a few days, store it at room temperature. Place it in an airtight container. It will stay moist for up to three days. - Refrigeration tips: If you want it to last longer, place it in the fridge. Wrap the cake in plastic wrap or foil. This keeps it fresh for about a week. If your cake has frosting, store it in a container with a lid to avoid drying out. You can freeze zucchini cake for later enjoyment. - Best practices for freezing: Allow the cake to cool completely. Slice the cake into pieces. Wrap each piece tightly in plastic wrap and then in foil. This helps prevent freezer burn. - Thawing tips for optimal taste: When ready to eat, remove a slice from the freezer. Place it in the fridge overnight to thaw. For a quick thaw, set it out on the counter for about an hour. Enjoy your delicious cake just like fresh! Can I use frozen zucchini for this recipe? Yes, you can use frozen zucchini. Just thaw it first and drain excess water. This keeps the cake moist. How can I tell when the cake is done? Check the center with a toothpick. If it comes out clean, the cake is ready. You can also look for a golden color. Can I make this cake ahead of time? Yes, you can bake it a day or two in advance. Store it in an airtight container to keep it fresh. What are the best ways to serve zucchini cake? Serve it warm or at room temperature. I love adding a slice of cream cheese frosting on top. You can also sprinkle nuts or coconut for extra flavor. How long does zucchini cake last? Zucchini cake stays fresh for about 3 to 5 days at room temperature. For longer storage, place it in the fridge. Can I make a layered zucchini cake? Absolutely! Just double the recipe and bake in two round pans. Layer the cakes with cream cheese frosting for a stunning dessert. For the complete recipe, check the Full Recipe section above. This blog post shared how to make a delicious zucchini cake. We explored the key ingredients, step-by-step instructions, and helpful baking tips. I also covered variations and storage methods to keep your cake fresh. Remember, using the right spices and resting the zucchini mixture is crucial for taste. Enjoy baking this cake, and don't hesitate to experiment with flavors. Your zucchini cake will surely impress everyone!](https://tossedflavors.com/wp-content/uploads/2025/07/8c461c20-f184-4aed-b37c-6277e7e152a5.webp)
![- 4 boneless, skinless chicken breasts - 1/2 cup balsamic vinegar - 3 tablespoons honey - 2 tablespoons extra virgin olive oil - 3 cloves garlic, finely minced - 1 teaspoon dried oregano - 1 teaspoon sea salt - 1/2 teaspoon freshly ground black pepper - Fresh basil leaves, for garnish - Optional: cherry tomatoes and arugula To convert measurements for larger quantities, simply multiply. For example, if you want to serve eight people, double each ingredient. If you need alternatives, here are some options: - Chicken: Use thighs for a juicier option. - Honey: Maple syrup works well for sweetness. - Vinegar: Try red wine vinegar if balsamic is not available. - Garlic: Use garlic powder in a pinch, but fresh is best. These swaps keep the dish tasty while meeting dietary needs. Always adjust based on what you have at home. Enjoy the process! You can find the full recipe to guide your cooking. To make the balsamic glaze, start by mixing balsamic vinegar and honey. In a small saucepan, combine 1/2 cup of balsamic vinegar with 3 tablespoons of honey. Heat this mixture over medium heat until it simmers. Once it simmers, lower the heat to low. Cook it gently for about 10-15 minutes. Stir it every so often. You want it to thicken into a nice glaze. When it’s thick, remove it from the heat and let it cool. Next, let’s marinate the chicken. In a bowl, whisk together 2 tablespoons of olive oil, 3 minced garlic cloves, 1 teaspoon of dried oregano, 1 teaspoon of sea salt, and 1/2 teaspoon of black pepper. This mix brings great flavor to your chicken. Place your 4 boneless, skinless chicken breasts in a large resealable bag or a shallow dish. Pour the marinade over the chicken. Make sure every piece is coated well. Seal the bag or cover the dish. Refrigerate it for at least 30 minutes. For even better flavor, let it marinate for up to 2 hours. Now it’s time to grill! Preheat your grill to medium-high heat. This step is key for perfect grilling. While the grill heats up, take the marinated chicken out of the fridge. Discard any leftover marinade. Grill each chicken breast for about 6-7 minutes per side. Cook until the internal temperature reaches 165°F (75°C). You want a nice char on the outside. In the last few minutes of grilling, brush the chicken with the balsamic glaze. This adds extra flavor and a beautiful finish. Once done, remove the chicken from the grill and let it rest for a few minutes. This helps keep it juicy when you slice it. To grill chicken perfectly, aim for medium-high heat. This temperature helps the chicken cook evenly. Use a grill thermometer to check the heat. A good range is 375°F to 450°F. To check if the chicken is done, use a meat thermometer. The safe internal temperature is 165°F. Insert the thermometer into the thickest part of the chicken. If it reads 165°F, your chicken is ready to eat! Fresh herbs can greatly improve the taste of your chicken. Try adding chopped rosemary or thyme to the marinade. Basil also pairs well with the balsamic glaze. You can also use spices to boost flavor. Consider adding smoked paprika for a smoky taste. A pinch of red pepper flakes can add some heat. Just remember not to overdo it! One mistake to avoid is over-marinating the chicken. If you marinate for too long, the chicken can become mushy. Stick to 30 minutes to 2 hours for the best results. Another key tip is to let the chicken rest after grilling. This allows the juices to settle. If you slice the chicken right away, it may dry out. Let it rest for about 5 minutes before cutting. For the complete recipe, check out the Full Recipe section. {{image_4}} You can use different chicken cuts for your grilled chicken with balsamic glaze. Chicken thighs have more fat, making them juicy and flavorful. They are a great choice if you want something rich. Chicken breasts are leaner and cook quicker. They are perfect if you prefer a lighter meal. For bone-in chicken, you need to adjust your cook time. Bone-in cuts take longer to cook, so grill them for about 10-12 minutes per side. Always check that the internal temperature reaches 165°F (75°C) to ensure safety. Adding fruits to your glaze can enhance the flavor. Peaches and apricots bring a sweet twist that pairs well with balsamic. Chop them and add them to the glaze as it simmers. This will create a delicious, fruity version. You can also experiment with different vinegars. Try apple cider vinegar or red wine vinegar for unique tastes. Each vinegar brings its own flavor, changing the dish in fun ways. Pair your grilled chicken with fresh salad or roasted vegetables. A crisp salad with mixed greens brightens the plate. Roasted veggies like zucchini or bell peppers add color and nutrition. For a creative presentation, stack the chicken slices on a plate. Drizzle with extra balsamic glaze for a beautiful look. Add a sprig of basil for color. You can even serve it with cherry tomatoes and arugula for a fresh touch. For the full recipe, check out [Full Recipe]. To keep your grilled chicken with balsamic glaze fresh, follow these simple steps: - Refrigerating leftovers effectively: Let the chicken cool down to room temperature. Then, store it in an airtight container. This helps prevent moisture loss. You can keep it in the fridge for up to four days. - Freezing grilled chicken with balsamic glaze: If you want to keep it longer, freeze the chicken. Wrap each piece in plastic wrap and place them in a freezer bag. This way, they stay fresh for up to three months. Remember to label the bags with the date for easy identification. To enjoy your grilled chicken again, you need to reheat it right: - Best methods for reheating grilled chicken: The oven is great for reheating. Preheat it to 350°F (175°C). Place the chicken on a baking sheet. Cover it with foil to keep it moist. Heat for about 15-20 minutes or until warm. You can also use a microwave for quick reheating. Just place the chicken in a microwave-safe dish and cover it. Heat it in short bursts until warm. - Maintaining flavor and juiciness while reheating: To keep the chicken juicy, add a splash of water or broth when reheating. This creates steam, which helps retain moisture. If you have leftover balsamic glaze, brush some on before serving to boost the flavor. These storage and reheating tips will help you enjoy your grilled chicken with balsamic glaze even more. For the full recipe, visit the [Full Recipe] link. To ensure chicken is safe to eat, check the internal temperature. The chicken must reach 165°F (75°C) for safe consumption. Use a meat thermometer for accuracy. Insert it into the thickest part of the chicken without touching bone. This step ensures even cooking and safety. Also, cut into the chicken to check that the juices run clear, not pink. Yes, you can prepare the balsamic glaze ahead. Just store it in an airtight container. Keep it in the fridge for up to a week. When ready to use, simply reheat the glaze on low heat. Stir it gently until it reaches the right consistency. Making the glaze ahead saves time on busy days. Grilled chicken with balsamic glaze pairs well with many sides. Here are some tasty options: - Garlic mashed potatoes: Creamy and rich in flavor. - Steamed green beans: Crisp and fresh. - Mixed green salad: Light and refreshing with a tangy dressing. - Quinoa: Nutty and full of protein, it complements the chicken well. - Roasted vegetables: Sweet and savory flavors balance the dish. Feel free to mix and match according to your taste! In this blog post, I shared a tasty grilled chicken recipe with balsamic glaze. You learned about the ingredients, preparation steps, and expert tips for grilling. I also covered meal variations and storage ideas. Remember, grilling chicken can be simple and fun. Don’t hesitate to experiment with flavors and techniques. With practice, you can make a perfect dish that impresses everyone. Enjoy your cooking journey, and let the flavor shine!](https://tossedflavors.com/wp-content/uploads/2025/07/9c263cd9-3848-4d73-a73c-08ebf213f55a.webp)