Creamy Pumpkin Sage Pasta Comforting Fall Delight
![- 8 oz (225g) fettuccine pasta - 1 can (15 oz) pureed pumpkin - 1 cup heavy cream - 2 tablespoons olive oil - 2 cloves garlic, minced - 1/2 cup grated Parmesan cheese - 1/4 cup fresh sage leaves, finely chopped - Salt and freshly ground black pepper, to taste - Crushed red pepper flakes (optional) - Chopped walnuts for garnish You may want to switch up the ingredients for your creamy pumpkin sage pasta. Here are some easy swaps: - Alternative pasta options: You can use penne, rotini, or gluten-free pasta if needed. - Dairy-free cream suggestions: Try coconut cream or cashew cream for a dairy-free option. - Substitute for fresh sage: Dried sage works in a pinch, but use less as it is stronger. Creating this dish is simple and fun. The creamy texture and warm flavors will make it a favorite for fall. For the complete recipe, check out the [Full Recipe]. To start, grab a large pot. Fill it with water and add a good amount of salt. This will help flavor the pasta. Bring the water to a rolling boil. It should bubble like crazy! Once the water is boiling, add 8 ounces of fettuccine pasta. Cook it for about 8 to 10 minutes. You want it to be al dente. This means it should still have a little bite to it. To check, taste a piece of pasta a minute or two before the time is up. Before draining, save about 1 cup of the starchy pasta water. This water will help make your sauce creamy later. Drain the pasta and set it aside. Now it’s time to make the sauce. Take a spacious skillet and heat 2 tablespoons of olive oil over medium heat. Let it warm up for a minute. Then, add 2 cloves of minced garlic. Sauté it for about 1 minute. You want it to smell amazing! Be careful not to burn the garlic. Next, add 1 can of pureed pumpkin to the skillet. Pour in 1 cup of heavy cream. Stir it all together well. You should see a lovely orange color forming. Bring this mixture to a gentle simmer. This helps all the flavors blend nicely. Now, it’s time to bring it all together. Add the cooked fettuccine to the skillet with the sauce. Toss it gently to coat the pasta in the creamy pumpkin sauce. If the sauce looks too thick, don’t worry! Just add some of that reserved pasta water a little at a time. Stir until you get your desired creamy consistency. Season the pasta with salt and freshly ground black pepper to taste. If you want a little kick, sprinkle in some crushed red pepper flakes. Serve your creamy pumpkin sage pasta warm. Enjoy all the flavors of fall in each comforting bite. For the complete recipe, check out the Full Recipe! To get the right thickness for your creamy pumpkin sauce, start with less heavy cream. You can always add more if needed. If the sauce is too thick, you can use the reserved pasta water. Just add a little at a time until it reaches your desired creaminess. For flavor enhancement, try adding a pinch of nutmeg. This spice pairs well with pumpkin. You can also add a squeeze of fresh lemon juice. This brightens the flavor and balances the creaminess. When using fresh sage, look for bright green leaves. The fresher the sage, the better the flavor. Chop the leaves finely before adding them to the sauce. This helps release their oils and enhances taste. If you don’t have fresh sage, you can use dried sage. Use about one-third of the amount, as dried herbs are more potent. Add it early in the cooking process to allow it to infuse the sauce. Pair your creamy pumpkin sage pasta with a crisp white wine. A Pinot Grigio or Sauvignon Blanc complements the flavors well. For side dishes, consider a simple green salad or crusty bread. They add nice texture and balance the meal. For an inviting presentation, serve the pasta in large, shallow bowls. Top with extra Parmesan cheese and some chopped walnuts. This adds a lovely crunch and visual appeal. {{image_4}} You can easily make this dish plant-based. Start by swapping heavy cream for coconut cream or a nut-based cream. These choices give you the same rich texture. Use nutritional yeast instead of Parmesan for a cheesy flavor without dairy. If you want to add protein, try chickpeas or lentils. They work well and add great texture. For those who want a protein boost, consider chicken, shrimp, or sausage. Chicken breast works best when diced and sautéed until golden. Shrimp cooks quickly and adds a nice touch. If you prefer sausage, use sweet or spicy varieties. Cook them first, then add your cooked pasta into the same skillet to mix flavors. This creates a delicious, hearty meal. You can boost flavor by adding vegetables. Spinach wilts nicely in the sauce. Mushrooms add an earthy taste. Simply stir them in when you cook the garlic. For cheese lovers, try mixing different cheeses. Goat cheese or feta can bring a tangy twist. Experimenting with flavors keeps each bite exciting. For the full recipe, check out the detailed instructions and ingredient list. To keep your creamy pumpkin sage pasta fresh, store it in an airtight container. Make sure to chill it before sealing. In the fridge, it stays good for about 3 to 4 days. If you want to save it for longer, freezing is a great option. Divide the pasta into smaller portions. Use freezer-safe bags or containers, and squeeze out excess air. It can last up to 3 months in the freezer while still tasting great. When reheating, I recommend using the stovetop. This method helps maintain the creamy texture. Just add a splash of water or broth to the pan, then gently heat it. Stir often to avoid sticking. If you prefer the microwave, use a microwave-safe bowl. Add a bit of water and cover with a lid or microwave-safe wrap. Heat in short bursts, stirring in between. This way, your pasta stays creamy and delicious. In the fridge, your creamy pumpkin sage pasta lasts about 3 to 4 days. If frozen, it will stay fresh for around 3 months. After that, the taste and texture might change. Always check for signs of spoilage before eating. If it smells off or has an unusual texture, it’s best to toss it out. Enjoy your pasta while it's fresh and flavorful! If you want a lighter option, try whole milk or half-and-half. For a dairy-free choice, use coconut cream or almond milk. You can also make a simple mix at home. Blend 2 tablespoons of melted butter with 1 cup of milk. This mix works well in many recipes. Yes! You can use any pasta shape you like. Penne, rigatoni, or even shells work great. Just remember, the sauce should coat the pasta well. Each shape will give a different bite and texture to your dish. To keep your sauce creamy, add pasta water slowly. Use the starchy water you saved when cooking pasta. This water helps thin out the sauce without losing flavor. If it still seems thick, stir in a little more heavy cream or milk. This blog post covered a delicious pasta recipe with pumpkin sauce. We explored each ingredient, cooking steps, and helpful tips. Remember, you can easily customize this dish with alternatives or add protein. Storing leftovers correctly ensures great taste for later meals. Enjoy experimenting with flavors and variations. You have all the tools to create a comforting meal. Happy cooking!](https://tossedflavors.com/wp-content/uploads/2025/08/80bd60ef-2df7-4961-94f4-1ed9c41725e1.webp)
Creamy Pumpkin Sage Pasta is the perfect dish for fall! Picture a warm bowl filled with smooth pumpkin, rich cream, and fragrant sage. This comforting pasta brings cozy vibes to …
Creamy Pumpkin Sage Pasta is the perfect dish for fall! Picture a warm bowl filled with smooth pumpkin, rich cream, and fragrant sage. This comforting pasta brings cozy vibes to …
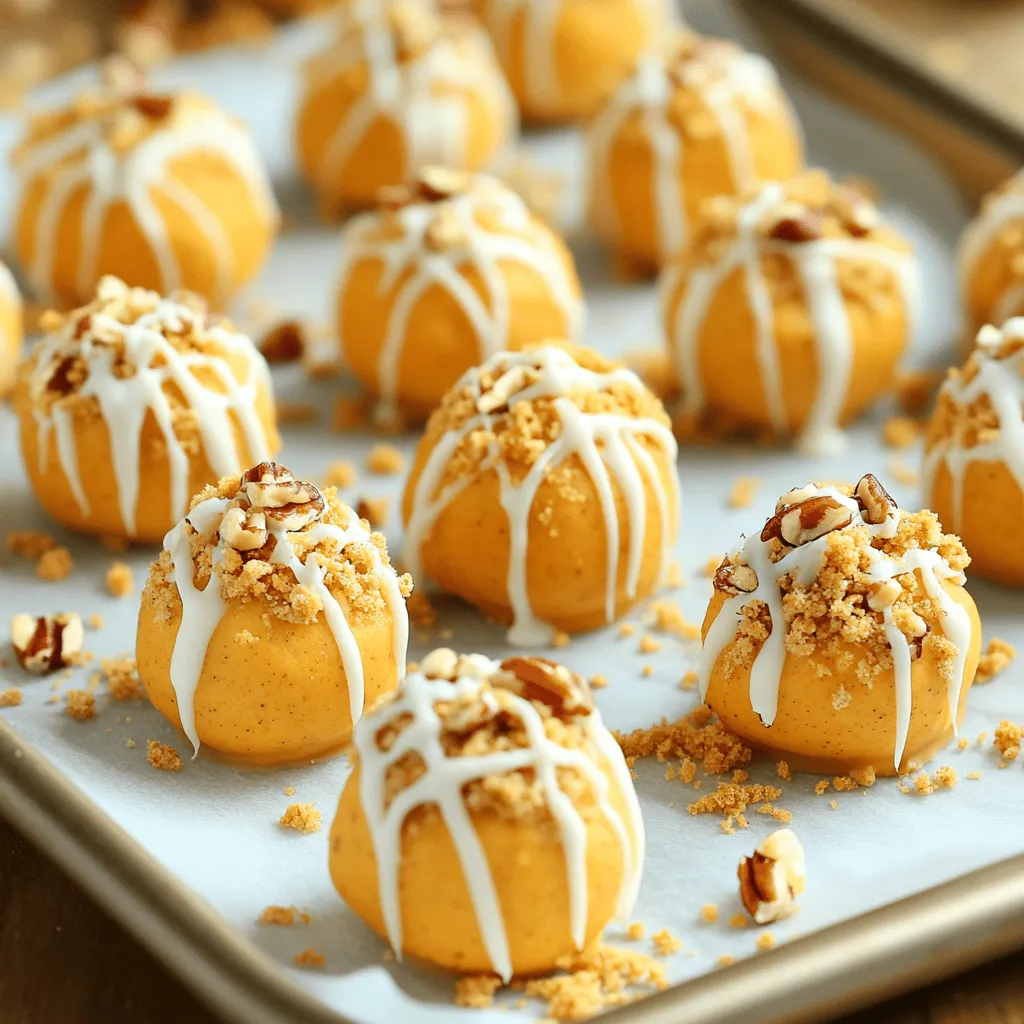
If you’re looking for a sweet treat that’s easy to make and as delicious as it sounds, you’re in the right place. These Easy No-Bake Pumpkin Cheesecake Balls are as …
![- 1 cup creamy peanut butter - 1/2 cup powdered sugar - 1/2 teaspoon pure vanilla extract - 1 cup semi-sweet chocolate chips - 1 tablespoon coconut oil - 1/2 cup crushed graham crackers - Edible gold dust (optional, for decoration) Alternatives for peanut butter If you have a nut allergy or want a change, try sunflower seed butter. It works well and has a nice flavor. Sugar-free options You can use a sugar substitute like erythritol or stevia. This will keep the truffles sweet without extra sugar. Different types of chocolate Feel free to swap semi-sweet chocolate chips for dark or milk chocolate. Each type will give the truffles a unique taste. For the full recipe, you can check the link above. To start, gather your ingredients. In a medium bowl, combine: - 1 cup creamy peanut butter - 1/2 cup powdered sugar - 1/2 teaspoon pure vanilla extract Use a spatula to mix until smooth and creamy. This step is key for a rich flavor. Next, you will want to portion the mixture. Use a small cookie scoop or your hands to form small balls. Aim for about 1 inch in diameter. Place each ball on a parchment-lined baking sheet. This keeps them from sticking together. Chilling is vital for firmness. Once you have formed the balls, transfer the sheet to the freezer. Let them chill for about 30 minutes. Check them after this time. They should feel firm to the touch. This firmness helps when you later dip them in chocolate. While your truffles chill, prepare the chocolate coating. In a microwave-safe bowl, mix: - 1 cup semi-sweet chocolate chips - 1 tablespoon coconut oil Heat in the microwave in 30-second intervals. Stir after each interval until smooth. Once melted, dip each peanut butter ball into the chocolate. Make sure to coat them fully. Gently shake off any extra chocolate. Place the coated truffle back on the parchment sheet. Before the chocolate hardens, sprinkle the tops with crushed graham crackers. This adds a lovely crunch. If you want to make them extra special, lightly dust with edible gold dust. This step is not necessary but can make them look fancy. After coating, place the baking sheet back in the fridge for at least 20 minutes. This allows the chocolate to harden completely. Now you’re ready to enjoy your Peanut Butter Chocolate Acorn Truffles! For the full recipe, check out the detailed instructions above. To make the best truffles, avoid common mistakes. One key mistake is not chilling the peanut butter balls long enough. If they are not firm, they will fall apart in the chocolate. Chill them for at least 30 minutes. Adjust the sweetness to your taste. If you like it sweeter, add more powdered sugar. Start with a little, taste, and then add more. Presentation adds flair to your truffles. Arrange them in a cute box or on a nice platter. You can sprinkle crushed graham crackers on top for texture. For a fancy touch, use edible gold dust. It makes your truffles look special and fun. Just a little gold dust goes a long way in making your treats shine! Customization makes your truffles unique. You can add nuts like chopped almonds or walnuts for crunch. This adds flavor and texture. For a twist, try flavor variations. A pinch of cinnamon can warm up the taste. You could also sprinkle some sea salt on top. This adds a nice contrast to the sweet chocolate. Explore your favorite flavors and make these truffles your own! {{image_4}} You can easily make these truffles vegan. Start by using almond or cashew butter instead of peanut butter. For sweetness, choose maple syrup or agave nectar. This change keeps the truffles creamy and rich. Use dark chocolate for coating, as it is often dairy-free. Look for brands that specify vegan-friendly options. Dark chocolate gives a deep, rich flavor that matches the peanut butter well. For those with nut allergies, consider using sun butter or soy nut butter. These options mimic the taste of peanut butter without the nuts. You can also use gluten-free graham crackers. These are widely available and keep the same crunch. Brands like Kinnikinnick or Schar offer tasty alternatives. This way, everyone can enjoy the truffles without worry. Get creative with holiday-themed truffles! Try adding peppermint extract for a fresh twist during winter. You can also mix in pumpkin spice for a cozy fall treat. These festive flavors make truffles perfect for special occasions. Decorate with colored sprinkles or themed wrappers to match the season. This adds a fun touch that makes your treats even more appealing. For the full recipe, be sure to check out the complete guide to making Peanut Butter Chocolate Acorn Truffles! To keep your Peanut Butter Chocolate Acorn Truffles fresh, store them in the fridge. Place them in an airtight container. This helps prevent them from drying out. If you want to save them for later, you can freeze them. Just make sure to use a freezer-safe container. This keeps them safe from freezer burn. In the fridge, these truffles last about one week. After that, they may start to lose flavor or texture. If you notice any white spots or an off smell, it’s best to toss them. Trust your senses; they guide you well! To thaw frozen truffles, move them to the fridge overnight. This keeps the texture and flavor intact. Avoid thawing them at room temperature, as this can make them too soft. Enjoy your delightful treats once they are back to the perfect consistency! For the complete Peanut Butter Chocolate Acorn Truffles recipe, check out the [Full Recipe]. Making these truffles takes about 1 hour total. Here’s the breakdown: - Prep time: 20 minutes - Chill time: 40 minutes This includes 30 minutes for the peanut butter balls to chill. Then, you’ll chill them again for 20 minutes after coating. Yes, you can make these truffles ahead of time. They store well in the fridge for up to one week. Just prepare them and keep them in an airtight container. You can also freeze them for up to three months. Just make sure to wrap them tightly. If you don’t have graham crackers, you have options! You can use crushed vanilla wafers, digestive biscuits, or even crushed nuts for a different texture. Each alternative gives a unique taste and crunch. Just make sure to crush them finely to coat the truffles nicely. You now have a simple guide for making delicious Peanut Butter Chocolate Acorn Truffles. We covered the key ingredients and fun ways to swap them if needed. I shared step-by-step instructions to ensure your truffles turn out perfect. Remember the tips for presentation and storage, so they taste great longer. Lastly, don't hesitate to get creative with variations. Enjoy your treats, whether for a party or just a snack. Happy cooking!](https://tossedflavors.com/wp-content/uploads/2025/08/71ce4f28-a489-4fe8-86d7-e2a7c0aa9e44.webp)
Are you ready to treat yourself to something delicious and easy to make? These Peanut Butter Chocolate Acorn Truffles are the perfect blend of creamy peanut butter and rich chocolate. …
![- 6 ripe tomatoes, diced - 1 medium red onion, finely chopped - 1 bell pepper, diced - 1 jalapeño pepper, minced - 1 bunch fresh cilantro, chopped - 2 cloves garlic, minced These ingredients make a fresh and vibrant salsa. When you pick your tomatoes, choose ones that feel firm. They should smell sweet and fragrant. The onion adds a nice crunch, while the bell pepper gives it a colorful touch. The jalapeño brings heat, but you can adjust it to your liking. Fresh cilantro gives a bright finish, and garlic adds depth. - 1 teaspoon ground cumin - 1 teaspoon fresh lime juice - Salt and pepper, to taste - Optional: 1 cup corn for sweetness These optional ingredients can enhance the flavor. Cumin adds a warm, earthy note. Lime juice brightens the salsa and gives it a zing. Salt and pepper balance the flavors. If you want a hint of sweetness, add corn. It pairs well with the other flavors. Use the [Full Recipe] to get started on making this delicious freezer salsa. 1. Start by washing your tomatoes, bell pepper, and jalapeño. 2. Dice the tomatoes and bell pepper into small pieces. 3. Finely mince the jalapeño, removing seeds if you want less heat. 4. Place all these ingredients in a large mixing bowl. 5. Next, chop the red onion and add it to the bowl. 6. Mince the garlic and toss it in too. 7. If you want a sweet twist, add corn to the bowl now. 1. Stir in the chopped cilantro, ground cumin, and fresh lime juice. 2. Mix everything until it is well combined. 3. Taste your salsa. Add salt and pepper to balance the flavor. Adjust if needed. 1. Carefully transfer the salsa into freezer-safe containers or zip-top bags. 2. Remove excess air to avoid freezer burn. 3. Label each container with the date and contents. 4. Place them in the freezer for future enjoyment. For the full recipe, check out the detailed steps provided above. Enjoy your homemade freezer salsa! To keep your salsa fresh, follow these tips: - Use good containers: Choose freezer-safe bags or hard containers. They help prevent freezer burn. - Remove air: Squeeze out air before sealing bags. This keeps your salsa safe from ice crystals. - Label your salsa: Write the date and contents on the bags. This helps you track how long it stays fresh. For thawing, always place your salsa in the fridge overnight. This method keeps the texture and taste intact. You can also run the bag under cool water if you need it quickly. Adjusting the heat in your salsa is easy. If you want it milder, use less jalapeño or remove the seeds. For a spicier kick, add more jalapeños or try serrano peppers. Before serving, add fresh ingredients for a burst of flavor. A handful of chopped cilantro or diced avocado can brighten your salsa. A squeeze of lime juice can also enhance the taste. Remember, the best salsa is fresh salsa! For the full recipe, check out Freezer Salsa Fiesta. {{image_4}} You can change the taste of your salsa easily. Adding fresh herbs like parsley or basil gives a nice twist. These herbs add freshness and depth. You might also try adding fruit. Diced mango or pineapple can bring sweetness. This makes the salsa more vibrant and fun. Do you like spice? You can play with the heat. Use different peppers to control the spice level. For a milder salsa, try bell peppers or poblano peppers. If you want it hotter, go for serrano or habanero. You can adjust the jalapeño too. Just change how much you add to fit your taste. Texture is key for salsa. If you prefer a smooth salsa, blend the ingredients. This makes it creamy and easy to dip. If you want it chunky, chop the ingredients coarsely. A chunky salsa has more bite and feels fresh. You can mix styles too. Some may like a bit of smoothness with chunks for variety. You can enjoy freezer salsa in many ways. One of my favorites is serving it with crispy tortilla chips. The crunch of the chips and the fresh taste of salsa make a perfect match. You can also use freezer salsa as a topping for tacos and burritos. Just spoon it on top for an added burst of flavor. It's a simple way to elevate your meal. Freezer salsa is not just for chips and tacos. It works great as a topping for grilled meats or seafood. Imagine a juicy grilled chicken breast topped with vibrant salsa. It adds a fresh taste that pairs well with any meat. You can also mix it into salads for an extra pop of flavor. It brightens up greens and adds a zesty twist. Just toss it in and enjoy! You can keep freezer salsa for up to six months. For the best taste, use it within three months. The longer it sits, the more the flavor fades. To keep it fresh, store it in airtight containers or zip-top bags. Always label your containers with the date. This way, you know when it’s best to use. Yes, you can use canned tomatoes in your salsa. However, fresh tomatoes offer a brighter taste. Canned tomatoes may make the salsa a bit more watery. If using canned, choose whole tomatoes and drain excess liquid. This helps keep the texture nice. You may want to add more spices to boost the flavor. The best way to thaw freezer salsa is in the fridge overnight. This keeps it cool and fresh. If you need it fast, you can place the bag in cold water for about an hour. Avoid using the microwave, as it can change the texture. Once thawed, give it a stir before serving. Absolutely! To make it gluten-free, just use fresh ingredients. For a vegan option, the recipe is already plant-based. You can also swap ingredients based on your needs. Use different peppers for heat or add fruits like mango for a sweet twist. Feel free to experiment to match your taste! Freezer salsa is a simple way to enjoy fresh flavors year-round. We explored essential and optional ingredients, along with step-by-step preparation and freezing tips. You can enhance the salsa with various herbs and adjust its heat to suit your taste. Whether you serve it with chips or use it in tacos, this versatile dish adds joy to any meal. Keep experimenting with flavors and textures. Your homemade salsa will elevate every bite!](https://tossedflavors.com/wp-content/uploads/2025/08/bb56892c-ad5c-4696-a190-ed78b55fe54d.webp)
Looking to add a zesty kick to your meals? Freezer salsa is a simple, tasty way to enhance your dishes, and I’m excited to share my easy recipe! The vibrant …
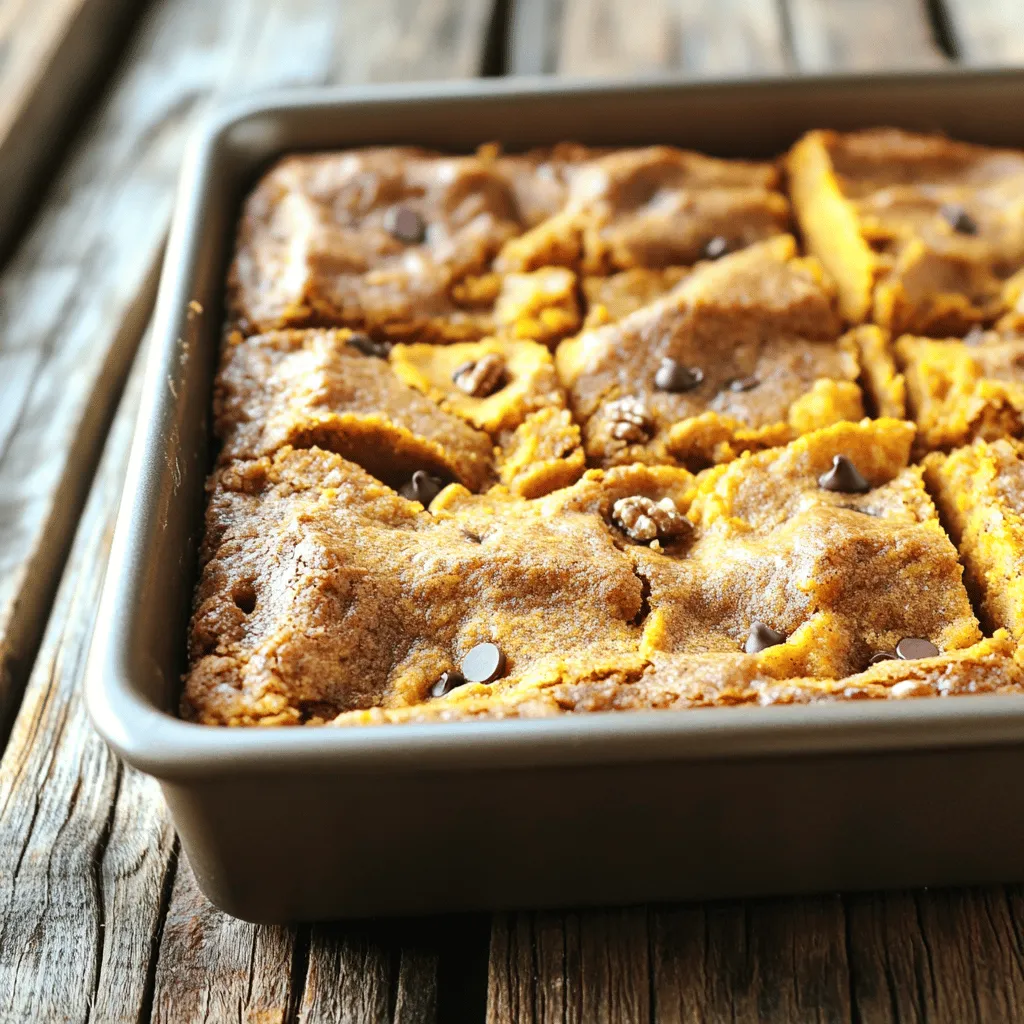
Fall is here, and that means it’s time for one of my favorite treats: pumpkin bars! This soft, chewy dessert is packed with cozy spices that capture the essence of …

Fall is here, and it’s the perfect time to indulge in cozy treats. Get ready to bake scrumptious cupcakes that capture the essence of the season! In this Fall Cupcake …
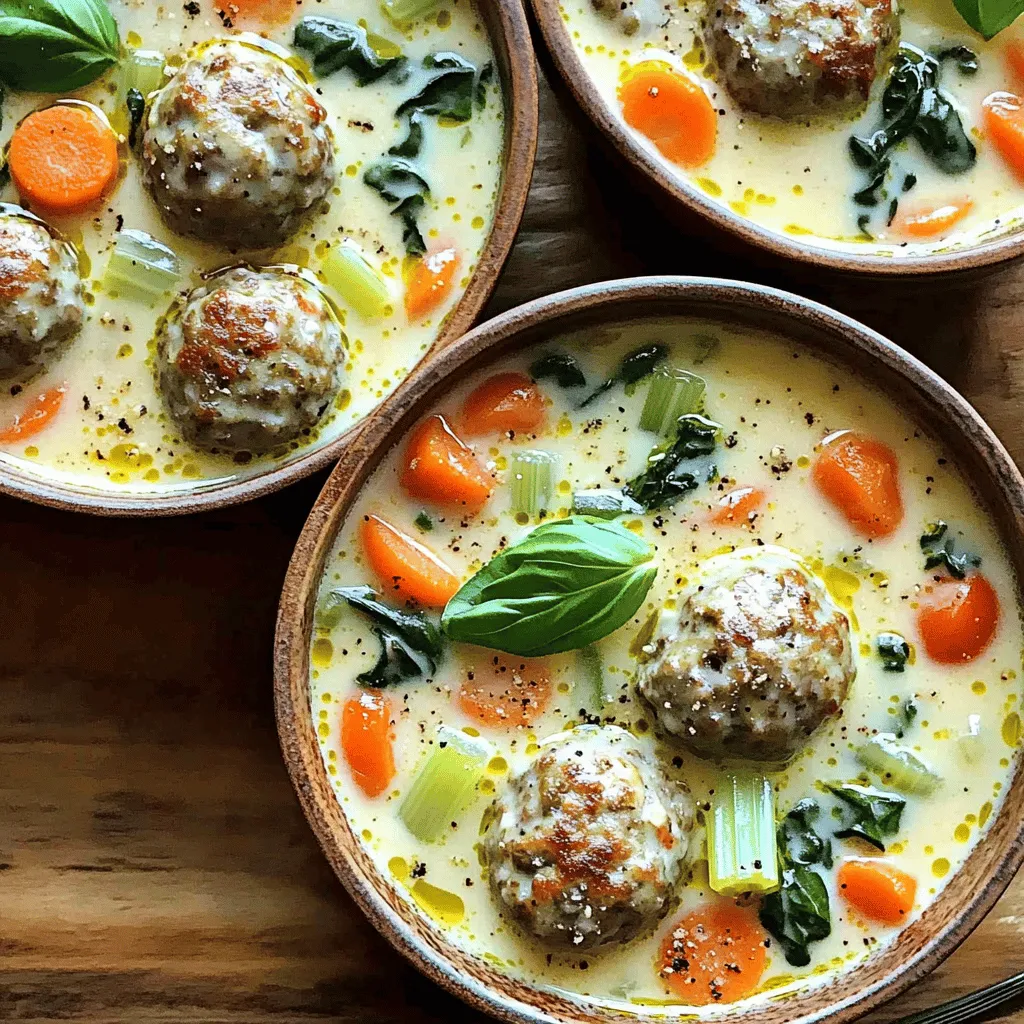
Looking for a cozy dish that warms your soul? Let me introduce you to Creamy Italian Meatball Soup! Packed with savory meatballs, fresh veggies, and rich flavors, this soup is …

Looking for a cozy treat that combines the warmth of fall with the joy of homemade goodness? My Pumpkin Cinnamon Rolls Recipe is your answer! These delightful rolls feature soft, …

Are you ready to create something sweet and fun? DIY caramel apples are the perfect treat for fall gatherings or just a special snack. I’ll guide you through easy steps, …
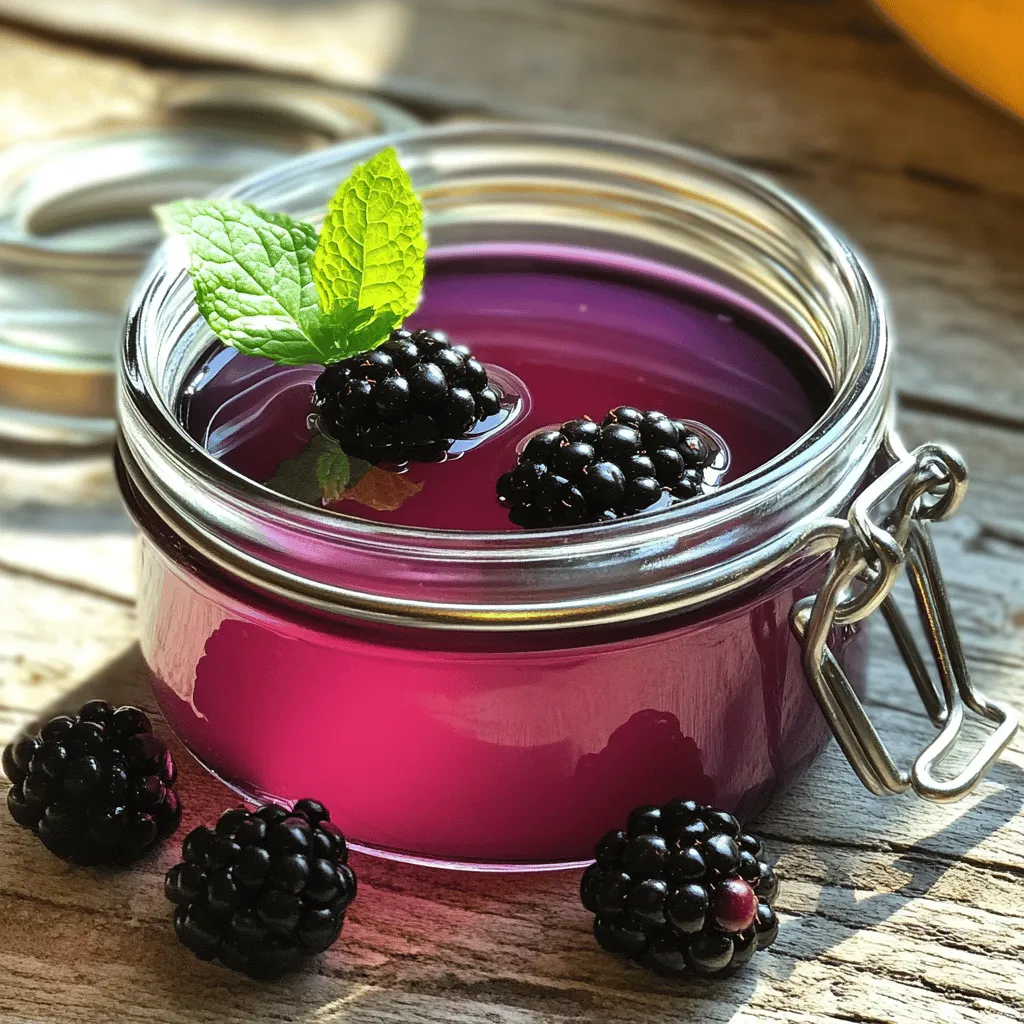
Looking to add a burst of berry goodness to your drinks and desserts? This easy blackberry simple syrup recipe is just what you need! With a few simple ingredients and …