Skip to content
tossedflavors.com
  • Home
  • Appetizers
  • Desserts
  • Salads
  • Breakfast
  • Dinner
  • Privacy Policy
  • Contact
  • About

Chef Evan

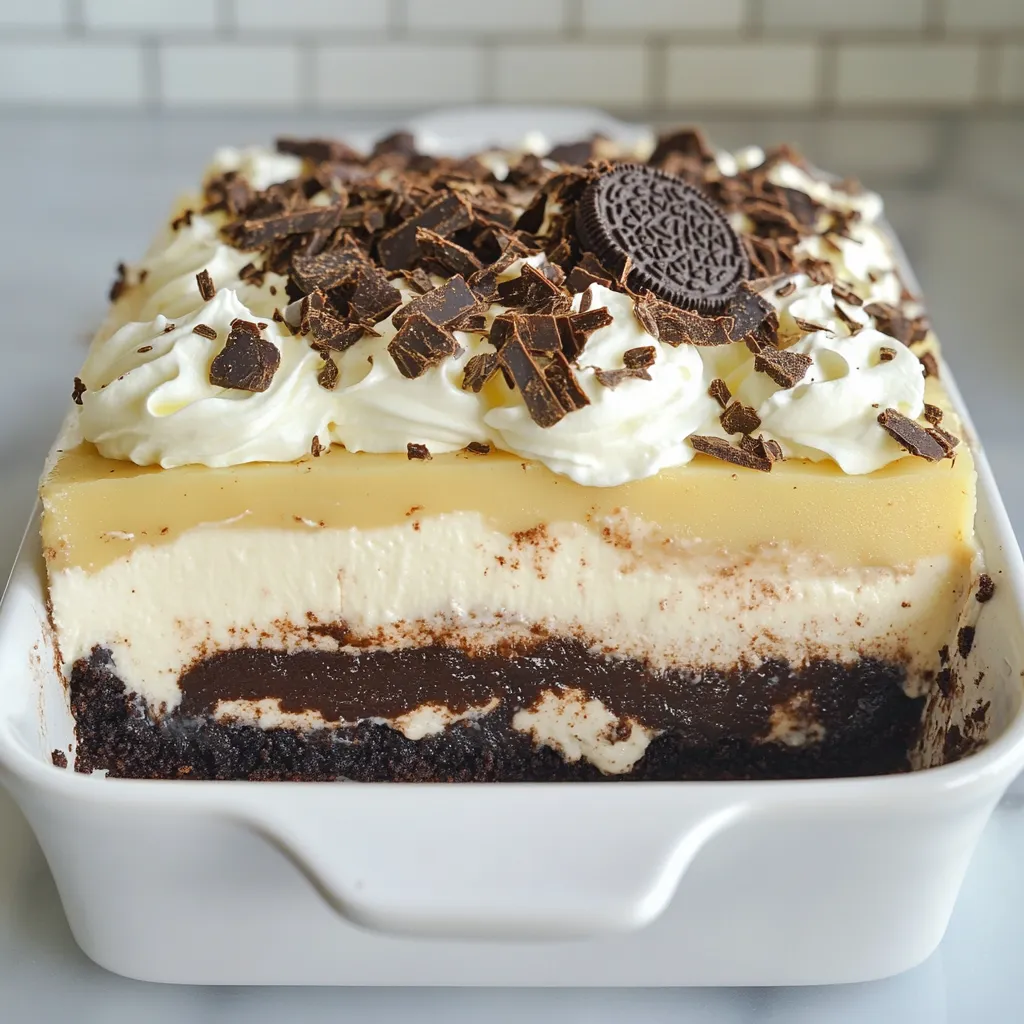
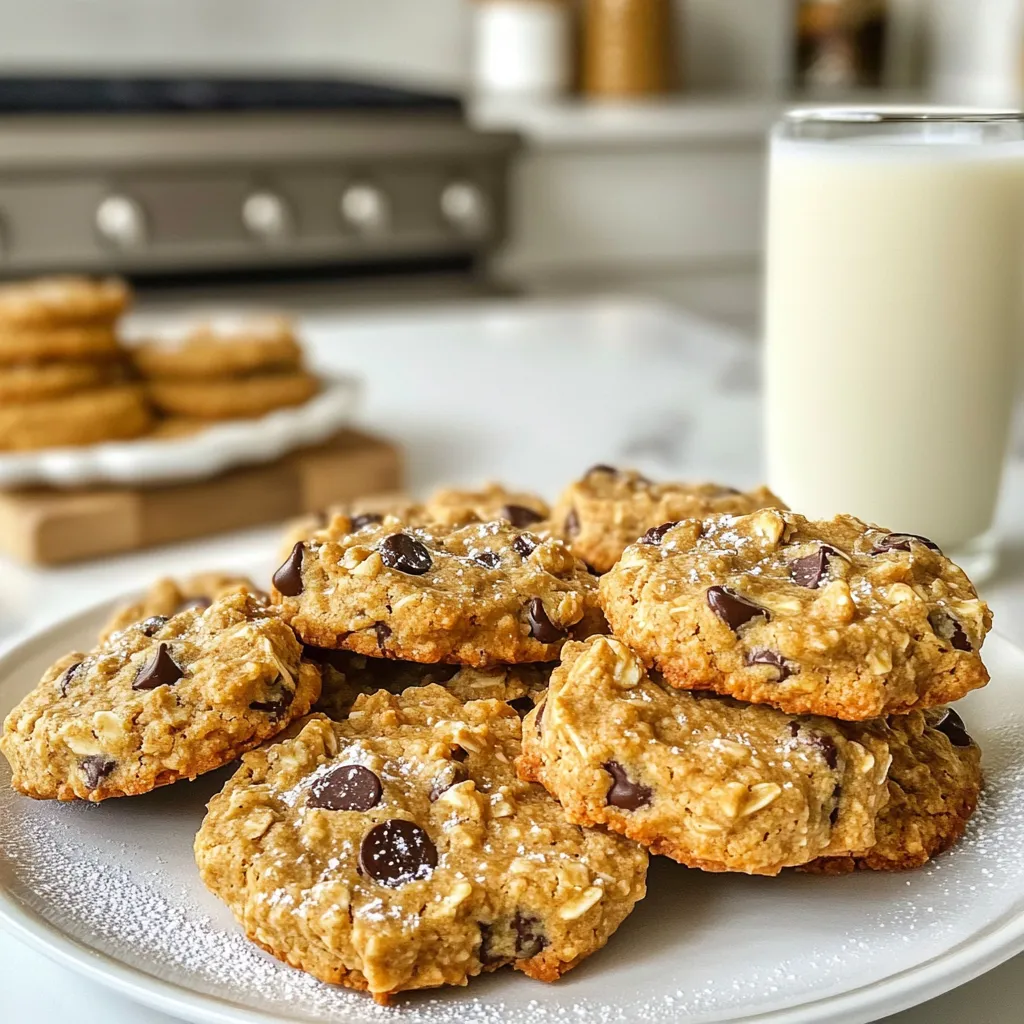
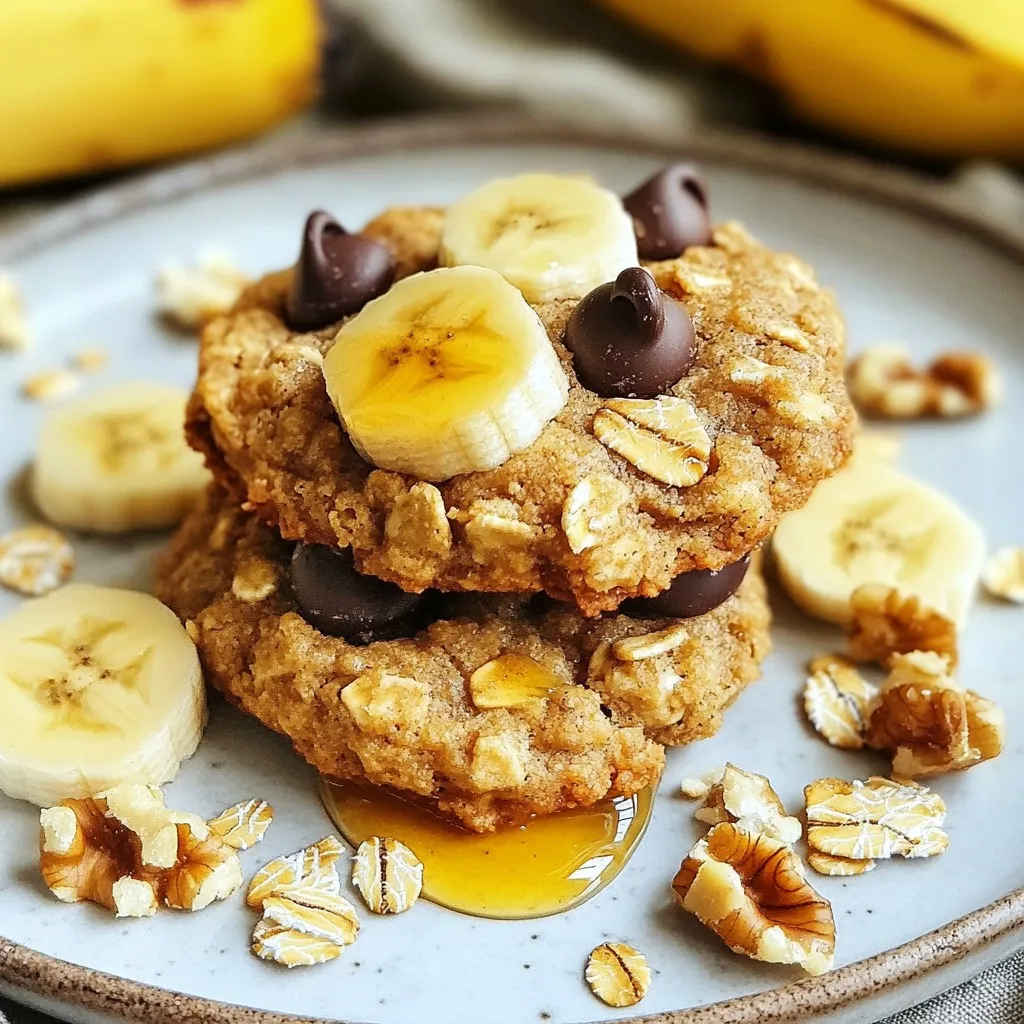
Peanut Butter Banana Oat Cookies Healthy Treat Recipe

November 27, 2025February 2, 2025 by Chef Evan
- 1 cup rolled oats - 1 ripe banana, mashed - 1/2 cup natural peanut butter - 1/4 cup honey or maple syrup - 1/2 teaspoon vanilla extract - 1/2 teaspoon baking powder - 1/4 teaspoon salt - 1/2 teaspoon cinnamon - 1/4 cup chocolate chips (optional) For these Peanut Butter Banana Oat Cookies, you need simple, healthy ingredients. The rolled oats provide a great base. They add fiber and texture. Next, use a ripe banana. The riper the banana, the sweeter it is. Natural peanut butter brings rich flavor and healthy fats. Honey or maple syrup adds sweetness. Choose one based on your taste. Don’t forget the vanilla extract! It enhances the cookie’s flavor. Baking powder gives the cookies a light rise. A pinch of salt balances the sweetness. Cinnamon adds warmth and spice. If you want a fun twist, add chocolate chips. They melt and create gooey pockets in the cookies. Each bite becomes even more delicious. These ingredients create a cookie that is not only tasty but also filled with good nutrition. Enjoy mixing them together! {{ingredient_image_1}} 1. First, preheat your oven to 350°F (175°C). This helps the cookies bake evenly. 2. Line a baking sheet with parchment paper. This keeps the cookies from sticking. 3. In a large bowl, mash the ripe banana until smooth. 4. Add 1/2 cup of natural peanut butter to the mashed banana. Stir until they blend well. 5. Pour in 1/4 cup of honey or maple syrup. Add 1/2 teaspoon of vanilla extract. Mix these wet ingredients well. 6. In a separate bowl, whisk together the dry ingredients. Combine 1 cup of rolled oats, 1/2 teaspoon of baking powder, 1/4 teaspoon of salt, and 1/2 teaspoon of cinnamon. 1. Now, slowly add the dry mix to the wet ingredients. Stir until just combined. 2. If you want, fold in 1/4 cup of chocolate chips for extra sweetness. 3. Use a tablespoon to scoop out the dough. Place each scoop onto the baking sheet, leaving space between them. 4. Flatten each cookie slightly with the back of a spoon. This helps them bake evenly. 5. Bake for 10-12 minutes. Look for lightly golden edges. 6. After baking, let the cookies cool on the baking sheet for 5 minutes. Then, transfer them to a wire rack to cool completely. To make the best cookies, adjust baking time based on your preference. For softer cookies, bake for 10 minutes. For crunchier ones, go for 12 minutes. Using the right ingredients can help too. You can swap honey with maple syrup for a different flavor. Almond butter is a great choice if you're out of peanut butter. Ripe bananas play a big role in taste. Choose bananas with brown spots for more sweetness. Mash them well for smooth mixing. Keep your cookies fresh by storing them in an airtight container. They last for up to a week at room temperature. If you want to save some for later, freeze them. Place cookies in a freezer-safe bag. They can stay good for about three months. To enjoy frozen cookies, let them thaw at room temperature. You can also warm them in the microwave for a few seconds. Enjoy your tasty treat! Pro Tips Use Overripe Bananas: The riper the banana, the sweeter and more flavorful your cookies will be. Look for bananas with brown spots for the best taste. Experiment with Nut Butters: While peanut butter is delicious, you can substitute it with almond butter or cashew butter for a different flavor profile. Chill the Dough: For even chewier cookies, chill the dough in the refrigerator for 30 minutes before baking. Store Properly: Keep cookies in an airtight container at room temperature for up to a week, or freeze them for longer storage. {{image_2}} You can make these cookies your own with fun add-ins. Here are some ideas: - Incorporating nuts or seeds: Try adding chopped walnuts, almonds, or sunflower seeds. These will give your cookies a nice crunch and boost nutrition. - Using different sweeteners: If you want to change up the sweetness, use agave or a sugar alternative like stevia. Each sweetener gives a different flavor, so experiment to find your favorite. - Different mix-ins: Add dried fruits like raisins or cranberries for extra sweetness. You can also add spices like nutmeg or ginger to change the flavor profile. You can easily adapt this recipe to fit different diets. Here’s how: - Gluten-free options: Use gluten-free oats instead of regular rolled oats. This keeps your cookies safe for those with gluten allergies while still tasting great. - Vegan substitutions: Swap honey for maple syrup to make the cookies vegan. You can also use almond butter or sunflower seed butter instead of peanut butter for a nut-free option. These variations let you customize your Peanut Butter Banana Oat Cookies to fit your taste and dietary needs. Enjoy experimenting! How long do Peanut Butter Banana Oat Cookies last? These cookies can last about one week at room temperature. Store them in an airtight container. If you want them to last longer, you can freeze them. They will stay fresh for up to three months in the freezer. Can I use other nut butters instead of peanut butter? Yes, you can use almond butter, cashew butter, or sunflower seed butter. Each nut butter adds its own flavor. Just make sure the consistency is similar to peanut butter for the best results. Are these cookies healthy? Absolutely! These cookies use natural ingredients. They have oats, bananas, and nut butter, which provide fiber and healthy fats. They are free from refined sugars, depending on your sweetener choice. Can I make these cookies without oats? You can, but oats provide texture and fiber. If you skip them, consider using flour. Almond flour or coconut flour can work, but you may need to adjust the liquid. What should I do if my dough is too wet? If your dough feels sticky, add more oats or flour. Start with a tablespoon at a time. Mix well until you reach the right consistency for scooping. Each cookie has about 110 calories. This makes them a great snack. The key ingredients add much to your health. - Rolled oats provide fiber, which aids digestion. - Peanut butter adds protein and healthy fats. - Bananas give you potassium and natural sweetness. - Honey or maple syrup offers quick energy and taste. These cookies pack a good balance of nutrients. They provide carbohydrates, proteins, and fats in a healthy way. - Carbohydrates come from oats and bananas. They give you lasting energy. - Protein from peanut butter helps build muscle. - Healthy fats in peanut butter support cell health. The cookies also contain essential vitamins and minerals: - Vitamin B6 from bananas helps brain function. - Iron from oats supports red blood cells. - Magnesium in peanut butter helps with muscle and nerve function. These cookies are not just tasty; they are also good for you! These Peanut Butter Banana Oat Cookies are easy to make and fun to tweak. You can mix in your favorite ingredients and adjust the baking time for your perfect cookie. Remember to store them well for freshness or freeze some for later. With this recipe, you’ll enjoy a tasty treat that’s good for you too. Now, go ahead and create your own batch of delicious cookies!

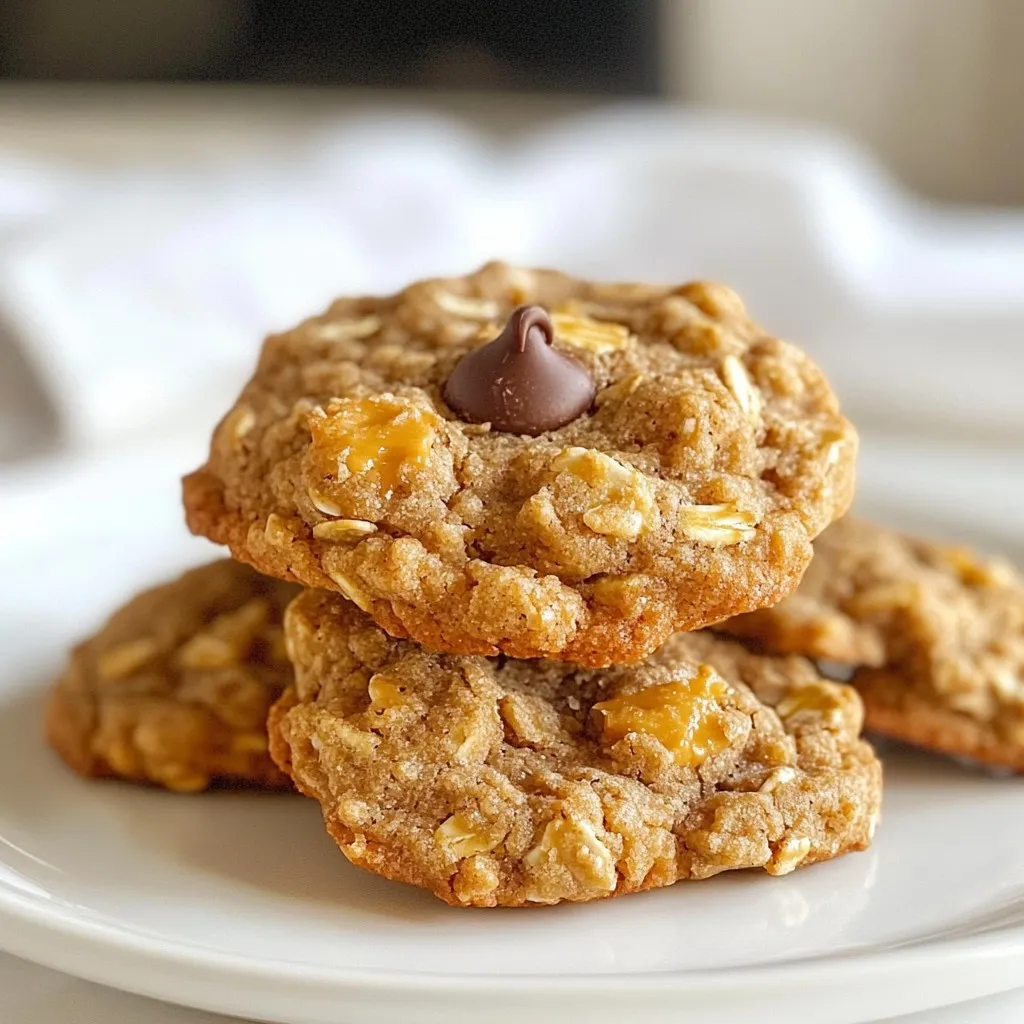
Looking for a delicious and healthy treat? You’ve hit the jackpot with these Peanut Butter Banana Oat Cookies! Made with simple, wholesome ingredients like oats, ripe bananas, and natural peanut …

Read more

Categories Desserts Leave a comment

Chocolate Oreo Lasagna Delightful No-Bake Treat

October 15, 2025January 30, 2025 by Chef Evan
- 1 package of Oreo cookies (about 36 cookies), crushed - 1/2 cup unsalted butter, melted - 8 oz cream cheese, softened - 1 cup powdered sugar - 1 cup whipped topping (like Cool Whip) - 1 package (3.9 oz) instant chocolate pudding mix - 2 cups milk - 1 cup whipped topping (for topping) - Chocolate shavings or crushed Oreos for garnish You need simple, tasty ingredients for this Chocolate Oreo Lasagna. Start with a package of Oreo cookies. These will give the dessert its rich, chocolatey flavor. Crush the cookies and blend them with melted butter. This mixture forms the crust, so press it well into your pan. Next, you’ll need cream cheese. Soften it before mixing it with powdered sugar. This makes a sweet and creamy layer. Gently fold in whipped topping to make it light and fluffy. For the pudding layer, grab a package of instant chocolate pudding mix. Mix it with milk until it thickens. This layer adds a delicious chocolate taste. Don't forget more whipped topping for the final layer. It makes the dessert look pretty and adds creaminess. Finally, choose how to garnish. You can use chocolate shavings or crushed Oreos for a fun touch. Now, you are ready to create a delightful dessert! {{ingredient_image_1}} To make the crust, start by crushing the Oreo cookies. You need about 36 cookies for this. Place them in a bowl and pour in 1/2 cup of melted butter. Mix until the crumbs are evenly coated. Next, press this mixture into the bottom of a 9x13 inch baking pan. Make sure it is packed tightly. Once done, refrigerate the crust to set while you prepare the next layers. Now it’s time for the cream cheese layer. In a mixing bowl, take 8 ounces of softened cream cheese. Add 1 cup of powdered sugar and beat them together until smooth. Then, gently fold in 1 cup of whipped topping. This makes it light and fluffy. Spread this cream cheese mixture evenly over the chilled Oreo crust. Next, prepare the chocolate pudding layer. In another bowl, whisk together 1 package of instant chocolate pudding mix and 2 cups of milk. Whisk for about 2-3 minutes until it thickens nicely. Pour this chocolate pudding over the cream cheese layer. Use a spatula to spread it evenly. For the final layer, take the remaining 1 cup of whipped topping. Spread it over the chocolate pudding layer, covering the entire surface. Now, it's time to chill! Place the lasagna in the fridge for at least 4 hours, or overnight if you can wait. Before serving, add some chocolate shavings or crushed Oreos on top for a fun garnish. - Use a suitable baking pan: A 9x13 inch pan works best for this treat. It gives enough space for all the layers. - Ensure Oreo crumbs are finely crushed: Use a food processor for a fine texture. This helps the crust hold together well. - Substitute with mascarpone or ricotta cheese: These cheeses add a rich flavor twist to the layer. Both options are creamy and delicious. - Experiment with flavored whipped toppings: Try using vanilla or chocolate-flavored whipped toppings. This adds fun flavors to each bite. - Use chocolate pudding with added chocolate chips: This boosts the chocolate taste. The chips add a nice texture as well. - Add melted chocolate for richness: Melt some chocolate and mix it with the pudding. This gives a deep and satisfying chocolate flavor. Pro Tips Chill for Best Results: Allow the lasagna to chill overnight for the best flavor and texture. This helps the layers to set perfectly and makes cutting easier. Customize Your Layers: Feel free to add additional layers such as a layer of peanut butter or a layer of caramel for extra decadence. Use Fresh Ingredients: Ensure your cream cheese and whipped topping are fresh for the best taste. This can make a significant difference in the overall flavor of the dessert. Presentation Matters: When serving, consider using a warm knife to cut through the layers cleanly. This will give you beautiful squares that are perfect for presentation. {{image_2}} Pairing dessert wine with Chocolate Oreo Lasagna can enhance your experience. I suggest a sweet red wine, like a port or a late-harvest Zinfandel. These wines have a rich flavor that matches the chocolate well. You can also try a Moscato, which offers a light, fruity taste. Each sip will balance the creaminess of the lasagna. Adding fresh fruit to your lasagna can bring a new twist. Raspberries or strawberries work great. Their bright flavors cut through the rich chocolate. You can layer them in between the cream cheese and pudding layers. You can also use fruit as a topping. This adds color and freshness to each bite. Switching up the base can create fun new flavors. Instead of Oreos, try using chocolate wafer cookies or graham crackers. You can even use gluten-free cookies if you have dietary needs. Each cookie type brings its own special taste and texture. Don’t be afraid to experiment! Store any leftover Chocolate Oreo Lasagna in the fridge. Use an airtight container to keep it fresh. If you don’t have one, cover the dish with plastic wrap or foil. This helps prevent the dessert from drying out. Leftovers stay tasty for about three to five days in the fridge. You can freeze the lasagna for longer storage. Cut it into squares for easy serving later. Wrap each piece tightly in plastic wrap, then place them in a freezer-safe bag. This method keeps the layers intact. The lasagna can last for up to two months in the freezer. When you're ready to enjoy a piece, take it out of the freezer. Let it thaw in the fridge for several hours or overnight. This keeps the texture creamy and delicious. Avoid microwaving it; this can change the layers and make them soggy. Enjoy your treat! Chocolate Oreo Lasagna stays fresh for about 3 to 5 days in the fridge. After that, it might lose its texture and taste. Make sure to store it in an airtight container for best results. Yes, you can make Chocolate Oreo Lasagna a day or two ahead. This dessert tastes even better when it sits for a while. Just cover it well and refrigerate. It allows the layers to set and flavors to blend nicely. If you don't have whipped topping, you can use heavy cream whipped to soft peaks. Cream cheese mixed with a bit of milk can also work. For a non-dairy option, try coconut whipped cream or almond whipped topping. Absolutely! For a gluten-free version, use gluten-free Oreo cookies. If you need a dairy-free option, substitute cream cheese with a dairy-free alternative and use plant-based milk. Make sure your whipped topping is also dairy-free. These swaps let everyone enjoy this treat! You learned how to make a tasty Chocolate Oreo Lasagna. We covered ingredients, step-by-step instructions, and tips to make it great. Remember, you can change the flavors and make it your own. Store leftovers right to keep them fresh. This dessert is fun to share with friends and family. Enjoy your sweet creation, and don't forget to try different toppings! Delicious moments await you.

Imagine a dessert that combines your favorite cookies and creamy layers—all without baking! Chocolate Oreo Lasagna is the perfect treat to impress your friends and family. With its rich flavors …

Read more

Categories Desserts Leave a comment

Honey Garlic Meatballs Flavorful Dish for Your Table

November 8, 2025January 30, 2025 by Chef Evan
- 1 pound ground beef (or ground turkey for a lighter option) - 1/2 cup breadcrumbs - 1/4 cup grated Parmesan cheese - 2 cloves garlic, minced - 1 egg, beaten - 1 tablespoon soy sauce - 1/4 teaspoon black pepper - 1/2 teaspoon salt - 1 tablespoon olive oil (for frying) For the meatballs, you can choose either ground beef or ground turkey. Beef gives a rich flavor, while turkey is lighter and leaner. Breadcrumbs act as a binder, helping the meatballs hold their shape. The Parmesan cheese adds a nice touch of flavor and creaminess. You’ll also need garlic for a bold taste. The egg helps bind everything together. Soy sauce adds umami, while salt and pepper season the mix perfectly. - 1/2 cup honey - 1/4 cup soy sauce - 2 cloves garlic, minced - 1 teaspoon grated fresh ginger (or 1/4 teaspoon ground ginger) - 1 tablespoon cornstarch mixed with 2 tablespoons water (for thickening) The honey garlic sauce is what makes these meatballs shine. The honey gives sweetness, while soy sauce brings saltiness. Garlic adds depth, and ginger gives a warm spice. To thicken the sauce, you’ll mix cornstarch with water. This creates a nice glaze that clings to the meatballs, making them even more delicious. {{ingredient_image_1}} To start, gather your ingredients. Place 1 pound of ground beef or turkey in a large bowl. Add 1/2 cup of breadcrumbs and 1/4 cup of grated Parmesan cheese. Next, include 2 minced garlic cloves, 1 beaten egg, 1 tablespoon of soy sauce, 1/4 teaspoon of black pepper, and 1/2 teaspoon of salt. Now, mix all these ingredients well. Use your hands to ensure everything combines evenly. Once mixed, shape the meat into small balls, about 1 inch wide. This step is crucial for even cooking. Heat 1 tablespoon of olive oil in a large skillet over medium heat. Once hot, carefully add the meatballs in batches. Avoid crowding the pan; this helps them brown evenly. Cook them for about 6-7 minutes, turning occasionally to get a nice golden color. Once browned, transfer the meatballs to a plate. In the same skillet, it’s time to make the sauce. Combine 1/2 cup of honey, 1/4 cup of soy sauce, 2 minced garlic cloves, and 1 teaspoon of grated fresh ginger. Mix well and bring the mixture to a simmer over medium heat. Once it simmers, add a thickening agent. Mix 1 tablespoon of cornstarch with 2 tablespoons of water. Stir this mixture into the sauce. Keep stirring for about 2 minutes until it thickens slightly. Now, it’s time to coat the meatballs. Add the cooked meatballs back to the skillet. Toss them gently in the honey garlic sauce. Make sure they are well coated and heated through, about 2-3 minutes. Serve these honey garlic meatballs warm. For a fun touch, arrange them on a platter, drizzle with extra sauce, and garnish with sliced green onions or sesame seeds. Toothpicks make for easy eating! To achieve perfectly browned meatballs, heat your olive oil well before adding them. This helps create a nice crust. Make sure not to overcrowd the pan. If you add too many at once, they will steam instead of brown. Cook them in batches for the best results. To ensure your meatballs are cooked thoroughly, use a meat thermometer. The inside should reach 160°F for beef or turkey. If you don’t have a thermometer, cut one open. The center should not be pink. Cooking time is usually about 6-7 minutes in the skillet. For a beautiful look, garnish your meatballs with sliced green onions or sesame seeds. This adds color and a fresh taste. Drizzle some extra honey garlic sauce on top for a glossy finish. Serving with toothpicks makes it easy for guests to enjoy these meatballs. Arrange them on a platter and watch them disappear! This simple touch makes your dish more inviting and fun. Pro Tips Use Fresh Ingredients: Always opt for fresh garlic and ginger for the best flavor in your sauce. Uniform Meatballs: Ensure your meatballs are uniform in size for even cooking; use a cookie scoop for precision. Rest Before Serving: Let the meatballs sit in the sauce for a few minutes before serving to enhance the flavor absorption. Customize the Sauce: Feel free to add a splash of sriracha or chili flakes to the sauce for a spicy kick! {{image_2}} You can swap ground beef for ground chicken or turkey. These lean meats work well. They keep the meatballs moist while reducing fat. If you want a plant-based option, try using lentils or chickpeas. Blend them into a smooth paste. Add breadcrumbs and spices for flavor. This way, you get a tasty, meat-free delight! Want some kick? Add chili flakes to the honey garlic sauce. Start with a pinch and taste. You can always add more heat. For extra sweetness, mix in brown sugar. It gives the sauce a nice depth. Just a tablespoon can make a big difference. Both options add fun twists to your dish! Pair these meatballs with rice, noodles, or fresh veggies. They soak up all the sauce, making every bite delicious. You can also create meatball subs. Just place the meatballs in a bun and drizzle with sauce. For a fun snack, make sliders. Small sandwiches are great for parties! To keep your honey garlic meatballs fresh, follow these tips: - Refrigeration: Place leftover meatballs in an airtight container. They stay good for 3-4 days in the fridge. Always let them cool down first. This prevents moisture buildup, which can make them soggy. - Freezing: For longer storage, freeze the meatballs. Use a baking sheet to arrange them in a single layer. Freeze for about 1-2 hours until firm. Then, transfer them to a freezer bag or container. They can last up to 3 months in the freezer. When it’s time to enjoy your leftovers, here’s how to reheat them: - Oven: Preheat your oven to 350°F (175°C). Place meatballs on a baking sheet. Heat for about 15-20 minutes or until warmed through. This method keeps them juicy. - Microwave: Place meatballs on a microwave-safe plate. Cover with a damp paper towel to keep moisture in. Heat for 1-2 minutes, checking every 30 seconds to avoid overcooking. - Creative Uses: Leftover meatballs are great in many dishes. You can add them to pasta, stir-fries, or even sandwiches. Try them in a meatball sub with melted cheese for a tasty twist! Yes, you can make honey garlic meatballs ahead of time. You can prepare the meatballs and store them in the fridge for up to a day. Just cover them tightly. When you're ready to cook, you can bake or fry them. This saves time on busy days. If you need a substitute for breadcrumbs, try crushed crackers or oats. You can also use almond flour for a low-carb option. Each substitute will give a different texture but will still hold the meatballs together well. Honey garlic meatballs can be gluten-free. Use gluten-free breadcrumbs or oats as a substitute. Make sure the soy sauce is gluten-free, as some brands contain wheat. This way, everyone can enjoy this tasty dish. Cooked meatballs should reach an internal temperature of 160°F. You can use a meat thermometer to check. If you don’t have one, cut a meatball in half. The inside should be no longer pink and juices should run clear. Yes, you can use a different sauce if you like. Try barbecue sauce for a smoky flavor or a spicy sauce for some heat. You can even mix honey with mustard for a tangy twist. Feel free to experiment with flavors you love! This blog post covered how to make honey garlic meatballs from start to finish. We explored main ingredients, step-by-step cooking, and tips for success. You learned about variations and how to store leftovers. In the end, these meatballs are tasty, easy to make, and fun to serve. Try these tips to impress friends and family. Enjoy making this dish, and get ready to savor real flavor!

Are you looking for a dish that wows guests and delights the family? Honey Garlic Meatballs can do just that! With their sweet and savory flavors, these meatballs are perfect …

Read more

Categories Appetizers Leave a comment

Chili Garlic Noodle Stir-Fry Bold and Spicy Delight

December 21, 2025January 29, 2025 by Chef Evan
For this bold and spicy dish, you will need: - 200g rice noodles - 2 tablespoons vegetable oil - 4 cloves garlic, minced - 1 tablespoon fresh ginger, minced - 1 red bell pepper, sliced - 1 carrot, julienned - 1 cup snap peas - 3 green onions, sliced - 3 tablespoons soy sauce - 1 tablespoon chili paste (adjust according to spice preference) - 1 tablespoon sesame oil - 1 tablespoon honey or maple syrup These ingredients create a perfect blend of flavors and textures. The rice noodles provide a soft base. Garlic and ginger add depth. The bell pepper, carrot, and snap peas bring a crisp crunch. To enhance your dish, consider using these garnishes: - Fresh cilantro - Sesame seeds These add fresh notes and crunch. They also make the dish look beautiful. For the best results, I suggest using: - Vegetable oil - Sesame oil Vegetable oil is great for frying. It has a high smoke point. Sesame oil adds a nutty flavor that elevates the dish. You can mix them for a balanced taste. {{ingredient_image_1}} First, boil a pot of water. Add the rice noodles and cook them as the package says. This usually takes about 3 to 5 minutes. Once done, drain the noodles. Rinse them under cold water. This step keeps them from sticking together. Set your noodles aside for later. Next, heat 2 tablespoons of vegetable oil in a large skillet or wok. Use medium-high heat for this. Add 4 minced garlic cloves and 1 tablespoon of minced ginger. Sauté these for about 30 seconds. You want to smell that great aroma. This step adds a nice kick to your dish. Now it’s time for the fun part—add your veggies! Toss in 1 sliced red bell pepper, 1 julienned carrot, and 1 cup of snap peas. Stir-fry them for about 3 to 4 minutes. You want them tender but still crisp. This keeps your stir-fry colorful and crunchy. Add your cooked rice noodles into the skillet. In a small bowl, mix 3 tablespoons of soy sauce, 1 tablespoon of chili paste, 1 tablespoon of sesame oil, and 1 tablespoon of honey or maple syrup. Pour this sauce over the noodles. Toss everything together well. You want all the flavors to blend nicely. Finally, add 3 sliced green onions to the skillet. Stir-fry for another 1 to 2 minutes. This adds freshness to your dish. The green onions will soften just a bit but will still add a nice crunch. Once everything is mixed well, remove the skillet from heat. Plate your stir-fry neatly. You can garnish it with fresh cilantro and a sprinkle of sesame seeds if you like. Serve it hot and enjoy your bold and spicy delight! You can control the heat in your chili garlic noodle stir-fry. Start with one tablespoon of chili paste. If you love spice, add more. Remember, you can always add spice, but you can't take it away. Taste the dish as you cook. This way, you find the perfect balance for your palate. To boost flavor, think about adding more ingredients. Try adding some sliced mushrooms for earthiness. You can also use baby bok choy for a nice crunch. A splash of lime juice brightens the dish. Consider incorporating nuts like cashews or peanuts for added texture. Fresh herbs like basil or mint can bring a refreshing twist. Stir-frying is all about speed and high heat. Use a large skillet or wok. Heat the oil until it shimmers but does not smoke. Add ingredients in stages. Start with garlic and ginger for aroma, then add veggies. This keeps everything crisp and vibrant. Always keep the food moving in the pan. This ensures even cooking and prevents burning. Pro Tips Perfectly Cooked Noodles: To ensure your rice noodles are not overcooked, keep an eye on them while boiling. They should be slightly undercooked, as they will continue to cook in the stir-fry. Customize the Heat: Adjust the amount of chili paste based on your spice tolerance. Start with a small amount, and you can always add more to the pan if needed. Fresh Ingredients Matter: Use fresh vegetables for the best flavor and texture. Crisp, seasonal veggies will elevate your stir-fry and make it more nutritious. Garnish for Flavor: Don’t skip the garnish! Fresh cilantro and sesame seeds not only add visual appeal but also enhance the overall flavor of your dish. {{image_2}} You can add protein to change the dish. Tofu is a great choice. It absorbs flavors well. Cut it into cubes and sauté until golden. Chicken is another option. Slice it thin and cook it until no longer pink. Shrimp cooks fast and adds a nice taste. Just toss it in during the last few minutes. Feel free to swap in your favorite veggies. Broccoli florets add crunch and color. Steam or stir-fry it for a few minutes. Zucchini is another tasty swap. Slice it thin and add it just before the noodles. You can also mix in bell peppers or baby corn. The key is to keep it colorful and fresh. You can change the noodles to fit your taste. Egg noodles are soft and hearty. They work well with the sauce. Soba noodles are made from buckwheat. They add a nutty flavor. Make sure to cook them according to package instructions. This keeps them from getting mushy. Each noodle type brings its own flavor and texture. After enjoying your chili garlic noodle stir-fry, store leftovers in an airtight container. Let the stir-fry cool before sealing it. This helps keep flavors fresh. You can keep it in the fridge for up to three days. Make sure to label the container with the date. To reheat, you have a few options. The best way is to use a skillet. Heat a little oil over medium heat. Add the stir-fry and cook until it’s hot. You can also use the microwave. Place the stir-fry in a bowl and cover it with a damp paper towel. Heat in short bursts, stirring in between. If you want to keep it longer, consider freezing the stir-fry. Place it in a freezer-safe container. It can last up to two months in the freezer. When ready to eat, thaw it overnight in the fridge. Then reheat it using the skillet method for the best taste. You can use many noodles instead of rice noodles. Egg noodles work well. You can also try udon or even whole wheat spaghetti. Each option gives a different taste and texture. Yes, you can easily make this dish vegetarian or vegan. Just use soy sauce that is labeled vegan. Swap honey for maple syrup or agave syrup. For protein, add tofu or tempeh. To make more servings, simply double or triple the ingredients. Keep the same cooking steps. This way, you maintain the great flavors while feeding more people. The spice level depends on how much chili paste you use. One tablespoon adds a nice kick. If you want it spicier, add more. Start with less if you prefer milder tastes. Yes, you can use other sauces in this dish. Try teriyaki sauce for a sweet twist. Hoisin sauce adds depth and sweetness too. Just remember to adjust the flavors accordingly. This blog post covered how to create a delicious Chili Garlic Noodle Stir-Fry. We explored key ingredients, step-by-step cooking instructions, and helpful tips to enhance flavor. You learned about optional garnishes, protein variations, and how to store leftovers correctly. Experiment with ingredients to make the dish your own. Enjoy the process and remember, good cooking takes practice. Keep it fun and tasty!

Are you ready for a flavor explosion? My Chili Garlic Noodle Stir-Fry brings bold heat and spice to your table. With just a few simple ingredients and easy steps, you …

Read more

Categories Dinner Leave a comment

Vegan Peanut Butter Oat Cookies Simple and Tasty Treat

October 31, 2025January 29, 2025 by Chef Evan
- 1 cup natural peanut butter (smooth or chunky) - 1 cup rolled oats - 1/2 cup brown sugar (packed) - 1/4 cup maple syrup - 1 tsp vanilla extract - 1/2 tsp baking soda - 1/4 tsp salt - 1/2 cup dark chocolate chips (dairy-free) - Optional: 1/4 cup chopped nuts (such as walnuts or pecans) Each ingredient in these cookies plays a key role. Peanut butter adds flavor and healthy fats. It gives cookies a rich, nutty taste. Rolled oats provide texture and fiber, making them chewy. Brown sugar adds sweetness and moisture, making cookies soft. Maple syrup enhances sweetness with a nice flavor twist. Vanilla extract brings depth, while baking soda helps cookies rise. Salt balances flavors and enhances the taste. Dark chocolate chips offer a sweet, creamy contrast. If you choose to add nuts, they give a satisfying crunch. You can swap peanut butter for almond or sunflower seed butter for nut allergies. Instead of brown sugar, use coconut sugar for a lower glycemic index option. Maple syrup can be replaced with agave syrup or simple syrup. For a gluten-free choice, use gluten-free oats. You can skip the chocolate chips for a plain cookie or add dried fruit for a different taste. {{ingredient_image_1}} First, set your oven to 350°F (175°C). This is the ideal temperature for baking our cookies. While the oven heats, get a baking sheet and line it with parchment paper. This will help the cookies not stick. A lined sheet makes cleanup easy, too. In a mixing bowl, add 1 cup of natural peanut butter. You can use smooth or chunky peanut butter based on your taste. Next, add 1/2 cup of packed brown sugar, 1/4 cup of maple syrup, and 1 teaspoon of vanilla extract. Mix well until the mixture is smooth. This blend gives our cookies a sweet and nutty flavor. In another bowl, whisk together 1 cup of rolled oats, 1/2 teaspoon of baking soda, and 1/4 teaspoon of salt. The oats give texture and chewiness to the cookies. Baking soda helps them rise, while salt balances the sweetness. Now, slowly add the dry mix to the wet mix. Stir until everything is well combined. If you like, fold in 1/2 cup of dark chocolate chips and 1/4 cup of chopped nuts. Using a tablespoon, scoop out the dough and form small balls. Place them on the prepared baking sheet. Flatten each ball slightly with a fork. Bake your cookies for 10-12 minutes until the edges turn golden brown. After baking, let them cool on the sheet for 5 minutes before moving them to a wire rack. Enjoy your delicious cookies! To get the right cookie texture, use the right mix of ingredients. Aim for a balance of peanut butter and oats. Too much peanut butter makes cookies soft. Too many oats make them dry. The key is one cup of each. When mixing, don’t over-mix. Stir just until everything combines. This keeps your cookies chewy and soft. Natural peanut butter is great for these cookies. It has fewer additives than regular peanut butter. This means more flavor and a more pure taste. Stir it well before using. The oil often separates, so mix it back in. If you like a crunchy texture, use chunky peanut butter. It adds fun bits in every bite. To keep your cookies fresh, store them in an airtight container. If you want them to last longer, place parchment paper between layers. This keeps them from sticking together. They can stay fresh for up to a week. If you want to save them longer, freeze them. Just wrap each cookie in plastic wrap and place them in a freezer bag. They can last for up to three months! Pro Tips Storage Tip: Store the cookies in an airtight container to keep them fresh for up to a week. Peanut Butter Choice: Use natural peanut butter for the best flavor and texture; avoid brands with added sugar or oils. Add-ins Customization: Feel free to experiment with different mix-ins like dried fruits or seeds for added texture and flavor. Chilling Dough: For thicker cookies, chill the dough for 30 minutes before baking to help them hold their shape. {{image_2}} If you want nut-free cookies, try sunflower seed butter instead of peanut butter. This swap keeps the taste great while avoiding nuts. You can also use pumpkin seed butter. Both options add a nice flavor and keep the cookies moist. To make these cookies gluten-free, use certified gluten-free oats. They taste just as good and won’t change the texture. Check the label to ensure your oats are gluten-free. You can also use almond flour or coconut flour for a different texture. Spice up your cookies with extra flavors! Add a pinch of cinnamon for warmth or a dash of nutmeg for a cozy touch. You can also mix in a bit of cocoa powder for a chocolatey twist. Consider using flavored extracts like almond or coconut for new tastes. This way, you can create cookies that are uniquely yours! Each cookie has about 120 calories. This is based on a recipe that makes 12 cookies. The cookies contain around 6 grams of fat, mostly from peanut butter. You also get about 15 grams of carbs and 3 grams of protein. The dark chocolate chips add some extra flavor and a few calories too. The main star, peanut butter, is packed with protein and healthy fats. It helps keep you full and energized. Rolled oats provide fiber, aiding digestion and heart health. Maple syrup offers a natural sweetness with some vitamins and minerals. Dark chocolate chips are rich in antioxidants, which can help with heart health. You can swap brown sugar or maple syrup with other sweeteners. For example, agave syrup has a lower glycemic index. This means it may not spike your blood sugar as much. Coconut sugar is another option; it has a slight caramel flavor and retains some nutrients. Each sweetener has different calorie counts, so check the labels. Yes, you can freeze these cookies! Just let them cool completely first. Place them in an airtight container or a freezer bag. They last up to three months in the freezer. When you’re ready to eat, just thaw them at room temperature. To make gluten-free Vegan Peanut Butter Oat Cookies, use certified gluten-free oats. Ensure all other ingredients are gluten-free too. Many brands offer gluten-free options for maple syrup and baking soda. This small change makes a big difference. If you need a substitute for peanut butter, try almond butter or sunflower seed butter. Both have a similar texture. They add a unique taste to the cookies. Just make sure the substitute is smooth and creamy for best results. Homemade Vegan Peanut Butter Oat Cookies last about one week at room temperature. Store them in an airtight container to keep them fresh. You can also store them in the fridge for up to two weeks. If you freeze them, they can last for months! You learned about making Vegan Peanut Butter Oat Cookies from scratch. We discussed the key ingredients, their roles, and how to substitute them. I shared step-by-step instructions to guide your baking. Tips for achieving the best texture and storing cookies helped ensure success. Variations allow you to customize flavors and accommodate dietary needs. Finally, I included nutritional insights to support healthier choices. These cookies are simple, tasty, and fun to make. Enjoy baking with friends and family!

Are you craving a sweet and healthy treat? Look no further! My Vegan Peanut Butter Oat Cookies are simple and tasty. Made with just a few wholesome ingredients, these cookies …

Read more

Categories Desserts Leave a comment

Honey Garlic Glazed Meatballs Simple and Flavorful Meal

October 28, 2025January 28, 2025 by Chef Evan
- 1 pound ground beef or turkey - 1/2 cup breadcrumbs - 1/4 cup grated Parmesan cheese - 1 large egg - 2 cloves garlic, minced - 1 teaspoon onion powder - 1 teaspoon Italian seasoning - Salt and pepper to taste - 1/4 cup honey - 1/4 cup soy sauce (low sodium) - 1 tablespoon apple cider vinegar These ingredients come together to create a tasty dish. The ground meat gives the meatballs their base, while breadcrumbs help them stay together. Parmesan adds a nice flavor. The egg binds everything well. Garlic and spices bring in great taste. - 1 teaspoon cornstarch (for thickening sauce) - 1 tablespoon sesame seeds (for garnish) - Sliced green onions (for garnish) Cornstarch helps thicken the sauce for a rich texture. Sesame seeds and green onions make the dish look nice. They also add extra flavor. You can choose to use them or leave them out based on your taste. {{ingredient_image_1}} - Preheat the oven to 400°F (200°C). - Prepare the baking sheet with parchment paper. Start by preheating your oven. This step gets it nice and hot for the meatballs. Next, line your baking sheet with parchment paper. This helps to keep the meatballs from sticking. - Combine ground meat, breadcrumbs, cheese, egg, and spices. In a large bowl, mix the ground beef or turkey with breadcrumbs. Add grated Parmesan cheese, the egg, and minced garlic. Sprinkle in onion powder, Italian seasoning, salt, and pepper. Stir until everything is blended well. - Form the mixture into meatballs. - Bake for 15-20 minutes until cooked through. Now, take small portions of the mixture and shape them into balls, about 1 inch wide. Place them on the baking sheet. Bake the meatballs for 15 to 20 minutes. They should be browned and cooked through, reaching an internal temperature of 160°F (70°C). This gives you tender and flavorful meatballs every time. To make sure your meatballs hold together, you need to bind the ingredients well. Use 1/2 cup breadcrumbs and 1 large egg to help with this. The egg acts like glue. Mix everything until combined, but don’t overdo it. For the right meatball size, aim for 1 inch in diameter. This size cooks evenly and stays juicy. If you want a larger meatball, adjust the cooking time. To make the sauce thick, whisk the honey, soy sauce, and apple cider vinegar in a saucepan. Add 1 teaspoon cornstarch if you like it thicker. Heat it on medium and stir until it simmers. This should take about 3-5 minutes. If your sauce is too sweet, add a dash of soy sauce. For more sweetness, just add a bit more honey. Always taste as you go to find the perfect balance. Pro Tips Use Fresh Ingredients: Fresh garlic and high-quality ground meat can significantly enhance the flavor of your meatballs. Always opt for fresh over pre-packaged when possible. Adjust the Sweetness: If you prefer a less sweet sauce, reduce the amount of honey or add more soy sauce to balance the flavors according to your taste. Keep Meatballs Uniform: Make sure your meatballs are the same size for even cooking. Using a cookie scoop can help achieve uniformity. Serve with a Side: These meatballs pair beautifully with rice or noodles. Consider serving them over steamed jasmine rice or alongside stir-fried vegetables for a complete meal. {{image_2}} You can use different types of meat for your meatballs. Ground chicken or pork works great. They both bring a lighter flavor. If you prefer, you can also try plant-based meat. This option is perfect for vegetarians. It gives you the same texture and taste, minus the meat. Adding spices or herbs can boost the flavor of your meatballs. Try mixing in some smoked paprika or fresh parsley. These will add depth and freshness. You can also sneak in some veggies. Finely chopped carrots or zucchini make a great addition. They add moisture and nutrients. Another fun idea is to incorporate cheese. A bit of mozzarella or feta inside the meatballs adds a nice surprise. It melts as they cook, making each bite creamy and tasty. These small changes can turn a simple meal into something special. To keep your honey garlic glazed meatballs fresh, first let them cool. Place the meatballs and sauce in an airtight container. Refrigerate them for up to three days. If you have sauce left over, store it separately. This prevents the meatballs from getting soggy. When you’re ready to eat, just reheat them on the stove or in the microwave. If you want to save some for later, freezing is a great option. Place the cooled meatballs in a single layer on a baking sheet. Freeze them for about an hour. Once frozen, transfer them to a freezer-safe bag. This way, they won’t stick together. You can store them for up to three months. To reheat, thaw the meatballs in the fridge overnight. Then, warm them in a skillet over medium heat. Adding a splash of water or broth keeps them moist. You can also microwave them in short bursts. This helps keep the texture just right. Enjoy your delicious meatballs anytime! You can pair these meatballs with many sides. Here are my favorites: - Rice: Serve over white or brown rice for a filling meal. - Noodles: Try them with lo mein or rice noodles. - Vegetables: Steamed broccoli or green beans add color and crunch. - Salad: A fresh salad balances the sweet and savory flavors. - Bread: Garlic bread or dinner rolls soak up the extra sauce. Yes, you can make these meatballs ahead of time. Here are some easy tips: - Prepare and Cook: Make and bake the meatballs. Let them cool completely. - Storage: Place them in an airtight container. They can last about 3 days in the fridge. - Freezing: Freeze cooked meatballs in a single layer on a baking sheet. Once frozen, transfer to a freezer bag. They last up to three months. - Reheating: To reheat, bake at 350°F until warm or use the microwave. If you want a thicker sauce, here’s how: - Cornstarch: Mix 1 teaspoon of cornstarch with a bit of water. Stir it into the sauce while it simmers. - Simmer Longer: Cook the sauce for an extra few minutes to reduce it naturally. - Add Honey: A little extra honey can also help thicken and sweeten the sauce. In this blog post, we've explored the delicious recipe for honey garlic glazed meatballs. We covered key ingredients, including ground beef, breadcrumbs, and flavorful sauces. You learned the step-by-step process for mixing, shaping, and baking the meatballs. We shared tips on perfecting their texture and provided options for flavor variations. Lastly, we discussed how to store and reheat leftovers effectively. Enjoy experimenting with this recipe to suit your tastes. Every bite promises to be tasty and satisfying.

Looking for a simple and tasty meal? Honey Garlic Glazed Meatballs are the answer! These little bites pack a flavorful punch. With just a few easy ingredients, you can impress …

Read more

Categories Dinner Leave a comment

Sweet Potato Brownies Rich and Decadent Treat

November 16, 2025January 27, 2025 by Chef Evan
- 1 cup cooked and mashed sweet potatoes (about 1 medium sweet potato) - 1/2 cup almond butter (or peanut butter) - 1/4 cup maple syrup - 1/4 cup cocoa powder - 1/2 cup oat flour - 1/2 teaspoon baking powder - 1/2 teaspoon vanilla extract - 1/4 teaspoon salt - 1/2 cup dark chocolate chips (dairy-free if desired) - 1 cup equals 240 milliliters. - 1/2 cup equals 120 milliliters. - 1/4 cup equals 60 milliliters. - 1/2 teaspoon equals 2.5 milliliters. You can use canned sweet potatoes if you want to save time. Almond butter can switch with peanut butter or any nut butter you like. Maple syrup can be replaced with honey for a different flavor. Oat flour can be made by grinding oats in a blender. Cocoa powder can be switched with carob powder for a unique taste. Dark chocolate chips can be replaced with milk chocolate or white chocolate. {{ingredient_image_1}} First, heat your oven to 350°F (175°C). This step is key for the brownies to bake evenly. Grab an 8x8 inch baking pan. You can grease it with some oil or line it with parchment paper. Lining helps the brownies come out easier. In a mixing bowl, put 1 cup of cooked and mashed sweet potatoes. You can use about 1 medium sweet potato for this. Add in 1/2 cup of almond butter or peanut butter. Then, pour in 1/4 cup of maple syrup. Stir these together until the mix is smooth and creamy. This is the heart of your brownie mix. Next, sift in 1/4 cup of cocoa powder and 1/2 cup of oat flour. Add 1/2 teaspoon of baking powder, 1/2 teaspoon of vanilla extract, and 1/4 teaspoon of salt. Mix until it turns into a thick batter. This is where the magic happens! Now fold in 1/2 cup of dark chocolate chips. Save a few to sprinkle on top later. Pour the batter into your prepared pan. Spread it out evenly. If you saved some chocolate chips, sprinkle them on top. Bake the brownies in the preheated oven for 25 to 30 minutes. To check if they are done, insert a toothpick into the center. It should come out mostly clean, with just a few moist crumbs. After baking, let them cool in the pan for about 10 minutes. Then, move them to a wire rack to cool completely before slicing. Enjoy your sweet potato brownies! To get the best texture, use smooth, well-mashed sweet potatoes. The more you mash, the creamier the brownies. Be sure to measure one cup of sweet potatoes after mashing. If you want them extra fudgy, don't overbake them. A toothpick should come out with a few moist crumbs. You can boost the flavor of your brownies in simple ways. Try adding a pinch of cinnamon or nutmeg for warmth. You can also mix in some crushed nuts for a nice crunch. If you want a deeper chocolate flavor, add an extra tablespoon of cocoa powder. Dark chocolate chips add richness, so don't skip them! One big mistake is not measuring the ingredients correctly. Too much flour can make the brownies dry. Make sure to sift the cocoa powder to avoid lumps. Another mistake is not letting the brownies cool enough. Cutting them too early can lead to a messy result. Lastly, watch the baking time closely. It’s better to check a bit early than to overbake. Pro Tips Use Fresh Sweet Potatoes: For the best flavor and texture, use freshly cooked sweet potatoes instead of canned ones. Adjust Sweetness: Depending on your taste, you can increase or decrease the amount of maple syrup to suit your preference. Experiment with Nut Butters: Try different nut butters like cashew or sunflower seed butter for a unique twist on flavor. Storage Tips: Store leftovers in an airtight container in the fridge for up to a week or freeze for longer storage. {{image_2}} To make vegan sweet potato brownies, swap almond butter with a nut-free option. Use sunflower seed butter or tahini instead. Replace maple syrup with agave nectar for a similar sweetness. Ensure your dark chocolate chips are dairy-free. These small changes keep your brownies rich and plant-based. For gluten-free brownies, use oat flour as in the recipe. Oat flour is safe and tasty for those who avoid gluten. You can also use almond flour or a gluten-free blend if you prefer. This way, you enjoy the same texture without the gluten. You can add nuts or other mix-ins to your brownies for extra flavor. Chopped walnuts or pecans give a nice crunch. You might also try adding shredded coconut or dried fruit like cranberries. Just fold these in before you pour the batter into the pan. This step adds texture and makes each bite special. You can store leftover sweet potato brownies in an airtight container. Keep them at room temperature for about 3 days. If you want to keep them fresh longer, store them in the fridge. They can last up to a week in the fridge. Just make sure they are sealed well. This helps to keep their rich and decadent taste. To freeze your brownies, first cut them into squares. Wrap each square tightly in plastic wrap. Place the wrapped brownies in a freezer bag or container. They can stay frozen for up to 3 months. When you want one, just take it out and let it thaw in the fridge. This keeps them moist and tasty. If you want to enjoy warm brownies, reheat them easily. Place a brownie on a microwave-safe plate. Heat it in the microwave for about 10-15 seconds. This warms it up without drying it out. You can also use the oven. Preheat it to 350°F (175°C). Place the brownie on a baking sheet and heat for about 5-10 minutes. Enjoy your warm treat! Yes, you can use fresh sweet potatoes. Just cook and mash them first. I suggest boiling or baking until soft. This way, you get the best flavor and texture. These brownies last about four to five days at room temperature. Store them in an airtight container to keep them fresh. You can also refrigerate them for up to a week. Yes, sweet potato brownies can be healthy. They use natural sweeteners and healthy fats. Sweet potatoes add vitamins and fiber. Just enjoy them in moderation! Absolutely! You can use peanut butter, cashew butter, or even sunflower seed butter. Each nut butter gives a different flavor, so choose what you like best. To test doneness, insert a toothpick into the center. It should come out mostly clean; a few moist crumbs are okay. If the toothpick has wet batter, bake for a few more minutes. In this post, we explored the full process of making sweet potato brownies. We covered ingredients, step-by-step instructions, and helpful tips. We also looked at variations and how to store them. Sweet potato brownies can be a fun treat for everyone. With your new skills, you can impress friends and family. Enjoy baking this tasty dessert!

Get ready to indulge in a rich and decadent treat that won’t break your diet! Sweet potato brownies are the perfect blend of taste and health. With their fudgy texture …

Read more

Categories Desserts Leave a comment

Banana Oatmeal Breakfast Cookies Simple and Tasty Recipe

November 24, 2025January 18, 2025 by Chef Evan
- 2 ripe bananas, mashed - 1 cup rolled oats - 1/2 cup almond butter or peanut butter - 1/4 cup honey or maple syrup - 1/2 teaspoon vanilla extract - 1/2 teaspoon cinnamon - 1/4 teaspoon salt - 1/4 cup dark chocolate chips (optional) - 1/4 cup chopped nuts (walnuts or pecans, optional) To make these banana oatmeal breakfast cookies, you will need a few simple ingredients. Start with two ripe bananas. The riper the bananas, the sweeter your cookies will be. Next, gather one cup of rolled oats. This is the heart of your cookie and gives it texture. Use half a cup of almond butter or peanut butter for a rich and creamy base. You can choose honey or maple syrup for sweetness; a quarter cup is just right. Add a half teaspoon of vanilla extract for nice flavor. Sprinkle in a half teaspoon of cinnamon and a quarter teaspoon of salt to enhance all the tastes. Optionally, you can add a quarter cup of dark chocolate chips for a sweet treat. Chopped nuts, like walnuts or pecans, can also be included for extra crunch. Remember, the optional ingredients make your cookies even more special, but they will still be tasty without them! - Calories per cookie: About 90 - Protein: 2g - Fat: 4g - Carbohydrates: 12g - Key ingredients offer health benefits. Each cookie has about 90 calories. They contain 2 grams of protein, 4 grams of fat, and 12 grams of carbs. The bananas provide potassium, while oats add fiber. Almond butter gives healthy fats, and honey adds natural sweetness. These cookies are not just delicious; they also offer good nutrition to start your day right. {{ingredient_image_1}} - Preheat your oven to 350°F (175°C). - Line a baking sheet with parchment paper. Starting with a hot oven helps the cookies bake evenly. Parchment paper stops sticking and makes cleanup easy. - Combine mashed bananas, almond butter, honey (or maple syrup), and vanilla extract. In a big bowl, mash the bananas until smooth. Then, stir in almond butter, honey, and vanilla. Mix until it is creamy and well-blended. This step adds flavor and moisture to the cookies. - Add rolled oats, cinnamon, and salt. - If using, fold in chocolate chips and nuts. Next, add the rolled oats, cinnamon, and salt to the wet mix. Stir until everything combines. If you like, fold in chocolate chips and nuts. They will add extra texture and taste. - Drop spoonfuls onto the baking sheet. - Flatten cookies slightly. - Bake for 12-15 minutes. Using a spoon, place heaping tablespoons of dough on the sheet. Leave about 2 inches between each scoop. Then, flatten them a bit with the back of the spoon. This helps them bake nicely. Bake for 12-15 minutes until the edges are golden brown. Enjoy the warm, sweet smell while they bake! To get the best cookie, focus on the dough's consistency. It should be thick but not dry. If it feels too wet, add a bit more oats. For flattening the cookies, use the back of a spoon. Press gently but firmly. This helps them cook evenly. Spices and extracts can boost flavor. I love adding nutmeg or ginger for warmth. A splash of almond extract adds a nice twist. For extra fun, mix in dried fruit or seeds. Try raisins, cranberries, or pumpkin seeds for added texture. These cookies are great for breakfast. Pair them with yogurt or fresh fruit. You can also enjoy them with a warm cup of tea. For presentation, place the cookies on a nice plate. Drizzle honey over them and add banana slices for a lovely display. Pro Tips Use Overripe Bananas: The riper the bananas, the sweeter and more flavorful your cookies will be. Look for bananas with brown spots for the best results. Experiment with Nut Butters: While almond butter is delicious, feel free to try other nut butters like cashew or sunflower seed butter for different flavor profiles. Customize with Add-Ins: Get creative by adding dried fruits, seeds, or your favorite spices to the dough for extra nutrition and flavor. Storage Tips: Store the cookies in an airtight container at room temperature for up to 5 days or freeze them for longer storage. They make a great on-the-go breakfast! {{image_2}} You can easily make these cookies to fit your diet. For a gluten-free option, use gluten-free oats. They work just as well and keep the texture right. If you want a vegan version, swap honey for maple syrup. This change keeps the sweetness without any animal products. Feel free to switch up the nut butter. Almond butter adds a nice flavor, but peanut butter is tasty too. You can also add fruits to the mix. Try adding fresh berries or a splash of applesauce. These fruits add moisture and extra taste. Want more texture? Use dried fruits like raisins, cranberries, or apricots. They give a chewy bite to each cookie. Adding seeds like chia or flaxseed can bring a crunch. These seeds are healthy and boost the nutrition of your cookies. To store your banana oatmeal breakfast cookies at room temperature, place them in an airtight container. This keeps them soft and fresh. You can stack the cookies, but add parchment paper between layers to avoid sticking. Keep them in a cool, dry place. They will stay good for about three days. Here are some tips for keeping cookies fresh: - Make sure they cool completely before storing. - Avoid direct sunlight or heat sources. - Use a container that fits snugly to limit air exposure. For long-term storage, freezing cookies is a great option. To freeze, let the cookies cool completely. Then, place them in a single layer on a baking sheet and freeze for one hour. Once frozen, transfer them to a zip-top bag. Remove as much air as possible before sealing. They can last for up to three months in the freezer. To thaw cookies, take them out of the freezer and leave them at room temperature for about 30 minutes. For quicker thawing, you can microwave one cookie for about 10-15 seconds. This warms them nicely. To reheat cookies, the best method is using the oven. Preheat your oven to 350°F (175°C). Place the cookies on a baking sheet and heat for about 5-7 minutes. This will restore their chewy texture and warm up the flavors. Another method is using the microwave. Heat one cookie for 10-15 seconds. This will keep them soft and enjoyable. Avoid overheating, as this can dry them out. Yes, you can use quick oats. However, rolled oats give a better texture. Quick oats absorb more liquid and may make the cookies softer. Rolled oats maintain their shape. This keeps the cookies chewy and hearty. Choose rolled oats for a more classic cookie. To make these cookies vegan, swap the honey for maple syrup. You can also use chia seeds or flaxseed as egg substitutes. Mix one tablespoon of chia seeds or flaxseed with three tablespoons of water. Let it sit until it thickens. This will help bind the cookies. These cookies can last about a week at room temperature. Store them in an airtight container. For longer storage, place them in the fridge. They can last up to two weeks in the fridge. You can also freeze them for up to three months. Yes, you can substitute almond butter. Peanut butter works well too. If you have nut allergies, try sunflower seed butter. It has a similar texture and flavor. You can also use tahini for a different taste. These cookies are simple and tasty, made from just a few healthy ingredients. You start with ripe bananas and oats, then mix in nut butter and a sweetener. Baking them brings out their flavor, making a delightful treat. You can also try fun twists, like adding nuts or swapping for gluten-free options. Store them right to keep them fresh. With these tips, you’ll enjoy delicious cookies without the fuss. Happy baking!

Are you ready for a breakfast treat that’s both simple and delicious? My Banana Oatmeal Breakfast Cookies are the perfect way to kick-start your day! Packed with wholesome ingredients like …

Read more

Categories Breakfast Leave a comment

Garlic Parmesan Roasted Radishes Flavorful and Easy Dish

November 28, 2025January 16, 2025 by Chef Evan
For Garlic Parmesan Roasted Radishes, you need a few simple items: - 1 lb radishes, trimmed and halved - 3 tablespoons olive oil - 4 cloves garlic, minced - 1/2 teaspoon salt - 1/4 teaspoon black pepper - 1/4 teaspoon smoked paprika - 1/2 cup grated Parmesan cheese - Fresh parsley, chopped (for garnish) These fresh radishes bring a crunchy texture. Olive oil helps them roast well. Garlic adds a savory touch, while salt and pepper give the right flavors. Smoked paprika adds a hint of warmth, and Parmesan cheese gives a nice cheesy crust. If you want to take your radishes to the next level, consider these optional ingredients: - Lemon zest for brightness - A dash of cayenne for heat - Fresh thyme or rosemary for an herbal note These options can change the flavor profile. Lemon zest brightens the dish, while cayenne adds spice. Fresh herbs bring a lovely aroma and taste. Each serving has important nutrients. Here’s a quick breakdown: - Calories: About 150 - Protein: 5g - Carbohydrates: 10g - Fiber: 3g - Fat: 11g Radishes are low in calories but high in fiber. The Parmesan adds a bit of fat and protein. This dish is a healthy choice that satisfies your taste buds. Enjoy Garlic Parmesan Roasted Radishes for a tasty side! {{ingredient_image_1}} First, gather your ingredients. You’ll need 1 pound of radishes, 3 tablespoons of olive oil, and 4 cloves of minced garlic. You will also need 1/2 teaspoon of salt, 1/4 teaspoon of black pepper, and 1/4 teaspoon of smoked paprika. Lastly, grab 1/2 cup of grated Parmesan cheese and some fresh parsley for garnish. Next, trim your radishes and cut them in half. This helps them roast evenly. In a large bowl, mix the halved radishes with olive oil, minced garlic, salt, black pepper, and smoked paprika. Toss everything well, so the radishes get a nice coat. Now, preheat your oven to 425°F (220°C). Spread the seasoned radishes on a baking sheet lined with parchment paper. Make sure they are in a single layer. This allows them to roast better. Roast the radishes for 20 minutes. After 20 minutes, take the baking sheet out of the oven. Sprinkle the grated Parmesan cheese evenly over the radishes. This adds a delicious flavor and texture. Return the baking sheet to the oven and roast for an additional 10 to 12 minutes. The radishes should become tender, and the cheese should melt and turn golden. Once the radishes are done, take them out of the oven. Let them cool for a few minutes to avoid burns. Then, transfer the radishes to a serving dish. Garnish with fresh chopped parsley for a pop of color and flavor. Serve warm and enjoy this tasty dish! When picking radishes, look for firm ones. They should feel heavy for their size. Avoid radishes with soft spots or dark marks. The color should be bright and vibrant. Fresh radishes have a crisp texture and a mild smell. Smaller radishes tend to be sweeter and less spicy. To roast radishes well, cut them in half for even cooking. Toss them with olive oil and spices to add flavor. Use parchment paper on your baking sheet to prevent sticking. Spread the radishes out in a single layer for even roasting. Roast them at a high temperature, around 425°F (220°C). This helps them caramelize and get a nice color. Stir them halfway through cooking for the best results. Garlic Parmesan roasted radishes make a great side dish. They pair well with grilled meats or fish. You can also serve them with pasta or rice. For a fresh touch, add a squeeze of lemon juice on top. Garnish with chopped parsley for color and flavor. These radishes are tasty hot or at room temperature. Enjoy them as a snack, too! Pro Tips Choose Fresh Radishes: Look for firm radishes with vibrant color to ensure the best flavor and texture. Adjust the Seasoning: Feel free to customize the spice levels by adding more smoked paprika or even a pinch of cayenne for extra heat. Experiment with Cheese: While Parmesan adds a delicious flavor, try swapping it with Pecorino Romano or a dairy-free alternative for different taste profiles. Serve Immediately: For the best texture and flavor, serve the roasted radishes right after they come out of the oven while they're still hot and crispy. {{image_2}} You can change the flavor of Garlic Parmesan Roasted Radishes. Try fresh herbs like thyme or rosemary. They add a lovely aroma and taste. You can also use dried herbs if fresh ones aren’t available. A pinch of oregano or basil can work well too. For a spicy kick, add red pepper flakes or cayenne pepper. This makes the dish more exciting and unique. To make this dish vegan, swap out the Parmesan cheese. Nutritional yeast gives a cheesy flavor without dairy. It’s a great choice for those who avoid animal products. You can also try a vegan cheese that melts well. Just be sure to check its ingredients. Use olive oil as your main fat. This keeps the dish rich and tasty. Pair your radishes with tasty dips or sauces. A simple garlic aioli works wonders. Just mix vegan mayo with garlic and lemon juice. You could also serve them with a spicy salsa or a tangy yogurt dip. For a refreshing touch, try a lemon vinaigrette. This adds brightness to each bite. Each option brings out the flavors of the radishes in a fun way. To keep Garlic Parmesan Roasted Radishes fresh, let them cool first. Place them in an airtight container. This helps to lock in flavor and moisture. Store them in the fridge. They stay good for about three to four days. Avoid leaving them out at room temperature for too long. When you're ready to enjoy leftovers, you can reheat them easily. Preheat your oven to 350°F (175°C). Spread the radishes in a single layer on a baking sheet. Heat them for about 10 to 15 minutes. This will help them regain their crispness. You can also use a microwave, but they may not be as crispy. Garlic Parmesan Roasted Radishes can last up to four days in the fridge. If you freeze them, they keep for about one month. However, freezing may change their texture. For the best flavor, try to eat them fresh. Enjoy the taste of this dish while it’s at its peak! Yes, you can prepare the radishes ahead. Toss them with oil and spices. Store in the fridge for up to a day. When ready, roast them as directed. The radishes will still taste great. Radishes are very healthy! They are low in calories and high in fiber. They also have vitamin C and antioxidants. Eating radishes can help with digestion and boost your immune system. Plus, they add a nice crunch to your meals. Yes, feel free to switch the cheese! Cheddar or feta can work well. Each cheese will give a different taste. Experiment to find your favorite. Just keep the amount similar to Parmesan for best results. We’ve explored garlic Parmesan roasted radishes, covering ingredients, preparation, and tips. You learned about optional flavor enhancers, nutritional info, and variations to suit your taste. Don’t forget storage tips to keep leftovers fresh. Enjoy experimenting with herbs or dairy-free options. This dish can fit any meal. With these insights, you can create delicious roasted radishes that everyone will love. Enjoy your cooking adventure!

Looking for a fun and tasty dish that’s quick to make? You’ll love Garlic Parmesan Roasted Radishes! They are full of flavor and perfect as a side dish. Plus, they’re …

Read more

Categories Appetizers Leave a comment

Strawberry Spinach Salad Nutrient-Packed Delight

October 8, 2025January 13, 2025 by Chef Evan
- 4 cups fresh spinach leaves, washed and dried - 2 cups strawberries, hulled and sliced - 1/4 cup feta cheese, crumbled - 1/4 red onion, thinly sliced I love using fresh spinach leaves for this salad. They are crisp and full of vitamins. Strawberries add a sweet touch. You can slice them to fit well with the salad. Feta cheese brings a creamy texture and salty taste. The red onion gives a nice crunch and flavor balance. - 1/4 cup almonds, sliced or slivered - 1/4 cup balsamic vinegar - 2 tablespoons honey - 1/4 cup olive oil Sliced almonds add a nutty crunch. They also give healthy fats that are good for you. Balsamic vinegar adds a tangy zing to the dressing. Honey sweetens the dressing naturally. Olive oil helps blend all flavors together smoothly. - Salt - Pepper Season with salt and pepper to taste. These simple spices enhance all the fresh flavors. Use them wisely to boost the taste of your salad. {{ingredient_image_1}} First, grab a small bowl. In this bowl, whisk together the balsamic vinegar, honey, and olive oil. Mix until everything blends well. This step is key for great flavor. Next, taste the dressing. Add salt and pepper as needed. Adjust it to fit your taste buds. Now, take a large salad bowl. Combine the fresh spinach leaves, sliced strawberries, crumbled feta cheese, sliced almonds, and thinly sliced red onion. Gently mix these ingredients together. You want to see all the colors in your salad. After that, drizzle your prepared dressing over the salad. Toss everything gently until all the ingredients are coated. This helps the flavors mix well. For a great look, serve the salad in a large bowl for family-style sharing. You can also plate it individually. For an elegant touch, sprinkle extra feta and almonds on top. Add a few whole strawberries for a pop of color. Serve the salad right away to enjoy the fresh taste. If you want, you can refrigerate it for up to 30 minutes. This allows the flavors to meld nicely, but it’s best enjoyed fresh. - Alternatives for feta cheese: You can use goat cheese if you want a similar taste. Another option is ricotta for a creamier texture. For a dairy-free choice, try crumbled tofu, which soaks up flavors well. - Different nuts to consider: If you want a crunch without almonds, try walnuts or pecans. Both add unique flavors and textures. Sunflower seeds are a great nut-free option, too. - Adjusting sweetness or acidity: You can make the salad sweeter by adding more honey. If you want it tangier, add more balsamic vinegar. Balance is key! - Adding herbs for extra freshness: Fresh mint or basil can liven up the salad. Just a few leaves can add a burst of flavor. Cilantro also works well if you enjoy its taste. - Best practices for prep ahead: You can wash and slice strawberries a few hours before serving. Keep them in the fridge to stay fresh. Prepare the dressing in advance, too. Store it in a jar and shake before using. Mix all the salad ingredients just before serving for the best texture. Pro Tips Use Fresh Ingredients: Always opt for fresh spinach and ripe strawberries for the best flavor and texture in your salad. Customize Your Nuts: Feel free to substitute almonds with walnuts or pecans for a different crunch and flavor profile. Chill Your Salad: Let the salad sit in the refrigerator for 30 minutes before serving to enhance the flavors as they meld together. Presentation Matters: For an elegant touch, serve individual portions with extra feta and strawberries on top as a garnish. {{image_2}} You can add other fruits to your strawberry spinach salad. Blueberries, raspberries, or sliced peaches work well. These fruits bring a burst of flavor. You can also use seasonal fruits. In summer, try fresh peaches or nectarines. In fall, consider apples or pears. Each fruit adds its own sweetness and texture. Mixing fruits keeps the salad exciting. Adding protein makes the salad more filling. Grilled chicken or shrimp is a great choice. They add a nice texture and flavor. If you prefer vegetarian options, quinoa is a smart choice. It’s packed with protein and has a nutty taste. You can also add beans for extra fiber. These proteins make your salad a full meal. You can experiment with different dressings for your salad. A honey mustard dressing gives a sweet touch. A lemon vinaigrette adds a fresh zing. Store-bought dressings are quick but check the labels. Homemade dressings are often healthier and tastier. You can whisk together olive oil, vinegar, and your favorite herbs. This way, you control the flavors and ingredients. Store your salad in a clean, dry container. I recommend using an airtight container. This helps keep the salad fresh. Place it in the fridge right away. The salad stays fresh for about 2 days. However, the spinach may wilt over time. To keep it crisp, store the dressing separately. Add it just before you eat. You can freeze this salad, but I do not suggest it. Freezing changes the texture of fresh ingredients. If you must freeze it, do this: store the spinach and strawberries separately. Place them in freezer-safe bags. When ready to use, thaw them in the fridge overnight. After thawing, enjoy them in smoothies or as a topping, not as a salad. Spinach is rich in vitamins A and C. It also has iron, which helps your blood. Strawberries are full of antioxidants and fiber. They can aid digestion and improve heart health. Together, they create a tasty and healthy salad. You can prepare the salad ahead. Just mix the spinach, strawberries, and other ingredients. However, keep the dressing separate until you are ready to eat. This keeps the salad fresh and crisp. If you want a change from feta, use goat cheese. It has a similar texture but a creamier taste. You can also try ricotta or a vegan cheese for a different flavor. Yes, you can make this salad vegan easily. Just leave out the feta cheese. Use a vegan cheese or skip the cheese entirely. The salad will still taste great! To keep the salad fresh, store it in an airtight container. Keep the dressing in a separate container. This way, the salad won’t get soggy and can last longer in the fridge. This blog post outlined the key ingredients, instructions, tips, and variations for a fresh and delicious salad. You learned how to prepare a tasty dressing and assemble your salad with vibrant produce and nuts. I shared how to enhance flavors and suggested delicious mix-ins. Remember to store leftovers properly for the best taste. With these steps and tips, you can enjoy a healthy meal that's simple and satisfying. Embrace your creativity and have fun with this salad!

Are you ready to enjoy a tasty and healthy dish? Our Strawberry Spinach Salad is a nutrient-packed delight that is both refreshing and colorful. This salad combines fresh spinach, juicy …

Read more

Categories Salads Leave a comment
Older posts
Newer posts
← Previous Page1 … Page119 Page120 Page121 … Page124 Next →

TOSSED FLAVORS

Where flavors are fresh, vibrant, and ready to toss! 🥗

PAGES

Home About Contact Privacy Policy Terms & Conditions Cookie Policy GDPR Policy Copyright Policy Disclaimer

CATEGORIES

Appetizers Desserts Salads Breakfast Dinner

Contact

  • Pinterest
  • Mail
Copyright © 2026 Tossed Flavors. All rights reserved.