Skip to content
tossedflavors.com
  • Home
  • Appetizers
  • Desserts
  • Salads
  • Breakfast
  • Dinner
  • Privacy Policy
  • Contact
  • About

Chef Evan

Easy Amish Apple Fritter Bread Delightful and Simple Recipe

August 7, 2025 by Chef Evan
Here is what you will need for the Easy Amish Apple Fritter Bread: - Dry Ingredients: - 2 cups all-purpose flour - 1 cup granulated sugar - 1 tablespoon baking powder - 1 teaspoon ground cinnamon - ½ teaspoon salt - Wet Ingredients: - 1 cup milk - 2 large eggs - ½ cup vegetable oil - 1 teaspoon vanilla extract - Apple Filling Ingredients: - 2 large apples, peeled, cored, and diced - ½ cup brown sugar - 1 teaspoon ground cinnamon (for filling) - Ingredients for Glaze: - 1 cup powdered sugar - 2 tablespoons milk This recipe combines simple, fresh ingredients to create a delightful bread. The apples give a sweet and tangy flavor, while the spices add warmth. You can find the Full Recipe for more detailed instructions to bring this dish to life. First, set your oven to 350°F (175°C). This is the perfect temperature for baking. Next, grab a 9x5-inch loaf pan. Generously spray it with non-stick spray. This helps the bread come out easily once baked. In a large bowl, mix the dry ingredients. Combine 2 cups of all-purpose flour, 1 cup of granulated sugar, 1 tablespoon of baking powder, 1 teaspoon of ground cinnamon, and ½ teaspoon of salt. Whisk them together well. In a separate bowl, blend the wet ingredients. Whisk 1 cup of milk, 2 large eggs, ½ cup of vegetable oil, and 1 teaspoon of vanilla extract until smooth. Slowly pour the wet mix into the dry mix. Fold them together gently. Do not overmix; this keeps the bread light and fluffy. Now, let’s make the apple filling. In a small bowl, mix 2 diced apples, ½ cup of brown sugar, and 1 teaspoon of cinnamon. Stir to coat the apples evenly. Pour half of the batter into your loaf pan. Spread it out evenly. Then, layer half of the apple mixture on top of the batter. Next, pour the rest of the batter over the apples. Smooth it out gently. Finally, sprinkle the remaining apples on top. Use a knife to swirl them lightly into the batter. To bake, place the loaf pan in the oven. Bake for 50-60 minutes. Check for doneness by inserting a toothpick into the center. If it comes out clean, the bread is ready. To make your Easy Amish Apple Fritter Bread fluffy, use room temperature eggs and milk. This helps the batter mix well. Avoid overmixing the batter; mix just until combined. Overmixing can lead to a dense loaf. Also, ensure your baking powder is fresh. Old baking powder can stop the bread from rising. Common pitfalls include not greasing the pan enough. A well-greased pan helps the bread come out easily. Also, do not skip the apple filling. It adds sweetness and moisture. Lastly, check the bread at the 50-minute mark. Each oven is different, so keep an eye on it! This bread pairs well with coffee or tea. A warm slice with a hot drink is delightful. For gatherings, slice the loaf on a pretty platter. Dust the top with powdered sugar for a festive look. You can also add thin apple slices or mint leaves for color. To store leftovers, wrap the bread in plastic wrap. Keep it at room temperature for up to three days. For longer storage, place it in the fridge. To reheat, slice a piece and warm it in the microwave for about 15 seconds. This keeps the bread soft and tasty. You can also toast slices in a pan for a crunchy outside. Enjoy your Easy Amish Apple Fritter Bread fresh! {{image_4}} You can easily make this dish your own. Adding nuts can give it a nice crunch. Chopped walnuts or pecans work well. You can also try different fruits. Pears or peaches are great substitutes for apples. For spice, you can mix in nutmeg or ginger. These spices add warmth and depth to the flavor. You can even try a dash of cardamom for an exotic twist. Feel free to experiment and find your favorite flavor blend. If you need a gluten-free version, you have options. Use almond flour or a gluten-free blend. Make sure it has a good mix of starches and flours. You might need to add a bit of extra liquid. Gluten-free flour can absorb more moisture. Keep an eye on the batter's texture. It should be thick but pourable. This small change can make a big difference in your bread's texture. Want to try mini loaves or muffins? It's easy to convert this recipe. For mini loaves, use smaller pans and reduce the bake time. Bake for about 30-40 minutes. For muffins, fill each cup about two-thirds full. Bake them for 18-22 minutes. Use a toothpick to check doneness. This way, you can enjoy individual portions. Perfect for sharing or for a quick snack! Amish apple fritter bread has roots in Pennsylvania. The Amish people hold traditions dear. This dish reflects their love for simple, wholesome food. Apples often grow in their orchards, making them a common ingredient. This bread is a sweet treat that shows their resourcefulness. It brings families together during gatherings and celebrations. Sharing this bread is a way to show love and hospitality. In the past, making apple fritter bread took a lot of time. Traditional recipes required more steps and special techniques. Today, the easy Amish apple fritter bread recipe lets everyone enjoy this treat. It uses common ingredients and is quick to prepare. While it’s simple, it still keeps the classic flavors intact. You will taste the sweet apples and warm spices. The glaze adds a lovely finish. This recipe stays true to the heart of Amish cooking while fitting modern kitchens. It makes gourmet baking easy and fun for everyone! To keep your Easy Amish Apple Fritter Bread fresh, store it in an airtight container. This way, it can last for about three to four days at room temperature. If you want it to last longer, you can refrigerate it. This will extend its shelf life to about a week. Just remember, the bread might dry out a bit in the fridge, so enjoy it fresh if you can! Yes, you can freeze this bread! To freeze it, first let the bread cool completely. Then, wrap it tightly in plastic wrap, followed by aluminum foil. This helps prevent freezer burn. When you want to enjoy it again, remove the wrap and let it thaw in the fridge overnight. For a quick option, you can thaw it at room temperature for a couple of hours. This bread pairs well with many drinks and snacks. Here are some great options: - A hot cup of coffee - A glass of cold milk - Sweet tea for a refreshing touch - Creamy butter or fruit preserves on the side Feel free to get creative with your pairing! The warm, sweet bread goes well with many flavors. For more great ideas, check out the Full Recipe for inspiration. In this article, we explored how to make Easy Amish Apple Fritter Bread. You learned about key ingredients like flour, apples, and sugar. I shared a step-by-step guide, ensuring you get the best texture without overmixing. You found tips to serve, store, and even adjust the recipe. Remember, this dish carries a rich history, rooted in comfort and community. Enjoy your baking journey, and share this delightful bread with loved ones. It’s sure to be a hit at any gathering!

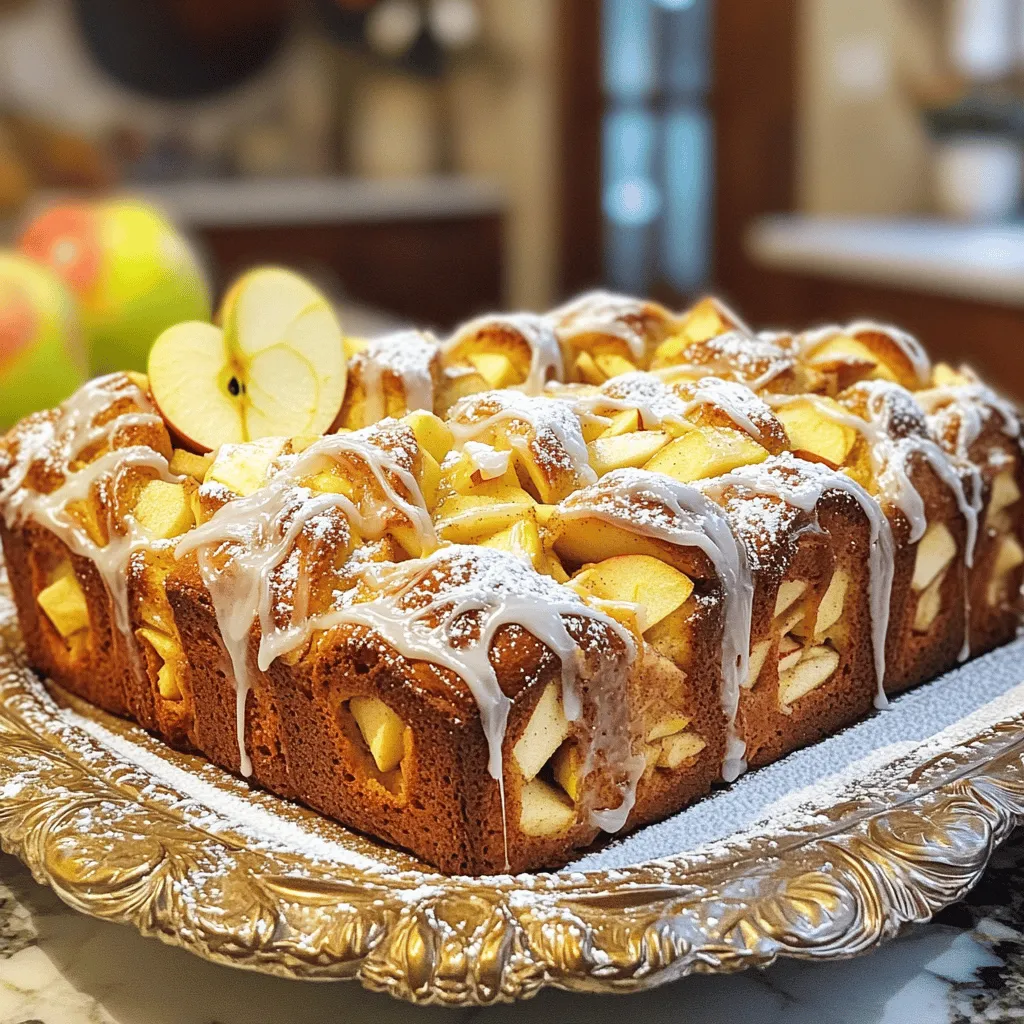
If you love warm, sweet treats, you’re in for a real delight! Today, I’ll share my easy recipe for Amish Apple Fritter Bread. This dish is soft, flavorful, and perfect …

Read more

Categories Desserts Leave a comment

Easy Pumpkin Spice Sauce Simple and Tasty Recipe

August 7, 2025 by Chef Evan
- 1 cup canned pumpkin puree - 1 cup coconut milk (or your preferred milk alternative) - 1/2 cup brown sugar - 2 teaspoons pumpkin pie spice (or a blend of ground cinnamon, nutmeg, and ginger) - 1 teaspoon pure vanilla extract - A pinch of salt - Medium-sized saucepan - Whisk or wooden spoon - Airtight container for storage To make this easy pumpkin spice sauce, you need simple and tasty ingredients. Canned pumpkin puree gives you a smooth base. Coconut milk or your favorite milk alternative makes it creamy. Brown sugar adds a lovely sweetness. For spices, you can use pumpkin pie spice. If you want, you can also mix ground cinnamon, nutmeg, and ginger. Pure vanilla extract fills your sauce with rich flavor. Don't forget a pinch of salt to balance everything. You will need a medium-sized saucepan to cook the sauce. A whisk or wooden spoon is great for stirring. Finally, use an airtight container to store your sauce once it cools. You can find the full recipe in the previous sections. Enjoy making this cozy pumpkin spice sauce! To start, take a medium-sized saucepan. Set it over medium heat. In this pan, combine these ingredients: - 1 cup canned pumpkin puree - 1 cup coconut milk (or your preferred milk alternative) - 1/2 cup brown sugar Use a whisk or a wooden spoon. Stir until the mix is smooth and well combined. This base is the heart of your sauce. Next, continue cooking the mixture. Stir it occasionally. You want it to gently simmer for about 5 minutes. Keep an eye on it to avoid burning. Once it starts to simmer, add these spices: - 2 teaspoons pumpkin pie spice (or a mix of ground cinnamon, nutmeg, and ginger) - 1 teaspoon pure vanilla extract - A pinch of salt Stir well. This step fills your kitchen with a wonderful aroma! Now, lower the heat to a gentle simmer. Let the sauce cook for another 5 minutes. This allows the flavors to blend beautifully. After that, remove the saucepan from heat. Allow the sauce to cool slightly. When it’s cool, transfer it to storage. You can keep it in an airtight container for up to one week. For more details, check the Full Recipe. You can enjoy this pumpkin spice sauce in many ways. Here are my favorites: - Drizzle it over pancakes or waffles for a warm treat. - Use it as a dip for crisp apple slices. - Stir it into your coffee or hot chocolate for a cozy drink. You might want your sauce thicker or thinner. Here are some easy tips: - For a thicker sauce, cook it longer. Let it simmer and reduce. - For a thinner sauce, add a bit more coconut milk. Stir until smooth. Want to spice it up? Here are some ideas to boost the flavor: - Try adding a pinch of ground nutmeg or cardamom for a twist. - Adjust the sweetness by adding more or less brown sugar. Taste as you go. These tips will help you make the most of your easy pumpkin spice sauce. Enjoy! {{image_4}} You can easily swap out regular milk for different milk alternatives. Almond milk, oat milk, or soy milk all work well. Each brings a unique flavor. You can also change the sweetener. Instead of brown sugar, try maple syrup or agave nectar. They add a nice taste without dairy. Want to jazz up your pumpkin spice sauce? Adding chocolate or caramel can give it a sweet twist. Just mix in a bit of melted chocolate or a drizzle of caramel while cooking. You can also infuse the sauce with more spices. Nutmeg, for example, adds a warm note that pairs perfectly with pumpkin. You can play with flavors based on the season. For the holidays, consider adding a hint of orange zest or a splash of rum for a festive touch. In spring or summer, lighten it up with some citrus zest or fresh herbs. This makes the sauce bright and fresh, perfect for warm days. You can find the full recipe for the pumpkin spice sauce above. Enjoy trying these variations and making this recipe your own! To keep your pumpkin spice sauce fresh, store it in an airtight container. This method prevents air from spoiling the sauce. Place it in the fridge after it cools. The sauce lasts up to one week in the refrigerator. Always check for any changes in smell or texture before use. For longer storage, you can freeze the pumpkin spice sauce. Pour the sauce into a freezer-safe container, leaving some space at the top. This space allows for expansion as it freezes. Seal it tightly, and label with the date. When ready to use, transfer the sauce to the fridge overnight to thaw. You can also place it in a bowl of warm water for quicker thawing. When reheating, aim to keep the sauce smooth. The best method is to use the stovetop. Pour the sauce into a small saucepan over low heat. Stir often to prevent sticking. If you prefer a quicker option, use the microwave. Heat in short intervals, stirring each time. This way, you avoid hot spots that can change the texture. Enjoy your cozy pumpkin spice sauce warm! Yes, you can use fresh pumpkin. First, choose a sugar pumpkin. These pumpkins are smaller and sweeter. Cut the pumpkin into quarters and remove the seeds. Next, roast the pieces in an oven at 350°F (175°C) for about 45 minutes. Once soft, scoop out the flesh and blend it until smooth. This gives you fresh pumpkin puree for your sauce. To make pumpkin spice sauce sugar-free, try using stevia or erythritol. These sweeteners provide sweetness without the calories. You may need to adjust the amount because they are sweeter than sugar. Start with half the amount and taste as you go. Pumpkin spice sauce is very versatile. Here are some ideas: - Pancakes or waffles: Drizzle it on top for a cozy breakfast. - Oatmeal: Stir it in for extra flavor and warmth. - Coffee or hot chocolate: Mix it in for a tasty treat. - Apple slices: Use it as a dip for a fun snack. The sauce lasts up to one week in the fridge. Store it in an airtight container to keep it fresh. Check for signs of spoilage, like an off smell or mold. If you notice these, it’s best to toss it. This blog post showed you how to make a tasty pumpkin spice sauce. We covered everything from the main ingredients like pumpkin puree and coconut milk to easy cooking steps. I shared tips on serving options and how to adjust the sauce’s consistency. You learned about storage, freezing, and reheating methods too. Now, you can experiment with different flavors and variations. Enjoy your homemade sauce on pancakes, in coffee, or with snacks! Your kitchen adventures can bring warmth and joy to every meal.

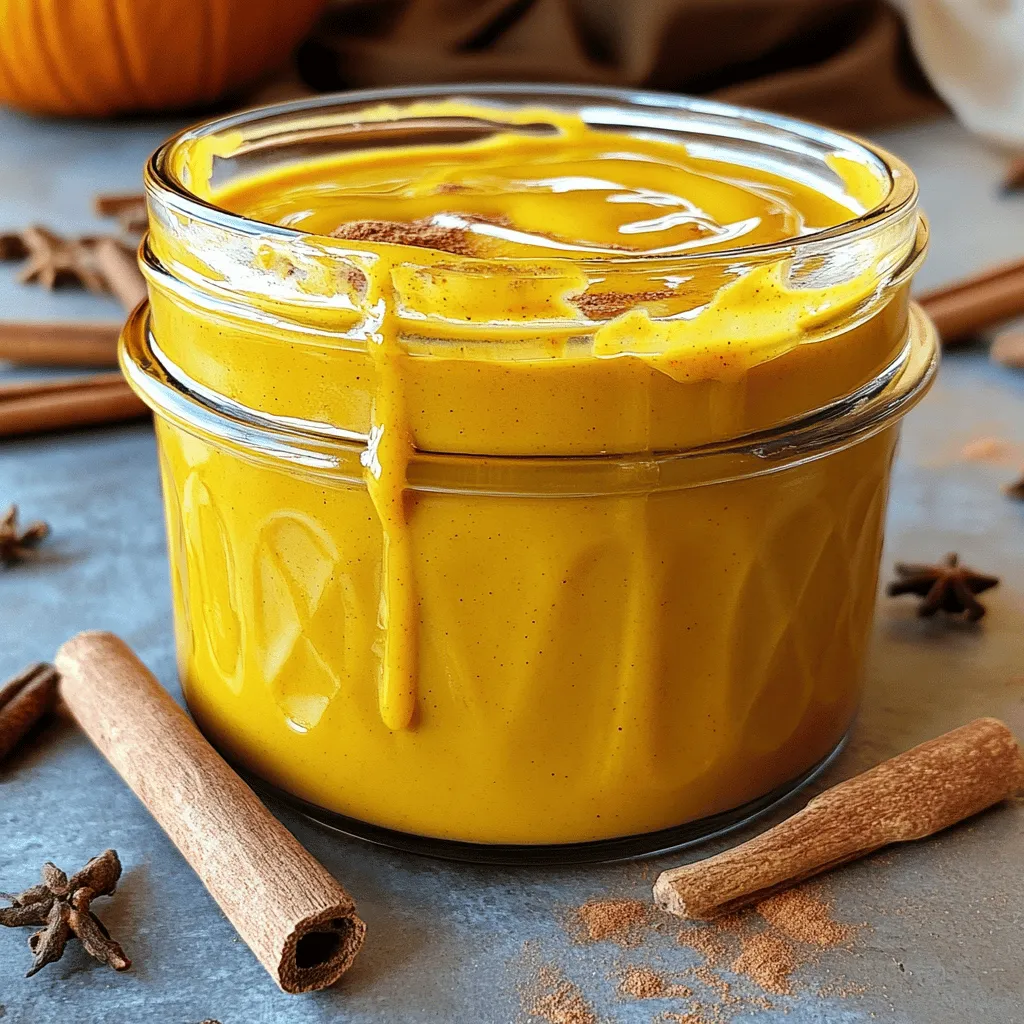
Are you ready to bring the cozy taste of fall into your kitchen? Today, I’m sharing an easy pumpkin spice sauce recipe that’s both simple and delicious. With just a …

Read more

Categories Desserts Leave a comment

Chewy Maple Pumpkin Cookies Perfectly Sweet Delight

August 7, 2025 by Chef Evan
- 1 cup pumpkin puree - 1/2 cup unsalted butter - 1/2 cup packed brown sugar - 1/2 cup granulated sugar - 1 large egg - 1/4 cup pure maple syrup - 2 teaspoons vanilla extract - 2 cups all-purpose flour - 1 teaspoon baking soda - 1 teaspoon baking powder - 1 teaspoon ground cinnamon - 1/2 teaspoon ground nutmeg - 1/4 teaspoon ground ginger - 1/4 teaspoon salt - Optional: 1/2 cup semi-sweet chocolate chips, 1/2 cup chopped walnuts For these chewy maple pumpkin cookies, I focus on fresh flavors and simple steps. You will need key ingredients that blend well together. Pumpkin puree adds moisture and a warm taste. Unsalted butter gives a rich base that helps with texture. Brown sugar adds a hint of caramel flavor, while granulated sugar balances the sweetness. Next, the egg binds everything and adds lift. Maple syrup enhances the cookie's flavor with a natural sweetness. Vanilla extract rounds it out with a lovely aroma. The dry ingredients include all-purpose flour, baking soda, and baking powder. They help the cookies rise. Spices like cinnamon, nutmeg, and ginger bring warmth and depth to the taste. Salt is crucial, as it enhances all the flavors. If you want to add more fun, consider chocolate chips or walnuts. They both give a nice crunch and extra flavor. - Electric mixer - Mixing bowls - Cookie scoop or tablespoon - Baking sheet - Parchment paper To make the process smooth, use an electric mixer. It makes creaming butter and sugars easy. Mixing bowls are essential for separating wet and dry ingredients. A cookie scoop or tablespoon helps shape perfect cookies. Line your baking sheet with parchment paper. This prevents sticking and makes cleanup simple. With these ingredients and tools, you’re ready to create a delightful treat. For the full recipe, check out the complete directions. - Preheat oven to 350°F (175°C). - Line baking sheet with parchment paper. - Cream together butter, brown sugar, and granulated sugar. - Add pumpkin, egg, maple syrup, and vanilla, mixing until combined. I find that creaming the butter and sugars well helps create a fluffy base. It gives the cookies a nice rise and great texture. Make sure the butter is soft. This step ensures a smooth mix. - Whisk together flour, baking soda, baking powder, and spices. - Gradually incorporate dry mixture into wet ingredients. Mixing the dry ingredients separately helps distribute the leavening agents evenly. This avoids clumps and ensures every bite is tasty. Be gentle when combining the mixtures. Overmixing can lead to tough cookies. - Fold in optional chocolate chips or walnuts. - Scoop dough onto the baking sheet. I love adding chocolate chips for a sweet touch. If you prefer nuts, walnuts add great crunch. Use a cookie scoop for even-sized cookies to help them bake evenly. - Bake for 12-15 minutes until edges are set. - Cool on the baking sheet before transferring to a wire rack. Watch the cookies closely. You want the edges set and tops slightly cracked. Let them cool for a few minutes on the sheet. This helps them firm up before moving them to a rack. Enjoy the aroma while they bake! For the full recipe, check the details above. - Avoid overmixing the dough: Mix just until combined. This keeps cookies soft. - Let the cookies cool briefly on the baking sheet: This helps them set up without getting hard. - Use fresh pumpkin puree for a richer taste: Fresh pumpkin brings out the best flavor. - Experiment with spices for flavor depth: Try adding cloves, allspice, or cardamom for a unique twist. - Serve on a rustic platter: A wooden plate adds charm and warmth. - Decorate with mini pumpkins or autumn leaves: This gives a festive autumn touch. These tips will help you create delightful chewy maple pumpkin cookies that shine in taste and look. Check out the Full Recipe for more details. {{image_4}} To make these chewy maple pumpkin cookies nut-free, simply omit the walnuts. If you want a bit of crunch, consider using sunflower seeds instead. They add a nice texture and flavor while keeping the cookies safe for those with nut allergies. If you need a gluten-free option, swap the all-purpose flour with a gluten-free blend. Many blends are designed to mimic regular flour, so the cookies will still be soft and chewy. Just check the ingredients to ensure it works for your needs. For a fun twist, think about adding white chocolate chips or some candy corn. These additions give your cookies a festive look and sweet flavor. It’s a great way to mix things up and impress your friends and family. These variations make the chewy maple pumpkin cookies even more enjoyable. You can create your perfect cookie every time! For the full recipe, check out the previous section. - Store cookies in an airtight container. - Use parchment paper between layers to prevent sticking. Keeping your cookies fresh is key. An airtight container helps maintain moisture. It also keeps the cookies soft and chewy, just as they should be. To avoid sticking, place parchment paper between layers. This simple step saves your cookies from losing their lovely texture. - Freeze shaped dough or finished cookies for later use. - Best consumed within 2 months of freezing. If you want to save some cookies for later, freezing works great. You can freeze the dough or the baked cookies. Shape the dough into balls and place them on a baking sheet. Once frozen, transfer them to a freezer bag. For baked cookies, let them cool completely first. Wrap them tightly in plastic wrap and place them in a freezer bag. Remember, they taste best when eaten within two months. Enjoy your chewy maple pumpkin cookies whenever you crave a sweet treat! The balance of wet and dry ingredients and the careful mixing process contributes to their chewy texture. When you mix the butter and sugars well, they form a nice base. The pumpkin puree adds moisture, while the flour gives structure. Mixing just enough keeps the cookies soft and chewy. Yes, canned pumpkin puree works well in this recipe for convenience. It saves time and still gives a rich flavor. Just make sure to use 100% pure pumpkin and not pumpkin pie filling. This ensures your cookies taste fresh and delicious. When stored properly, they can last up to a week at room temperature. Place them in an airtight container to keep them soft. If you want them to last longer, put them in the fridge. Just remember to let them sit at room temperature before eating. Yes, substitute the egg with a flax egg and use a dairy-free butter alternative. To make a flax egg, mix one tablespoon of ground flaxseed with three tablespoons of water. Let it sit for a few minutes until it thickens. This keeps your cookies tasty while making them vegan-friendly. Check the Full Recipe for more details. These cookies combine tasty pumpkin with warm spices, creating a delicious treat. You learned how to gather the ingredients, mix them well, and bake properly. Plus, I shared tips for chewiness and flavor. Remember, you can play with variations to fit your needs. Enjoy them with family or friends, and don’t forget proper storage for lasting freshness. Baking these cookies can be fun and rewarding! Now, gather your ingredients and get started. Your kitchen adventure awaits!

Get ready to delight your taste buds with my Chewy Maple Pumpkin Cookies! These soft, sweet treats bring together warm spices and maple syrup in every bite. Perfect for fall …

Read more

Categories Desserts Leave a comment

No Bake Caramel Apple Cake Easy and Delicious Dessert

August 7, 2025 by Chef Evan
- 2 cups graham cracker crumbs - 1/2 cup unsalted butter, melted - 1 can (14 oz) sweetened condensed milk - 1 cup heavy whipping cream - 1/4 cup powdered sugar - 2 large apples, peeled, cored, and diced (preferably Granny Smith) - 1/2 cup caramel sauce - 1 teaspoon vanilla extract - 1/2 teaspoon ground cinnamon - 1/4 cup chopped nuts (walnuts or pecans) for garnish When I create a no bake caramel apple cake, I always choose the best ingredients. Each one plays a key role in making this dessert shine. For the crust, graham cracker crumbs add a sweet and crunchy base. The melted butter keeps the crumbs together and adds richness. Using sweetened condensed milk gives a smooth sweetness to the cream filling. Heavy whipping cream is essential for a light and fluffy texture. Powdered sugar helps stabilize the whipped cream, adding just the right amount of sweetness. I prefer Granny Smith apples. Their tartness contrasts well with the sweet caramel. A dash of cinnamon and vanilla extract enhances the flavors, making the dessert even more delicious. For a little crunch, I love to sprinkle chopped nuts on top. They add texture and make the cake look pretty. You can find all these ingredients in your local grocery store. Check the Full Recipe for additional tips on ingredient sourcing. You can swap ingredients if needed. For a gluten-free crust, use gluten-free graham crackers. Coconut cream can replace heavy whipping cream for a dairy-free option. If you want less sweetness, try using less sweetened condensed milk. I suggest using brands that focus on quality. For graham crackers, I like Nabisco or Honey Maid. For butter, any unsalted brand will work well. For sweetened condensed milk, Eagle Brand is a trusted choice. Choose heavy cream with a high fat content, like Land O'Lakes. For caramel sauce, Smucker’s is a reliable option. To start, gather your graham cracker crumbs and melted butter. In a medium bowl, combine the crumbs and butter. Stir until the crumbs feel wet, like sand. Next, take a 9-inch springform pan. Press the crumb mixture firmly into the bottom. Make sure it is even. Place the pan in the refrigerator for about 15 minutes. This helps the crust set. Now, let’s make the cream filling. In a separate bowl, use a hand mixer to whip the heavy cream. Beat it on medium speed until soft peaks form. Gradually add the powdered sugar as you mix. Keep beating until you see stiff peaks. This is what gives the filling a fluffy texture. In another bowl, mix the sweetened condensed milk, vanilla extract, and ground cinnamon. Whisk until it’s smooth. Gently fold the whipped cream into this mixture. Do this in two parts to keep it light and airy. Now for the fun part—layering the cake! Start by spooning half of the cream mixture onto your chilled crust. Spread it out evenly with a spatula. Next, add half of the diced apples on top. Drizzle some caramel sauce over the apples for extra sweetness. Repeat this layering process. Add the rest of the cream mixture, then the remaining apples. Finish by drizzling more caramel sauce on top. Once done, cover the cake with plastic wrap or a lid. Refrigerate it for at least four hours, or overnight if you can wait. This helps the cake firm up nicely. For the full recipe, check the detailed instructions provided. To get the best texture for your No Bake Caramel Apple Cake, focus on the cream. Start by chilling your mixing bowl and beaters before whipping. This simple step helps the cream whip faster and increases volume. When you whip the cream, stop as soon as you see soft peaks. Overwhipping can make it grainy. When folding the whipped cream into the condensed milk mixture, do it gently. Use a spatula to cut down through the middle, then lift and turn. This keeps air in the cream, making your cake light and fluffy. Fold in two parts to ensure even mixing without deflating the cream. For a stunning presentation, slice the cake into wedges and place them on dessert plates. Add a drizzle of caramel on top of each slice for extra flair. You can garnish with thin apple slices and a dollop of whipped cream. This not only looks nice but also adds a fresh touch. When choosing drinks, pair the cake with apple cider or a light tea. Both options complement the cake’s flavors and enhance the experience. A cold glass of milk also works well for a classic touch. Many people make the mistake of skipping the chilling time. This step is key for the cake to set properly. If you cut too soon, the layers may not hold together. Another common issue is overwhipping the cream. This can lead to a dense texture that is not pleasant. Always keep an eye on the cream as it whips. Lastly, be careful with the caramel. Too much can make the cake overly sweet. Always drizzle lightly and taste as you go. For the full recipe, check out [Full Recipe]. {{image_4}} You can change the taste of your caramel apple cake in fun ways. Adding spices, like nutmeg or allspice, gives it warmth. You can also try extracts, like almond or maple, for a twist. Different apples can change the flavor too. Granny Smith apples are tart, but you can use sweet ones like Fuji or Honeycrisp for a different taste. Each apple brings its own unique flavor and texture to the cake. You can easily make this cake fit special diets. For a gluten-free version, use gluten-free graham cracker crumbs. They will still give you that great crust. If you need dairy-free options, replace heavy cream with coconut cream. You can also use almond milk in place of condensed milk. These swaps keep the cake rich and creamy without dairy. Change the cake for the seasons to keep it fresh. In fall, add pumpkin puree to the cream mixture. It pairs well with spices and gives a cozy flavor. You might also toss in chopped pecans for a nice crunch. In summer, using mixed berries can lighten the cake. Strawberries, blueberries, or raspberries add a bright and refreshing taste. Each season offers a chance to try new flavors. To store leftover cake, first, cover it well. Use plastic wrap or a tight lid. This keeps the cake fresh and prevents it from drying out. I like to place the cake in a springform pan. This way, you can easily slice it later. If you have a large piece, you can cut it into smaller slices for easy access. To freeze the no-bake cake, wrap it tightly in plastic wrap. Then, place it in a freezer-safe container. Make sure it’s airtight to prevent freezer burn. To thaw, take the cake out and place it in the fridge for a few hours. This gentle thawing helps keep the texture smooth. You can also let it sit at room temperature for about 30 minutes before serving. In the fridge, the cake lasts about 5 days. If you freeze it, it can last up to 2 months. Just remember to label the container with the date. This way, you will know when you made it. Enjoying this dessert is easy, whether fresh or frozen! For the complete recipe to make this delicious cake, check out the Full Recipe. Yes, you can make this cake ahead of time. In fact, this dessert tastes better when chilled overnight. Making it a day before gives the flavors time to blend. Just cover it tightly in the fridge to keep it fresh. I recommend using Granny Smith apples. They add a nice tartness that balances the sweet caramel. Other options like Honeycrisp or Fuji can work too. Just pick apples that are firm and crisp for the best texture. To make this cake more decadent, try adding chocolate. You can drizzle melted chocolate on top or mix chocolate chips into the cream filling. Adding more caramel sauce also boosts the richness. You could even layer in some crushed toffee for extra crunch. Yes! You can swap graham cracker crumbs with crushed nuts or oats for a healthier crust. Use low-fat cream and less sugar in the filling. You can also add more fruit to balance flavors. These changes keep the taste great but cut down on calories. Absolutely! You can use a cookie crust made from Oreos or a nut crust made from almonds or pecans. A gluten-free option is to use gluten-free graham crackers or ground nuts. Each crust adds its unique flavor and texture to the cake. This cake combines simple steps and delicious flavors. You learned about the key ingredients, from graham crackers to apples. I shared tips to get the best texture and avoid common mistakes. You can personalize this dessert with many variations, including seasonal ones. Whether you serve it now or save it for later, it will be a hit. Try it out and make this cake your own!

Are you looking for a dessert that’s easy to make and oh-so-delicious? Look no further! My No Bake Caramel Apple Cake combines the sweet tastes of apples and caramel with …

Read more

Categories Desserts Leave a comment

Delicious Apple Pie Cupcakes Simple and Sweet Treat

August 7, 2025 by Chef Evan
- 1 ½ cups all-purpose flour - ½ cup unsalted butter, softened - 1 cup granulated sugar - 2 large eggs - 1 large apple, peeled and diced - ½ cup buttermilk When making these cupcakes, start with the main ingredients. All-purpose flour forms the base. Softened butter adds richness. Granulated sugar gives sweetness. Eggs help bind everything together. The diced apple provides that classic pie flavor. Buttermilk keeps the cupcakes moist and fluffy. - ½ cup walnuts, chopped - ½ teaspoon ground nutmeg Adding walnuts gives a nice crunch. Ground nutmeg adds warmth and spice. These ingredients are optional, but they can enhance the flavor. - ½ cup cream cheese, softened - 1 cup powdered sugar - 2 tablespoons milk For the frosting, cream cheese adds a tangy touch. Powdered sugar sweetens it perfectly. Milk makes the frosting smooth and spreadable. Together, they create a creamy topping for the cupcakes. For the full recipe, check out the detailed instructions on how to bring these delicious apple pie cupcakes to life! - Preheat oven to 350°F (175°C). - Line cupcake pan with liners. First, I start by preheating the oven. This step is key for even baking. Next, I grab my cupcake pan and line it with colorful cupcake liners. This makes cleanup easy and adds a fun touch. - Whisk together flour, baking powder, baking soda, salt, and cinnamon. In a medium bowl, I whisk the dry ingredients. This includes flour, baking powder, baking soda, salt, and cinnamon. Mixing these ensures that they blend well. This step helps the cupcakes rise and adds a lovely flavor. - Beat butter and sugar until fluffy. - Add eggs and vanilla extract. Now, I move to a large bowl. I add softened butter and granulated sugar. I beat them together until they are light and fluffy. This takes about 3-4 minutes. Next, I add the eggs one at a time, mixing well. Finally, I stir in the vanilla extract. This gives the cupcakes a warm, sweet flavor. - Gradually mix in dry ingredients and buttermilk alternately. Next, I slowly mix in the dry ingredients, alternating with buttermilk. I start and end with the flour mix. This helps keep the batter smooth and fluffy. I mix until just combined. Overmixing can make the cupcakes tough. - Toss diced apples with lemon juice, brown sugar, nutmeg, and walnuts. In a separate bowl, I prepare the apple mix. I toss diced apples with lemon juice, brown sugar, nutmeg, and walnuts. This adds sweetness and a crunch. The lemon juice keeps the apples fresh and bright. - Fold apple mixture into the batter. - Fill cupcake liners and bake for 18-20 minutes. I gently fold the apple mixture into the batter. This way, I keep the air in the batter. Then, I spoon the batter into the lined cupcake cups, filling each about two-thirds full. I bake them in the preheated oven for 18-20 minutes. I check for doneness with a toothpick. If it comes out clean, they are ready. This is the heart of the recipe. For the full recipe, you can find all the details to make these delicious Apple Pie Cupcakes! - Check for doneness using a toothpick. Insert it into the center of a cupcake. If it comes out clean, they are done. This simple test helps you avoid overbaking. - Allow cooling time before frosting. Once you take the cupcakes out, let them cool for about 5 minutes in the pan. Then, transfer them to a wire rack. This step keeps the frosting from melting. - Ensure cream cheese is at room temperature for easier mixing. Cold cream cheese can make it hard to achieve a smooth texture. Let it sit out for about 30 minutes before using. - Use a piping bag for decorative frosting. This tool lets you create fun designs and swirls on top. If you don’t have one, a zip-top bag with a corner cut off works too! - Dust with cinnamon and garnish with apple slices. A sprinkle of cinnamon adds warmth and visual appeal. Slices of apple on top make the cupcakes look fresh and inviting. Enjoy making these treats as beautiful as they are delicious! {{image_4}} You can make these cupcakes even more delicious. Try adding caramel sauce to the cream cheese frosting. This sweet touch makes each bite extra special. You can also use different types of apples. Granny Smith apples bring a tart flavor. Honeycrisp or Fuji apples add sweetness. Mixing apple types can create a unique taste. If you need gluten-free options, substitute all-purpose flour with a gluten-free blend. This swap keeps the texture light and fluffy. For those who prefer vegan recipes, you can replace eggs with flax eggs. Use plant-based milk instead of buttermilk. These options make the cupcakes suitable for everyone. You don’t have to stick with cream cheese frosting. Buttercream frosting gives a rich, sweet flavor. Whipped cream can add a light and airy touch. Both alternatives can elevate your cupcakes. Choose based on your taste and the occasion. For the full recipe, check the details above. To store your cupcakes at room temperature, place them in an airtight container. This keeps them fresh and moist. You can enjoy them this way for up to three days. If you want them to last longer, refrigerate them. Just remember to let them come to room temperature before serving. You can freeze your cupcakes for later enjoyment. First, let them cool completely. Then, wrap each cupcake in plastic wrap. After that, place them in a freezer bag. For the frosting, store it in a separate container. This keeps the frosting fresh and fluffy. To enjoy your cupcakes later, thaw them in the fridge overnight. Apple pie cupcakes taste best within a week. To keep them fresh, follow the tips above. After a week, they may still be safe to eat but might lose some flavor. For the best experience, eat them fresh. You can find the full recipe and enjoy these cupcakes any time! To make Apple Pie Cupcakes from scratch, follow these easy steps: 1. Preheat your oven to 350°F (175°C) and line a cupcake pan with liners. 2. Mix the dry ingredients. In a bowl, whisk flour, baking powder, baking soda, salt, and cinnamon. 3. Cream the butter and sugar. In a larger bowl, beat softened butter and sugar until fluffy. 4. Add eggs and vanilla. Mix in eggs one at a time and then add vanilla. 5. Combine wet and dry ingredients. Gradually mix the dry ingredients with buttermilk until just combined. 6. Prepare the apple mixture. Toss diced apples with lemon juice, brown sugar, and nutmeg. 7. Fold in the apples. Gently mix the apple mixture into the batter. 8. Fill the cupcake liners about two-thirds full with the batter. 9. Bake for 18-20 minutes. Use a toothpick to check if they are done. 10. Cool and frost. Let them cool before adding frosting. This method makes it easy to create delicious cupcakes from scratch. Yes, you can make the frosting ahead of time. Here’s how: - Prepare the frosting. Mix cream cheese, powdered sugar, vanilla, and milk until smooth. - Store it correctly. Put the frosting in an airtight container and refrigerate. - Rewhip if needed. Before using, you may need to rewhip the frosting to get it smooth again. Making frosting in advance saves time and makes your baking day easier. The best apples for baking are: - Granny Smith. They are tart and hold their shape well. - Honeycrisp. These apples add a nice sweetness and crunch. - Fuji. They are sweet and firm, making them great for pies. Using a mix of these apples can give your cupcakes a nice flavor balance. Yes, this recipe is great for kids! Here are some fun ideas: - Involve them in mixing. Let kids help mix ingredients or fold in the apple mixture. - Decorating. Kids can help frost the cupcakes and add sprinkles or apple slices. - Learning. This recipe teaches basic baking skills in a fun way. These steps make baking a fun and educational activity for children. You’ve now got all the details for making delicious apple pie cupcakes. We covered the key ingredients and showed you how to combine them step by step. Remember to enjoy the baking process, and don’t be afraid to get creative with flavors and toppings. These cupcakes can bring joy to any gathering. Store them well, and share them with friends or family. Bake with love, and they’ll taste even better!

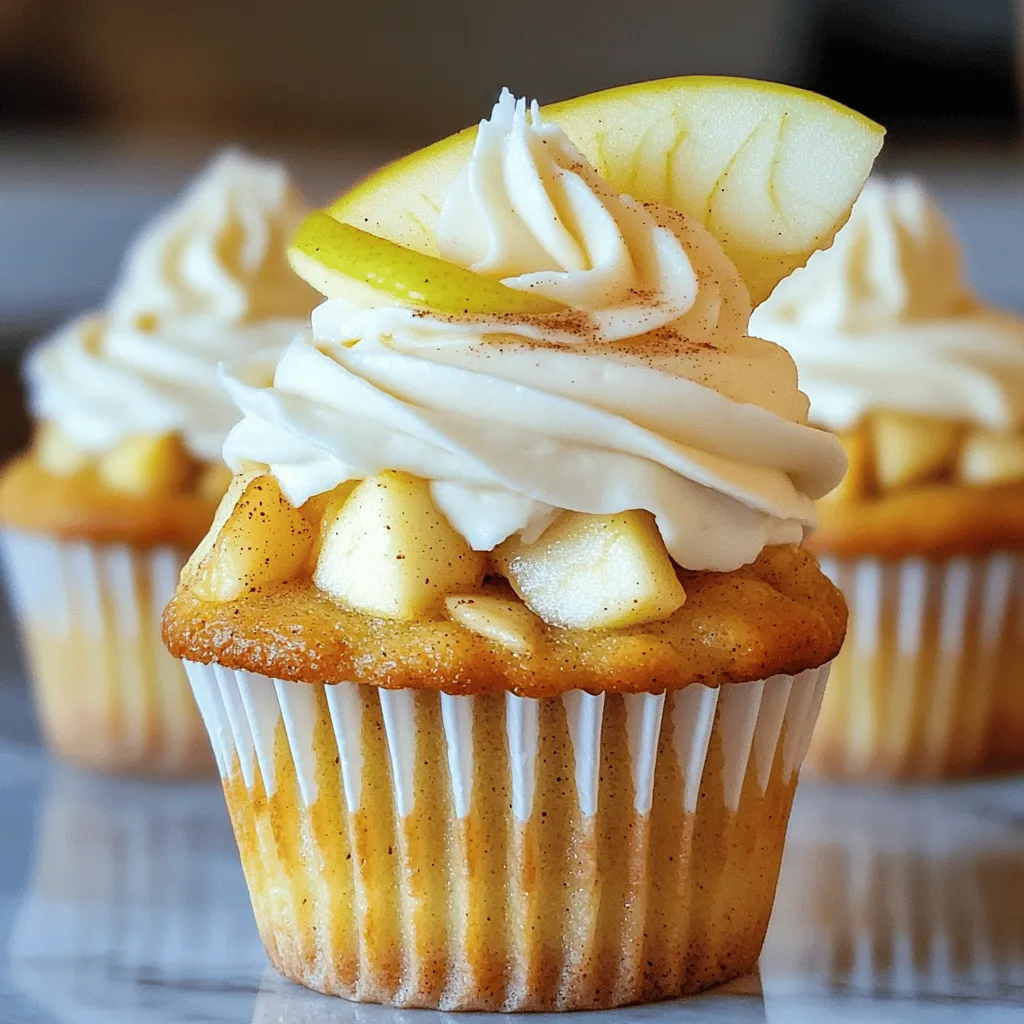
Fall brings the perfect time for cozy treats, and these Delicious Apple Pie Cupcakes combine the best of both worlds: the flavors of apple pie in a cupcake form. You’ll …

Read more

Categories Desserts Leave a comment

Toffee Apple Pie Delectable and Easy Recipe Guide

August 7, 2025 by Chef Evan
To make a tasty toffee apple pie, gather these ingredients: - 6 medium tart apples (such as Granny Smith or Bramley), peeled and thinly sliced - 1 cup packed brown sugar - 1/2 cup unsalted butter, plus extra for brushing - 1 teaspoon pure vanilla extract - 1 teaspoon ground cinnamon - 1/4 teaspoon ground nutmeg - 1 tablespoon fresh lemon juice - 1 pre-made pie crust (store-bought or homemade) - 1/4 cup toffee bits (or crushed toffee bars) - 1 tablespoon cornstarch mixed with 2 tablespoons water (optional, for thickening) - Pinch of sea salt Choose tart apples for this pie. Granny Smith apples work well because they balance the sweetness. You can also use Bramley apples, known for their soft texture. Mixing these varieties enhances flavor and texture. Store apples in a cool, dark place. Keep them in a paper bag if you want to ripen them slowly. Before preparing, wash the apples well. Peel and slice them just before you use them to keep them fresh. Having all your ingredients ready makes cooking easier. It helps you focus on the fun part: making this delicious toffee apple pie! For the full recipe, check out the detailed instructions. Start by peeling and slicing your apples. Use about six medium tart apples. I like Granny Smith or Bramley for their balance of sweet and tart. Once sliced, place the apples in a large bowl. Add one tablespoon of lemon juice to keep them fresh. Next, sprinkle in one cup of packed brown sugar, one teaspoon of ground cinnamon, and a pinch of sea salt. Toss the apples gently to coat them. Let the mixture sit for 10-15 minutes. This time helps the apples release their natural juices. In a medium saucepan, melt half a cup of unsalted butter over medium heat. When the butter is melted, stir in one teaspoon of pure vanilla extract. If you like your filling thicker, mix one tablespoon of cornstarch with two tablespoons of water in a small bowl. Add this to the melted butter, and stir for about a minute until it thickens slightly. Carefully add your apple mixture to the saucepan. Cook it for 5-7 minutes, stirring often. The apples should soften but still have some crunch. Once done, remove the saucepan from the heat and fold in a quarter cup of toffee bits. Roll out your pre-made pie crust and fit it into a pie dish. Pour the warm apple filling into the crust, spreading it evenly. You can cover the filling with a second pie crust or create a lattice top. If you use a full crust, make slits in the top to let steam escape. Brush the top with melted butter and sprinkle a bit of brown sugar for a sweet crunch. Place the pie in your preheated oven at 425°F (220°C) and bake for 20-25 minutes. The crust should turn golden, and the filling should bubble through the slits. Once baked, cool the pie for at least 30 minutes before slicing. This step helps it set up nicely. To bake a perfect pie crust, start with cold ingredients. Use ice water when mixing. This helps the fat to stay firm. A firm fat creates layers and a flaky texture. Roll the dough gently to avoid overworking it. This keeps your crust tender. Before baking, chill it in the fridge for at least 30 minutes. Chilling helps prevent shrinking. For the filling, the right thickness matters. Too thick and it won't cook well. Too thin, and it can make your crust soggy. Cook your apples just enough to soften them slightly. They will continue to cook in the oven, so leave them a bit firm. If you want a thicker filling, use cornstarch mixed with water. This will help set the filling as it bakes. To avoid a soggy bottom, start with a pre-baked crust. This gives it a head start. Also, sprinkle a thin layer of cornstarch or flour on the crust before filling. This creates a barrier. Another tip is to bake the pie on a hot baking sheet. The heat will cook the crust quickly. Finally, let the pie cool before slicing. This allows the filling to set and keeps the crust crisp. For the full recipe, check the ingredient list and instructions above. {{image_4}} You can switch up the sweetness in your toffee apple pie. Instead of brown sugar, try using maple syrup or honey. These options add a unique flavor. You can also use coconut sugar for a lower glycemic index. If you want a hint of spice, add a touch of ginger or clove for warmth. The type of apples you use changes the pie's taste. Granny Smith apples bring tartness, while Honeycrisp apples offer sweetness. For a balanced flavor, mix tart and sweet apples. Try using Fuji or Braeburn apples for a juicy bite. Each apple type gives a different texture and taste, so experiment to find your favorite. Making this pie gluten-free is simple. Use a gluten-free pie crust or make one from almond or oat flour. For a vegan version, swap butter for coconut oil or vegan butter. Replace the eggs with flaxseed meal mixed with water for binding. You can ensure everyone enjoys this pie, regardless of dietary needs. To store leftover pie, let it cool completely. Cover it with plastic wrap or foil. You can also place it in an airtight container. This will keep the pie fresh for up to three days in the fridge. If you want to keep it longer, consider freezing it. To reheat your pie, preheat the oven to 350°F (175°C). Remove the pie from the fridge and let it sit for about 15 minutes. This helps it warm evenly. Place the pie in the oven for 15-20 minutes. The crust should become crisp, and the filling will warm up. If you want to freeze your pie, wrap it tightly in plastic wrap and then in aluminum foil. This helps prevent freezer burn. You can freeze the pie for up to three months. To bake, thaw it overnight in the fridge. Then, bake it at 350°F (175°C) for about 30-40 minutes. Enjoy your Toffee Apple Pie whenever you like! For a full recipe, check the previous sections. For Toffee Apple Pie, I recommend using tart apples. Granny Smith or Bramley apples work great. They hold their shape well during baking. Their tartness balances the sweet toffee flavor. Other good choices include Honeycrisp or Fuji apples for added sweetness. Mixing different apple types can enhance the flavor and texture. Yes, you can make Toffee Apple Pie ahead of time! You can prepare the filling a day in advance. Store it in the fridge until you are ready to bake. Just remember to assemble the pie with the crust before baking. This keeps the crust fresh and flaky. You can also bake it a day early. Just reheat it in the oven before serving. To prevent burning, keep an eye on the baking time. Set a timer for 20 minutes, then check the pie. If the crust browns too fast, cover it with foil. This helps protect the crust while the filling cooks. Also, ensure your oven temperature is correct. An oven thermometer can help with this. You now have everything you need to make a great Toffee Apple Pie. We covered the best apples for flavor, how to prep and cook the filling, and tips for a perfect crust. Plus, I shared some fun variations and storage tips. Remember, experimenting can lead to tasty surprises! Whether you stick to the classic or try something new, enjoy every slice. Happy baking!

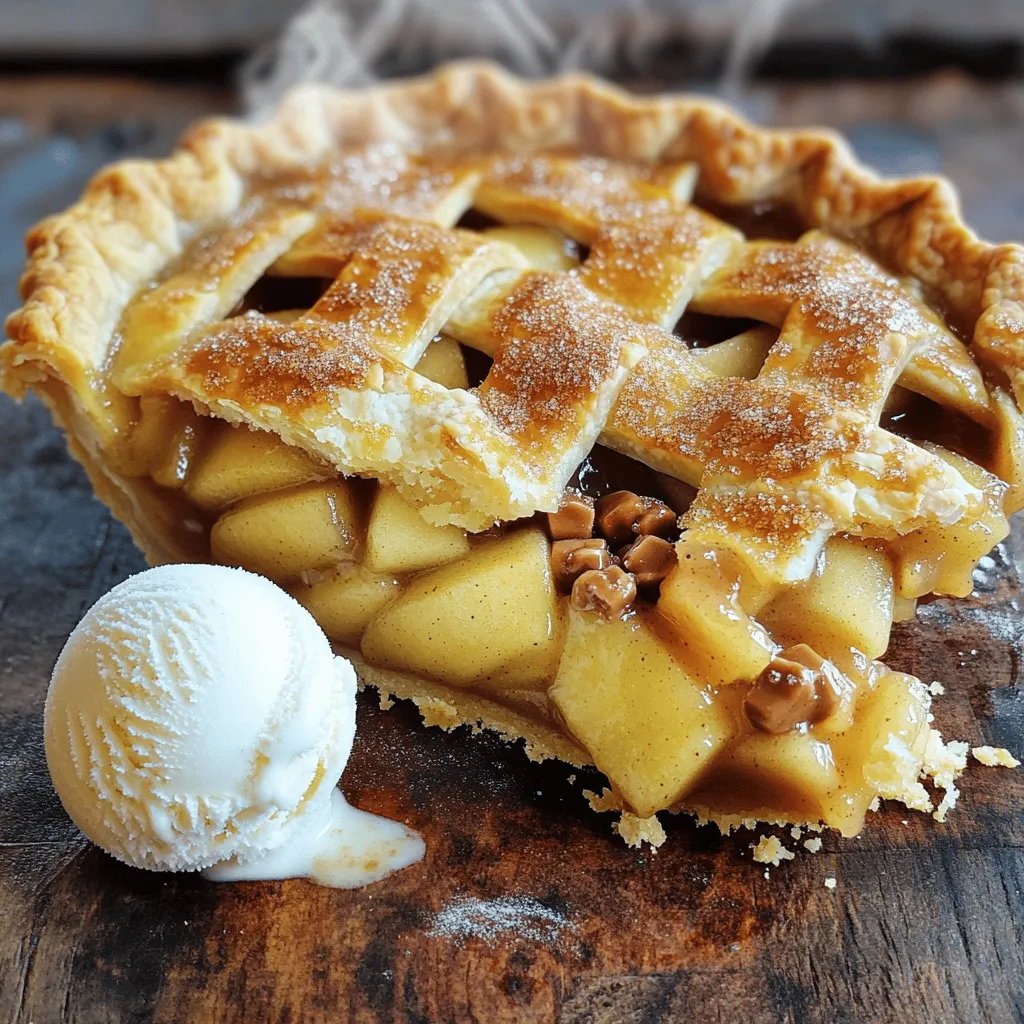
Welcome to your new favorite dessert: Toffee Apple Pie! This guide is packed with easy steps and tips, ensuring that anyone can create this delicious treat. You’ll learn about the …

Read more

Categories Desserts Leave a comment

Mini Pumpkin Pies Delightful Fall Dessert Recipe

August 7, 2025 by Chef Evan
To make these mini pumpkin pies, you need simple yet delicious ingredients. Here’s what you’ll need: - 1 cup pumpkin puree - 1/2 cup coconut milk (canned) - 1/3 cup brown sugar - 2 large eggs - 1 teaspoon vanilla extract - 1 teaspoon ground cinnamon - 1/2 teaspoon ground nutmeg - 1/4 teaspoon ground ginger - 1/4 teaspoon salt - 1 package pre-made mini pie crusts (or make your own from scratch) - Whipped cream (for serving) These ingredients create a rich, creamy filling that makes every bite delightful. You can customize your mini pumpkin pies to fit your taste. Here are some fun options: - Add a pinch of cloves for extra spice. - Use almond milk instead of coconut milk for a different flavor. - Swap out brown sugar for maple syrup for a unique sweetness. - Top with chocolate shavings for a twist on the classic pie. Experimenting with these ingredients can lead to exciting new flavors. To prepare your mini pumpkin pies, you’ll need some basic tools: - Mixing bowl - Whisk - Measuring cups and spoons - Mini pie crust pans or muffin tins - Baking sheet - Oven mitts These tools help ensure that your pies bake evenly and come out perfectly every time. For the full recipe, check out the detailed steps and enjoy making this delightful fall dessert! To start, preheat your oven to 375°F (190°C). This ensures a perfect bake. If you want, you can use pre-made mini pie crusts, which save time. They are easy to find at grocery stores. If you prefer to make your own, roll out your dough and cut it into small circles. Place each circle into a muffin tin for a perfect fit. In a large bowl, mix the pumpkin puree, coconut milk, brown sugar, eggs, and vanilla extract. Use a whisk for a smooth blend. Then, add the spices: ground cinnamon, nutmeg, ginger, and salt. Mix again until everything is well combined. This filling gives your pies a warm, fall flavor that everyone loves. Now, pour the pumpkin filling into each mini pie crust. Fill them about three-quarters full. This allows the filling to rise without spilling over. Place the muffin tin in the oven and bake for 20 to 25 minutes. They are done when the filling is firm. To check, insert a toothpick in the center; it should come out clean. After baking, let the pies cool for 10 minutes before transferring them to a wire rack. Enjoy them with whipped cream for an extra special treat. For the complete recipe, refer to the Full Recipe section. To keep your crust crispy, pre-bake the crusts for 5-7 minutes. This helps harden the bottom. Use a fork to poke small holes in the crust. This lets steam escape and stops sogginess. Always fill the crusts only 3/4 full. This gives the filling room to puff up. Mix your pumpkin filling well to avoid lumps. Use a whisk for a smooth texture. When filling, pour slowly to prevent spills. A small measuring cup works great for this. Make sure each pie has an even amount of filling. This helps them bake evenly and look nice. Serve your mini pumpkin pies warm or at room temperature. Top each pie with a dollop of whipped cream. A sprinkle of cinnamon or nutmeg adds a nice touch. For a fun twist, drizzle some caramel sauce on top. Pair them with a scoop of vanilla ice cream for a special treat. For the full recipe, check out the details above. {{image_4}} To make gluten-free mini pumpkin pies, use gluten-free pie crusts. You can find these in stores or make your own. For a homemade crust, combine almond flour, coconut flour, and a bit of butter. Press it into your mini pie pans. The filling remains the same. Just follow the full recipe, and you will have tasty pies that everyone can enjoy. For a vegan twist, replace eggs with flaxseed meal. Mix one tablespoon of flaxseed meal with three tablespoons of water. Let it sit for five minutes to thicken. Use almond or soy milk instead of coconut milk. The rest of the ingredients stay the same. This version is creamy and delicious, perfect for plant-based eaters. You can add fun flavors to your mini pumpkin pies. For a chocolate kick, mix in some cocoa powder. About two tablespoons should do the trick. Maple syrup can add a sweet twist; just reduce the brown sugar slightly. Try adding a splash of bourbon or rum for warmth. Each option creates a unique taste, making your mini pumpkin pies even more delightful! To keep your mini pumpkin pies fresh, let them cool completely. Place them in an airtight container. You can store them in the fridge for up to four days. If you plan to eat them later, this method works best. When you're ready to enjoy your mini pumpkin pies, preheat your oven to 350°F (175°C). Place the pies on a baking sheet. Heat them for about 10 to 15 minutes. This brings back their lovely texture and warmth. Avoid using the microwave, as it can make the crust soggy. Freezing mini pumpkin pies is a great option for longer storage. Wrap each pie tightly in plastic wrap. Then, place them in a freezer bag or an airtight container. They can stay in the freezer for up to three months. When ready to eat, thaw them in the fridge overnight. Reheat them in the oven for the best results. Enjoy your mini pumpkin pies at any time! For the full recipe, check the section above. Mini pumpkin pies can last about three days in the fridge. Store them in an airtight container. This keeps them fresh and tasty. If you want to keep them longer, consider freezing. Yes, you can make mini pumpkin pies ahead of time. You can bake them and chill them for up to three days. Or, you can prepare the filling and crust separately. Just assemble and bake them when you are ready. If you cannot find pumpkin puree, you can use butternut squash puree. It has a similar taste and texture. You can also use sweet potato puree in a pinch. Both options work well in this recipe. You can buy mini pie crusts at most grocery stores. Look in the baking aisle or freezer section. Many stores offer pre-made options. You can also make your own if you prefer. Serve mini pumpkin pies warm or at room temperature. Top them with whipped cream for a nice touch. You can also sprinkle some cinnamon or nutmeg on top. This adds extra flavor and makes them look pretty. For the full recipe, check out the complete cooking instructions above. - 1 cup pumpkin puree - 1/2 cup coconut milk (canned) - 1/3 cup brown sugar - 2 large eggs - 1 teaspoon vanilla extract - 1 teaspoon ground cinnamon - 1/2 teaspoon ground nutmeg - 1/4 teaspoon ground ginger - 1/4 teaspoon salt - 1 package pre-made mini pie crusts (or make your own from scratch) - Whipped cream (for serving) 1. Preheat your oven to 375°F (190°C). This step warms your oven for baking. 2. In a large bowl, mix the pumpkin puree, coconut milk, brown sugar, eggs, and vanilla. 3. Add in the spices: cinnamon, nutmeg, ginger, and salt. Whisk until smooth. 4. Place the mini pie crusts on a baking sheet. This keeps them steady when filling. 5. Carefully pour the pumpkin filling into each crust, filling them to about 3/4 full. 6. Bake the mini pies for 20 to 25 minutes. They are done when the filling is firm. 7. Remove the pies from the oven and cool for 10 minutes. Then, transfer them to a rack. 8. Serve with whipped cream on top for a delicious touch. Each mini pumpkin pie serves up a delightful mix of flavor and nutrition. They contain about: - Calories: 150 - Protein: 2g - Carbohydrates: 20g - Fat: 7g - Fiber: 1g Enjoy this easy and tasty treat! For the full recipe, check out the details above. Making mini pumpkin pies is simple and fun. We covered the key ingredients, tools, and how to prepare the crust and filling. I shared tips to keep your crust crisp and suggested tasty variations. You learned how to store, reheat, and freeze these delightful treats. Now, you have everything to create your mini pumpkin pie masterpiece. Enjoy every bite and experiment with flavors as you go! Happy baking!

Fall means cozy flavors, and nothing says autumn like mini pumpkin pies! These delightful desserts capture the essence of the season with their rich, spiced filling and crisp crust. I’ll …

Read more

Categories Desserts Leave a comment

Easy Mexican Coleslaw Fresh and Flavorful Side Dish

August 7, 2025 by Chef Evan
To make Easy Mexican Coleslaw, you need the following ingredients: - 4 cups green cabbage, finely shredded - 1 cup red cabbage, finely shredded - 1 medium carrot, grated - 1/2 cup fresh cilantro, chopped - 1 cup corn (fresh, frozen, or canned) - 1 medium jalapeño, finely diced (seeds removed for less heat) - 1/2 cup cherry tomatoes, halved - 1/4 cup red onion, thinly sliced - 1 teaspoon lime zest (freshly grated) - 1/3 cup fresh lime juice - 3 tablespoons extra-virgin olive oil - 1 teaspoon honey or agave syrup (for vegan options) - Salt and cracked pepper to taste You might not always have every ingredient on hand. Here are some easy swaps: - Cabbage: You can use green cabbage only or add kale for a twist. - Corn: Try black beans or chopped bell peppers if you prefer. - Jalapeño: Use bell pepper for no heat or a hotter pepper for more spice. - Honey: Maple syrup works well if you want a vegan option. - Lime Juice: Lemon juice is a good alternative if you run out. To make this coleslaw, gather these helpful tools: - A large mixing bowl for combining ingredients - A sharp knife or box grater for shredding vegetables - A whisk for mixing the dressing - A small mixing bowl for the dressing - A cutting board for easy chopping - A serving bowl to present your coleslaw This setup makes the process smooth and enjoyable. Grab these tools, and let’s create a fresh and flavorful side dish! Start by preparing your vegetables. You need to finely shred 4 cups of green cabbage and 1 cup of red cabbage. Grate 1 medium carrot and chop 1/2 cup of fresh cilantro. In a large mixing bowl, combine the cabbage, carrot, and cilantro. Mix them well to ensure a good blend. Next, add 1 cup of corn, which can be fresh, frozen, or canned. Then, take 1 medium jalapeño and finely dice it. If you want a milder taste, remove the seeds. Add the jalapeño to the bowl. Finally, include 1/2 cup of halved cherry tomatoes and 1/4 cup of thinly sliced red onion. Fold the vegetables together gently. You want to make sure they are evenly distributed. In a separate small bowl, prepare the dressing. Start by whisking together 1 teaspoon of lime zest and 1/3 cup of fresh lime juice. Then, add 3 tablespoons of extra-virgin olive oil. For sweetness, mix in 1 teaspoon of honey or agave syrup. Season with a pinch of salt and cracked pepper. Whisk until the mixture is well combined and smooth. Now it’s time to combine everything. Drizzle the dressing over the vegetable mixture. Toss gently to coat all the ingredients with the dressing. Make sure every bite is tasty. Let the coleslaw sit for at least 15 minutes at room temperature. This time allows the flavors to meld. Stir occasionally during this resting period. Before serving, taste the coleslaw. Adjust the seasoning with more salt, pepper, or lime juice if needed. Enjoy your fresh and flavorful dish! For the full recipe, check out the complete details above. To make your coleslaw pop, use fresh veggies. Fresh ingredients enhance taste. Use lime juice right before serving for the best zing. If you want a kick, add more jalapeño or even a dash of hot sauce. Mix the coleslaw and dressing just before serving. This keeps everything crisp and fresh. Serve your coleslaw in a colorful bowl. Garnish with extra cilantro and lime wedges. This adds a nice touch and invites everyone to try it. You can also serve it chilled for a refreshing bite. Pair it with grilled meats or tacos for the perfect meal. This coleslaw shines with many Mexican dishes. It goes well with tacos, burritos, or even grilled fish. Try it next to spicy enchiladas or quesadillas. The cool, crunchy texture balances well with warm, rich flavors. For a fun twist, serve it alongside a Mexican BBQ or picnic. You’ll find it complements your favorite dishes beautifully, making each meal more exciting. For the full recipe, check out the details above. {{image_4}} You can spice up your coleslaw easily! Add more jalapeños for heat. If you want more flavor, try chipotle powder. It brings a smoky taste. Mixing in some diced serrano peppers adds a nice kick. For a zesty twist, include some hot sauce in the dressing. This gives a burst of flavor and warmth. Adjust these ingredients to match your taste! Making this coleslaw vegan is simple. Just use agave syrup instead of honey. This keeps it sweet without animal products. You can also add avocado for creaminess. It gives a smooth texture and healthy fats. If you want protein, toss in some black beans. They add bulk and flavor while keeping it plant-based. Texture is key in a great coleslaw. For crunch, add nuts like walnuts or almonds. They give a nice bite and extra flavor. You can also mix in sunflower seeds for a little nutty taste. If you like fruit, try adding diced mango or pineapple. They bring sweetness and a juicy contrast to the crisp veggies. These add-ins make the dish more exciting and enjoyable! For the full recipe, check the section above. To store your leftovers, place the coleslaw in an airtight container. This helps keep it fresh. You can keep it in the fridge for up to three days. Make sure to seal the container tightly to avoid moisture loss. Keep the coleslaw and dressing separate until serving. Mixing them ahead of time can make the veggies soggy. If you want to keep it fresh longer, add the dressing right before serving. This way, it stays crunchy and vibrant. I do not recommend freezing coleslaw. Freezing can change the texture of the vegetables. If you freeze it, the cabbage will become limp when thawed. For the best taste, enjoy it fresh! You can make the dressing ahead and freeze it if needed. Just thaw it in the fridge before adding to the fresh veggies. If you don't have lime juice, you can use lemon juice. It works well in this recipe. You could also try vinegar, like apple cider or white wine vinegar. These options add a tangy flavor that brightens the coleslaw. Yes, you can make this coleslaw ahead of time. Just mix the veggies and dressing separately. Store them in the fridge. Combine them right before serving. This keeps the coleslaw crunchy and fresh. To adjust the heat, change the jalapeño amount. For less heat, remove the seeds and ribs. You can also use a milder pepper, like a bell pepper. For more heat, add extra jalapeño or try a spicier pepper. For the complete guide to making Easy Mexican Coleslaw, check out the [Full Recipe]. It includes all the steps and tips to create this tasty side dish. This blog post covered how to make Easy Mexican Coleslaw. We talked about key ingredients, tools, and step-by-step instructions. I shared tips for flavor and serving ideas, plus variations for spice and texture. Lastly, we explored storage methods and answered common questions. Enjoy making this coleslaw as a fresh side for your favorite dishes. Experiment with your own twists to make it truly yours. A simple recipe can spark joy in your cooking!

Looking to spice up your meals? My Easy Mexican Coleslaw is the answer! Fresh, colorful, and full of flavor, this dish makes a perfect side for tacos or grilled meats. …

Read more

Categories Salads Leave a comment

Sticky Toffee Pudding Irresistible Dessert Recipe

August 6, 2025 by Chef Evan
To make sticky toffee pudding, gather these main ingredients: - 200g (7 oz) pitted and chopped dates - 250ml (1 cup) boiling water - 100g (1/2 cup) unsalted butter, softened - 150g (3/4 cup) packed brown sugar - 2 large eggs, at room temperature - 180g (1 1/2 cups) all-purpose flour - 1 teaspoon baking powder - 1 teaspoon pure vanilla extract - A pinch of salt For the rich toffee sauce, you will need: - 150g (3/4 cup) packed brown sugar - 100g (1/2 cup) unsalted butter - 250ml (1 cup) heavy cream - 1 teaspoon pure vanilla extract Importance of Accurate Measuring Measuring your ingredients accurately is key. It ensures your pudding turns out perfect. If you use too much flour, it can make your pudding dry. Too little sugar can change the flavor. Always use a kitchen scale for best results. Alternatives to Common Ingredients If you don't have dates, you can use prunes or figs. They will give a similar sweetness. If you're out of brown sugar, use white sugar with a little molasses mixed in. This keeps the flavor close and helps your pudding taste great! For the full recipe, check out Sticky Toffee Pudding Delight . Preheating the Oven First, set your oven to 180°C (350°F). This heat makes the pudding rise and bake evenly. While the oven warms up, prepare your baking dish. Lightly grease an 8x8 inch dish and line the bottom with parchment paper. This helps us remove the pudding easily later. Soaking the Dates In a medium bowl, take the chopped dates and pour in boiling water. Add one teaspoon of baking soda on top. Let this sit for about 20 minutes. The dates will soak up the water and soften. This step is key for a moist pudding. Creaming Butter and Sugar In a large bowl, mix 100g of softened butter and 150g of packed brown sugar. Use an electric mixer or a wooden spoon. Beat them together until it looks light and fluffy. This step adds air to the mix, making the pudding light. Incorporating Eggs and Vanilla Add two large eggs to the butter-sugar mix, one at a time. Make sure to mix well after each egg. Then, pour in one teaspoon of pure vanilla extract and stir until combined. Vanilla adds a warm flavor that enhances the pudding. Baking Time and Temperature Now, sift in 180g of all-purpose flour, one teaspoon of baking powder, and a pinch of salt. Stir gently until just combined. Then, fold in the soaked date mixture. Pour the batter into your prepared dish and smooth the top. Bake for 30-35 minutes. To check if it's done, stick a skewer in the center. If it comes out clean, it's ready. Preparing the Toffee Sauce Simultaneously While the pudding bakes, make the toffee sauce. In a medium saucepan over medium heat, melt 150g of packed brown sugar and 100g of butter. Stir until smooth. Gradually add in 250ml of heavy cream and bring it to a gentle boil. Keep stirring for about 5 minutes until it thickens a bit. Don’t forget to add one teaspoon of vanilla extract at the end for extra flavor! You can find the Full Recipe for Sticky Toffee Pudding Delight to guide you in creating this amazing dessert. Importance of Soaking Dates Soaking dates is key. It softens them and adds moisture. This makes your pudding rich and tender. Use boiling water to soak them for about 20 minutes. This step is non-negotiable if you want that melt-in-your-mouth texture. Baking Time Adjustment Baking time matters. If your oven runs hot, check your pudding a few minutes early. If it’s undercooked, it can be too gooey. Use a toothpick to test. It should come out clean or with a few crumbs. Achieving the Right Consistency The sauce must be thick yet pourable. Start with equal parts brown sugar and butter. Melt them together first. Then add heavy cream slowly. Stir constantly until it thickens. If it's too thick, add a splash of cream. Flavor Enhancements To boost flavor, add a pinch of salt. This helps balance the sweetness. You can also try adding a touch of espresso or dark rum for depth. These small tweaks can turn a good sauce into a great one. Plating Suggestions Serve the pudding warm on a nice plate. Cut it into squares and drizzle with toffee sauce. Use a spoon to create a nice swirl. This adds an inviting look to your dessert. Garnishing for Visual Appeal For an extra touch, sprinkle with sea salt or chopped nuts. Fresh mint leaves can add color too. You could even add a dollop of whipped cream or a scoop of ice cream for a lovely contrast. {{image_4}} You can make sticky toffee pudding even better with some fun add-ins. - Nuts and Chocolate Chips: Chopped walnuts or pecans add a nice crunch. You can also mix in dark or milk chocolate chips for a sweet twist. - Fruit Variations: Try adding dried fruits like apricots or cranberries. They give a lovely tartness that balances the sweetness. If you have dietary needs, you can still enjoy this dessert. - Gluten-Free Options: Use a gluten-free all-purpose blend instead of regular flour. This swap keeps the pudding soft and tasty. - Vegan Alternatives: Replace the eggs with flaxseed meal or applesauce. Use vegan butter and coconut cream for the sauce. You can serve sticky toffee pudding in many fun ways. - Ice Cream Pairings: A scoop of vanilla or caramel ice cream on the side adds creaminess. It melts into the warm pudding for a delightful treat. - Sauce Alternatives: Instead of just toffee sauce, try caramel or chocolate sauce. They bring different flavors and make the dish even more special. For the full recipe, check out the Sticky Toffee Pudding Delight . - Refrigeration Guidelines: Store leftover sticky toffee pudding in an airtight container. It keeps well in the fridge for up to 4 days. Always let it cool completely before sealing. - Freezing Instructions: For longer storage, you can freeze the pudding. Wrap it tightly in plastic wrap and place it in a freezer-safe container. It can last up to 3 months in the freezer. - Best Methods for Reheating: The best way to reheat sticky toffee pudding is in the microwave. Heat it for 20 to 30 seconds on medium power. You can also use an oven. Preheat to 175°C (350°F) and warm for about 10-15 minutes. - Ensuring Pudding Retains Moisture: To keep the pudding moist, cover it with foil if using the oven. You can also add a splash of water or some toffee sauce while reheating for extra moisture. - How Long Does It Last?: When stored properly, sticky toffee pudding lasts 4 days in the fridge and 3 months in the freezer. - Signs of Spoilage: Look for changes in color or smell. If you see mold or if it smells off, it’s best to throw it away. Always trust your senses! Sticky toffee pudding is a sweet, moist dessert. It comes from England. Many believe it started in the Lake District in the 20th century. This warm pudding has soft dates mixed into the batter. It is topped with a rich toffee sauce. People love it for its sweet flavor and gooey texture. Yes, you can make sticky toffee pudding ahead. Prepare the pudding and let it cool. Wrap it tightly in plastic wrap. Store it in the fridge for up to three days. When ready, reheat it in the oven at low heat. Serve it warm with fresh toffee sauce for the best taste. Serve sticky toffee pudding warm for the best flavor. Cut it into squares and place it on a plate. Drizzle warm toffee sauce generously over each piece. You can add a scoop of vanilla ice cream or a dollop of whipped cream. These toppings balance the warm pudding and creamy sauce. If you do not have dates, try using prunes. Prunes are sweet and soft, just like dates. You can also use figs or raisins as alternatives. Soak them in boiling water to soften them before mixing. This helps keep the pudding moist and adds sweetness. You can find the Full Recipe for Sticky Toffee Pudding Delight [here](https://example.com). It provides detailed instructions and tips for making this delicious dessert. Sticky toffee pudding is a rich dessert made with simple ingredients. You need dates, brown sugar, and butter for the pudding, and brown sugar, butter, and cream for the sauce. Accurate measuring and soaking the dates are key for a moist treat. Consider adding nuts or chocolate for a twist. Serve it hot with ice cream or create a vegan version. Store leftovers in the fridge or freeze for later. This dessert is a must-try, and I hope you enjoy making it as much as I do. Find the full recipe for sticky toffee pudding [here](#).

Are you ready to dive into the world of Sticky Toffee Pudding? This warm, rich dessert is a classic that will delight your taste buds! With soft dates, sweet brown …

Read more

Categories Desserts Leave a comment

Slow Cooker Honey Garlic Chicken Flavorful and Easy Dish

August 6, 2025 by Chef Evan
- 4 boneless, skinless chicken thighs - 1/2 cup honey - 1/4 cup low-sodium soy sauce - 3 cloves garlic, finely minced - 1 tablespoon freshly grated ginger - 1 tablespoon sesame oil - 1 teaspoon red pepper flakes (optional) The heart of this dish is the chicken thighs. They stay juicy and tender when cooked low and slow. Honey gives it a sweet touch, while soy sauce adds saltiness. Garlic and ginger bring depth, making each bite full of flavor. - 1 cup broccoli florets - 1 cup sliced bell peppers (any color) - 2 green onions, chopped - Sesame seeds Adding vegetables makes this dish colorful and healthy. Broccoli florets add crunch and nutrients. Bell peppers bring a sweet, crisp bite. Green onions and sesame seeds give a lovely finish. They not only look great but also add a fresh taste. - Red pepper flakes - Fresh ginger - Sesame oil You can spice things up with red pepper flakes. Fresh ginger boosts flavor and warmth. A little sesame oil can enhance the nutty taste. Feel free to mix and match. You can create your own twist on this classic dish. For the full recipe, check out the link provided. To make the honey garlic sauce, start by mixing the ingredients in a bowl. You will need honey, low-sodium soy sauce, minced garlic, grated ginger, sesame oil, and red pepper flakes if you want a bit of heat. Whisk these ingredients together until you get a smooth sauce. It's important to make sure there are no lumps. A smooth texture helps the sauce coat the chicken evenly, giving every bite the right balance of flavor. Now, let’s set up the slow cooker. Place the chicken thighs at the bottom. Lay them out in a single layer. This helps them cook evenly, which is key for a tasty meal. Next, pour the honey garlic sauce over the chicken. Make sure each piece is well-coated. This sauce will soak into the chicken as it cooks, making it super tender and full of flavor. For cooking, you have two options: low and high settings. If you cook on low, let the chicken go for 6-7 hours. If you prefer high, 3-4 hours will do. You’ll know the chicken is done when it’s tender and shreds easily with a fork. About 30 minutes before it finishes cooking, add in the broccoli florets and sliced bell peppers. Gently stir them in so they mix with the chicken and sauce. Once the time is up, use two forks to shred the chicken right in the slow cooker. This lets the meat soak up even more sauce. Stir everything together, and you’re ready to serve! For the full recipe, check out the complete instructions above. To avoid overcooking, always check the chicken's internal temperature. The magic number is 165°F. If you cook it longer, the chicken can dry out. Use a meat thermometer to be sure. For tenderness, cook on low heat for the best results. This method lets the chicken absorb all the flavors. Shredding the chicken in the slow cooker also helps keep it juicy. When serving, use shallow bowls to show off the colorful veggies. Arrange the chicken on a bed of rice or noodles. Drizzle extra sauce over the top for a nice shine. For garnish, sprinkle sesame seeds and chopped green onions. This adds a nice crunch and freshness. You can also add a few slices of lime for a pop of color. If you want to adjust spice levels, add more red pepper flakes for heat. Start with a small amount and taste as you go. You can always add more, but it’s hard to take away heat. For side dishes, pair the chicken with steamed rice or a fresh salad. The rice soaks up the sauce well. A simple cucumber salad can add a refreshing crunch. For the full recipe, check the link provided. {{image_4}} You can easily swap ingredients in this dish. If you prefer, use chicken breast instead of thighs. It will cook well and stay juicy. For a plant-based option, try tofu. It soaks up the honey garlic sauce nicely. You can also change the sauce. Instead of honey, use maple syrup for a different sweet flavor. If you want a spicy kick, add sriracha or chili garlic sauce. These swaps can give your dish a new taste. This dish pairs well with rice, noodles, or salads. Serve it over fluffy white rice or whole grain. For a fun twist, try it on noodles tossed in sesame oil. You can also add a salad on the side for a fresh crunch. If you have leftovers, get creative. Use the chicken in wraps or sandwiches. You can mix it into a stir-fry or salad for an easy meal. The honey garlic flavor will make it enjoyable any way you use it. Add local spices to give your dish a fun twist. For example, mix in some cumin or coriander for a warm flavor. You can also try adding fresh herbs like cilantro or basil. Consider adding seasonal vegetables too. In spring, use asparagus or snap peas. In fall, try carrots or sweet potatoes. These changes keep the dish fresh and exciting throughout the year. To keep your honey garlic chicken fresh, first allow it to cool down. Then, place it in an airtight container. Store it in the fridge for up to three days. If you want to save it longer, consider freezing it. Just ensure it’s in a freezer-safe bag or container. You can freeze leftovers for up to three months. When you are ready to enjoy your leftovers, reheating them properly is key. The best method is to use the oven. Preheat your oven to 350°F (175°C). Place the chicken in an oven-safe dish and cover it with foil. Heat for about 15-20 minutes. This helps retain the flavors. If using a microwave, cover your dish with a microwave-safe lid. Heat on medium power for 2-3 minutes, stirring halfway through. This dish stays fresh for about three days in the fridge. If frozen, it can last up to three months. Always check for signs of spoilage before eating. Look for changes in smell or color. If anything seems off, it’s best to toss it. Keeping these tips in mind will ensure you enjoy every bite of your slow cooker honey garlic chicken. For more detailed cooking instructions, check the Full Recipe. If you don't have honey, you can use maple syrup or agave nectar. These sweeteners work well and offer a similar flavor. You can also try brown sugar. Just mix it with a bit of water to make it liquid. This way, you will still enjoy a sweet sauce with your chicken. Yes, you can use frozen chicken thighs! Just remember that they will take longer to cook. Set your slow cooker on low for about 8 hours. This will help them cook evenly and become tender. If you use high heat, plan on 4 to 5 hours. Always check if they are fully cooked before serving. To spice things up, add more red pepper flakes or diced jalapeños. If you like a milder dish, use less red pepper or skip it altogether. You can also add a touch of honey to balance the heat. Taste as you go to find the right level for you. Yes, you can thicken the sauce! One way is to mix a bit of cornstarch with water and stir it in. Cook on high for another 15 to 20 minutes to thicken it up. Another method is to simmer the sauce in a pan until it reduces. This will give you a rich and thicker sauce. For the best flavor, choose the method that works for you. This post covered making a delicious slow cooker honey garlic chicken. You learned about key ingredients like chicken thighs and honey, plus vegetables to boost flavor. I shared tips for cooking and serving, as well as variations and storage tips for leftovers. With this simple recipe, you can impress family and friends. Enjoy the process and make it your own! You’ll have a tasty meal that’s easy to prepare and sure to please everyone at the table.

If you’re looking for a simple yet delicious dinner, try Slow Cooker Honey Garlic Chicken. This dish is full of flavor and easy to make. You can set it up …

Read more

Categories Dinner Leave a comment
Older posts
Newer posts
← Previous Page1 … Page11 Page12 Page13 … Page124 Next →

TOSSED FLAVORS

Where flavors are fresh, vibrant, and ready to toss! 🥗

PAGES

Home About Contact Privacy Policy Terms & Conditions Cookie Policy GDPR Policy Copyright Policy Disclaimer

CATEGORIES

Appetizers Desserts Salads Breakfast Dinner

Contact

  • Pinterest
  • Mail
Copyright © 2026 Tossed Flavors. All rights reserved.