30 Minute Easy Creamy Spicy Parsnip Soup Recipe
![- 4 medium-sized parsnips, peeled and chopped into 1-inch pieces - 1 large onion, finely diced - 3 cloves of garlic, minced to a paste - 1 teaspoon ground cumin - 1 teaspoon smoked paprika - 1/2 teaspoon cayenne pepper - 4 cups vegetable broth - 1 cup full-fat coconut milk - Fresh parsley or cilantro For this creamy spicy parsnip soup, you need simple, fresh ingredients. Parsnips are the star; they add a sweet, nutty flavor. When you peel and chop them, look for smooth skin with no blemishes. The onion adds a nice base, while garlic gives it depth. Spices are key to the soup's warmth. Ground cumin offers a slight earthiness. Smoked paprika brings a rich, smoky note. Adjust the cayenne pepper based on how much heat you want. Next, you’ll need liquid. Low-sodium vegetable broth keeps it light. Full-fat coconut milk adds creaminess and a touch of sweetness. For a fresh finish, sprinkle chopped parsley or cilantro on top. This adds color and brightens the dish. You can find the complete recipe by following the link to the [Full Recipe]. - Peel and chop parsnips. - Dice onion and mince garlic. Start by peeling the parsnips. Use a sharp peeler for ease. After peeling, chop them into 1-inch pieces. This size helps them cook quickly and evenly. Next, take your onion. Dice it finely, aiming for small, even pieces. Finally, mince the garlic cloves into a paste. This ensures the garlic flavor spreads well in the soup. - Sauté onion and garlic. - Add spices and bloom for flavor. - Incorporate parsnips and broth. Warm olive oil in a large pot over medium heat. Once the oil shimmers, add the diced onion. Sauté for about 5 minutes. Stir occasionally until the onion turns soft and translucent. Then, add the minced garlic along with the spices. This includes ground cumin, smoked paprika, and cayenne pepper. Stir well and let the spices cook for 1-2 minutes. This helps release their flavors. After that, add in the chopped parsnips. Pour in the vegetable broth next. Increase the heat until it gently boils. Once boiling, reduce the heat and cover the pot. Let it simmer for about 15 minutes, or until the parsnips are tender. - Blend the soup until creamy. - Stir in coconut milk. - Season and garnish before serving. After simmering, it’s time to blend the soup. Use an immersion blender for a quick and easy option. Blend until it becomes silky and creamy. If you don't have an immersion blender, let the soup cool a bit. Then, transfer it in batches to a countertop blender. Blend until smooth. Return the creamy soup to the pot if using a countertop blender. Stir in the full-fat coconut milk for added creaminess. Season with salt and freshly cracked black pepper. Heat through on low for about 5 more minutes. Serve warm in bowls, garnished with fresh parsley or cilantro. Enjoy this delightful creamy spicy parsnip soup for a cozy meal! - Use an immersion blender for ease. It blends the soup right in the pot. - Adjust spice levels based on preference. Add less cayenne for mild flavor. - Pair with crusty bread or a side salad. This adds texture and balance. - Serve hot with a drizzle of coconut milk. It enhances creaminess and taste. - Garnish with herbs for visual appeal. Fresh parsley or cilantro brightens the dish. - Add a sprinkle of smoked paprika. This gives a nice color and flavor boost. Enjoy the simple pleasure of this creamy spicy parsnip soup. Check out the Full Recipe for more details! {{image_4}} You can easily change some ingredients in this soup. Here are a few ideas: - Substitute coconut milk with heavy cream for a richer taste. - Use vegetable stock for more flavor instead of water. These swaps can help you find your favorite version of the soup. You can adjust the creaminess or the taste to match your needs. Want to make your soup stand out? Here are some fun ideas to boost flavor: - Add a splash of lemon juice to brighten the soup. - Incorporate roasted red peppers for a touch of sweetness. These options can change the taste and make your soup unique. Feel free to experiment and find what you love! If you have special diet needs, this soup can work for you. Here are some adjustments: - Make it vegan by choosing plant-based ingredients like coconut milk. - Use certified gluten-free broth for gluten-free options. These changes help everyone enjoy the soup without worry. Just follow the recipe and swap as needed! You can store any leftover soup in airtight containers. This keeps it fresh for days. Make sure to cool the soup before sealing it. It’s best to eat the soup within three days. If you want to keep your soup longer, freeze portions for up to three months. Use freezer-safe containers or bags. Label them with the date so you can track freshness. Thaw in the fridge overnight before reheating. To enjoy your soup again, reheat it on the stovetop. Pour it into a pot and warm it gently over medium heat. Add extra broth if needed to reach your desired creaminess. Stir occasionally to prevent sticking. Enjoy your soup warm and tasty! For the full recipe, check the earlier section. To make the soup spicier, simply increase the amount of cayenne pepper. Start with a small amount and taste as you go. This way, you can control the heat level. You can also add crushed red pepper flakes or even fresh chili for more kick. Adjusting spice is fun and personalizes the soup to your taste. Yes, you can make this soup ahead of time. It stores well in the fridge for up to three days. The flavors actually meld and deepen over time. Just store it in an airtight container. When ready to eat, reheat it on the stove. You might want to add a splash of broth to keep it creamy. I love pairing creamy parsnip soup with a fresh salad or crusty bread. A bright salad adds crunch and freshness to the meal. Crusty bread is perfect for dipping and soaking up the soup. You can also serve it with a light sandwich for a full meal. Enjoy the blend of warm soup and fresh sides! This creamy parsnip soup is easy and packed with flavor. You learned about the key ingredients, like parsnips and spices. I shared simple steps for cooking and tips for great serving. You can customize it to fit your taste and dietary needs. Whether you enjoy it fresh or as leftovers, this dish shines. Try it today to warm your kitchen and impress your guests. Simple, delicious, and satisfying—this soup is a winner!](https://tossedflavors.com/wp-content/uploads/2025/05/61de7167-e054-497c-9523-748cdadbd38f.webp)
Looking for a quick and creamy soup that packs a spicy punch? This 30 Minute Easy Creamy Spicy Parsnip Soup is the answer! With just a few fresh ingredients like …
Looking for a quick and creamy soup that packs a spicy punch? This 30 Minute Easy Creamy Spicy Parsnip Soup is the answer! With just a few fresh ingredients like …
![- 2 lbs lamb shoulder, cut into 1-inch cubes - 2 tablespoons vegetable oil - 2 large onions, finely chopped - 4 cloves garlic, minced - 1 tablespoon fresh ginger, minced - 3-4 green chilies, slit lengthwise - 2 teaspoons cumin seeds - 1 tablespoon coriander powder - 1 tablespoon garam masala - 1 teaspoon turmeric powder - 1 can (14 oz) diced tomatoes, with juice - 1 cup coconut milk - 1/2 cup plain yogurt - Salt to taste - Fresh cilantro, chopped for garnish Collect these ingredients before you start cooking. The lamb shoulder gives the dish a rich flavor. The spices, like cumin and garam masala, add warmth and depth. Coconut milk and yogurt create a creamy texture that balances the heat. Use fresh cilantro for a pop of color and flavor at the end. - Slow cooker - Large skillet - Measuring spoons and cups - Chopping board and knife Gather your tools. The slow cooker is key for tender lamb. A large skillet helps with the initial sautéing of the onions and spices. Use a chopping board and a sharp knife for prepping your ingredients. Having everything ready makes cooking easy and fun. For the full recipe, check out the complete details in the instructions section. Sautéing the Onions Start by heating the vegetable oil in a large skillet over medium heat. Once the oil is hot, add the cumin seeds. Let them sizzle for about 30 seconds. You will smell a wonderful aroma. Now, toss in the finely chopped onions. Cook them for about 8-10 minutes. Stir them occasionally until they turn golden brown. Adding Garlic, Ginger, and Chilies Next, add the minced garlic and ginger to the skillet. Also, include the slit green chilies. Cook this mixture for 2-3 minutes. You want it to smell fragrant. This step adds depth to your curry. Precooking Meat and Vegetables In your slow cooker, place the cubed lamb shoulder. Season it well with salt. Pour the sautéed onion and spice mix over the lamb. Make sure the lamb is covered evenly. This helps the meat soak in all the flavors. Layering Ingredients in the Slow Cooker Now, add the diced tomatoes along with their juice. After that, pour in the coconut milk and plain yogurt. Stir everything gently. Ensure the lamb is well coated in this delicious sauce. Slow Cooking Process Cover your slow cooker with its lid. Set it to cook on low for 6-8 hours or on high for 4-5 hours. The lamb should become fork-tender. This slow cooking makes the meat juicy and tasty. Finishing Touches Before Serving Once the cooking time is up, taste the curry. Adjust salt if needed. Stir the dish well and let it rest for 10 minutes. This resting time helps the flavors blend nicely. Just before serving, sprinkle fresh chopped cilantro on top for a fresh kick. Enjoy this tasty meal! For the full recipe, check [Full Recipe]. How to Select the Best Cuts of Lamb When making lamb curry, choose lamb shoulder. It has the right fat and flavor. Look for a deep red color and some marbling. This cut stays tender during slow cooking. Avoid lean cuts like lamb loin. They dry out too easily. Adjusting Spice Levels for Your Taste Spice can make or break your curry. If you like it milder, use fewer green chilies. You can also remove the seeds for less heat. For more kick, add extra chilies or a pinch of cayenne. Taste as you go. This way, you can find your perfect balance. Marinating Tips for Richer Flavor Marinating your lamb boosts its flavor. Use yogurt, garlic, and spices to coat the meat. Let it sit in the fridge for at least one hour. Overnight is even better. This step helps the spices soak in well. Importance of Resting Time Before Serving Once your curry is done, let it rest for ten minutes. This time helps blend the flavors. The curry will taste better after resting. It also cools slightly, making it safer to eat. Serve it alongside warm naan or rice for a complete meal. Check the [Full Recipe] for detailed instructions! {{image_4}} You can change the protein in this lamb curry. Here are some ideas: - Beef: Use chuck roast for a rich taste. - Chicken: Chicken thighs work well; they stay tender. - Vegetarian Options: Use chickpeas or lentils for a hearty meal. Try using different spices and herbs too. Here are some suggestions: - Aromatics: Add leeks or shallots for a sweet note. - Spices: Experiment with cardamom or cinnamon for warmth. These small changes keep your meals exciting and fresh. You have options for cooking this curry. You can choose between stovetop, slow cooker, or even an Instant Pot. - Stovetop Version: Brown the lamb first. Then, add the aromatics and spices. Finally, simmer until tender. This method takes less time, but you must watch it closely. - Slow Cooker: Follow the full recipe as written. It allows the flavors to blend beautifully over hours. You can set it in the morning and return to a warm meal. - Instant Pot Adaptation: Use the sauté function for the aromatics. Then, add the lamb and other ingredients. Cook on high pressure for about 35 minutes. This method is quicker and still delivers great flavor. Feel free to mix and match these methods with the ingredient swaps for a unique twist on this easy slow-cooked Indian lamb curry. - Refrigeration Guidelines: After enjoying your lamb curry, let it cool to room temperature. Place the curry in an airtight container. It will last in the fridge for about 3 to 4 days. Always ensure the container is sealed well to keep out air. - Freezing Tips for Longer Storage: If you want to keep your lamb curry longer, freezing is a great option. Use a freezer-safe container or heavy-duty freezer bags. Make sure to remove as much air as possible. You can store it for up to 3 months. When ready to eat, thaw it in the fridge overnight. - Best Methods for Reheated Curry: Reheat your curry in a pot over low heat. Stir it often to prevent sticking. You can also use the microwave. Place the curry in a microwave-safe bowl and cover it. Heat in short bursts, stirring in between. - Maintaining Flavor and Texture: To keep the flavors fresh, add a splash of coconut milk or yogurt when reheating. This keeps the curry creamy and delicious. Make sure to taste and adjust the salt if needed before serving again. How long can I store slow cooked lamb curry? You can store slow cooked lamb curry in the fridge for up to four days. Make sure to keep it in an airtight container. If you want to keep it longer, you can freeze it for up to three months. Can I use frozen lamb for this recipe? Yes, you can use frozen lamb. Just make sure to thaw it before cooking. This helps the lamb cook evenly and absorb all the flavors. What to serve with Indian lamb curry? I love serving lamb curry with warm naan or fluffy basmati rice. You can also add a side of raita or a fresh salad for balance. What is the ideal cooking temperature for lamb? The ideal cooking temperature for lamb is around 145°F (63°C) for medium-rare. Use a meat thermometer to check doneness. Can I add vegetables to the curry? Absolutely! You can add vegetables like peas, carrots, or potatoes. Just add them about an hour before the curry finishes cooking. What to do if the curry is too spicy? If the curry is too spicy, add a bit of yogurt or coconut milk. This will help cool down the heat and balance the flavors. How to thicken the curry if it’s too watery? To thicken the curry, you can mash some of the cooked lamb or add a spoonful of cornstarch mixed with water. Stir it in and let it simmer for a few minutes. This blog post covered key steps to make a tasty lamb curry. We discussed ingredients, cooking methods, and tips for perfecting your dish. Remember, choose the best lamb cuts and adjust spices to your taste. You can also try different proteins or cooking methods. Store leftovers properly for fresh meals later. Cooking can be fun, so don't hesitate to experiment. Enjoy the journey of making your curry delicious!](https://tossedflavors.com/wp-content/uploads/2025/05/d95f79a0-dc1e-4ad1-8a57-a7f93ac5383a.webp)
If you’re craving a warm, comforting dish, look no further! This Easy Slow Cooked Indian Lamb Curry is packed with flavor and simplicity. You can create a rich, hearty meal …

Are you ready to take your chicken game to the next level? In this post, I’ll share my top secret to making the best crispy buttermilk chicken. This delightfully juicy …

Are you ready to take your snacking game to the next level? In this guide, I’ll show you how to make the best homemade egg rolls that are both crispy …
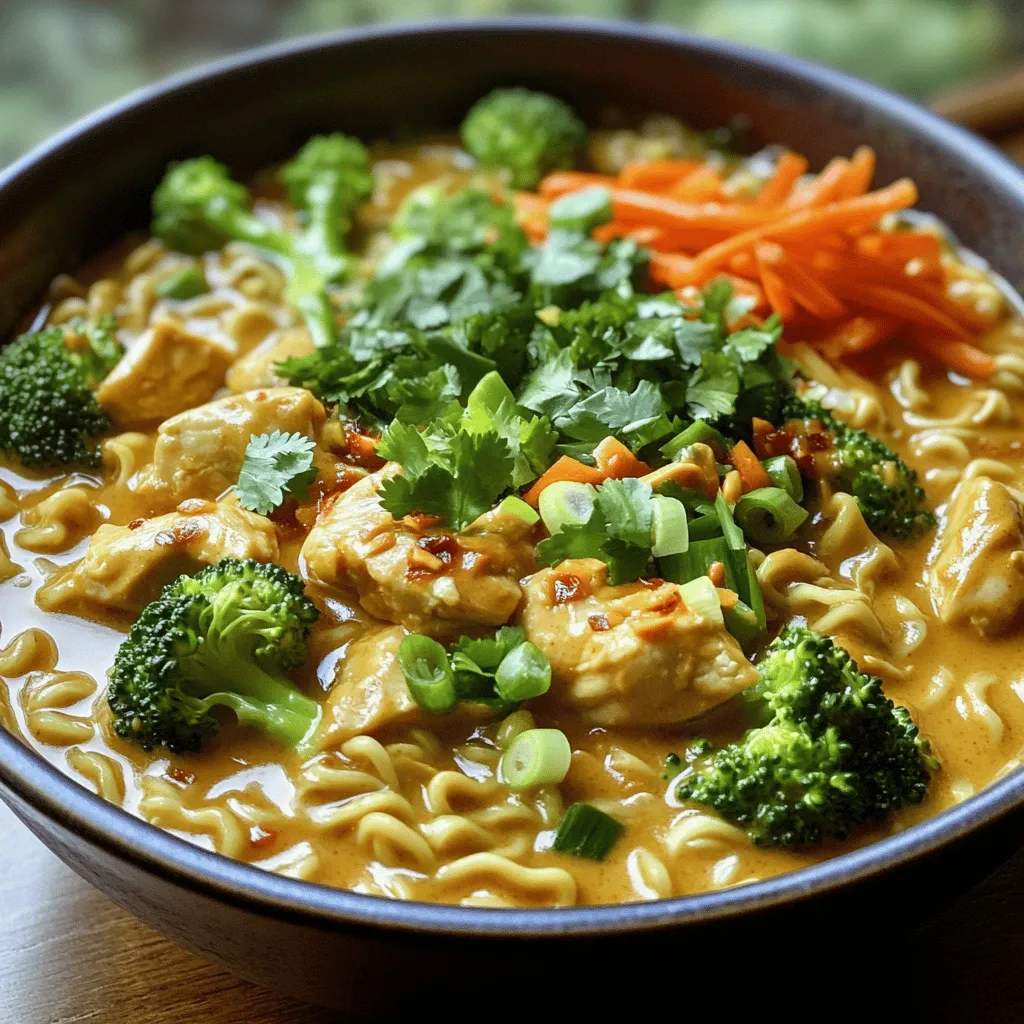
Are you ready to spice up your dinner plans? In just a few easy steps, you can whip up a bowl of Easy Spicy Chicken & Peanut Butter Ramen that’s …

Craving a dessert that combines the best of brownies and cookies? You’re in for a treat! These fudgy chewy brookies are the ultimate indulgence, blending rich brownie texture with cookie …
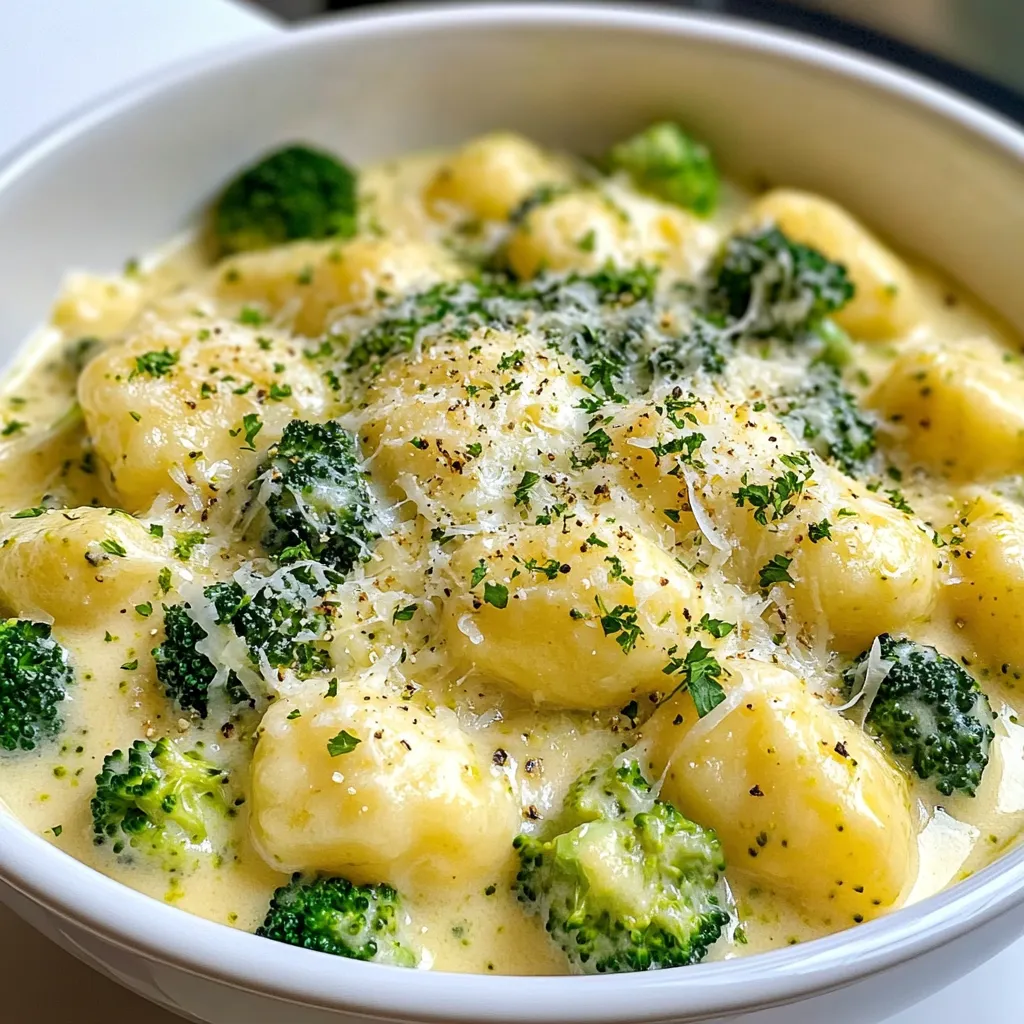
Looking for a quick and tasty dinner idea? Try my Creamy Broccoli Cheddar Gnocchi! This dish blends soft gnocchi and fresh broccoli with rich cheddar cheese and cream, creating a …
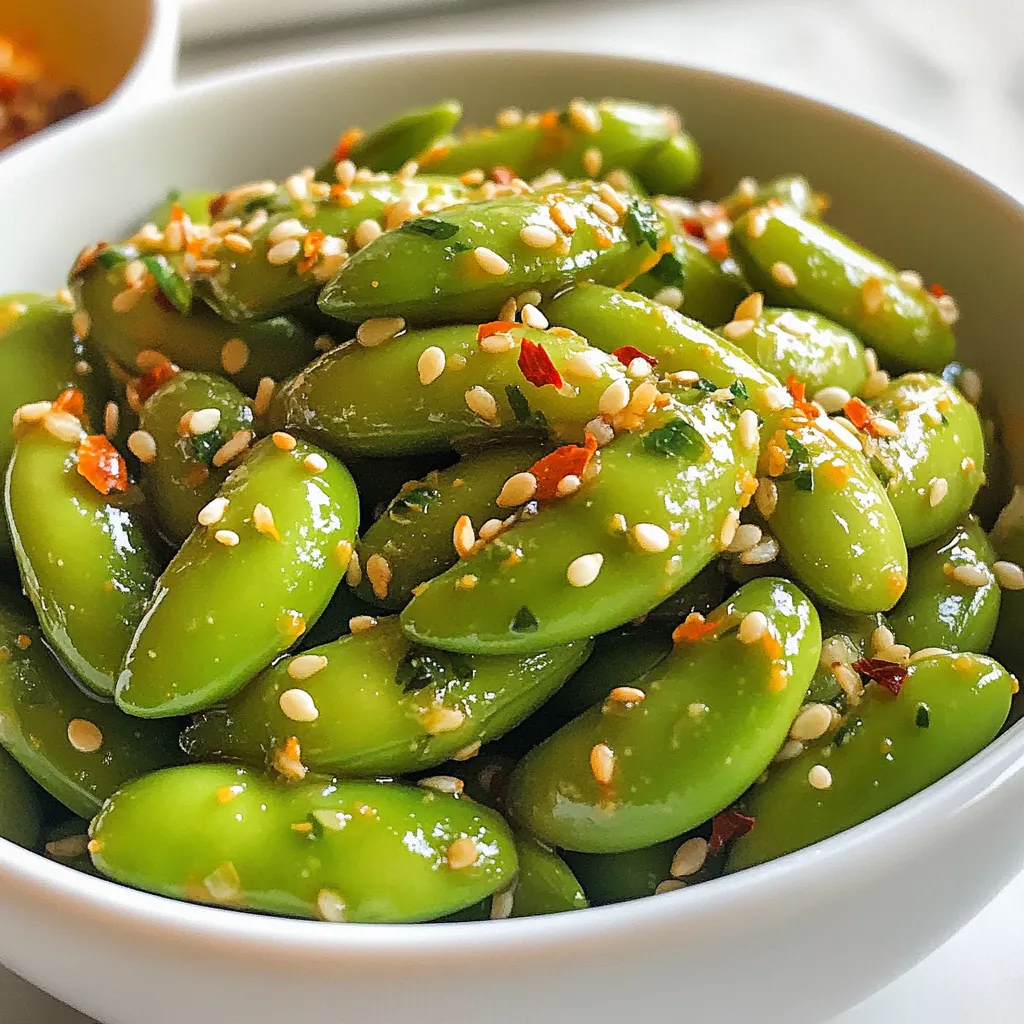
Are you ready to spice up your snack game? This Spicy Garlic Edamame recipe is easy, quick, and bursting with flavor. With just a handful of ingredients, you’ll create a …
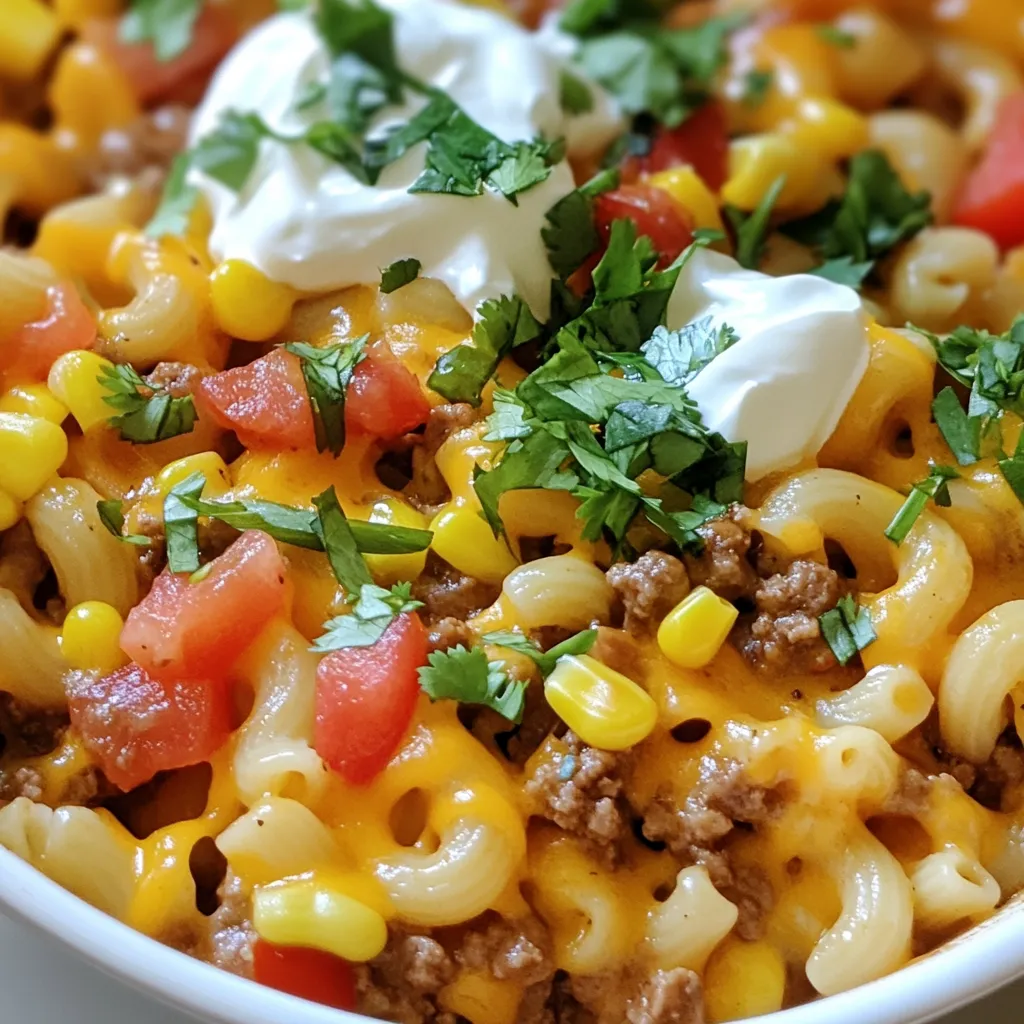
If you’re looking for a quick and tasty meal, you’ll love my Taco Macaroni Skillet. This hearty dinner cooks in one pan, making cleanup a breeze. Packed with flavor and …
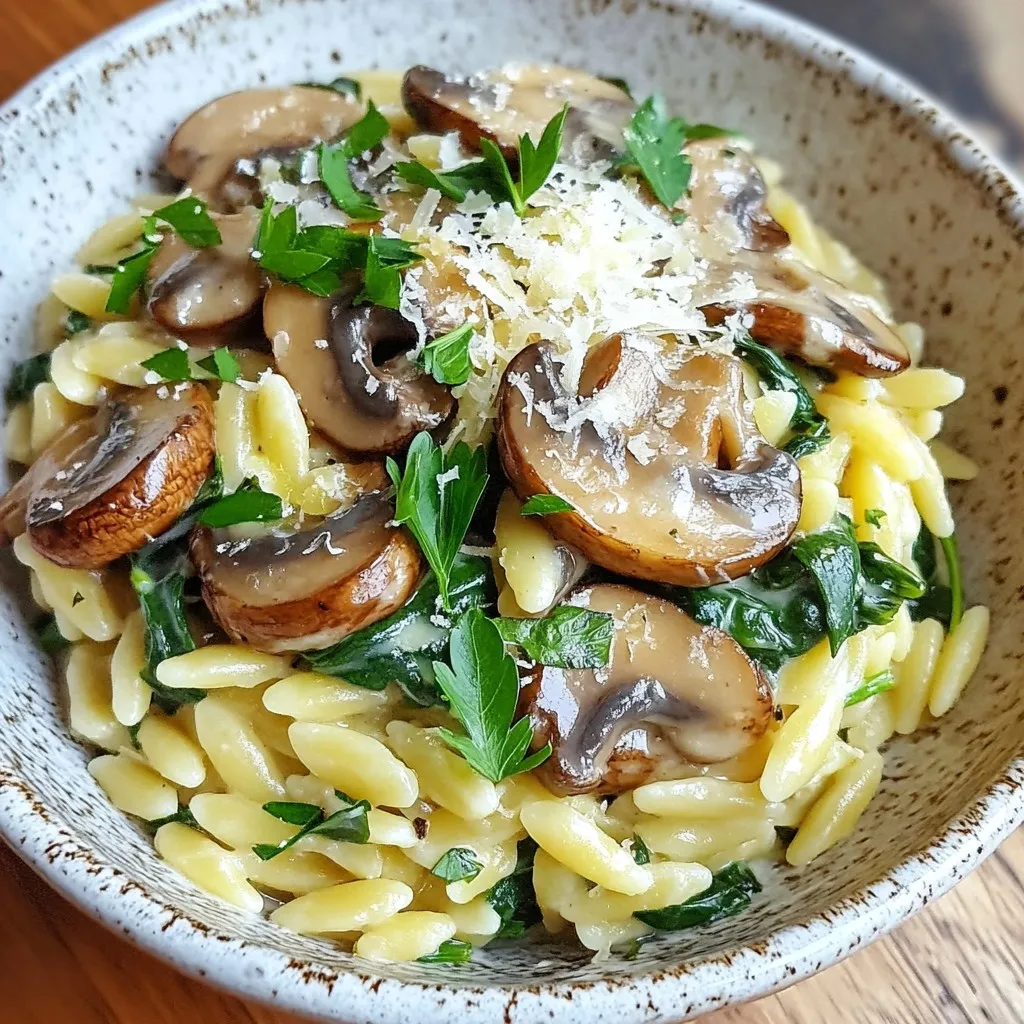
Looking for a quick and creamy dinner that impresses? Try my Creamy Mushroom Spinach Orzo! This dish packs rich flavors and smooth textures, perfect for any night of the week. …