Buffalo Chicken Wings Crispy and Flavorful Recipe

Get ready to delight your taste buds with my Crispy and Flavorful Buffalo Chicken Wings recipe! These wings are packed with flavor and perfect for game days or even a …
Get ready to delight your taste buds with my Crispy and Flavorful Buffalo Chicken Wings recipe! These wings are packed with flavor and perfect for game days or even a …

Get ready to indulge your taste buds with my Irresistible Cheesy Parmesan Mozzarella Bites! These crunchy, cheesy delights are perfect for snacking or entertaining. With simple ingredients and easy steps, …

Looking to spice up your snack game? This Caprese Dip brings fresh flavors that delight the taste buds. With juicy cherry tomatoes, creamy mozzarella, and fragrant basil, this dish is …
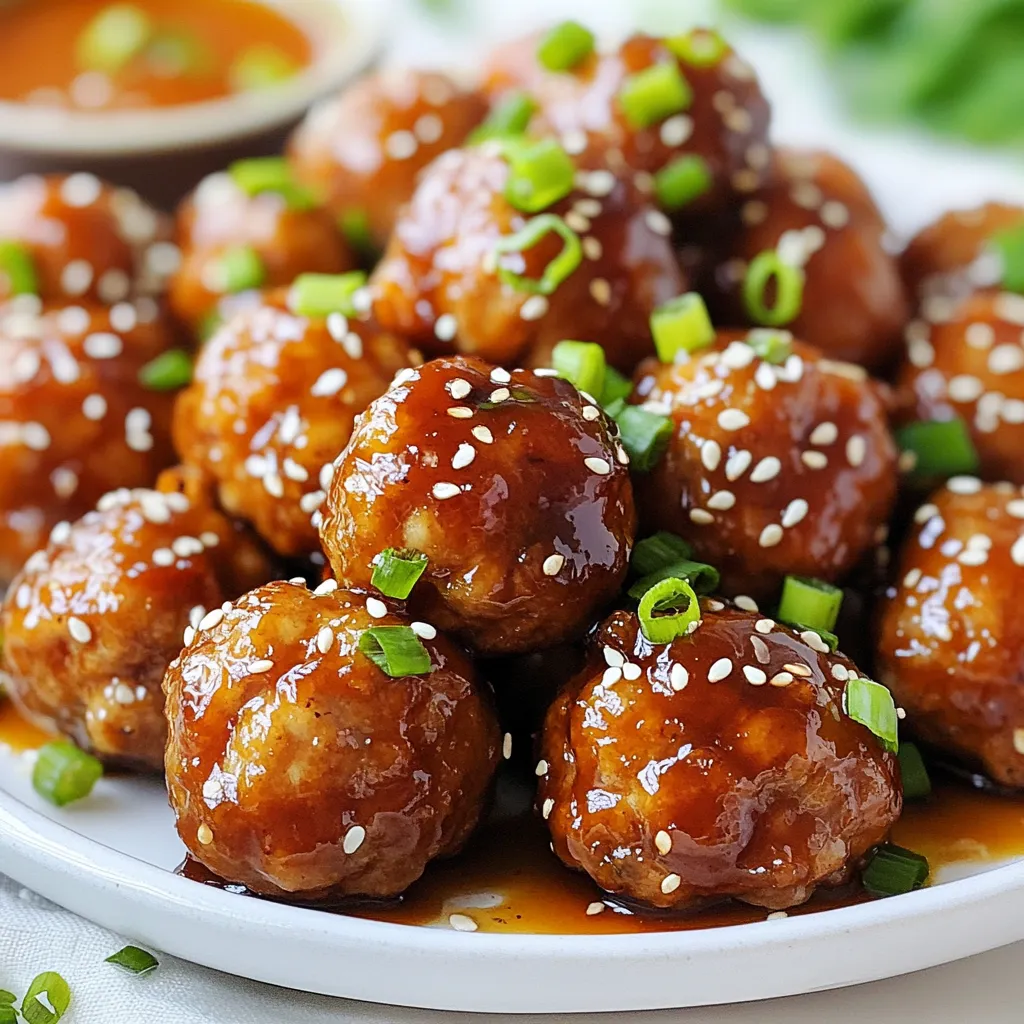
Looking for a quick, tasty meal that will impress everyone? You’ve found it! My Sticky Teriyaki Meatballs are packed with flavor and easy to make. This recipe uses simple ingredients …

Craving a warm treat that’s cheesy and satisfying? Loaded tater tots hit the spot every time! They’re crispy, gooey, and full of flavor. In this blog post, I’ll share the …
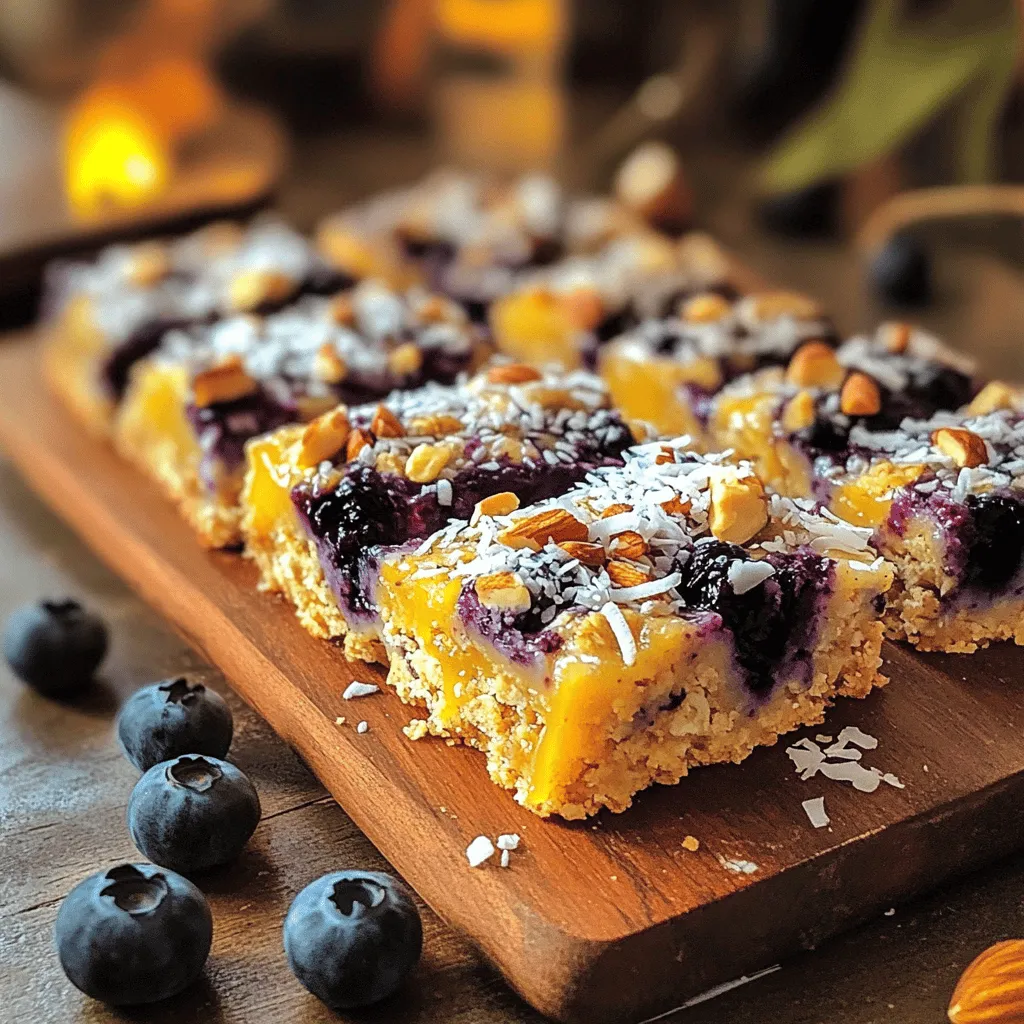
Are you looking for a healthy and tasty snack that’s easy to make? Blueberry oatmeal bars are your answer! Packed with wholesome ingredients, they make for a perfect breakfast or …

Are you ready to dive into a warm and gooey treat? Monkey Bread is fun to make and even better to eat. Whether you are a seasoned baker or a …
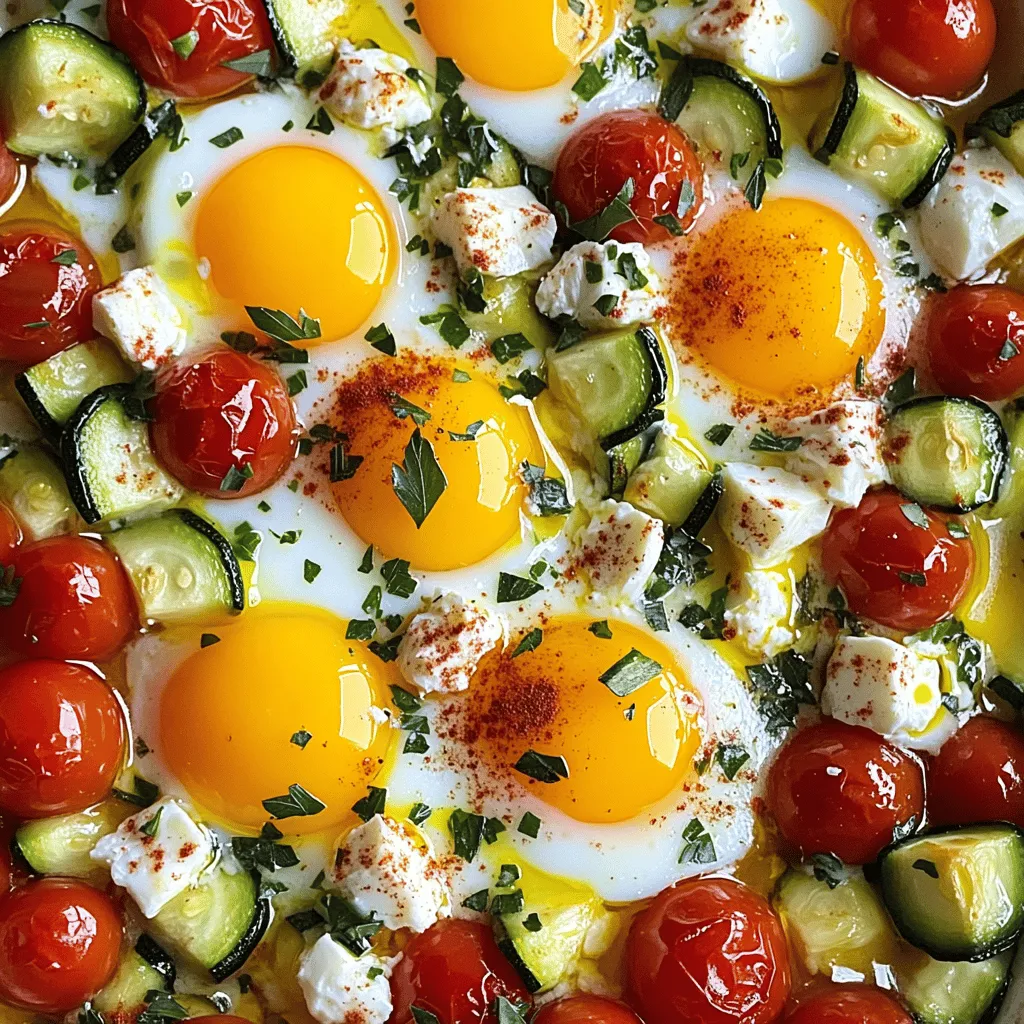
Welcome to a simple yet flavorful dish you’ll love: Mediterranean Baked Feta Eggs! This recipe is packed with veggies and creamy feta, perfect for any meal. You don’t need advanced …
![To make the best pan fried beef tacos, gather these fresh ingredients: - 1 lb ground beef - 1 small onion, finely chopped - 2 garlic cloves, minced - 1 teaspoon cumin - 1 teaspoon chili powder - 1/2 teaspoon smoked paprika - Salt and freshly ground black pepper to taste - 8 small corn tortillas - 1 cup shredded iceberg or romaine lettuce - 1 cup ripe tomatoes, diced - 1/2 cup shredded cheese (either sharp cheddar or crumbled queso fresco) - 1 ripe avocado, sliced - Fresh cilantro leaves, for garnish - Lime wedges, for serving These ingredients blend well to create a tasty taco experience. The ground beef provides a rich flavor. Onions and garlic add depth. Spices like cumin and chili powder give warmth. Fresh toppings bring crunch and brightness. You can find the full recipe in the cooking section. Enjoy customizing your tacos with your favorite toppings! 1. Start by heating a large skillet over medium heat. 2. Add 1 lb of ground beef to the skillet. Cook it until it is brown. This takes about 5-7 minutes. 3. Break the meat apart with a spatula as it cooks. This helps it brown evenly. 4. Once the beef is brown, add 1 finely chopped onion and 2 minced garlic cloves. 5. Sauté the onion and garlic for 3-4 minutes. You want the onion to be soft and clear. 6. Next, add 1 teaspoon of cumin, 1 teaspoon of chili powder, and 1/2 teaspoon of smoked paprika. 7. Season with salt and black pepper to taste. Stir well and cook for 2 more minutes. This lets the spices mix in. 1. In another non-stick skillet, heat it over medium-high heat. 2. Place one small corn tortilla in the hot skillet. 3. Warm it for about 30 seconds on each side. The tortilla should feel soft. 4. Repeat this with the other tortillas. Keep them warm by covering them with a clean towel. 1. Take a warm tortilla and scoop a generous amount of the beef mixture onto it. 2. Add a handful of shredded lettuce and a dollop of diced tomatoes on top. 3. Sprinkle some shredded cheese over the beef. You can use sharp cheddar or queso fresco. 4. Place a few slices of ripe avocado on top for creaminess. 5. Garnish with fresh cilantro leaves for a pop of color. 6. Serve the tacos right away with lime wedges on the side. Squeeze the lime for extra flavor. For more details, check the Full Recipe. - Use a heavy skillet, like cast iron. It heats evenly and keeps the beef warm. - Start with medium heat. This helps brown the beef without burning it. - Season the beef with cumin, chili powder, and smoked paprika. These spices add depth. - Use fresh onions and garlic for a bright flavor. Fresh herbs like cilantro boost taste too. - Arrange tacos on a large platter. This makes them look inviting and easy to grab. - Serve with lime wedges and a side of salsa. This adds color and extra flavor to the meal. For a full recipe, check out the [Full Recipe]. {{image_4}} You can switch the ground beef for ground turkey or chicken. These meats are leaner and still tasty. Just make sure to cook them until they reach a safe temperature. If you want a vegetarian option, try using beans. Black beans or pinto beans work great. They add protein and fiber, making your tacos hearty. Toppings can make your tacos exciting. You can add fresh salsa for a zesty kick, jalapeños for heat, or sour cream for creaminess. If you need dairy-free options, use avocado or a vegan yogurt instead. You can also try adding roasted corn or pickled onions for extra flavor. The choice of tortilla matters. Corn tortillas are traditional and gluten-free. They have a nice texture and flavor. Flour tortillas are soft and chewy, perfect for those who like a little more bite. If you need gluten-free options, look for corn or almond flour tortillas. They hold the filling well and taste great. For the full recipe, refer to the section above. To keep your pan fried beef tacos fresh, follow these tips. First, let the tacos cool down to room temperature. Then, place them in an airtight container. This helps prevent moisture loss. Store them in the fridge. Your tacos will stay good for about 3 to 4 days. When it's time to enjoy leftovers, reheat them well. You can use a skillet over medium heat. This method warms them evenly. Flip the tacos gently to avoid breaking them. To keep tortillas from getting soggy, avoid using the microwave. Instead, heat them on the skillet for a minute or two. This keeps them crisp and tasty. If you want to save tacos for later, freezing works well. You can freeze them assembled or unassembled. For assembled tacos, wrap them tightly in foil or plastic wrap. If you choose to freeze them unassembled, pack the beef and toppings separately. To thaw, place them in the fridge overnight. When ready, reheat in the oven or skillet. This method ensures the best taste and texture. Enjoy your delicious pan fried beef tacos later! To make pan fried beef tacos, follow these simple steps: 1. Start by cooking 1 lb of ground beef in a large skillet. 2. Break it apart with a spatula until it’s fully browned. 3. Add 1 small chopped onion and 2 minced garlic cloves. 4. Sauté for 3-4 minutes until the onion is soft. 5. Mix in 1 teaspoon of cumin, 1 teaspoon of chili powder, and 1/2 teaspoon of smoked paprika. 6. Season with salt and black pepper. Cook for 2 more minutes. 7. Warm 8 small corn tortillas in a separate skillet. 8. Fill each tortilla with the beef mix and top with your favorites. I recommend checking the Full Recipe for more details. Yes, you can use other meats! Ground turkey or chicken are great options. You can also use shredded beef or pork. If you want a meatless option, try black beans or lentils, which are tasty and filling. For tasty toppings, I suggest: - Shredded lettuce - Diced tomatoes - Shredded cheese (like cheddar or queso fresco) - Sliced avocado - Fresh cilantro - Squeeze of lime You can also add jalapeños or salsa for extra flavor. To spice things up, add chopped jalapeños to your beef mix. You can also sprinkle in cayenne pepper or hot sauce. For a smoky flavor, try using chipotle peppers. Adjust the heat to match your taste! Yes, you can prep ahead! Cook the beef mix and store it in the fridge. Warm it up when you’re ready to eat. You can also chop your toppings ahead of time. Just keep them fresh and cold until serving. You can now enjoy making tasty tacos at home. The ingredients and steps are simple. Start with the beef and spices, then heat your tortillas. Don’t forget to add fresh toppings like lettuce and avocado. Use the tips for flavor and presentation to impress your family. Feel free to get creative with proteins and toppings. Store extras properly for later meals. With the right methods, your tacos can be a hit every time. Enjoy your cooking and savor the delicious rewards!](https://tossedflavors.com/wp-content/uploads/2025/05/31d9781c-e43d-40b9-8934-cc29040e178e.webp)
Craving a quick and delicious meal? Look no further than pan-fried beef tacos! This tasty dish combines juicy ground beef with fresh toppings to create a satisfying bite. Whether you’re …

Imagine waking up to the smell of warm, fluffy banana chocolate chip pancakes. This simple recipe will make your mornings brighter and start your day off sweet. I’ll show you …