Skip to content
tossedflavors.com
  • Home
  • Appetizers
  • Desserts
  • Salads
  • Breakfast
  • Dinner
  • Privacy Policy
  • Contact
  • About

Chef Evan

Maple Cinnamon Roasted Almonds Tasty and Healthy Snack

December 21, 2025December 4, 2025 by Chef Evan
To make Maple Cinnamon Roasted Almonds, gather these simple ingredients: - 2 cups raw almonds - 1/4 cup pure maple syrup - 1 tablespoon ground cinnamon - 1/4 teaspoon salt - 1/2 teaspoon vanilla extract - 1 tablespoon coconut oil (or olive oil) These ingredients create a sweet and warm flavor that you will love. To make your roasted almonds even more exciting, try adding: - 1/4 cup dried cranberries or raisins for extra sweetness - A pinch of nutmeg for a warm spice that complements cinnamon These options let you customize your snack to suit your taste. For the best flavor, choose high-quality ingredients. Look for: - Raw almonds from a trusted store or farmer's market - Pure maple syrup, not imitation syrup, for a rich taste - Fresh ground cinnamon to ensure full flavor Shopping at local markets helps you find the freshest options. {{ingredient_image_1}} Start by preheating your oven to 350°F (175°C). This step is key for even roasting. Next, grab a baking sheet and line it with parchment paper. The parchment helps prevent sticking and makes cleanup easy. You want a clean surface where the almonds can roast freely. In a mixing bowl, add these ingredients: - 1/4 cup pure maple syrup - 1 tablespoon ground cinnamon - 1/4 teaspoon salt - 1/2 teaspoon vanilla extract - 1 tablespoon coconut oil (or olive oil) Whisk them together until they blend into a smooth mixture. The maple syrup will give sweetness, while the cinnamon adds warmth. The salt enhances the flavors. This blend coats the almonds well, making them tasty. Now, add 2 cups of raw almonds to your bowl. Stir them until they are fully coated with the maple-cinnamon mixture. This step ensures every almond gets flavor. Then, spread the coated almonds in a single layer on the lined baking sheet. Make sure they are not too crowded. This will help them roast evenly. Place the baking sheet in your preheated oven. Roast for about 15-20 minutes. Remember to stir the almonds halfway through. This helps them brown nicely. Watch them closely to avoid burning. You want them golden brown and fragrant. Once done, take them out and let them cool on the baking sheet. The almonds will harden as they cool. If you like, toss in 1/4 cup of dried cranberries or raisins for added sweetness after cooling. Once cool, store the almonds in an airtight container. Enjoy your tasty snack! To get the best flavor, use pure maple syrup. It adds a rich, sweet taste. Ground cinnamon is key too; it gives warmth and spice. Make sure to mix your ingredients well. This helps each almond get coated evenly. If you want extra sweetness, add dried cranberries or raisins. They pair great with the maple and cinnamon. To prevent burning, check your almonds often while roasting. Stir them halfway through to keep them from browning too much. Use a timer for 15 minutes, but watch closely after that. If they smell nutty, they are close to done. You want them golden brown, not dark brown. For freshness, store your roasted almonds in an airtight container. This keeps them crunchy and tasty. Make sure they are completely cool before you store them. If left at room temperature, they last about a week. For longer storage, keep them in the fridge. They can last up to a month that way. Pro Tips Watch the Oven: Keep a close eye on the almonds as they roast. They can go from perfectly golden to burnt in just a minute or two. Experiment with Flavors: Feel free to add other spices like nutmeg or ginger for a unique twist on the flavor profile. Storage Matters: Store the cooled almonds in an airtight container at room temperature to keep them fresh and crunchy. Perfect Pairing: These roasted almonds make a great snack on their own or can be added to salads and yogurt for extra crunch and flavor. {{image_2}} You can switch up the sweeteners in this recipe. If you want less sugar, try using honey or agave syrup. Both can bring a nice flavor twist. You might also like to use brown sugar for a deeper taste. For spices, consider using nutmeg or ginger. Each spice adds a new layer of warmth. You can mix and match these options to find your favorite blend. Feel free to add other nuts or seeds to this recipe. Cashews or pecans pair well with almonds. They offer different textures and flavors. You can also try seeds like pumpkin or sunflower seeds. They add crunch and healthy fats. When adding, keep the total amount the same. This helps the coating stick well. Mix the nuts and seeds in the same bowl before roasting. Roasted almonds are great on their own, but you can use them in many ways. Try adding them to salads for a crunchy bite. They work well in granola or trail mix too. You can also sprinkle them on yogurt for extra taste. Another fun idea is to use them in baking. Chop them and add to cookies or muffins. They can even be a topping for ice cream. The options are endless, so get creative! Maple cinnamon roasted almonds are not only tasty but also packed with nutrition. A typical serving of these almonds (about 1 ounce or 28 grams) contains: - Calories: Approximately 170 - Protein: 6 grams - Fat: 15 grams - Carbohydrates: 8 grams - Fiber: 3 grams These numbers can vary based on the exact amounts of maple syrup and any added fruits. The almonds provide healthy fats, protein, and fiber, making them a smart snack choice. Almonds are a nutrient-rich food with several health benefits: - Heart health: Almonds can help lower bad cholesterol levels. They may lower the risk of heart disease. - Weight management: Eating almonds in moderation can help with weight control. - Nutrient density: They are high in vitamin E, magnesium, and antioxidants. Maple syrup also has its perks: - Natural sweetener: It is a better alternative to refined sugars. - Rich in minerals: Maple syrup contains zinc, manganese, and calcium. - Antioxidants: It offers antioxidants that can help reduce inflammation. Combining almonds with maple syrup creates a snack that is both delicious and good for you. To enjoy maple cinnamon roasted almonds as a balanced snack, consider these ideas: - Pair them with Greek yogurt for protein and creaminess. - Mix them into oatmeal for added texture and flavor. - Serve with apple slices for a sweet and crunchy combo. These options can enhance the snack's nutritional value and keep you full longer. Enjoy your healthy treat! Yes, you can use other nuts. Try walnuts, pecans, or cashews. Each nut brings a unique flavor. You may need to adjust the roasting time. Walnuts may roast faster, while pecans may take a bit longer. Always watch them closely to avoid burning. The almonds are done when they turn golden brown and smell nice. They usually take about 15 to 20 minutes in the oven. Stir them halfway to ensure even cooking. If they look dark or smell burnt, they are overdone. Always trust your senses! Leftover roasted almonds are great for snacks or toppings. You can add them to salads or yogurt. They also make a tasty addition to oatmeal. Store them in an airtight container to keep them fresh. Enjoy them as a quick snack anytime! This guide covered everything you need for delicious roasted almonds. You learned the best ingredients and how to prepare them. We walked through simple steps for roasting and shared tips to enhance flavor and freshness. The variations offered creative ideas, while the nutritional section highlighted their health benefits. Remember, choose quality ingredients for the best taste. Enjoy your roasted almonds as a snack or in recipes. Combining knowledge and practice will lead to tasty results every time.

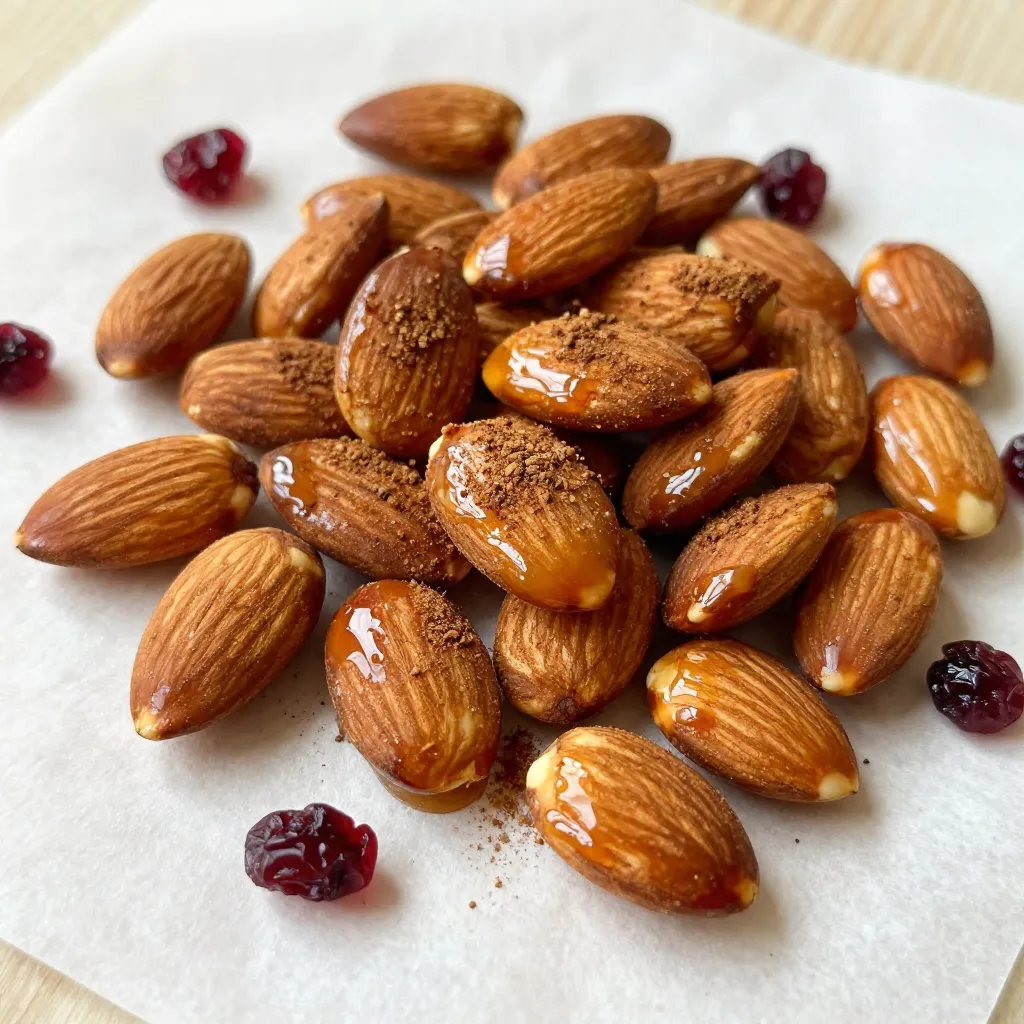
Looking for a tasty and healthy snack? Try making Maple Cinnamon Roasted Almonds! This easy recipe combines creamy almonds with warm maple and cinnamon flavors. Not only will you enjoy …

Read more

Categories Appetizers Leave a comment

Spinach Artichoke Stuffed Chicken Flavorful Delight

December 26, 2025November 30, 2025 by Chef Evan
- 4 boneless, skinless chicken breasts - 1 cup fresh spinach, chopped - 1 cup artichoke hearts, chopped (canned or frozen) - 1/2 cup cream cheese, softened - 1/2 cup shredded mozzarella cheese - 1/4 cup grated Parmesan cheese - 3 cloves garlic, minced - 1 teaspoon Italian seasoning - Salt and pepper to taste - 2 tablespoons olive oil - Fresh parsley, for garnish - 1 cup = 240 milliliters - 1/2 cup = 120 milliliters - 1/4 cup = 60 milliliters - 1 teaspoon = 5 milliliters For the best flavor, use fresh spinach. Fresh artichoke hearts add a nice touch. Choose high-quality cream cheese for a creamy texture. Look for good mozzarella and Parmesan. Always check for freshness when buying your chicken. Quality ingredients make a big difference in taste. {{ingredient_image_1}} 1. First, preheat your oven to 375°F (190°C). This helps cook the chicken evenly. 2. In a medium bowl, combine the chopped spinach, artichoke hearts, cream cheese, shredded mozzarella, grated Parmesan, minced garlic, Italian seasoning, salt, and pepper. Mix well until smooth. 3. Next, take each chicken breast and slice a pocket into it. Be careful not to cut through completely. 4. Now, stuff each chicken breast with the spinach and artichoke mixture. Use toothpicks if needed to keep it closed. 1. In a large oven-safe skillet, heat the olive oil over medium-high heat. Wait until it's nice and hot. 2. Add the stuffed chicken breasts to the skillet. Sear each side for about 3-4 minutes until they turn golden brown. 3. After searing, transfer the skillet to the preheated oven. Bake for 20-25 minutes. Make sure the chicken reaches an internal temperature of 165°F (74°C). 4. Once done, take the chicken out of the oven. Let it rest for a few minutes before removing any toothpicks. 1. For a lovely presentation, garnish the chicken with fresh parsley. 2. Serve the stuffed chicken on a cutting board or a white plate. 3. Drizzle any leftover juices from the skillet over the top. 4. Pair your dish with roasted vegetables or a fresh salad for a complete meal. Start by selecting the right chicken breasts. Choose large, boneless, and skinless ones. Cut a pocket carefully into each breast. Do not cut all the way through. This keeps your stuffing inside. Use a spoon to fill each pocket with the spinach and artichoke mix. Make sure to pack it in well. Secure the opening with toothpicks if needed. This helps keep the filling from spilling out. To make this dish easier, gather a few tools. You will need a sharp knife for cutting. A medium bowl is great for mixing the filling. Use a large oven-safe skillet for cooking. A spoon helps with stuffing the chicken. Finally, have a meat thermometer on hand. It ensures your chicken is cooked to the right temperature. For added flavor, try these simple tips. Use fresh garlic for a strong taste. You can also add more herbs, like thyme or rosemary. Mixing in a bit of lemon juice brightens the dish. If you like a kick, add red pepper flakes. Pair your stuffed chicken with roasted vegetables for a healthy side. Serve it with a nice salad to balance flavors. Pro Tips Use Fresh Ingredients: Fresh spinach and artichokes will enhance the flavor of your stuffed chicken. If using frozen artichokes, ensure they are well-drained to avoid excess moisture. Perfectly Cooked Chicken: To ensure the chicken is juicy and cooked thoroughly, use a meat thermometer to check that the internal temperature reaches 165°F (74°C). Customize Your Stuffing: Feel free to add other ingredients to the stuffing mixture, such as sun-dried tomatoes, feta cheese, or a pinch of red pepper flakes for extra flavor and spice. Rest Before Serving: Let the chicken rest for a few minutes after baking. This allows the juices to redistribute, making the chicken more tender and flavorful. {{image_2}} You can switch up the cheeses in this dish. Try using feta for a tangy taste. Goat cheese adds creaminess and depth. For a sharper flavor, use cheddar or gouda. Mixing cheeses can create a unique blend. Just make sure to keep the cream cheese for texture. If you want a lighter version, use Greek yogurt instead of cream cheese. This swap cuts calories and adds protein. You can also use low-fat cheese for less fat. For a gluten-free option, confirm all ingredients are gluten-free. Adding more veggies like bell peppers or mushrooms boosts nutrition, too. Pair this stuffed chicken with a simple salad. A light vinaigrette complements the rich flavors. Roasted vegetables, like broccoli or carrots, add color and crunch. For a sauce, consider a lemon butter or garlic sauce for extra flavor. You can even serve it with a side of whole grain rice or quinoa for a hearty meal. Store your leftover Spinach Artichoke Stuffed Chicken in an airtight container. Make sure it cools down first. This will keep the chicken fresh. Place it in the fridge. It will last for about 3 to 4 days. If you have extra filling, store it separately. To reheat, use your oven for best results. Preheat it to 350°F (175°C). Place the chicken in an oven-safe dish. Cover it with foil to keep it moist. Heat for about 15 to 20 minutes, or until warm. You can also use a microwave if you’re in a hurry. Heat it in short bursts, checking often. If you want to freeze the chicken, wrap each piece tightly in plastic wrap. Then place them in a freezer bag. Remove as much air as you can. This helps prevent freezer burn. Spinach Artichoke Stuffed Chicken can last in the freezer for about 2 to 3 months. When you’re ready to eat, thaw it in the fridge overnight before reheating. You can make Spinach Artichoke Stuffed Chicken in an air fryer easily. First, prepare the stuffing as usual. Follow the mixing steps with spinach, artichokes, and cheeses. Next, stuff the chicken breasts like before. Preheat the air fryer to 375°F (190°C). Place the stuffed chicken in the basket, ensuring they are not touching. Cook for around 15 to 18 minutes. Check that the chicken reaches 165°F (74°C). This method gives you a crispy outside and juicy inside. Yes, you can use frozen spinach in this recipe. Just make sure to thaw and drain it well. Frozen spinach can have more water than fresh spinach. Press it in a clean cloth to remove excess moisture. This step helps keep the stuffing from being too watery. The flavor will still be great, and it saves time. Spinach Artichoke Stuffed Chicken pairs well with many sides. Here are some tasty options: - Roasted vegetables, like carrots and bell peppers - A fresh green salad with a light dressing - Garlic mashed potatoes for creaminess - Quinoa or rice for a healthy grain option - Crusty bread to soak up juices These sides complement the rich flavor of the chicken and make a balanced meal. This blog covered the essentials for making delicious Spinach Artichoke Stuffed Chicken. You learned about key ingredients, easy preparation steps, and helpful tips. I shared variations to suit your taste and storage advice for leftovers. With this knowledge, you can cook confidently and enjoy your meal. Remember to have fun in the kitchen. The right tools and fresh ideas can elevate your dishes. Dive in, explore flavors, and impress yourself and others with your cooking skills.

Are you ready to impress at your next dinner? Spinach Artichoke Stuffed Chicken is a tasty dish that combines creamy flavors and a juicy chicken breast. You’ll learn how to …

Read more

Categories Dinner Leave a comment

Strawberry Cheesecake Stuffed French Toast Delight

December 10, 2025November 24, 2025 by Chef Evan
- 6 slices of thick-cut brioche or challah bread - 8 oz cream cheese, softened - 1/4 cup powdered sugar - 1 tsp vanilla extract - 1 cup fresh strawberries, hulled and sliced - 2 large eggs - 1/2 cup milk - 1/2 tsp ground cinnamon - 1 tbsp butter (for cooking) - Maple syrup (for serving) - Extra sliced strawberries (for garnish) - Whipped cream (optional, for serving) To make Strawberry Cheesecake Stuffed French Toast, gather these ingredients. You want thick-cut brioche or challah bread for the best texture. Cream cheese gives that cheesecake flavor. Mix in powdered sugar and vanilla extract for sweetness and depth. Fresh strawberries add a nice fruity touch. Next, you’ll need eggs, milk, and ground cinnamon. This mixture creates a custard. It helps the bread soak up flavor while cooking. Butter is essential for cooking and flavor. Maple syrup is a must for serving. It adds sweetness and richness. Optional garnishes include more sliced strawberries and whipped cream. They make your dish look beautiful and taste even better. Each ingredient plays a key role in your French toast delight. {{ingredient_image_1}} To make the filling, start by taking a bowl. Combine 8 oz of softened cream cheese, 1/4 cup of powdered sugar, and 1 tsp of vanilla extract. Mix these until smooth and creamy. This step is key for a rich flavor. Next, gently fold in 1 cup of sliced strawberries. Make sure the strawberries are evenly mixed into the cream cheese. This filling is what makes your French toast special. Now it’s time to create the stuffed sandwiches. Take two slices of thick-cut brioche or challah bread. Spread about 2-3 tablespoons of the strawberry cheesecake filling on one slice. Place another slice on top, making a sandwich. Repeat this for the rest of the bread slices. Make sure each sandwich has enough filling. This will ensure every bite is delicious. For cooking, whisk together 2 large eggs, 1/2 cup of milk, and 1/2 tsp of ground cinnamon in a shallow dish. This mixture will coat the sandwiches. Heat a skillet over medium heat and add 1 tbsp of butter. Dip each stuffed sandwich into the egg mixture, coating both sides well. Let any excess drip off before placing it in the skillet. Cook for about 3-4 minutes on each side. You want them golden brown and slightly crispy. Once cooked, remove them from the skillet and keep warm. Repeat this with any remaining sandwiches. Enjoy them warm, drizzled with maple syrup and garnished with extra sliced strawberries! To make the best Strawberry Cheesecake Stuffed French Toast, ensure you mix the filling well. Take your time when blending the cream cheese, powdered sugar, and vanilla. This helps create a smooth filling. If the mixture is lumpy, it won’t spread easily. Next, avoid soaking the bread too long. Dip each sandwich into the egg mixture just enough to coat. Too much soaking makes the bread soggy. You want it to soak up flavor but still hold its shape. When serving, pair this dish with fresh fruit, like a side of berries. This adds color and freshness to your plate. You can also serve it with crispy bacon or sausage for a savory touch. For a beautiful presentation, dust the French toast with powdered sugar. This adds a nice touch and makes it look fancy. Place the stuffed French toast on a pretty plate and drizzle extra maple syrup around the edges. Add a dollop of whipped cream on top for a special treat. Pro Tips Use Day-Old Bread: Using slightly stale brioche or challah helps the bread absorb the egg mixture without becoming too soggy, resulting in a better texture. Customize the Filling: Feel free to experiment with different fruits like blueberries or raspberries, or add a splash of lemon zest for an extra zing in your cheesecake filling. Control the Heat: Cook on medium heat to ensure the outside gets golden brown while allowing the inside to warm through without burning the bread. Presentation is Key: For an impressive presentation, stack the stuffed French toasts, drizzle with syrup, and top with whipped cream and fresh fruit for a colorful finish. {{image_2}} You can change the fruit for fun. Blueberries or bananas work great too. Just swap the strawberries for your favorite fruit. This keeps the taste fresh and exciting. You can also modify the cream. Try using flavored cream cheese. Options like strawberry or vanilla add a nice twist. Mixing in lemon zest brings a bright kick to every bite. You can make this dish fit your needs. Use gluten-free bread if you want to avoid gluten. Many brands offer tasty options that work well. For dairy-free lovers, try alternatives for cream cheese. Brands now make coconut or almond cream cheese. These options keep the flavor rich without the dairy. You’ll still enjoy a delightful stuffed French toast! To keep your Strawberry Cheesecake Stuffed French Toast fresh, store it in the fridge. Use an airtight container to prevent it from drying out. If you have extra filling, keep it in a separate container. This way, you can enjoy the leftovers without losing flavor. When reheating, the best method is to use a skillet. Heat it on low and add a bit of butter. Place the French toast in the skillet for about 2-3 minutes on each side. This keeps the outside crispy while warming the inside. You can also use a microwave, but the texture may not be as nice. If you choose the microwave, heat it in short bursts. Enjoy your delicious French toast warm! Can I make this in advance? Yes, you can prepare the filling the night before. Store it in the fridge. You can also assemble the sandwiches ahead of time. Keep them wrapped in the fridge. Just cook them in the morning for a warm treat. How do I keep French toast warm? To keep your French toast warm, set your oven to a low heat. Place the cooked French toast on a baking sheet. Cover it with foil to keep it warm while you cook the rest. This way, all your French toast stays nice and toasty. What can I serve alongside? You can serve fresh fruit like bananas or more strawberries. A side of crispy bacon adds a savory touch. You might also like to add yogurt or whipped cream for extra flavor. A sprinkle of powdered sugar makes it look fancy, too! This blog post shared how to make delicious strawberry cheesecake stuffed French toast. We covered key ingredients, like brioche and cream cheese, and outlined step-by-step instructions for making the dish. I also shared helpful tips for perfecting the recipe, fun variations, and storage info. As you try this fun recipe, remember that the key is enjoyment. Experiment with flavors and presentation. This dish is perfect for breakfast or brunch with friends and family. Enjoy your cooking adventure!

Welcome to a breakfast dream that will delight your taste buds! Today, we’re diving into Strawberry Cheesecake Stuffed French Toast. This sweet twist on a classic dish will turn any …

Read more

Categories Breakfast Leave a comment

Classic French Onion Soup Irresistible Flavor Delight

December 23, 2025November 20, 2025 by Chef Evan
- 4 large yellow onions, thinly sliced - 3 tablespoons unsalted butter - 1 tablespoon olive oil - 1 teaspoon sugar - 4 cups beef broth (low-sodium) - 1 cup vegetable broth - 2 cloves garlic, minced - 1 tablespoon fresh thyme leaves (or 1 teaspoon dried thyme) - 1 bay leaf - Salt and pepper to taste - 8 slices of baguette, toasted - 1 ½ cups grated Gruyère cheese - ½ cup grated Parmesan cheese Using fresh ingredients is key to great flavor. Fresh onions caramelize better and give that sweet taste we love. I always choose yellow onions for their balance of sweetness and strength. For the cheese, Gruyère is my top pick. It melts well and adds a rich flavor. Parmesan gives a sharp kick that complements the soup. When choosing cheese, look for high-quality options. Aged cheeses can enhance the taste even more. Using low-sodium broth helps control saltiness. It allows the natural flavors to shine. Always taste as you cook. This way, you can adjust flavor to your liking. {{ingredient_image_1}} Caramelizing the onions (30-40 minutes) To start, I melt the butter and olive oil in a large pot over medium heat. Then, I add the sliced onions and sugar. I stir often to help the onions cook evenly. After about 30 to 40 minutes, they should turn a deep golden brown. This process makes the soup sweet and rich. Combining ingredients for the soup Next, I stir in the minced garlic. I cook this for about 2 minutes to bring out its flavor. Then, I pour in the beef broth and vegetable broth. I add thyme, bay leaf, salt, and pepper to the pot. I let the mixture simmer gently for 20 minutes. This step builds the soup’s flavor. Preparing for broiling After simmering, I remove the bay leaf. Then, I ladle the soup into oven-safe bowls. This is key for the next step. I place a slice of toasted baguette on top of each bowl. Plating the soup in oven-safe bowls Now, I generously sprinkle Gruyère and Parmesan cheese over the bread. It’s important to cover the bread well with cheese. This will create a delicious cheesy crust when broiled. Cheese topping and broiling technique I place the bowls under the broiler for 3 to 5 minutes. I watch closely to ensure the cheese melts and bubbles nicely. Once it’s golden brown, I carefully take the bowls out of the oven. I let them cool slightly before serving. This dish looks great and smells even better! Caramelizing onions is a key step. First, slice your onions thinly. Set your heat to medium. Watch closely as they cook. The color will change from white to golden brown. This takes about 30 to 40 minutes. Stir often to keep them from burning. If they start to brown too fast, lower the heat. Adding a pinch of salt helps draw out moisture. This makes them softer and sweeter. For French onion soup, Gruyère cheese is the best choice. It melts nicely and adds rich flavor. You can mix in Parmesan for extra depth. To achieve the perfect melt, grate your cheese finely. This helps it melt quickly and evenly. Place the cheese on top of the bread, then broil it. Keep an eye on it to avoid burning. The cheese should bubble and turn golden brown. Presentation matters for this dish. Use rustic bowls for a cozy feel. Place a sprinkle of fresh thyme on top. This adds color and flavor. For a touch of luxury, drizzle truffle oil over the soup. Pair it with a light white wine, like Sauvignon Blanc. A simple green salad also makes a great side. Enjoy your warm, comforting bowl of soup! Pro Tips Caramelization is Key: Take your time when caramelizing the onions; a slower cook at medium heat will yield a richer flavor and deeper color. Broth Quality Matters: Use high-quality beef and vegetable broth for the best depth of flavor. Homemade broth can elevate your soup significantly. Cheese Variety: Experiment with different cheeses like Emmental or Comté for a unique twist on the classic Gruyère topping. Serve Immediately: French onion soup is best enjoyed fresh from the broiler, so serve it right away for that perfect cheesy, bubbly experience. {{image_2}} You can use chicken or vegetable broth for this soup. Each broth gives a unique taste. Chicken broth adds richness, while vegetable broth brings a lighter flavor. Mixing broth types can deepen the taste. Experiment with your favorite to find what you love. Adding wine can boost the flavor. A splash of white wine gives a nice zing. Fresh herbs like parsley or basil can add extra depth. If you want a vegan option, use only vegetable broth. Ensure your bread and cheese meet your dietary needs. Gluten-free bread works well, too! Using seasonal vegetables can enhance your soup. In spring, try adding fresh peas or asparagus. In fall, consider roasted squash for warmth. Each season brings new flavors to explore. Don’t be afraid to mix and match! How do you store leftover French Onion Soup? First, let the soup cool down. Then, pour it into an airtight container. Make sure to seal it tight. Store it in the fridge. It will stay fresh for up to three days. What are the best practices for reheating? To reheat, pour the soup into a pot. Heat it over medium-low heat. Stir often to avoid burning. You can also use the microwave. Heat in short bursts, stirring in between. Add a splash of broth to keep it moist. Can you freeze French Onion Soup? Yes, you can freeze it! This is a great way to save leftovers. What steps do you take before freezing for optimal flavor? First, cool the soup completely. Next, pour it into freezer-safe bags or containers. Leave some space at the top for expansion. Label the bags with the date. You can freeze it for up to three months. When ready to eat, thaw it overnight in the fridge before reheating. How long does it take to prepare French Onion Soup? It takes about 15 minutes to prep and about 1 hour to cook. You need time to caramelize the onions well. What can I serve with French Onion Soup? Serve French Onion Soup with a crisp salad or some crusty bread. A glass of red wine pairs nicely too. Can I make French Onion Soup in advance? Yes, you can make it a day ahead. Just store it in the fridge and reheat before serving. What is the secret to a rich flavor in French Onion Soup? The secret lies in caramelizing the onions slowly. This brings out their natural sweetness. Use good quality beef broth for depth. Adding fresh thyme and bay leaves also boosts the flavor. In summary, this blog outlined the key ingredients for a delicious French Onion Soup, highlighted the importance of quality ingredients, and provided detailed cooking steps. You learned how to caramelize onions, choose the best cheese, and present the dish beautifully. Remember, using fresh ingredients greatly improves flavor. With tips on variations and storage, you can adapt this recipe to your taste. Enjoy making this classic dish, and savor its warm, rich flavors. It's a simple recipe that always impresses.

Are you ready to savor the delightful taste of Classic French Onion Soup? This rich, warm dish combines sweet caramelized onions with savory broth and melted cheese. I’ll guide you …

Read more

Categories Dinner Leave a comment

Sticky Sesame Cauliflower Crispy and Flavorful Dish

December 20, 2025November 14, 2025 by Chef Evan
- Cauliflower florets - 1 cup all-purpose flour - 1/2 cup cornstarch - 1 teaspoon garlic powder - 1 teaspoon onion powder - 1/2 teaspoon salt - 1/4 teaspoon black pepper - 1/2 cup water - Oil for frying (vegetable or canola) - 1/4 cup soy sauce - 2 tablespoons maple syrup - 1 tablespoon rice vinegar - 2 teaspoons sesame oil To make Sticky Sesame Cauliflower, you need fresh cauliflower. I prefer medium-sized florets. They fry nicely and soak up the sauce well. The batter is key to getting that perfect crunch. You mix flour, cornstarch, garlic powder, onion powder, salt, and pepper in a bowl. Then add water slowly until the batter is smooth. For the sauce, combine soy sauce, maple syrup, rice vinegar, and sesame oil. This mix gives the dish its sticky and sweet flavor. - Toasted sesame seeds - Chopped green onions Garnishes add texture and flavor. I love to sprinkle toasted sesame seeds on top. They add a nice crunch. Chopped green onions bring a fresh taste and color to the dish. - Vegetable oil - Canola oil For frying, I recommend using vegetable or canola oil. Both oils have a high smoke point. This keeps the cauliflower crispy and prevents burning. Make sure to heat the oil well before adding the batter-coated florets. This step is crucial for getting that golden, crispy finish. {{ingredient_image_1}} To start, gather your dry ingredients. You need 1 cup of all-purpose flour, 1/2 cup of cornstarch, 1 teaspoon of garlic powder, 1 teaspoon of onion powder, 1/2 teaspoon of salt, and 1/4 teaspoon of black pepper. Mix them in a bowl. This blend gives the batter a tasty kick. Next, add water. Pour in 1/2 cup of water slowly while you whisk. Keep stirring until the batter is smooth and thick. This step is key. A good batter sticks well to the cauliflower, giving it that crunchy coating. Now it’s time for the cauliflower. Take your medium head of cauliflower and cut it into florets. Dip each floret into the batter. Make sure each piece is covered well. Let any extra batter drip off. This helps with the frying process. If the batter is too thick, it won't fry right. Heat oil for frying. Use a large pot or deep skillet. Set the heat to medium-high. Check the oil’s readiness by dropping a tiny bit of batter into it. If it sizzles, you are good to go. Carefully add the coated florets in batches. Fry them for about 4-5 minutes. You want them golden brown and crispy. Avoid crowding the pan. This keeps the heat even. Once done, remove them and place them on a paper towel-lined plate. This helps soak up extra oil. Enjoy the crispy texture! For the best crispy texture, batter consistency matters a lot. Aim for a thick batter that clings well to the cauliflower. If it's too runny, it won't coat properly, leading to soggy bites. Start with one cup of all-purpose flour and half a cup of cornstarch. Mix in your spices and then add water bit by bit until you reach a smooth texture. Timing is key when frying. Fry the cauliflower in small batches. This keeps the oil temperature steady, helping each piece become golden and crispy. If you overcrowd the pan, the temperature drops. This can make your cauliflower greasy instead of crispy. To boost the flavor of your sticky sesame cauliflower, add more spices to the batter. Consider using cayenne for heat or smoked paprika for a smoky touch. You can also mix in some ginger powder for warmth. For the sauce, thickness matters too. If you want a thicker sauce, let it simmer longer to reduce. You can also add a cornstarch slurry (mix cornstarch with water) to thicken it quickly. Just stir it in while cooking. When serving, a colorful platter makes a big difference. Place the sticky cauliflower on a bright dish for contrast. Sprinkle extra sesame seeds on top for a nice touch. Adding chopped green onions not only adds color but also a fresh bite. Wedge some lime slices on the side. When squeezed over the dish, they add a zesty kick. This makes your dish not just tasty but also appealing to the eyes. Pro Tips Ensure Even Coating: Make sure each cauliflower floret is thoroughly coated with the batter to achieve a uniform crispness when frying. Maintain Oil Temperature: Keep the oil at a consistent medium-high heat. If the temperature drops, the batter may become soggy instead of crispy. Batch Frying: Fry the cauliflower in small batches to avoid overcrowding the pot. This ensures even cooking and prevents the temperature from dropping too much. Customize the Sauce: Feel free to adjust the sweetness or saltiness of the sauce by adding more maple syrup or soy sauce according to your taste preference. {{image_2}} You can switch up the sauce to match your taste. For a spicy kick, add chili garlic sauce or sriracha to the mix. This adds heat and depth to the dish. For a sweet twist, try using honey or agave instead of maple syrup. These options bring a unique flavor that pairs well with the cauliflower. If you want a vegan version, you can use gluten-free flour instead of all-purpose flour. Almond or rice flour works great. You can also swap the maple syrup with agave nectar for a vegan option. Make sure to check that your soy sauce is vegan as well. It’s easy to make this dish fit your diet! This dish is a star on its own, but you can make it even better. Serve the sticky sesame cauliflower with steamed rice. It balances the dish perfectly. You can also add stir-fried vegetables for extra color and nutrition. Broccoli, bell peppers, and snap peas work well. Enjoy your meal with friends or family! To keep your sticky sesame cauliflower fresh, start by letting it cool down. Place it on a plate or in a bowl. Avoid sealing it while it's hot; steam can make it soggy. Once it cools, transfer the cauliflower to an airtight container. This step helps maintain its crispness. Store it in the fridge for up to three days. When you want to enjoy your leftovers, reheating is key. To keep the cauliflower crispy, use the oven or an air fryer. Preheat your oven to 350°F (175°C). Spread the cauliflower on a baking sheet in a single layer. Bake for about 10-15 minutes. If using an air fryer, set it to 350°F (175°C) and heat for about 5-8 minutes. Keep an eye on it to avoid burning. You can freeze sticky sesame cauliflower, but timing matters. It’s best to freeze it before frying. After coating the florets, place them on a baking sheet. Freeze them until solid, then transfer to a freezer bag. This method prevents them from sticking together. When ready to cook, fry them directly from frozen, adding a few extra minutes to the cooking time. If you freeze after frying, the texture may suffer. Yes, you can bake it! Baking is a great way to cut down on oil. It makes the dish less greasy. However, baked cauliflower may not be as crispy as fried. To bake, preheat the oven to 425°F (220°C). Spread the coated florets on a baking sheet. Bake for about 20 minutes, flipping halfway through. This method is healthier but may lack the crunch you get from frying. To thicken the sauce, you can make a simple change. Add more cornstarch. Mix one tablespoon of cornstarch with two tablespoons of cold water to create a slurry. Stir this into the sauce while it simmers. Heat it for an extra minute. This will help you achieve that perfect sticky texture you want. Just remember to add slowly and stir well! Sticky Sesame Cauliflower pairs well with many sides. Here are some tasty ideas: - Steamed jasmine rice - Stir-fried mixed vegetables - Quinoa for a nutty flavor - A fresh green salad - Noodles tossed in soy sauce These options help balance the dish's sweetness and add nutrition to your meal. Enjoy experimenting with different pairings! You now have a complete guide to making Sticky Sesame Cauliflower. We covered essential ingredients, step-by-step instructions, and useful tips for perfect texture and flavor. Remember to play with garnishes and sauces to make it your own. Cooking is fun, and your choices can change this dish. Whether you're frying, baking, or trying new ingredients, enjoy the process and share your results!

If you crave a dish that’s both crispy and packed with flavor, you’re in for a treat! My Sticky Sesame Cauliflower is your new go-to recipe. It’s simple, tasty, and …

Read more

Categories Appetizers Leave a comment

Greek Chicken Gyro Bowls Flavorful Meal Idea

November 27, 2025November 13, 2025 by Chef Evan
- 2 chicken breasts, sliced into strips - 1 cup quinoa, rinsed and drained - 1 cup cherry tomatoes, halved - 1 cucumber, diced - 1/2 red onion, thinly sliced - 1 cup feta cheese, crumbled - 1/4 cup fresh parsley, chopped In Greek chicken gyro bowls, the chicken serves as a tasty protein source. Quinoa adds healthy grains. Fresh vegetables like cherry tomatoes and cucumber provide crunch and color. Feta cheese adds a creamy taste, while parsley gives a fresh touch. - 2 tablespoons olive oil - 3 cloves garlic, minced - 1 teaspoon dried oregano - 1 teaspoon smoked paprika - Salt and pepper to taste These herbs and spices bring life to the dish. Olive oil adds richness. Garlic gives a strong flavor. Oregano and smoked paprika provide a warm aroma. Salt and pepper enhance all the tastes. - Tzatziki sauce for drizzling - Fresh parsley for garnish - Lemon zest for brightness Tzatziki sauce is a must for a creamy finish. It pairs well with the chicken and veggies. Fresh parsley adds color and flavor. Lemon zest gives a zesty kick, making the dish pop. {{ingredient_image_1}} - In a bowl, mix sliced chicken with olive oil, minced garlic, oregano, smoked paprika, salt, and pepper. - Make sure every piece is well coated. - Let the chicken marinate for at least 30 minutes in the fridge. This step adds great flavor! - In a saucepan, bring 2 cups of vegetable broth to a boil. - Measure 1 cup of rinsed quinoa and add it to the boiling broth. - Lower the heat, cover, and let it simmer for about 15 minutes. - Once the liquid is absorbed, fluff the quinoa with a fork and set it aside. - Heat a large skillet over medium-high heat. - Add the marinated chicken strips to the skillet. - Cook for 6-8 minutes, stirring now and then. - Look for a nice golden color and make sure the chicken is cooked through. - While the chicken cooks, chop the cherry tomatoes, cucumber, and red onion. - Also, crumble the feta cheese and chop the fresh parsley. - These toppings will add color and crunch to your bowl. - Start with a base of fluffy quinoa in each serving bowl. - Top it with the cooked chicken strips. - Add diced cucumber, halved cherry tomatoes, sliced red onion, crumbled feta, and chopped parsley. - Finish by drizzling lemon juice and tzatziki sauce over everything. - For an extra kick, sprinkle some lemon zest on top. To check if the chicken is done, use a meat thermometer. The chicken should reach 165°F. You can also cut a piece to see if it’s no longer pink inside. For a golden color, use high heat and avoid overcrowding in the pan. This helps the chicken brown evenly. To avoid mushy quinoa, rinse it well before cooking. This removes excess starch. Use a 2:1 ratio of broth to quinoa for perfect texture. You can also cook quinoa in a rice cooker for ease. Just follow the same ratio. For sauce variations, try adding herbs like dill or mint to tzatziki. You can also mix in yogurt for creaminess. If you want heat, add red pepper flakes or chili powder. These spices bring a nice kick to your dish. Pro Tips Marinate for Best Flavor: Allowing the chicken to marinate for at least 30 minutes enhances the flavor. For even more depth, marinate overnight in the refrigerator. Cooking Quinoa Perfectly: Ensure you rinse the quinoa before cooking to remove its natural bitter coating. This step will help achieve a fluffier texture. Fresh Ingredients Matter: Use fresh vegetables and herbs for the best taste. Fresh parsley and ripe tomatoes can elevate the dish significantly. Customize Your Toppings: Feel free to add other toppings like olives, bell peppers, or avocado for a personalized touch. This makes each bowl unique and flavorful. {{image_2}} For a tasty vegetarian version of Greek chicken gyro bowls, you can swap chicken for chickpeas or grilled vegetables. Chickpeas offer a great protein source and add a nutty flavor. Grilled eggplant or zucchini can add a nice texture. You can also try marinated tofu for a different twist. If you want to replace quinoa, consider using brown rice or farro. Both grains give a nice chewiness. For gluten-free options, try using cauliflower rice or millet. These alternatives bring a new taste while keeping the meal light and healthy. To boost your bowls, think about adding olives, roasted red peppers, or artichokes. These toppings can add extra flavor and make your meal more colorful. For a fusion idea, try adding Korean kimchi or spicy sriracha for a unique kick. Store your Greek chicken gyro bowls in airtight containers. This keeps the flavors fresh. Use glass or BPA-free plastic containers. They are great for keeping food safe. You can keep leftovers for up to three days in the fridge. After that, the quality may drop. To freeze your gyro bowls, separate the chicken and toppings from the quinoa. This helps keep the texture right. Place the chicken and quinoa in freezer-safe bags. Remove as much air as you can. You can freeze them for up to three months. When you're ready, thaw overnight in the fridge. Reheat the chicken in a skillet until hot. You can microwave the quinoa if you like it quick. For meal prep, cook the chicken and quinoa in advance. Store them in separate containers. This makes it easy to grab and go. You can assemble bowls fresh each day. When reheating, use a microwave or skillet. This keeps the chicken juicy and the quinoa fluffy. Yes, you can make Greek chicken gyro bowls ahead of time. This meal is great for meal prep. You can cook the chicken and quinoa, then store them separately. Keep the veggies and toppings fresh in the fridge. Use airtight containers for storage. The chicken and quinoa last about three to four days in the fridge. Just reheat the chicken when you're ready to eat. This saves time on busy days and keeps meals ready. If you don't have tzatziki sauce, don't worry! You can use yogurt mixed with herbs. Try Greek yogurt with dill and garlic for a fresh taste. Hummus is another great option. It adds creaminess and pairs well with the chicken. For a spicy kick, use a hot sauce or chili oil. You can also mix sour cream with lemon juice for a tangy flavor. These substitutions keep your gyro bowls delicious and fun. Yes, Greek chicken gyro bowls are healthy! They are full of protein from chicken and quinoa. The veggies add fiber and vitamins. Feta cheese gives you calcium, too. Each bowl has a balanced mix of nutrients. A serving has about 450-500 calories, depending on toppings. You can adjust the portions to fit your diet. Overall, this meal is tasty and nutritious, making it a smart choice for lunch or dinner. In this blog post, we explored how to create delicious Greek chicken gyro bowls. We covered essential ingredients like chicken, quinoa, and spices. You learned how to marinate chicken and cook quinoa perfectly. We also shared tips for toppings and storage. These bowls are not only tasty but also easy to customize. Remember, meal prep can save time during busy days. Enjoy making these bowls as a satisfying meal option. Your kitchen is ready; have fun experimenting!

Are you ready to spice up your dinner routine? Greek Chicken Gyro Bowls are a flavorful meal idea that packs a punch! With juicy chicken, fresh veggies, and creamy tzatziki, …

Read more

Categories Dinner Leave a comment

Lemon Garlic Roasted Shrimp Simple and Flavorful Dish

December 18, 2025November 12, 2025 by Chef Evan
- 1 pound large shrimp, peeled and deveined - 4 cloves garlic, minced - 3 tablespoons olive oil - Zest and juice of 2 lemons - 1 teaspoon paprika - 1 teaspoon red pepper flakes - Salt and pepper to taste - Fresh parsley, chopped To make Lemon Garlic Roasted Shrimp, start with the main ingredients. You need fresh shrimp that are peeled and deveined. This helps the flavors sink in better. Garlic adds a great aroma and taste. You will use four cloves, minced finely. Olive oil is your base for the marinade. Three tablespoons will do. Next, let's talk about flavor enhancers. The zest and juice of two lemons give a bright and tangy kick. Paprika adds a mild smokiness. If you like heat, one teaspoon of red pepper flakes will spice things up. Be sure to add salt and pepper to taste. This will balance all the flavors. Finally, fresh parsley serves as a lovely garnish. It adds color and a hint of freshness to your dish. When you have all these ingredients ready, you can create a dish that bursts with flavor. Enjoy the vibrant taste profile of this simple recipe! {{ingredient_image_1}} - Preheat the oven to 400°F (200°C). - In a large bowl, combine minced garlic, olive oil, lemon zest, lemon juice, paprika, red pepper flakes, salt, and pepper. Mix well until smooth. This will be your flavorful marinade. - Toss the shrimp in the marinade. Make sure each shrimp gets coated well. Let them sit for 15 minutes. This helps the shrimp soak up all those tasty flavors. - Arrange the marinated shrimp on a baking sheet. Keep them in a single layer for even cooking. - Roast the shrimp in the preheated oven for 8-10 minutes. Watch them closely! They are done when they turn pink and opaque. Don’t overcook them; they can get tough. - Once cooked, remove the shrimp from the oven and garnish with freshly chopped parsley for a pop of color. - Avoid overcooking the shrimp for best texture. Shrimp cook fast, so watch them closely. They turn pink when done. If you cook too long, they get tough and rubbery. Aim for 8-10 minutes in the oven. - Use parchment paper for easy cleanup. It keeps the shrimp from sticking. Plus, it saves time on washing dishes. Just toss the paper after cooking. - Pair lemon garlic roasted shrimp with quinoa or rice. These grains soak up the extra juice well. They make a great base for the shrimp. - Add lemon wedges and parsley for presentation. The bright colors make the dish pop. Fresh parsley adds a nice touch and a burst of flavor. - Adjust red pepper flakes for desired heat level. If you like it spicy, add more. If not, use less. Tailoring the spice makes the dish fit your taste. - Add additional spices for variety. Consider adding cumin or dill for a different twist. Feel free to experiment and find your favorite flavor combo. Pro Tips Marinate for More Flavor: Allow the shrimp to marinate for at least 30 minutes if time permits; this enhances the flavor and tenderness. Use Fresh Ingredients: Fresh garlic and lemons will give you the best flavor; avoid pre-minced garlic or bottled lemon juice for this recipe. Check for Doneness: Shrimp cooks quickly; they are done when they turn pink and opaque. Overcooking can make them tough. Experiment with Spices: Feel free to adjust the seasonings; try adding a pinch of cayenne pepper or some fresh herbs for a unique twist. {{image_2}} You can switch up the seafood in this dish. Try using scallops or fish instead of shrimp. Each option brings its own unique taste and texture. If you want a twist, swap the lemon for lime. Lime adds a bright, zesty flavor that pairs well with seafood. Feel free to change how you cook the shrimp. You can grill them for a smoky touch. Simply season them and place them on the grill until they turn pink. Another option is to sauté the shrimp on the stovetop. Heat some oil in a pan, add the shrimp, and cook until they’re done. If you need a gluten-free meal, this recipe is already safe. You can also add veggies like bell peppers or zucchini. This makes it a one-pan meal that is colorful and healthy. Just toss the veggies in with the shrimp and roast them together. After you make your lemon garlic roasted shrimp, let it cool. Then, store it in an airtight container. This way, your shrimp stays fresh in the fridge for up to 2 days. Keep in mind that the flavors will continue to meld, which can make it even tastier! If you want to save your shrimp for later, freezing is a great option. First, let the shrimp cool completely. Place them in a freezer-safe bag or container. Be sure to remove as much air as possible to prevent freezer burn. Cooked shrimp can last in the freezer for about 3 months. When you’re ready to enjoy them, simply thaw in the fridge overnight. To reheat the shrimp and keep their flavor and texture, use a gentle method. You can warm them in a skillet over low heat. Add a splash of olive oil or a little water to keep them moist. Stir occasionally until heated through. If you're in a hurry, you can microwave them for short bursts. Just heat them for 15 seconds at a time to avoid overcooking. Enjoy your shrimp just as fresh as when you first made them! You can marinate shrimp for 15 to 30 minutes. This timing helps the shrimp soak up the flavors. If you marinate too long, the shrimp may become mushy. Always check for taste and texture. Yes, you can use frozen shrimp. It is best to thaw them first. Place the shrimp in the fridge overnight or run them under cold water. Once thawed, pat them dry before marinating. This helps the shrimp absorb the flavor better. The ideal internal temperature for shrimp is 120°F (49°C). At this temperature, they are fully cooked and safe to eat. You can check with a food thermometer. Proper cooking ensures a juicy and tender bite, not rubbery. This blog post shared an easy shrimp recipe and gave you all the steps. You learned about key ingredients like shrimp, garlic, and lemon. The cooking tips help you avoid overcooking. Variations let you change flavors and cooking methods. In the end, this dish is simple and tasty. Try it with your favorite sides, and enjoy!

If you’re looking for a quick and tasty meal, Lemon Garlic Roasted Shrimp is the answer. This dish combines fresh shrimp with bright flavors, making it perfect for any night. …

Read more

Categories Appetizers Leave a comment

Chocolate Dipped Coconut Macaroons Irresistible Treat

December 20, 2025November 9, 2025 by Chef Evan
- 3 cups sweetened shredded coconut - 1 cup sweetened condensed milk - 1 teaspoon vanilla extract - 1/4 teaspoon salt - 2 egg whites - 1/4 cup granulated sugar - 8 ounces semi-sweet chocolate chips - 1 tablespoon coconut oil (optional) To make chocolate dipped coconut macaroons, you need these key ingredients. Sweetened shredded coconut gives the macaroons their chewy texture. Sweetened condensed milk adds sweetness and helps bind everything together. Vanilla extract gives a warm flavor, while a pinch of salt balances the sweetness. Egg whites are crucial for the light, airy structure of the macaroons. Whipping them to stiff peaks is key. Granulated sugar sweetens the egg whites and helps create volume. For the chocolate dip, semi-sweet chocolate chips work best, but you can also use dark or milk chocolate. Coconut oil can help the chocolate melt smoothly, but it’s not a must. - Alternatives for sweetened condensed milk: You can use evaporated milk mixed with sugar or try homemade sweetened condensed milk using regular milk and sugar. - Different types of chocolate for dipping: You can use dark chocolate for a richer flavor or white chocolate for a sweeter, creamier taste. - Gluten-free options: All the ingredients listed are gluten-free. Just ensure your chocolate is labeled gluten-free as well. These substitutions help you customize the recipe to your taste. Don’t be afraid to experiment! {{ingredient_image_1}} 1. Preheat your oven to 325°F (160°C). Line a baking sheet with parchment paper. This step helps the macaroons not stick. 2. In a large bowl, mix 3 cups of sweetened shredded coconut, 1 cup of sweetened condensed milk, 1 teaspoon of vanilla extract, and 1/4 teaspoon of salt. Stir until everything blends well. 1. In another bowl, whip 2 egg whites with an electric mixer. Beat until soft peaks form. 2. Gradually add 1/4 cup of granulated sugar. Keep whipping until you see stiff peaks. This makes the macaroons light. 3. Gently fold the whipped egg whites into the coconut mixture. Be careful not to deflate the whites. Use a spatula for this step. 4. Use a small cookie scoop or two tablespoons to drop rounded mounds onto the baking sheet. Leave an inch between each mound. 1. While the macaroons cool, melt 8 ounces of semi-sweet chocolate chips. You can add 1 tablespoon of coconut oil for a smooth finish. 2. Melt the chocolate in a microwave-safe bowl. Heat in 30-second intervals, stirring in between until it is smooth. 3. Once the macaroons are cool, dip the bottoms or half into the melted chocolate. Let the excess chocolate drip off. 4. Place the dipped macaroons back on the parchment paper. If you like, drizzle leftover melted chocolate on top for decoration. 5. Allow the chocolate to set. You can speed this up by chilling them in the fridge for 15 minutes. Whipping egg whites is key to light and fluffy macaroons. Start with clean, dry bowls. Make sure there’s no yolk in the whites. Whip the whites until they form soft peaks. Then, slowly add sugar while continuing to whip until stiff peaks form. This helps your macaroons rise well. Common mistakes include over-mixing or under-mixing the egg whites. Gently fold them into the coconut mixture. Be careful not to deflate the egg whites. This step is crucial for the right texture. You can add zest or extracts for extra flavor. Try almond extract for a nutty touch. You can also mix in some dark chocolate chips with the coconut. This creates a richer taste. Consider adding toasted nuts for a crunchy contrast. Customize the coconut mixture by using different types of coconut. Unsweetened coconut can give a different taste, too. Arrange your macaroons on a lovely platter for a stunning display. Try stacking them in rows for a neat look. For special occasions, sprinkle some toasted coconut flakes on top. You can also drizzle extra melted chocolate over them. This adds flair and makes them even more appealing. Pro Tips Use Fresh Ingredients: Fresh egg whites and high-quality chocolate can significantly enhance the flavor and texture of your macaroons. Customize Your Flavor: Experiment with different extracts, such as almond or coconut, to give your macaroons a unique twist. Perfect the Chocolate Dip: Make sure the chocolate is warm but not too hot to prevent the macaroons from melting. A little coconut oil can help achieve a smooth consistency. Storage Tips: Store the macaroons in an airtight container at room temperature for up to a week, or refrigerate them for longer freshness. {{image_2}} You can easily change the taste of your macaroons. Adding 1 teaspoon of almond extract gives a lovely nutty flavor. This pairs well with the coconut. You can also try different nuts on top. Chopped almonds or hazelnuts add crunch. These small changes make your treat unique. Want a vegan or dairy-free version? Use coconut milk instead of sweetened condensed milk. This keeps the rich flavor while making it plant-based. For those avoiding sugar, choose sugar-free sweeteners. They work well in the mixture without losing sweetness. Your guests will love these options. You can dress up your macaroons for the holidays. Add festive colors with sprinkles or colored chocolate. For spring, try a lemon zest mix. It brightens the flavor and adds a fresh twist. Each season brings new ideas, so get creative! To keep your macaroons fresh, store them at room temperature. Place them in an airtight container. Keep them away from heat and light. This way, they stay tasty for longer. If you live in a humid area, consider refrigerating them. Just remember to let them reach room temperature before eating. You can freeze macaroons too! Place them in a freezer-safe bag. They can last for up to three months in the freezer. How long do macaroons last? At room temperature, they last about a week. In the fridge, they can stay fresh for up to two weeks. If frozen, they will last three months. Look for signs of spoilage. If they smell off or have an unusual texture, it's best to toss them. Fresh macaroons should be soft and slightly chewy. If your macaroons lose their texture, you can refresh them. Place them in a warm oven for a few minutes. This helps them regain softness. If they become stale, try using them in a new way. Crumble stale macaroons over ice cream or mix them into yogurt. You can even use them as a base for a dessert parfait. Enjoying them in new forms can be just as fun! You can tell macaroons are done when they turn golden brown on top. They should feel firm but soft inside. If you press them lightly, they should spring back a bit. This means they are just right. Yes, you can use unsweetened coconut. Just remember to add some extra sugar to balance the flavors. Unsweetened coconut will give you a less sweet taste but still great texture. The best way to melt chocolate is in a microwave. Use a microwave-safe bowl and heat in 30-second bursts. Stir in between until the chocolate is smooth. You can add coconut oil to get a better shine. Yes, you can make macaroons ahead of time. They store well in an airtight container. Keep them at room temperature for up to a week. You can also freeze them for longer storage. To prevent macaroons from spreading, make sure to whip the egg whites well. Stiff peaks help keep the shape. Also, leave enough space between each mound on the baking sheet for proper baking. You now have the tools to make delicious macaroons. We covered key ingredients, substitutes, and step-by-step baking instructions. Remember to whip the egg whites well for the best texture. Don’t hesitate to customize flavors or try seasonal variations. Proper storage is crucial to keep your treats fresh. With these tips, you can create stunning and tasty macaroons that impress everyone. Enjoy baking and sharing your creations!

Welcome to the world of Chocolate Dipped Coconut Macaroons—an irresistible treat! If you love sweet, chewy coconut surrounded by rich chocolate, then this recipe is for you. With easy steps …

Read more

Categories Desserts Leave a comment

Honey Garlic Chicken Stir Fry Flavor-Packed Delight

December 23, 2025November 8, 2025 by Chef Evan
To make this tasty dish, gather these main ingredients: - 1 lb (450g) boneless chicken thighs, sliced into bite-sized pieces - 2 tablespoons honey - 3 cloves garlic, minced - 1 tablespoon soy sauce - 1 tablespoon sesame oil - 2 cups mixed bell peppers (red, yellow, green), sliced - 1 cup snap peas, trimmed - 1 small onion, sliced - 1 tablespoon ginger, grated - 2 tablespoons cornstarch - 2 tablespoons chicken broth - Salt and pepper to taste These ingredients form the base of your stir fry. The chicken thighs bring rich flavor and a tender bite. Honey and garlic create a sweet and savory sauce that coats everything perfectly. You can add even more taste to your stir fry with these optional ingredients: - Chili flakes for heat - Broccoli for added crunch - Carrots for sweetness - Zucchini for a fresh twist These extras can change the flavor and texture of your dish. Feel free to mix and match based on what you like or have on hand. Garnishes make your dish look appealing. Consider these options: - Sesame seeds - Chopped green onions Sprinkling these on top adds a nice touch. They also enhance the flavor and make your meal pop on the plate. {{ingredient_image_1}} To make the honey garlic sauce, start by gathering your ingredients. In a bowl, mix together 2 tablespoons of honey, 3 minced cloves of garlic, 1 tablespoon of soy sauce, and 1 tablespoon of sesame oil. Whisk these ingredients until they blend well. This sauce adds a sweet and savory flavor to your dish. Next, take 1 pound of boneless chicken thighs. Cut them into bite-sized pieces. In a separate bowl, toss the chicken with 2 tablespoons of cornstarch, salt, and pepper. This step helps create a crispy crust when you cook the chicken. Make sure each piece is well coated. Heat a large skillet or wok over medium-high heat. Add a splash of vegetable oil. When the oil is hot, add the coated chicken. Stir-fry the chicken for about 5 to 7 minutes. Cook until the chicken is browned and cooked through. Remove the chicken from the pan and set it aside. In the same pan, add a bit more oil if needed. Then, add 1 sliced onion and 1 tablespoon of grated ginger. Stir-fry these for 2 to 3 minutes until the onion turns translucent. After that, add 2 cups of mixed bell peppers and 1 cup of snap peas. Stir-fry for another 3 to 4 minutes. You want the vegetables to be tender but still crisp. Return the cooked chicken to the pan. Pour the honey garlic mixture over everything. Stir well to combine the ingredients. Cook for 2 to 3 more minutes. This allows the sauce to thicken and coat the chicken and vegetables. Before serving, taste the stir fry. Adjust seasoning with more salt, pepper, or soy sauce if needed. Finally, remove from heat and garnish with sesame seeds and chopped green onions. Enjoy your flavorful dish! To cook chicken thighs just right, start with the right heat. Use medium-high heat for best results. Toss the chicken in cornstarch to get a nice crust. This helps lock in juices. Cook until the chicken is golden brown, about 5-7 minutes. Make sure it's cooked through with no pink inside. One common mistake is overcrowding the pan. This can cause steaming instead of frying. Keep the pieces spaced out. Stir often for even cooking. Also, don’t skip the sauce blending step. Mixing honey, garlic, and soy sauce well ensures even flavor. Lastly, avoid overcooking your veggies. They should be tender but still crisp. If you can’t find chicken thighs, use chicken breasts instead. They will still taste great. For the honey, maple syrup is a good swap. If you don’t have sesame oil, olive oil works too. You can mix and match veggies as well. Use broccoli, carrots, or snow peas if that’s what you have. Pro Tips Marinate for Flavor: Allow the chicken to marinate in the honey-garlic mixture for at least 30 minutes before cooking to deepen the flavor. High Heat Stir-Fry: Ensure your skillet or wok is very hot before adding the chicken to achieve a nice sear and prevent steaming. Vegetable Crunch: Add the vegetables in stages based on cooking time; start with onions and ginger, then add bell peppers and snap peas to retain their crunch. Thickening the Sauce: If you want a thicker sauce, mix an additional teaspoon of cornstarch with water and add it to the stir fry at the end. {{image_2}} You can boost your honey garlic chicken stir fry by adding more veggies. Try using carrots, broccoli, or zucchini. They add color and crunch. You can also sneak in leafy greens like spinach or kale. These greens cook quickly and bring extra nutrients. Add them at the end of cooking for a vibrant touch. More veggies keep the dish healthy and tasty. While chicken thighs are great, you can switch proteins for fun. Try sliced beef, shrimp, or tofu. Each option brings a unique flavor. If you choose shrimp, cook it for a shorter time. For beef, look for tender cuts like flank steak. Tofu absorbs flavors well, making it a perfect choice for vegetarians. Adjust cooking times based on your protein choice to keep everything tender. Making this dish gluten-free is simple. Use tamari instead of soy sauce. Tamari has a similar taste but is gluten-free. For a low-carb option, swap out rice for cauliflower rice. Cauliflower rice is light and absorbs flavors well. You can also skip the cornstarch if you prefer. This keeps the dish low-carb while still being delicious. Enjoy all the flavors without the extra carbs! To keep your Honey Garlic Chicken Stir Fry fresh, store leftovers in an airtight container. Place it in the fridge within two hours of cooking. This helps prevent bacteria growth. It will last for about three to four days in the fridge. When reheating, use a skillet or pan over medium heat. Add a splash of water or broth to keep it moist. Stir it often to heat evenly. You can also use the microwave. Place the stir fry in a microwave-safe bowl. Cover it with a lid or a damp paper towel. Heat in short bursts, stirring in between, until hot. If you want to keep it longer, freezing is a great option. Let the stir fry cool completely before freezing. Use freezer-safe bags or containers. Try to remove as much air as possible. This helps prevent freezer burn. It can stay in the freezer for up to three months. To reheat, thaw it overnight in the fridge, then follow the reheating tips above for the best flavor. You can serve Honey Garlic Chicken Stir Fry with rice or noodles. Steamed jasmine rice pairs well. You might also try brown rice for a healthier choice. Noodles like udon or soba add a nice twist. A side of crispy spring rolls can make it a feast. If you want greens, a simple salad works too. Yes, you can make this dish ahead. Cook the chicken and veggies, then store separately. Keep the honey garlic sauce in a jar. When ready to eat, just reheat everything. Then, mix in the sauce and enjoy. This saves time and still tastes great. To make a vegan version, swap the chicken for tofu or tempeh. Use the same honey substitute with maple syrup. You can still add garlic, ginger, and veggies. The sauce will keep the flavors rich. Cook the tofu until golden for best results. Enjoy a plant-based delight that everyone will love! In this blog post, we explored the key ingredients for honey garlic chicken stir fry, including main components and optional flavors. We dive into clear steps for preparation and cooking, along with handy tips to avoid common mistakes. Variations allow for extra veggies, different proteins, and gluten-free options. Lastly, we covered how to store and reheat leftovers effectively. Remember, cooking can be simple and fun. Enjoy your stir fry journey!

Are you ready to elevate your weeknight dinners? This Honey Garlic Chicken Stir Fry is not just any meal—it’s a flavor-packed delight that’s easy to whip up! With sweet and …

Read more

Categories Dinner Leave a comment

Roasted Garlic Parmesan Asparagus Flavorful Side Dish

December 4, 2025October 31, 2025 by Chef Evan
To make Roasted Garlic Parmesan Asparagus, you need some simple, fresh ingredients. Here’s what you will need: - 1 pound fresh asparagus, trimmed - 4 cloves garlic, minced - 2 tablespoons olive oil - 1/4 cup grated Parmesan cheese - 1/2 teaspoon red pepper flakes (optional) - Salt and pepper to taste - Zest of 1 lemon - Fresh parsley, chopped (for garnish) Fresh asparagus is the star here. Look for bright green stems. Minced garlic adds a robust flavor. Olive oil helps everything roast nicely. Grated Parmesan cheese creates a cheesy, savory topping. Red pepper flakes bring a bit of heat, but they are optional. Salt and pepper enhance all the flavors. Lemon zest adds a fresh, citrusy kick. Finally, chopped parsley gives a nice touch of color. Gather these ingredients, and you’re ready to create a tasty side dish! {{ingredient_image_1}} First, preheat your oven to 400°F (200°C). This step is key for roasting. A hot oven helps the asparagus cook evenly. Next, take 1 pound of fresh asparagus. Trim the tough ends. Lay the asparagus on a baking sheet lined with parchment paper. This keeps the asparagus from sticking. Drizzle 2 tablespoons of olive oil over the asparagus. Add 4 cloves of minced garlic, salt, and pepper to taste. If you like a kick, sprinkle in 1/2 teaspoon of red pepper flakes. Toss everything gently to coat the asparagus well. Spread them out in a single layer. Roast them in the oven for 10 to 15 minutes. Look for tender, slightly crispy asparagus. After roasting, take the asparagus out of the oven. Sprinkle 1/4 cup of grated Parmesan cheese on top. Return the baking sheet to the oven for another 3 to 5 minutes. The cheese should melt and become bubbly. Once done, zest a lemon over the asparagus. This adds a bright flavor. Finish by garnishing with fresh chopped parsley before serving. Enjoy this delicious side dish! Choose bright green asparagus. Look for firm, smooth stalks. Thin stalks are tender and sweet. Thick ones can be woody. The tips should be closed and compact. This shows freshness. If they look dry or wilted, skip them. Fresh asparagus makes your dish pop. You can change the flavor with simple swaps. Try adding lemon juice instead of zest for a tart kick. Want more heat? Increase the red pepper flakes. For a nutty twist, add toasted pine nuts. Mixing flavors keeps your meal exciting and tasty. Cooking time can vary based on size. Thin asparagus cooks faster, about 10 minutes. Thicker stalks may need 15 minutes. Keep an eye on them. You want them tender but still crisp. Check often to avoid overcooking. Adjust as needed for perfect results. Pro Tips Choose Fresh Asparagus: Look for firm, bright green stalks with tightly closed tips for the best flavor and texture. Don’t Overcrowd the Baking Sheet: Give the asparagus enough space to ensure even roasting and crispiness. Adjust Cooking Time: Thicker asparagus may require a few extra minutes in the oven, so keep an eye on them to prevent overcooking. Experiment with Cheese: Try different cheeses like Pecorino Romano or Gruyère for a unique twist on flavor. {{image_2}} You can switch up the cheese for more flavor. Try using Pecorino Romano for a salty kick. Goat cheese adds creaminess and tang. If you like it rich, use Gruyère cheese. Mix and match to find your favorite combo. Each cheese gives a unique taste and feel. Asparagus loves company! Add carrots or bell peppers for color and crunch. Broccoli also works well and adds more nutrients. You can even mix in cherry tomatoes for a burst of sweetness. Just cut them to the same size as your asparagus. This way, everything cooks evenly. Want to heat things up? Add more red pepper flakes to make it spicy. Try adding smoked paprika for a smoky twist. You can also sprinkle in some garlic powder for extra flavor. If you love heat, consider cayenne pepper. Just a pinch can make a big difference! After you enjoy your roasted garlic parmesan asparagus, store any leftovers in an airtight container. Keep them in the fridge for up to three days. If you leave them out, they can spoil quickly. Make sure to cool them to room temperature first. This helps keep them fresh longer. To reheat, use your oven for the best results. Preheat it to 350°F (175°C). Place the asparagus on a baking sheet. Heat for about 10 minutes until warm. If you want it crisp again, you can broil it for a minute. You can also use the microwave, but it may make the asparagus soft. If you want to save asparagus for later, you can freeze it. First, blanch the asparagus in boiling water for two minutes. Then, cool it in ice water. Drain and pat dry. Place them in a freezer-safe bag and remove as much air as you can. They can last up to three months in the freezer. When ready to use, just thaw in the fridge overnight. Roast asparagus at 400°F for 10 to 15 minutes. Check for tenderness during roasting. The asparagus should be bright green and slightly crisp. Yes, you can use frozen asparagus. Thaw it first and pat it dry. Frozen asparagus may need a few extra minutes to roast. Roasted garlic parmesan asparagus pairs well with many dishes. Try it with grilled chicken or fish. It also goes great with pasta or risotto. Asparagus is cooked when it’s bright green and tender. You can test it by piercing with a fork. If it gives easily, it’s done! In this post, we explored how to make tasty roasted garlic Parmesan asparagus. We covered the key ingredients and step-by-step instructions. You learned tips on selecting fresh asparagus and ways to adjust flavors. I shared ideas for variations and provided storage tips. Using this information, you can enjoy creating a delicious side dish. Customize it to fit your taste. With practice, you'll roast asparagus like a pro! Enjoy your cooking adventure.

If you’re looking for a tasty side dish, you’ll love this Roasted Garlic Parmesan Asparagus. It’s quick to make and packed with flavor! With fresh asparagus, rich garlic, and a …

Read more

Categories Appetizers Leave a comment
Older posts
Page1 Page2 … Page124 Next →

TOSSED FLAVORS

Where flavors are fresh, vibrant, and ready to toss! 🥗

PAGES

Home About Contact Privacy Policy Terms & Conditions Cookie Policy GDPR Policy Copyright Policy Disclaimer

CATEGORIES

Appetizers Desserts Salads Breakfast Dinner

Contact

  • Pinterest
  • Mail
Copyright © 2026 Tossed Flavors. All rights reserved.