Chocolate Peanut Butter Cheesecake Cups Decadent Treat

WANT TO SAVE THIS RECIPE?

Treat yourself to a sweet delight with these Chocolate Peanut Butter Cheesecake Cups! These no-bake desserts are easy to make and packed with flavor. You’ll love the smooth cream cheese mixed with creamy peanut butter, all on a crunchy cookie crust. Follow my simple steps to create a treat that’s perfect for any occasion. Let’s dive into the ingredients and get started on making your new favorite dessert!

Ingredients

Essential Ingredients

– 1 cup chocolate cookie crumbs

– 1/4 cup melted butter

– 8 oz cream cheese, softened

– 1/2 cup peanut butter

– 1/2 cup powdered sugar

– 1 teaspoon vanilla extract

– 1 cup heavy whipping cream

To create your chocolate peanut butter cheesecake cups, you need some key ingredients. The chocolate cookie crumbs form a sweet base. You will mix these with melted butter to create a crust. Then, you will need cream cheese, which gives this treat its rich, smooth texture. Peanut butter adds a nutty flavor, while powdered sugar sweetens the mix. The vanilla extract enhances the taste, and heavy cream helps make it light and fluffy.

Optional Garnishes

– Chocolate shavings

– Cocoa powder

Garnishes can add that extra touch. Chocolate shavings bring a nice look and taste. You can also use cocoa powder for a rich finish. These are not required but can make your cups even more special.

Recommended Equipment

– Mixing bowls

– Electric mixer

– Serving cups or mini dessert glasses

To make this recipe, you will need some basic tools. Mixing bowls are essential for combining your ingredients. An electric mixer helps you blend everything smoothly. Finally, serving cups or mini dessert glasses hold your cheesecake cups, making them easy to serve and enjoy.

Step-by-Step Instructions

Prepare the Crust

1. In a medium bowl, combine 1 cup of chocolate cookie crumbs with 1/4 cup of melted butter.

2. Mix well until the crumbs are nicely coated.

3. Take individual serving cups or mini dessert glasses.

4. Use a tablespoon to press the cookie mixture into the bottom of each cup.

Make the Cheesecake Filling

1. In a large mixing bowl, beat 8 oz of softened cream cheese with an electric mixer.

2. Mix until the cream cheese is smooth and creamy.

3. Add 1/2 cup of peanut butter, 1/2 cup of powdered sugar, and 1 teaspoon of vanilla extract.

4. Blend until fully combined and smooth.

Assemble and Set

1. In a separate bowl, whip 1 cup of heavy cream until stiff peaks form.

2. Gently fold the whipped cream into the peanut butter mixture.

3. Spoon the cheesecake filling over the crust in each cup.

4. Smooth the top with the back of a spoon.

5. Refrigerate the cups for at least 4 hours or until set.

Before serving, you can add chocolate shavings or cocoa powder on top for a nice touch. Enjoy this easy and decadent treat!

Tips & Tricks

Perfecting the Creamy Texture

To make your cheesecake cups smooth and creamy, start by whipping the heavy cream to stiff peaks. This helps give your filling a light texture. It’s key to incorporate air into the cream. Next, always use cream cheese that is at room temperature. Cold cream cheese can make lumps in your mix. Softened cream cheese blends easily, ensuring a silky finish.

Customizing Flavor Profiles

Want to tweak the taste? Add a pinch of salt to your peanut butter mixture. This small touch can enhance the sweetness and balance the flavors. You can also swap peanut butter for other nut butters, like almond or cashew. Each nut butter brings its own flavor, making your cups unique every time.

Serving Suggestions

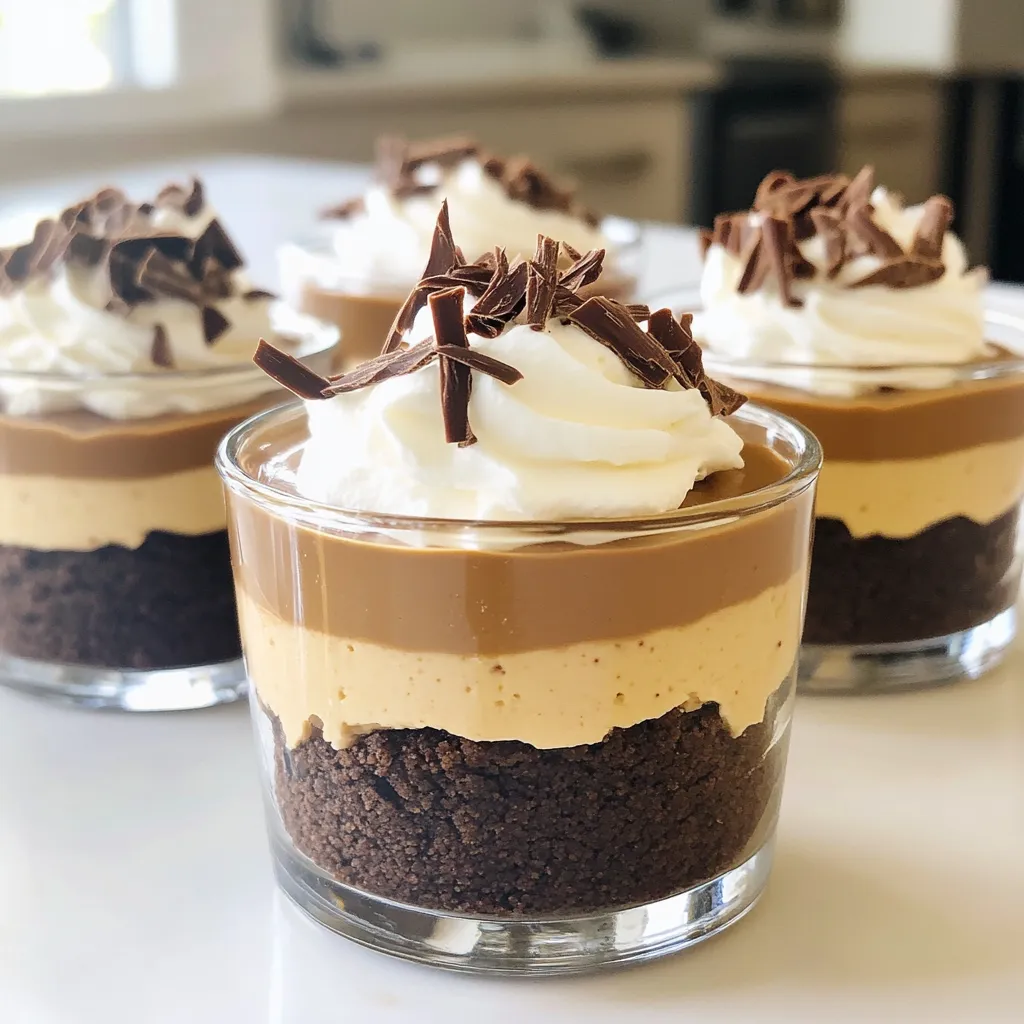
For a beautiful presentation, serve your cheesecake cups on a decorative platter. You can drizzle extra peanut butter and chocolate sauce on top. This adds a fancy touch that impresses guests. For a fresh twist, pair your cups with sliced strawberries or raspberries. The fruit adds color and a bright flavor that complements the rich cheesecake.

Variations

Swaps and Substitutions

You can easily change this recipe with swaps and substitutions. If you need a gluten-free option, use gluten-free cookies for the crust. They work just as well and keep the taste rich. You can also try flavored cream cheese, like vanilla, for a fun twist. This small change can add a new depth to the cheesecake flavor.

Size and Serving Adjustments

When it comes to serving, the size can vary. You can create mini cups for a cute presentation or go for larger dessert servings. Mini cups are great for parties or events. Adjust the serving sizes based on your gathering. Everyone loves a little treat, so having different sizes means everyone gets to enjoy!

Dietary Adaptations

For those with dietary needs, there are options too. You can make vegan cheesecake cups by using plant-based cream cheese and whipped cream. This way, everyone can enjoy the dessert. If you follow a low-carb or keto diet, consider using sugar-free powdered sugar. This lets you satisfy your sweet tooth without the carbs. These adaptations make the dessert inclusive for all.

Storage Info

Best Practices for Refrigeration

To keep your chocolate peanut butter cheesecake cups fresh, store them in an airtight container. This helps prevent them from drying out or absorbing other smells in your fridge. Always keep these treats chilled until serving. The cold helps maintain their creamy texture and delicious flavor.

Freezing Guidelines

If you want to save some for later, you can freeze the cheesecake cups. First, place them in a freezer-safe container. Make sure to cover them well to avoid freezer burn. When you are ready to enjoy them, take them out of the freezer. Let them thaw in the fridge overnight for the best taste and texture.

Shelf Life

These cheesecake cups can last about 5 days in the fridge. After that, they may not taste as fresh. Look for signs of spoilage, like an off smell or changes in texture. If you see any mold, it’s best to toss them out. Keeping an eye on these signs will help you enjoy your treats at their best!

FAQs

Can I make these cheesecake cups in advance?

Yes, you can make these cheesecake cups ahead of time. I recommend chilling them for at least 4 hours. This allows the flavors to blend and the filling to set properly. You can also make them the night before! Just cover them well and keep them in the fridge.

What can I use instead of cream cheese?

If you need an alternative, try using Greek yogurt or mascarpone cheese. Both options give a nice creamy texture. For a dairy-free choice, use vegan cream cheese. Each option will change the taste slightly, but they all work well in this recipe.

How do I prevent the crust from being too crumbly?

To avoid a crumbly crust, mix the chocolate cookie crumbs well with melted butter. Make sure every crumb is coated. When pressing the mixture into the cups, press firmly and evenly. This helps create a strong base that holds together nicely.

This blog post guides you in making delicious cheesecake cups. You need simple ingredients like chocolate cookie crumbs, cream cheese, and peanut butter. We explored tips for texture and flavor. You can customize these desserts with optional garnishes and variations to suit your needs. Remember to store them well to keep them fresh. With this recipe, you can create a tasty treat for any occasion. Enjoy every sweet bite!
- 1 cup chocolate cookie crumbs - 1/4 cup melted butter - 8 oz cream cheese, softened - 1/2 cup peanut butter - 1/2 cup powdered sugar - 1 teaspoon vanilla extract - 1 cup heavy whipping cream To create your chocolate peanut butter cheesecake cups, you need some key ingredients. The chocolate cookie crumbs form a sweet base. You will mix these with melted butter to create a crust. Then, you will need cream cheese, which gives this treat its rich, smooth texture. Peanut butter adds a nutty flavor, while powdered sugar sweetens the mix. The vanilla extract enhances the taste, and heavy cream helps make it light and fluffy. - Chocolate shavings - Cocoa powder Garnishes can add that extra touch. Chocolate shavings bring a nice look and taste. You can also use cocoa powder for a rich finish. These are not required but can make your cups even more special. - Mixing bowls - Electric mixer - Serving cups or mini dessert glasses To make this recipe, you will need some basic tools. Mixing bowls are essential for combining your ingredients. An electric mixer helps you blend everything smoothly. Finally, serving cups or mini dessert glasses hold your cheesecake cups, making them easy to serve and enjoy. 1. In a medium bowl, combine 1 cup of chocolate cookie crumbs with 1/4 cup of melted butter. 2. Mix well until the crumbs are nicely coated. 3. Take individual serving cups or mini dessert glasses. 4. Use a tablespoon to press the cookie mixture into the bottom of each cup. 1. In a large mixing bowl, beat 8 oz of softened cream cheese with an electric mixer. 2. Mix until the cream cheese is smooth and creamy. 3. Add 1/2 cup of peanut butter, 1/2 cup of powdered sugar, and 1 teaspoon of vanilla extract. 4. Blend until fully combined and smooth. 1. In a separate bowl, whip 1 cup of heavy cream until stiff peaks form. 2. Gently fold the whipped cream into the peanut butter mixture. 3. Spoon the cheesecake filling over the crust in each cup. 4. Smooth the top with the back of a spoon. 5. Refrigerate the cups for at least 4 hours or until set. Before serving, you can add chocolate shavings or cocoa powder on top for a nice touch. Enjoy this easy and decadent treat! To make your cheesecake cups smooth and creamy, start by whipping the heavy cream to stiff peaks. This helps give your filling a light texture. It’s key to incorporate air into the cream. Next, always use cream cheese that is at room temperature. Cold cream cheese can make lumps in your mix. Softened cream cheese blends easily, ensuring a silky finish. Want to tweak the taste? Add a pinch of salt to your peanut butter mixture. This small touch can enhance the sweetness and balance the flavors. You can also swap peanut butter for other nut butters, like almond or cashew. Each nut butter brings its own flavor, making your cups unique every time. For a beautiful presentation, serve your cheesecake cups on a decorative platter. You can drizzle extra peanut butter and chocolate sauce on top. This adds a fancy touch that impresses guests. For a fresh twist, pair your cups with sliced strawberries or raspberries. The fruit adds color and a bright flavor that complements the rich cheesecake. {{image_2}} You can easily change this recipe with swaps and substitutions. If you need a gluten-free option, use gluten-free cookies for the crust. They work just as well and keep the taste rich. You can also try flavored cream cheese, like vanilla, for a fun twist. This small change can add a new depth to the cheesecake flavor. When it comes to serving, the size can vary. You can create mini cups for a cute presentation or go for larger dessert servings. Mini cups are great for parties or events. Adjust the serving sizes based on your gathering. Everyone loves a little treat, so having different sizes means everyone gets to enjoy! For those with dietary needs, there are options too. You can make vegan cheesecake cups by using plant-based cream cheese and whipped cream. This way, everyone can enjoy the dessert. If you follow a low-carb or keto diet, consider using sugar-free powdered sugar. This lets you satisfy your sweet tooth without the carbs. These adaptations make the dessert inclusive for all. To keep your chocolate peanut butter cheesecake cups fresh, store them in an airtight container. This helps prevent them from drying out or absorbing other smells in your fridge. Always keep these treats chilled until serving. The cold helps maintain their creamy texture and delicious flavor. If you want to save some for later, you can freeze the cheesecake cups. First, place them in a freezer-safe container. Make sure to cover them well to avoid freezer burn. When you are ready to enjoy them, take them out of the freezer. Let them thaw in the fridge overnight for the best taste and texture. These cheesecake cups can last about 5 days in the fridge. After that, they may not taste as fresh. Look for signs of spoilage, like an off smell or changes in texture. If you see any mold, it’s best to toss them out. Keeping an eye on these signs will help you enjoy your treats at their best! Yes, you can make these cheesecake cups ahead of time. I recommend chilling them for at least 4 hours. This allows the flavors to blend and the filling to set properly. You can also make them the night before! Just cover them well and keep them in the fridge. If you need an alternative, try using Greek yogurt or mascarpone cheese. Both options give a nice creamy texture. For a dairy-free choice, use vegan cream cheese. Each option will change the taste slightly, but they all work well in this recipe. To avoid a crumbly crust, mix the chocolate cookie crumbs well with melted butter. Make sure every crumb is coated. When pressing the mixture into the cups, press firmly and evenly. This helps create a strong base that holds together nicely. This blog post guides you in making delicious cheesecake cups. You need simple ingredients like chocolate cookie crumbs, cream cheese, and peanut butter. We explored tips for texture and flavor. You can customize these desserts with optional garnishes and variations to suit your needs. Remember to store them well to keep them fresh. With this recipe, you can create a tasty treat for any occasion. Enjoy every sweet bite!

Chocolate Peanut Butter Cheesecake Cups No Bake

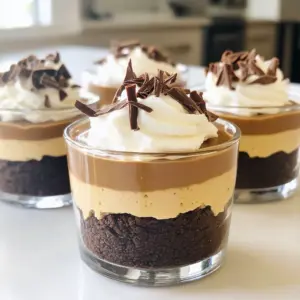
Indulge in the ultimate dessert with these Chocolate Peanut Butter Cheesecake Cups! Perfectly layered with a chocolate cookie crust and a creamy peanut butter filling, this delectable treat is as easy to make as it is to enjoy. With just a few simple ingredients, impress your guests and satisfy your sweet tooth. Ready to make your dessert dreams come true? Click through for the full recipe and enjoy! #ChocolatePeanutButter #DessertRecipe #NoBakeTreats #SweetTooth

Ingredients
  

1 cup chocolate cookie crumbs

1/4 cup melted butter

8 oz cream cheese, softened

1/2 cup peanut butter

1/2 cup powdered sugar

1 teaspoon vanilla extract

1 cup heavy whipping cream

Chocolate shavings or cocoa powder for garnish

Instructions
 

In a medium bowl, combine the chocolate cookie crumbs and melted butter. Mix until the crumbs are well coated.

    Using a tablespoon, press the cookie mixture into the bottom of individual serving cups or mini dessert glasses to create the crust layer. Set aside.

      In a large mixing bowl, beat the softened cream cheese with an electric mixer until smooth and creamy.

        Add the peanut butter, powdered sugar, and vanilla extract to the cream cheese. Mix until fully combined and smooth.

          In a separate bowl, whip the heavy cream until stiff peaks form. Gently fold the whipped cream into the peanut butter mixture until well blended.

            Spoon the peanut butter cheesecake filling over the chocolate crust in each cup, smoothing the top with the back of a spoon.

              Refrigerate the cups for at least 4 hours or until set.

                Before serving, garnish with chocolate shavings or a dusting of cocoa powder on top.

                  Prep Time: 20 minutes | Total Time: 4 hours 20 minutes | Servings: 6

                    - Presentation Tips: Serve the cheesecake cups on a decorative platter, drizzled with extra peanut butter and chocolate sauce for an added touch.

                      WANT TO SAVE THIS RECIPE?

                      Leave a Comment

                      Recipe Rating