Easy Halloween Chocolate Chip Cookies Simple Treat

WANT TO SAVE THIS RECIPE?

Get ready for some spooky fun in the kitchen! In this post, I’ll show you how to make Easy Halloween Chocolate Chip Cookies that are both tasty and simple. Whether you’re baking for a party or just for yourself, these cookies are sure to delight. With just a few fun twists and tricks, you will impress everyone this Halloween. Let’s get started on your sweet seasonal treat!

Ingredients

Main Ingredients for Easy Halloween Chocolate Chip Cookies

To make these spooky treats, gather these main ingredients:

– 1 cup unsalted butter, softened

– 3/4 cup brown sugar, packed

– 1/4 cup granulated sugar

– 1 large egg

– 1 teaspoon pure vanilla extract

– 2 cups all-purpose flour

– 1 teaspoon baking soda

– 1/2 teaspoon fine salt

– 1 cup semi-sweet chocolate chips

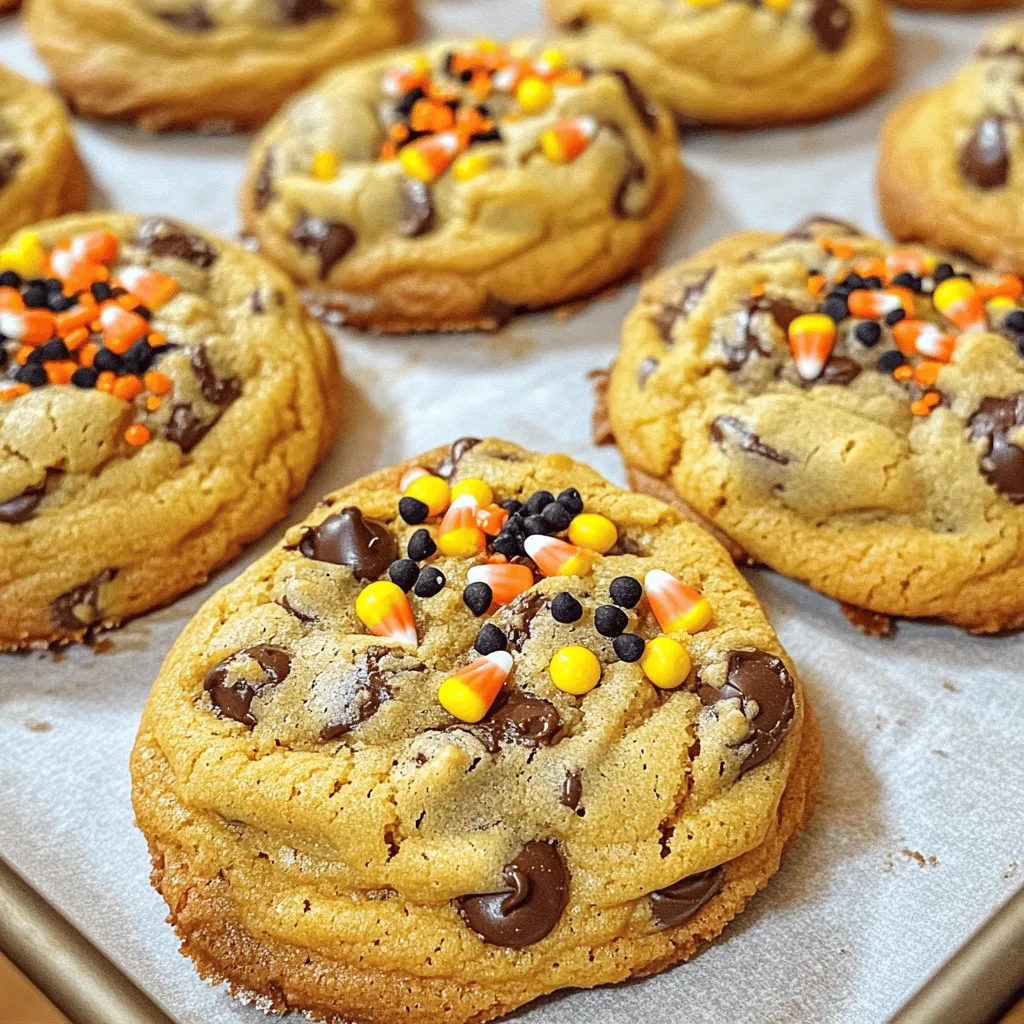
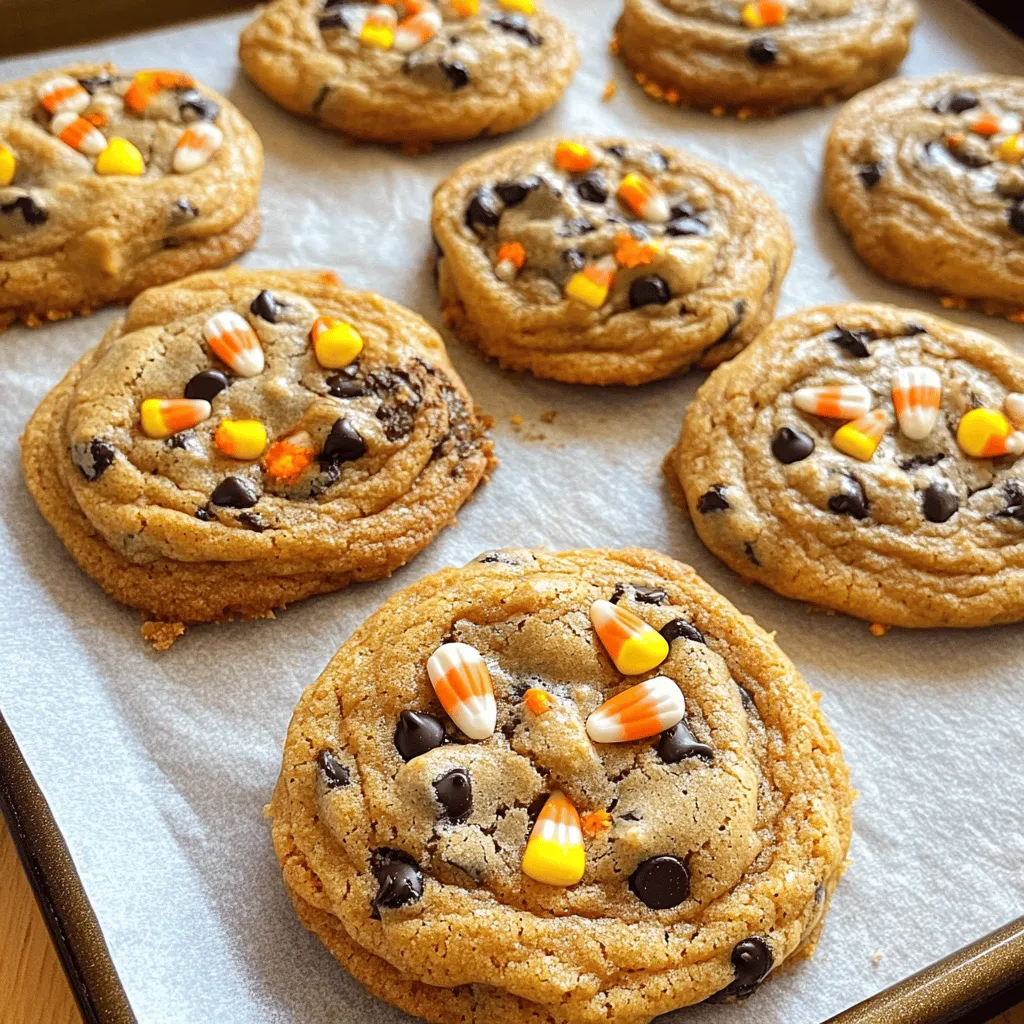
– 1/2 cup candy corn

These ingredients create a soft and chewy cookie. The butter and sugars blend to make a rich base. The egg adds moisture, while the flour and baking soda help them rise.

Optional Decorative Ingredients

To make your cookies even more festive, consider these fun toppings:

– Black sprinkles

– Orange sprinkles

Sprinkles add color and excitement. They bring the Halloween spirit to life. You can mix them into the dough or sprinkle them on top before baking.

Quantity and Quality Considerations

When baking, always measure your ingredients carefully. Use a kitchen scale for the best results. Fresh ingredients make a big difference. For the best flavor, use high-quality chocolate chips. They should melt beautifully in your cookies. If you can, use organic or local ingredients for a fresher taste.

For the full recipe, check out the link above. Happy baking!

Step-by-Step Instructions

Preparing the Cookie Dough

To start, preheat your oven to 350°F (175°C). This helps the cookies bake evenly. Line a baking sheet with parchment paper. This makes it easy to remove the cookies later.

In a large bowl, mix 1 cup of softened butter, 3/4 cup of brown sugar, and 1/4 cup of granulated sugar. Beat these together until the mix is light and fluffy. This takes about 2-3 minutes. Then, add in 1 large egg and 1 teaspoon of pure vanilla extract. Mix until smooth.

In another bowl, whisk together 2 cups of all-purpose flour, 1 teaspoon of baking soda, and 1/2 teaspoon of fine salt. Gradually add this dry mix to your wet ingredients. Mix just until combined. Be careful not to overmix; we want soft cookies!

Now, fold in 1 cup of semi-sweet chocolate chips and 1/2 cup of candy corn. Make sure they are spread evenly throughout the dough. Use a tablespoon or cookie scoop to drop generous balls of dough onto the baking sheet. Leave about 2 inches between each ball.

For extra fun, sprinkle some black and orange sprinkles on top of each dough ball.

Baking the Cookies

Place your baking sheet in the oven and bake for 10-12 minutes. Look for lightly golden edges, while the centers should stay soft. This gives you that perfect texture.

Once baked, take the cookies out of the oven. Allow them to cool on the baking sheet for about 5 minutes. After that, transfer them to a wire rack to cool completely.

Cooling and Storing the Cookies

Let the cookies cool completely before you store them. This helps keep them soft and chewy. To store, place them in an airtight container. They will stay fresh for about a week.

If you want to keep them longer, you can freeze the cookies. Just make sure to wrap them tightly. Enjoy your spooky treat! For the full recipe, check out the details above.

Tips & Tricks

How to Achieve Perfectly Soft Cookies

To get soft cookies, focus on the butter. Use softened butter, not melted. This keeps the dough light. Mix the butter and sugars until fluffy. Don’t overmix the dough after adding flour. This helps keep cookies tender. Bake them until the edges are golden but the centers look soft. They will firm up as they cool.

Common Mistakes to Avoid

One big mistake is using cold butter. It won’t mix well and will lead to hard cookies. Another error is overbaking. Cookies should look slightly underbaked in the middle. Don’t forget to space them well on the baking sheet. This allows room for spreading. Lastly, skip the temptation to skip the salt. It balances the sweetness.

Enhancing Flavor & Texture

You can boost flavor by adding a pinch of cinnamon or nutmeg. These spices give a warm taste. If you want a richer cookie, try using brown sugar only. This adds moisture and depth. For texture, consider adding nuts or oats. They add a fun crunch. Use the Full Recipe to explore these ideas further and enjoy the magic of baking!

Variations

Gluten-Free Version of Halloween Cookies

You can easily make these cookies gluten-free. Just swap the all-purpose flour for a gluten-free blend. Look for a mix that has xanthan gum. This helps mimic the texture of regular flour. Ensure you check the labels for allergens. The taste will still be delicious!

Incorporating Other Festive Ingredients

Want to spice things up? Try adding pumpkin puree or cinnamon. This will give your cookies a fall flavor. You can also mix in some chopped nuts, like walnuts or pecans. Dried fruits can add a fun twist too. Think cranberries or raisins for a chewy texture.

Creative Decoration Ideas

Make these cookies even more festive with fun decorations. Use melted chocolate to drizzle over the tops. You can also add candy eyes or spooky sprinkles. Try using orange and black colors for a Halloween vibe. Get creative with shapes, like bats or pumpkins. The fun is in the details!

For the full recipe, you can follow the steps provided. Enjoy making your spooky treats!

Storage Info

Best Practices for Cookie Storage

To keep your Halloween chocolate chip cookies fresh, store them in an airtight container. This helps keep moisture in and prevents them from getting hard. Place parchment paper between layers if you stack them. You can also use a cookie tin for added protection.

How Long Do the Cookies Last?

When stored correctly, these cookies last about one week at room temperature. If you put them in the fridge, they can stay fresh for about two weeks. Always check for any signs of spoilage, like a change in smell or texture.

Freezing Cookies for Later Use

You can freeze cookies for later enjoyment! To freeze, let them cool completely. Wrap each cookie tightly in plastic wrap. Place the wrapped cookies in a freezer bag or container. They can last up to three months in the freezer. When you crave one, just take it out and let it thaw at room temperature. Enjoy your treat whenever you want! For the full recipe, check back to the top.

FAQs

Can I use different types of chocolate chips?

Yes, you can use many types of chocolate chips. Dark, milk, or white chocolate all work well. Each type brings a unique taste. Mixing different types can add fun flavors. Try adding peanut butter chips for a twist. This lets your cookies shine with new tastes!

How can I make these cookies even more festive?

You can add spooky touches to your cookies! Use candy corn for crunch and color. Black and orange sprinkles also bring fun vibes. You can also shape the dough into pumpkins or ghosts. For a creative twist, add Halloween-themed cookie cutters. These ideas make your treats extra special!

What is the best way to reheat chocolate chip cookies?

The best way to reheat cookies is in the oven. Preheat your oven to 300°F (150°C). Place cookies on a baking sheet for 5-10 minutes. This warms them without making them hard. You can also use the microwave. Heat each cookie for 10-15 seconds. This keeps them soft and gooey!

These Halloween chocolate chip cookies are easy and fun to make. We covered main ingredients, decorations, and quality tips. You learned how to prepare, bake, cool, and store your treats. Plus, we shared how to get soft cookies and avoid common mistakes. Variations and storage tips help you enjoy them longer.

Feel free to get creative! Explore flavors and decorations to make these cookies your own. Enjoy making memories while baking this Halloween.

To make these spooky treats, gather these main ingredients: - 1 cup unsalted butter, softened - 3/4 cup brown sugar, packed - 1/4 cup granulated sugar - 1 large egg - 1 teaspoon pure vanilla extract - 2 cups all-purpose flour - 1 teaspoon baking soda - 1/2 teaspoon fine salt - 1 cup semi-sweet chocolate chips - 1/2 cup candy corn These ingredients create a soft and chewy cookie. The butter and sugars blend to make a rich base. The egg adds moisture, while the flour and baking soda help them rise. To make your cookies even more festive, consider these fun toppings: - Black sprinkles - Orange sprinkles Sprinkles add color and excitement. They bring the Halloween spirit to life. You can mix them into the dough or sprinkle them on top before baking. When baking, always measure your ingredients carefully. Use a kitchen scale for the best results. Fresh ingredients make a big difference. For the best flavor, use high-quality chocolate chips. They should melt beautifully in your cookies. If you can, use organic or local ingredients for a fresher taste. For the full recipe, check out the link above. Happy baking! To start, preheat your oven to 350°F (175°C). This helps the cookies bake evenly. Line a baking sheet with parchment paper. This makes it easy to remove the cookies later. In a large bowl, mix 1 cup of softened butter, 3/4 cup of brown sugar, and 1/4 cup of granulated sugar. Beat these together until the mix is light and fluffy. This takes about 2-3 minutes. Then, add in 1 large egg and 1 teaspoon of pure vanilla extract. Mix until smooth. In another bowl, whisk together 2 cups of all-purpose flour, 1 teaspoon of baking soda, and 1/2 teaspoon of fine salt. Gradually add this dry mix to your wet ingredients. Mix just until combined. Be careful not to overmix; we want soft cookies! Now, fold in 1 cup of semi-sweet chocolate chips and 1/2 cup of candy corn. Make sure they are spread evenly throughout the dough. Use a tablespoon or cookie scoop to drop generous balls of dough onto the baking sheet. Leave about 2 inches between each ball. For extra fun, sprinkle some black and orange sprinkles on top of each dough ball. Place your baking sheet in the oven and bake for 10-12 minutes. Look for lightly golden edges, while the centers should stay soft. This gives you that perfect texture. Once baked, take the cookies out of the oven. Allow them to cool on the baking sheet for about 5 minutes. After that, transfer them to a wire rack to cool completely. Let the cookies cool completely before you store them. This helps keep them soft and chewy. To store, place them in an airtight container. They will stay fresh for about a week. If you want to keep them longer, you can freeze the cookies. Just make sure to wrap them tightly. Enjoy your spooky treat! For the full recipe, check out the details above. To get soft cookies, focus on the butter. Use softened butter, not melted. This keeps the dough light. Mix the butter and sugars until fluffy. Don’t overmix the dough after adding flour. This helps keep cookies tender. Bake them until the edges are golden but the centers look soft. They will firm up as they cool. One big mistake is using cold butter. It won’t mix well and will lead to hard cookies. Another error is overbaking. Cookies should look slightly underbaked in the middle. Don't forget to space them well on the baking sheet. This allows room for spreading. Lastly, skip the temptation to skip the salt. It balances the sweetness. You can boost flavor by adding a pinch of cinnamon or nutmeg. These spices give a warm taste. If you want a richer cookie, try using brown sugar only. This adds moisture and depth. For texture, consider adding nuts or oats. They add a fun crunch. Use the Full Recipe to explore these ideas further and enjoy the magic of baking! {{image_4}} You can easily make these cookies gluten-free. Just swap the all-purpose flour for a gluten-free blend. Look for a mix that has xanthan gum. This helps mimic the texture of regular flour. Ensure you check the labels for allergens. The taste will still be delicious! Want to spice things up? Try adding pumpkin puree or cinnamon. This will give your cookies a fall flavor. You can also mix in some chopped nuts, like walnuts or pecans. Dried fruits can add a fun twist too. Think cranberries or raisins for a chewy texture. Make these cookies even more festive with fun decorations. Use melted chocolate to drizzle over the tops. You can also add candy eyes or spooky sprinkles. Try using orange and black colors for a Halloween vibe. Get creative with shapes, like bats or pumpkins. The fun is in the details! For the full recipe, you can follow the steps provided. Enjoy making your spooky treats! To keep your Halloween chocolate chip cookies fresh, store them in an airtight container. This helps keep moisture in and prevents them from getting hard. Place parchment paper between layers if you stack them. You can also use a cookie tin for added protection. When stored correctly, these cookies last about one week at room temperature. If you put them in the fridge, they can stay fresh for about two weeks. Always check for any signs of spoilage, like a change in smell or texture. You can freeze cookies for later enjoyment! To freeze, let them cool completely. Wrap each cookie tightly in plastic wrap. Place the wrapped cookies in a freezer bag or container. They can last up to three months in the freezer. When you crave one, just take it out and let it thaw at room temperature. Enjoy your treat whenever you want! For the full recipe, check back to the top. Yes, you can use many types of chocolate chips. Dark, milk, or white chocolate all work well. Each type brings a unique taste. Mixing different types can add fun flavors. Try adding peanut butter chips for a twist. This lets your cookies shine with new tastes! You can add spooky touches to your cookies! Use candy corn for crunch and color. Black and orange sprinkles also bring fun vibes. You can also shape the dough into pumpkins or ghosts. For a creative twist, add Halloween-themed cookie cutters. These ideas make your treats extra special! The best way to reheat cookies is in the oven. Preheat your oven to 300°F (150°C). Place cookies on a baking sheet for 5-10 minutes. This warms them without making them hard. You can also use the microwave. Heat each cookie for 10-15 seconds. This keeps them soft and gooey! These Halloween chocolate chip cookies are easy and fun to make. We covered main ingredients, decorations, and quality tips. You learned how to prepare, bake, cool, and store your treats. Plus, we shared how to get soft cookies and avoid common mistakes. Variations and storage tips help you enjoy them longer. Feel free to get creative! Explore flavors and decorations to make these cookies your own. Enjoy making memories while baking this Halloween.

- Easy Halloween Chocolate Chip Cookies

Get ready to bake some fun with these Spooky Chocolate Chip Cookies! Perfect for Halloween, these cookies are loaded with semi-sweet chocolate chips and festive candy corn for a delightful treat. Follow our easy recipe that takes just 30 minutes from start to finish. Ideal for sharing at parties or enjoying at home, click through to discover how to make your spooky cookies come to life in the kitchen!

Ingredients
  

1 cup unsalted butter, softened to room temperature

3/4 cup brown sugar, packed for maximum sweetness

1/4 cup granulated sugar for added crunch

1 large egg, preferably at room temperature

1 teaspoon pure vanilla extract for flavor

2 cups all-purpose flour, spooned and leveled

1 teaspoon baking soda for that perfect rise

1/2 teaspoon fine salt to balance flavors

1 cup semi-sweet chocolate chips to melt in your mouth

1/2 cup candy corn for a festive crunch

Optional: Black and orange sprinkles for decoration

Instructions
 

Start by preheating your oven to 350°F (175°C). Prepare a baking sheet by lining it with parchment paper to ensure easy removal of cookies.

    In a large mixing bowl, combine the softened butter, packed brown sugar, and granulated sugar. Using a hand mixer or stand mixer, beat these ingredients together until the mixture is light and fluffy, about 2-3 minutes.

      Next, add in the egg and vanilla extract to the butter-sugar blend. Continue mixing until both are fully incorporated into the mixture, creating a silky texture.

        In a separate bowl, whisk together the all-purpose flour, baking soda, and salt. Gradually add this dry blend to the wet ingredients, mixing just until combined. Be careful not to overmix—you want tender cookies!

          Gently fold in the semi-sweet chocolate chips and candy corn, ensuring they are well-distributed throughout the dough for an even flavor in every bite.

            Using a tablespoon or cookie scoop, drop generous balls of dough onto the prepared baking sheet, spacing them about 2 inches apart as they will spread during baking.

              For a fun and festive look, sprinkle a few black and orange sprinkles on top of each cookie dough ball before baking.

                Place the baking sheet in the preheated oven and bake for 10-12 minutes. The cookies are ready when the edges turn lightly golden, but the centers remain soft and slightly underbaked.

                  Once baked, remove the cookies from the oven and allow them to cool on the baking sheet for approximately 5 minutes. Afterward, transfer them to a wire rack to cool completely and set.

                    Prep Time: 15 minutes | Total Time: 30 minutes | Servings: Approximately 24 cookies

                      - Presentation Tips: Arrange your spooky cookies on a Halloween-themed platter and consider garnishing with extra candy corn or decorative sprinkles for a festive touch. Enjoy a sweet and spooky treat!

                        WANT TO SAVE THIS RECIPE?

                        Leave a Comment

                        Recipe Rating