![To make old school fried chicken, you need some key items. Here’s a list: - 4 pieces of chicken (preferably legs and thighs) - 1 cup buttermilk - 1 teaspoon hot sauce (optional for a spicy kick) - 2 cups all-purpose flour - 1 teaspoon smoked paprika (for extra flavor) - 1 teaspoon garlic powder - 1 teaspoon onion powder - 1 teaspoon dried oregano - Salt and pepper, to taste - Vegetable oil, for frying These ingredients work together to create a crispy and flavorful delight. You can add a few things to boost flavor even more. Consider using: - 1 teaspoon cayenne pepper (for heat) - 1 tablespoon fresh herbs (like thyme or rosemary) - 1 teaspoon sugar (to balance flavors) These options can take your chicken to the next level. Having the right tools makes cooking easier. Here’s what I recommend: - Large mixing bowl - Whisk for mixing ingredients - Skillet or deep frying pan - Tongs for turning chicken - Wire rack for draining chicken These tools help ensure your fried chicken comes out perfect every time. For the complete recipe, check the [Full Recipe]. To start, you need to marinate the chicken. Combine buttermilk and hot sauce in a big bowl. Stir it well until it's mixed. Add the chicken pieces, making sure they are fully covered. This part is crucial for making the chicken tender. Cover the bowl with plastic wrap. Place it in the fridge for a minimum of 2 hours. If you can, let it sit overnight. This allows the flavors to soak in deeply. Next, let's prepare the coating. In a separate bowl, mix the flour, smoked paprika, garlic powder, onion powder, oregano, salt, and pepper. Whisk it all together till it’s blended well. This will create a tasty crust that makes the chicken shine. Make sure the mixture is ready when the chicken comes out of the fridge. Now, it's time to fry. Heat about one inch of vegetable oil in a large skillet or deep pan over medium heat. You want the oil to reach 350°F (175°C). To check if it’s hot enough, drop a small pinch of flour in the oil. If it sizzles, it’s ready for the chicken. Carefully add the chicken pieces one by one, making sure not to crowd the pan. Fry the chicken for about 8 to 10 minutes on each side. Look for a deep golden brown color. The internal temperature should hit 165°F (75°C) to ensure it’s safe to eat. Once the chicken is done, use tongs to take it out of the oil. Place the chicken on a wire rack over a baking tray. This helps the extra oil drip off and keeps the chicken crispy. Let it rest for about 5 minutes before serving. This resting time is key. It allows the juices to settle back into the meat, making each bite juicy and delicious. You can find the full recipe and more tips in the recipe section above. To make great fried chicken, start with good chicken. I prefer legs and thighs for their flavor. Marinating in buttermilk is a must. It makes the meat tender and juicy. Let it soak for at least two hours. Overnight is even better. For the coating, use a mix of flour and spices. This forms a crispy crust. Don't rush the frying. Keep the oil hot but not smoking. Fry the chicken in small batches. This ensures even cooking. A common mistake is not seasoning enough. Always add salt and pepper to your flour mixture. Another issue is overcrowding the pan. This can make the chicken soggy. Also, don’t skip the resting step. Letting the chicken rest helps keep it juicy. Lastly, avoid flipping the chicken too soon. Wait until it's golden brown before turning. To jazz up your fried chicken, try adding spices to your flour. Smoked paprika adds depth, while garlic powder gives flavor. You can also try cayenne for heat. For a twist, mix in some dried herbs like thyme or rosemary. A splash of lemon juice or hot sauce in the marinade can brighten the taste. These small changes can elevate your dish. Explore different combinations to find what you love. For more tips, check out the Full Recipe for even more ideas! {{image_4}} Southern-style fried chicken is crispy and juicy. It features a seasoned flour coating and has a mild flavor. You fry it until it's golden brown. In contrast, Nashville hot chicken brings the heat! This version uses a spicy oil to coat the chicken after frying. It has a bold kick that many love. Both styles are great, but they cater to different tastes. Try them both to see which one you like more! If you want a gluten-free option, use almond flour or rice flour instead of regular flour. They still give a nice crunch. You can also use crushed cornflakes for extra crispy texture. For a healthier choice, try using whole wheat flour. It adds fiber and nutrients. Another option is to use a mixture of nuts and seeds for a unique taste. These swaps can make your fried chicken fit your diet better without losing flavor. Marinating chicken is key to flavor. You can switch up the classic buttermilk marinade. For a tangy twist, try yogurt mixed with lemon juice. This adds a nice zest. If you love Asian flavors, use soy sauce and ginger in your marinade. Another fun idea is to use pickle juice for a salty and sour kick. Let your chicken soak in these marinades for at least two hours. The longer, the better! Explore these options to find your favorite flavor. For the full recipe, check out the Crispy Classic Fried Chicken section above. To keep your fried chicken fresh, let it cool first. Then, wrap each piece in foil or parchment paper. Place the wrapped chicken in an airtight container. This helps keep the moisture in while preventing sogginess. Avoid stacking the pieces too tightly, as this can cause them to lose their crispiness. Store the container in the fridge for the best results. When it's time to enjoy your leftover fried chicken, reheating it properly is key. The best way is to use an oven. Preheat your oven to 375°F (190°C). Place the chicken on a wire rack over a baking sheet. This allows hot air to circulate around the chicken, keeping it crispy. Bake for about 15-20 minutes, or until heated through. If you're in a hurry, you can use a microwave, but it may not keep the skin crunchy. Fried chicken can last in the fridge for about 3-4 days. If you want to keep it longer, consider freezing it. Wrap the chicken tightly in plastic wrap and foil. In the freezer, it can last up to 4 months. For best flavor, try to consume it within 2-3 months. This way, you'll enjoy that crispy, flavorful delight just like when it was freshly made! The best oil for frying chicken is one with a high smoke point. Vegetable oil works great. Canola oil is also a good choice. These oils help achieve that crispy texture without burning. They are neutral, so they won’t change the chicken's flavor. Yes, you can bake old school fried chicken. Baking is a healthier option. To do this, preheat your oven to 425°F (220°C). Place the coated chicken on a baking sheet lined with parchment paper. Bake for about 30-40 minutes, or until golden brown. This method may not be as crispy as frying, but it’s still tasty. To check if the chicken is fully cooked, use a meat thermometer. Insert it into the thickest part of the chicken. You want it to reach 165°F (75°C). Another way is to check the juices. If they run clear, the chicken is ready. Proper cooking keeps it safe and juicy. Old school fried chicken pairs well with many sides. Here are a few favorites: - Coleslaw: Crunchy and refreshing. - Mashed potatoes: Creamy and comforting. - Cornbread: Sweet and soft. - Green beans: Light, fresh, and healthy. These sides complement the rich flavors of the chicken and make a complete meal. For more ideas, check the full recipe! Old school fried chicken requires care and attention, from ingredients to tips. You learned about essential ingredients and some extra options for flavor. The step-by-step instructions teach effective frying and marinating techniques. We explored variations like Southern-style and gluten-free options. Lastly, storing and reheating tips help keep your chicken fresh. In the end, the secret lies in your practice and enthusiasm. Frying chicken can be both fun and rewarding. Enjoy each bite and share with loved ones!](https://tossedflavors.com/wp-content/uploads/2025/06/9141325c-0dc0-4339-863a-5a4b430ef5a6.webp)
Welcome to the crispy world of Old School Fried Chicken! I’ll guide you through making this classic dish, packed with rich flavor and satisfying crunch. You’ll learn the essential ingredients and the best techniques, all guaranteed to impress your family and friends. Whether you crave Southern-style goodness or Nashville hot spice, I’ve got tips for every palate. Let’s dive in and make some mouthwatering chicken together!
Ingredients
Essential Ingredients for Old School Fried Chicken
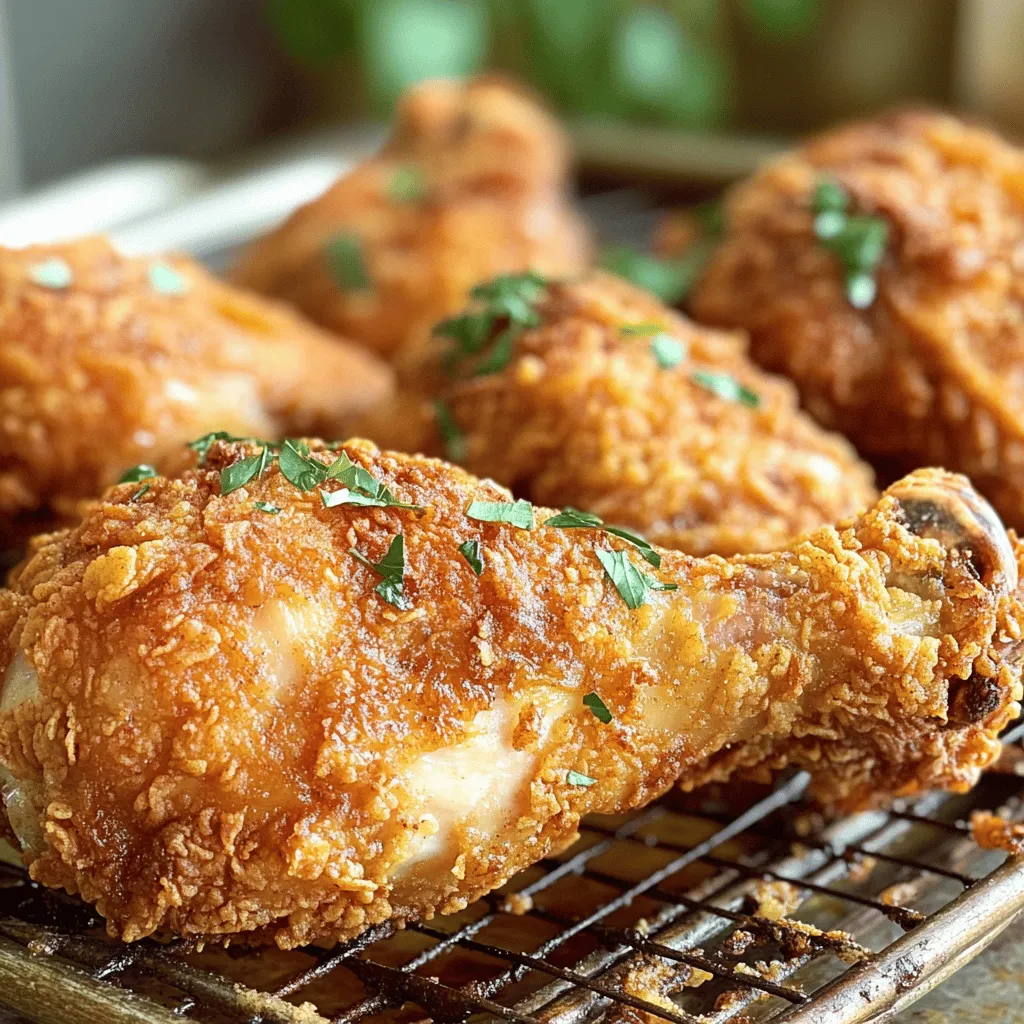
To make old school fried chicken, you need some key items. Here’s a list:
– 4 pieces of chicken (preferably legs and thighs)
– 1 cup buttermilk
– 1 teaspoon hot sauce (optional for a spicy kick)
– 2 cups all-purpose flour
– 1 teaspoon smoked paprika (for extra flavor)
– 1 teaspoon garlic powder
– 1 teaspoon onion powder
– 1 teaspoon dried oregano
– Salt and pepper, to taste
– Vegetable oil, for frying
These ingredients work together to create a crispy and flavorful delight.
Optional Ingredients for Extra Flavor
You can add a few things to boost flavor even more. Consider using:
– 1 teaspoon cayenne pepper (for heat)
– 1 tablespoon fresh herbs (like thyme or rosemary)
– 1 teaspoon sugar (to balance flavors)
These options can take your chicken to the next level.
Recommended Tools and Equipment
Having the right tools makes cooking easier. Here’s what I recommend:
– Large mixing bowl
– Whisk for mixing ingredients
– Skillet or deep frying pan
– Tongs for turning chicken
– Wire rack for draining chicken
These tools help ensure your fried chicken comes out perfect every time. For the complete recipe, check the [Full Recipe].
Step-by-Step Instructions
Marinating the Chicken: Achieving Tenderness
To start, you need to marinate the chicken. Combine buttermilk and hot sauce in a big bowl. Stir it well until it’s mixed. Add the chicken pieces, making sure they are fully covered. This part is crucial for making the chicken tender. Cover the bowl with plastic wrap. Place it in the fridge for a minimum of 2 hours. If you can, let it sit overnight. This allows the flavors to soak in deeply.
Preparing the Perfect Coating
Next, let’s prepare the coating. In a separate bowl, mix the flour, smoked paprika, garlic powder, onion powder, oregano, salt, and pepper. Whisk it all together till it’s blended well. This will create a tasty crust that makes the chicken shine. Make sure the mixture is ready when the chicken comes out of the fridge.
Frying Techniques for Crispy Skin
Now, it’s time to fry. Heat about one inch of vegetable oil in a large skillet or deep pan over medium heat. You want the oil to reach 350°F (175°C). To check if it’s hot enough, drop a small pinch of flour in the oil. If it sizzles, it’s ready for the chicken. Carefully add the chicken pieces one by one, making sure not to crowd the pan. Fry the chicken for about 8 to 10 minutes on each side. Look for a deep golden brown color. The internal temperature should hit 165°F (75°C) to ensure it’s safe to eat.
How to Drain and Rest Fried Chicken
Once the chicken is done, use tongs to take it out of the oil. Place the chicken on a wire rack over a baking tray. This helps the extra oil drip off and keeps the chicken crispy. Let it rest for about 5 minutes before serving. This resting time is key. It allows the juices to settle back into the meat, making each bite juicy and delicious. You can find the full recipe and more tips in the recipe section above.
Tips & Tricks
Keys to Perfecting Old School Fried Chicken
To make great fried chicken, start with good chicken. I prefer legs and thighs for their flavor. Marinating in buttermilk is a must. It makes the meat tender and juicy. Let it soak for at least two hours. Overnight is even better. For the coating, use a mix of flour and spices. This forms a crispy crust. Don’t rush the frying. Keep the oil hot but not smoking. Fry the chicken in small batches. This ensures even cooking.
Common Mistakes to Avoid
A common mistake is not seasoning enough. Always add salt and pepper to your flour mixture. Another issue is overcrowding the pan. This can make the chicken soggy. Also, don’t skip the resting step. Letting the chicken rest helps keep it juicy. Lastly, avoid flipping the chicken too soon. Wait until it’s golden brown before turning.
Flavor Enhancements and Seasoning Ideas
To jazz up your fried chicken, try adding spices to your flour. Smoked paprika adds depth, while garlic powder gives flavor. You can also try cayenne for heat. For a twist, mix in some dried herbs like thyme or rosemary. A splash of lemon juice or hot sauce in the marinade can brighten the taste. These small changes can elevate your dish. Explore different combinations to find what you love. For more tips, check out the Full Recipe for even more ideas!
Variations
Southern-Style vs. Nashville Hot Fried Chicken
Southern-style fried chicken is crispy and juicy. It features a seasoned flour coating and has a mild flavor. You fry it until it’s golden brown. In contrast, Nashville hot chicken brings the heat! This version uses a spicy oil to coat the chicken after frying. It has a bold kick that many love. Both styles are great, but they cater to different tastes. Try them both to see which one you like more!
Gluten-Free and Healthier Coating Alternatives
If you want a gluten-free option, use almond flour or rice flour instead of regular flour. They still give a nice crunch. You can also use crushed cornflakes for extra crispy texture. For a healthier choice, try using whole wheat flour. It adds fiber and nutrients. Another option is to use a mixture of nuts and seeds for a unique taste. These swaps can make your fried chicken fit your diet better without losing flavor.
Unique Marinade Ideas for Different Flavors
Marinating chicken is key to flavor. You can switch up the classic buttermilk marinade. For a tangy twist, try yogurt mixed with lemon juice. This adds a nice zest. If you love Asian flavors, use soy sauce and ginger in your marinade. Another fun idea is to use pickle juice for a salty and sour kick. Let your chicken soak in these marinades for at least two hours. The longer, the better! Explore these options to find your favorite flavor. For the full recipe, check out the Crispy Classic Fried Chicken section above.
Storage Info
How to Store Fried Chicken Properly
To keep your fried chicken fresh, let it cool first. Then, wrap each piece in foil or parchment paper. Place the wrapped chicken in an airtight container. This helps keep the moisture in while preventing sogginess. Avoid stacking the pieces too tightly, as this can cause them to lose their crispiness. Store the container in the fridge for the best results.
Reheating Techniques for Best Results
When it’s time to enjoy your leftover fried chicken, reheating it properly is key. The best way is to use an oven. Preheat your oven to 375°F (190°C). Place the chicken on a wire rack over a baking sheet. This allows hot air to circulate around the chicken, keeping it crispy. Bake for about 15-20 minutes, or until heated through. If you’re in a hurry, you can use a microwave, but it may not keep the skin crunchy.
How Long Does Fried Chicken Last?
Fried chicken can last in the fridge for about 3-4 days. If you want to keep it longer, consider freezing it. Wrap the chicken tightly in plastic wrap and foil. In the freezer, it can last up to 4 months. For best flavor, try to consume it within 2-3 months. This way, you’ll enjoy that crispy, flavorful delight just like when it was freshly made!
FAQs
What is the best oil for frying chicken?
The best oil for frying chicken is one with a high smoke point. Vegetable oil works great. Canola oil is also a good choice. These oils help achieve that crispy texture without burning. They are neutral, so they won’t change the chicken’s flavor.
Can I bake old school fried chicken instead of frying?
Yes, you can bake old school fried chicken. Baking is a healthier option. To do this, preheat your oven to 425°F (220°C). Place the coated chicken on a baking sheet lined with parchment paper. Bake for about 30-40 minutes, or until golden brown. This method may not be as crispy as frying, but it’s still tasty.
How do I know when the chicken is fully cooked?
To check if the chicken is fully cooked, use a meat thermometer. Insert it into the thickest part of the chicken. You want it to reach 165°F (75°C). Another way is to check the juices. If they run clear, the chicken is ready. Proper cooking keeps it safe and juicy.
What sides pair well with old school fried chicken?
Old school fried chicken pairs well with many sides. Here are a few favorites:
– Coleslaw: Crunchy and refreshing.
– Mashed potatoes: Creamy and comforting.
– Cornbread: Sweet and soft.
– Green beans: Light, fresh, and healthy.
These sides complement the rich flavors of the chicken and make a complete meal. For more ideas, check the full recipe!
Old school fried chicken requires care and attention, from ingredients to tips. You learned about essential ingredients and some extra options for flavor. The step-by-step instructions teach effective frying and marinating techniques. We explored variations like Southern-style and gluten-free options. Lastly, storing and reheating tips help keep your chicken fresh.
In the end, the secret lies in your practice and enthusiasm. Frying chicken can be both fun and rewarding. Enjoy each bite and share with loved ones!
![To make old school fried chicken, you need some key items. Here’s a list: - 4 pieces of chicken (preferably legs and thighs) - 1 cup buttermilk - 1 teaspoon hot sauce (optional for a spicy kick) - 2 cups all-purpose flour - 1 teaspoon smoked paprika (for extra flavor) - 1 teaspoon garlic powder - 1 teaspoon onion powder - 1 teaspoon dried oregano - Salt and pepper, to taste - Vegetable oil, for frying These ingredients work together to create a crispy and flavorful delight. You can add a few things to boost flavor even more. Consider using: - 1 teaspoon cayenne pepper (for heat) - 1 tablespoon fresh herbs (like thyme or rosemary) - 1 teaspoon sugar (to balance flavors) These options can take your chicken to the next level. Having the right tools makes cooking easier. Here’s what I recommend: - Large mixing bowl - Whisk for mixing ingredients - Skillet or deep frying pan - Tongs for turning chicken - Wire rack for draining chicken These tools help ensure your fried chicken comes out perfect every time. For the complete recipe, check the [Full Recipe]. To start, you need to marinate the chicken. Combine buttermilk and hot sauce in a big bowl. Stir it well until it's mixed. Add the chicken pieces, making sure they are fully covered. This part is crucial for making the chicken tender. Cover the bowl with plastic wrap. Place it in the fridge for a minimum of 2 hours. If you can, let it sit overnight. This allows the flavors to soak in deeply. Next, let's prepare the coating. In a separate bowl, mix the flour, smoked paprika, garlic powder, onion powder, oregano, salt, and pepper. Whisk it all together till it’s blended well. This will create a tasty crust that makes the chicken shine. Make sure the mixture is ready when the chicken comes out of the fridge. Now, it's time to fry. Heat about one inch of vegetable oil in a large skillet or deep pan over medium heat. You want the oil to reach 350°F (175°C). To check if it’s hot enough, drop a small pinch of flour in the oil. If it sizzles, it’s ready for the chicken. Carefully add the chicken pieces one by one, making sure not to crowd the pan. Fry the chicken for about 8 to 10 minutes on each side. Look for a deep golden brown color. The internal temperature should hit 165°F (75°C) to ensure it’s safe to eat. Once the chicken is done, use tongs to take it out of the oil. Place the chicken on a wire rack over a baking tray. This helps the extra oil drip off and keeps the chicken crispy. Let it rest for about 5 minutes before serving. This resting time is key. It allows the juices to settle back into the meat, making each bite juicy and delicious. You can find the full recipe and more tips in the recipe section above. To make great fried chicken, start with good chicken. I prefer legs and thighs for their flavor. Marinating in buttermilk is a must. It makes the meat tender and juicy. Let it soak for at least two hours. Overnight is even better. For the coating, use a mix of flour and spices. This forms a crispy crust. Don't rush the frying. Keep the oil hot but not smoking. Fry the chicken in small batches. This ensures even cooking. A common mistake is not seasoning enough. Always add salt and pepper to your flour mixture. Another issue is overcrowding the pan. This can make the chicken soggy. Also, don’t skip the resting step. Letting the chicken rest helps keep it juicy. Lastly, avoid flipping the chicken too soon. Wait until it's golden brown before turning. To jazz up your fried chicken, try adding spices to your flour. Smoked paprika adds depth, while garlic powder gives flavor. You can also try cayenne for heat. For a twist, mix in some dried herbs like thyme or rosemary. A splash of lemon juice or hot sauce in the marinade can brighten the taste. These small changes can elevate your dish. Explore different combinations to find what you love. For more tips, check out the Full Recipe for even more ideas! {{image_4}} Southern-style fried chicken is crispy and juicy. It features a seasoned flour coating and has a mild flavor. You fry it until it's golden brown. In contrast, Nashville hot chicken brings the heat! This version uses a spicy oil to coat the chicken after frying. It has a bold kick that many love. Both styles are great, but they cater to different tastes. Try them both to see which one you like more! If you want a gluten-free option, use almond flour or rice flour instead of regular flour. They still give a nice crunch. You can also use crushed cornflakes for extra crispy texture. For a healthier choice, try using whole wheat flour. It adds fiber and nutrients. Another option is to use a mixture of nuts and seeds for a unique taste. These swaps can make your fried chicken fit your diet better without losing flavor. Marinating chicken is key to flavor. You can switch up the classic buttermilk marinade. For a tangy twist, try yogurt mixed with lemon juice. This adds a nice zest. If you love Asian flavors, use soy sauce and ginger in your marinade. Another fun idea is to use pickle juice for a salty and sour kick. Let your chicken soak in these marinades for at least two hours. The longer, the better! Explore these options to find your favorite flavor. For the full recipe, check out the Crispy Classic Fried Chicken section above. To keep your fried chicken fresh, let it cool first. Then, wrap each piece in foil or parchment paper. Place the wrapped chicken in an airtight container. This helps keep the moisture in while preventing sogginess. Avoid stacking the pieces too tightly, as this can cause them to lose their crispiness. Store the container in the fridge for the best results. When it's time to enjoy your leftover fried chicken, reheating it properly is key. The best way is to use an oven. Preheat your oven to 375°F (190°C). Place the chicken on a wire rack over a baking sheet. This allows hot air to circulate around the chicken, keeping it crispy. Bake for about 15-20 minutes, or until heated through. If you're in a hurry, you can use a microwave, but it may not keep the skin crunchy. Fried chicken can last in the fridge for about 3-4 days. If you want to keep it longer, consider freezing it. Wrap the chicken tightly in plastic wrap and foil. In the freezer, it can last up to 4 months. For best flavor, try to consume it within 2-3 months. This way, you'll enjoy that crispy, flavorful delight just like when it was freshly made! The best oil for frying chicken is one with a high smoke point. Vegetable oil works great. Canola oil is also a good choice. These oils help achieve that crispy texture without burning. They are neutral, so they won’t change the chicken's flavor. Yes, you can bake old school fried chicken. Baking is a healthier option. To do this, preheat your oven to 425°F (220°C). Place the coated chicken on a baking sheet lined with parchment paper. Bake for about 30-40 minutes, or until golden brown. This method may not be as crispy as frying, but it’s still tasty. To check if the chicken is fully cooked, use a meat thermometer. Insert it into the thickest part of the chicken. You want it to reach 165°F (75°C). Another way is to check the juices. If they run clear, the chicken is ready. Proper cooking keeps it safe and juicy. Old school fried chicken pairs well with many sides. Here are a few favorites: - Coleslaw: Crunchy and refreshing. - Mashed potatoes: Creamy and comforting. - Cornbread: Sweet and soft. - Green beans: Light, fresh, and healthy. These sides complement the rich flavors of the chicken and make a complete meal. For more ideas, check the full recipe! Old school fried chicken requires care and attention, from ingredients to tips. You learned about essential ingredients and some extra options for flavor. The step-by-step instructions teach effective frying and marinating techniques. We explored variations like Southern-style and gluten-free options. Lastly, storing and reheating tips help keep your chicken fresh. In the end, the secret lies in your practice and enthusiasm. Frying chicken can be both fun and rewarding. Enjoy each bite and share with loved ones!](https://tossedflavors.com/wp-content/uploads/2025/06/9141325c-0dc0-4339-863a-5a4b430ef5a6-300x300.webp)