If you’re after a delicious dish that looks as good as it tastes, you’ve found it! This simple tomato tart recipe is both easy to make and packed with flavor. With fresh tomatoes, creamy cheese, and a flaky crust, it’s perfect for any meal. Let’s dive into the details so you can impress your family and friends with this delightful treat. Prepare to elevate your cooking game!
Ingredients
Essential Ingredients for The BEST Tomato Tart
– 1 pre-made flaky pie crust
– 4 large ripe tomatoes, sliced to about 1/4 inch thick
– 1 cup ricotta cheese
– 1 cup shredded mozzarella cheese
– 2 tablespoons fresh basil, finely chopped (plus extra leaves for garnish)
– 1 teaspoon dried oregano
– 1 tablespoon extra virgin olive oil (plus more for drizzling)
– Salt and freshly ground black pepper, to taste
To create The BEST Tomato Tart, you need fresh and simple ingredients. The star of the dish is ripe, juicy tomatoes. Look for ones that feel heavy for their size and have a rich aroma. For the cheese, I recommend a mix of creamy ricotta and stretchy mozzarella. This combo gives the tart a wonderful texture and flavor. Fresh herbs like basil and oregano add depth. Don’t forget the salt and pepper to enhance the taste.
Optional Ingredients for Customization
– Balsamic glaze
– Additional vegetables
If you want to add more flavor, you can drizzle balsamic glaze on top. It adds a sweet tang that pairs well with tomatoes. You can also mix in other veggies, like zucchini or bell peppers. This makes your tart even more colorful and tasty.
Tools and Equipment Needed
– Tart pan
– Mixing bowls
– Baking sheets
To make the tart, you’ll need a few tools. A tart pan helps shape the crust and gives it a nice edge. Use mixing bowls to combine your cheese and herbs. Finally, a baking sheet is handy for catching any drips while the tart bakes. This setup will make your cooking process smooth and fun.
For the full recipe, check out The Ultimate Savory Tomato Tart.
Step-by-Step Instructions
Preparing the Crust
1. Roll out the pie crust: Start with a pre-made flaky pie crust. Roll it out evenly on a clean surface.
2. Fit into the tart pan: Carefully place the rolled crust into the tart pan. Make sure it covers the bottom and sides without tears.
3. Prick the crust: Use a fork to prick the bottom of the crust. This helps it cook evenly and prevents bubbles.
Making the Cheese Mixture
1. Combine ricotta and mozzarella: Take a medium bowl and add 1 cup of ricotta cheese and 1 cup of shredded mozzarella cheese.
2. Add fresh herbs and seasonings: Stir in 2 tablespoons of fresh basil, 1 teaspoon of dried oregano, and a pinch of salt and pepper.
3. Mix until uniform: Blend all the ingredients together until they form a smooth cheese mixture.
Assembling the Tart
1. Spread the cheese mixture: Evenly spread the cheese mix onto the crust. Make sure it covers the base entirely.
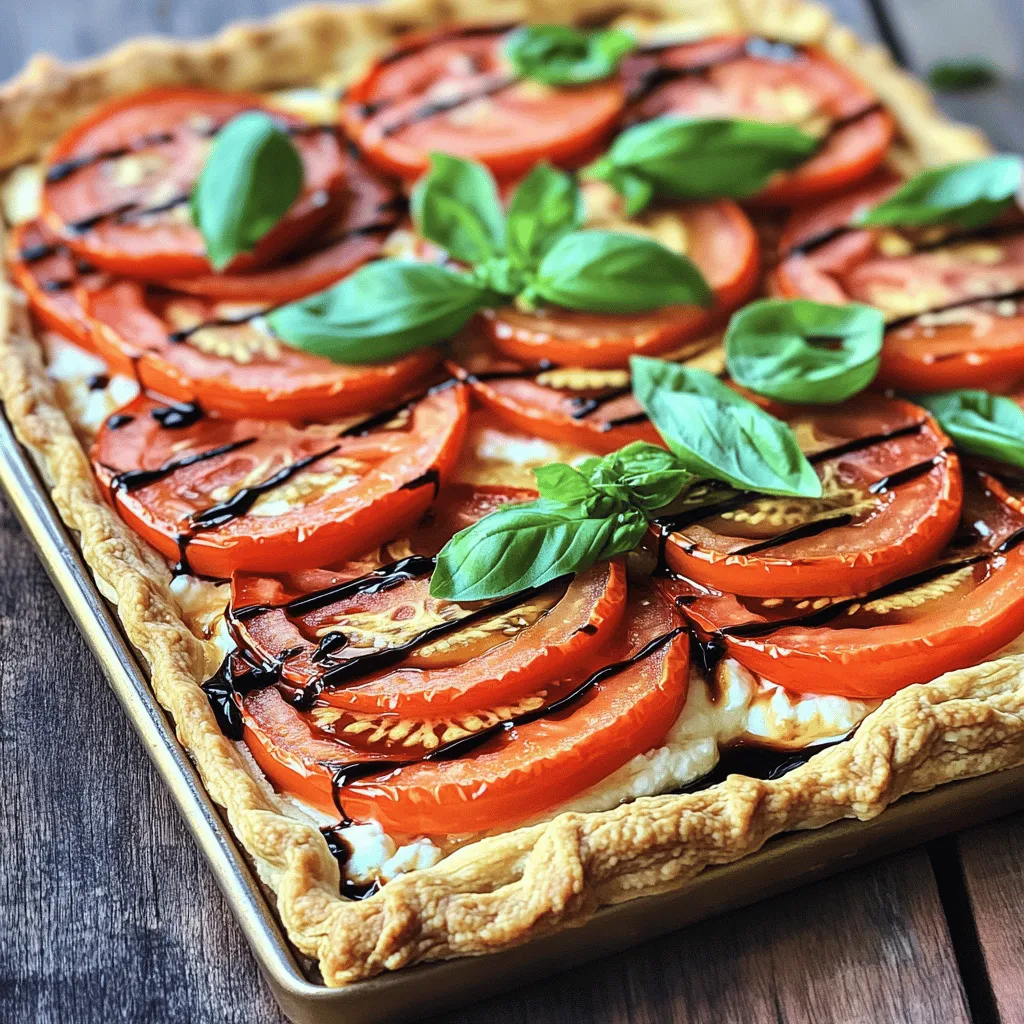
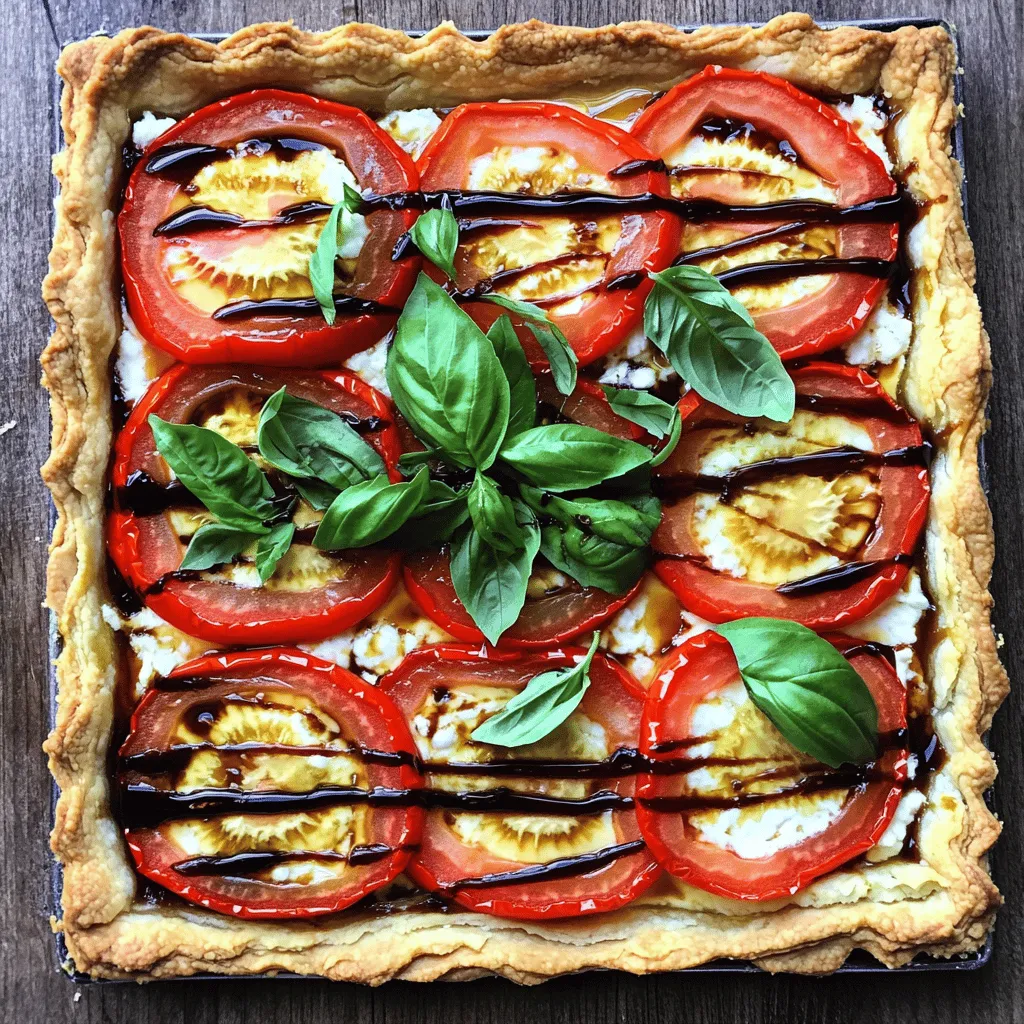
2. Arrange the tomato slices: Layer 4 large, thin tomato slices over the cheese. Overlap them for a lovely look.
3. Drizzle with olive oil and season: Lightly drizzle extra virgin olive oil on top and sprinkle with more salt and pepper.
Baking the Tart
1. Preheat the oven: Set your oven to 400°F (200°C) and let it heat up.
2. Bake time and monitoring: Place the tart in the oven. Bake for 30-35 minutes. Watch for a golden crust and tender tomatoes.
This step-by-step guide ensures you create a delicious tomato tart. For the full recipe, check out the detailed instructions above.
Tips & Tricks
Selecting the Best Tomatoes
Choose ripe tomatoes for the best flavor. I like using heirloom or vine-ripened tomatoes. These types are sweet and juicy. Look for tomatoes that feel heavy for their size. They should have smooth skin and vibrant color. To check ripeness, gently squeeze the tomato. It should yield a bit but not be mushy. If you can smell the tomato, it’s usually ripe and ready to eat.
Achieving the Perfect Crust
A soggy crust will ruin your tart. To prevent this, always prick the crust with a fork before baking. This helps steam escape. Consider pre-baking the crust for a few minutes. This sets it and keeps it crisp. Aim for a golden brown color. You want a flaky texture that contrasts with the soft tomatoes.
Presentation and Serving Suggestions
Serve your tomato tart warm or at room temperature. Cut it into neat wedges for a nice look. Pairing it with a crisp green salad adds freshness. A light vinaigrette complements the tart well. You can also drizzle balsamic glaze on top for extra flavor. Fresh basil leaves make a beautiful garnish. They add color and a hint of herbal note. For a fun twist, serve with some crusty bread.
Variations
Vegetarian Variations
You can make your tomato tart even tastier. Add other vegetables like zucchini or bell peppers. These veggies add color and flavor. You can also try different cheeses. Swap mozzarella for goat cheese or feta. Both add a nice tangy taste.
Herb and Spice Variations
Fresh herbs can change the whole dish. Instead of basil, use thyme or parsley. These herbs give a fresh kick. You can also add spices for an exciting twist. A pinch of red pepper flakes adds heat. Try smoked paprika for a deep flavor.
Gluten-Free Options
For a gluten-free crust, look for pre-made options. Many brands offer tasty gluten-free choices. You can also make your own with almond flour or coconut flour. For the filling, use the same great ingredients. Just check for gluten in the cheese and herbs you choose. This way, everyone can enjoy your delicious tart.
Storage Info
Refrigeration Tips
To store leftovers, let the tart cool. Wrap it tightly in plastic wrap or foil. You can also place it in an airtight container. This keeps it fresh for up to three days in the fridge.
Freezing Instructions
For freezing, slice the tart into pieces. Wrap each slice in plastic wrap, then place them in a freezer bag. Squeeze out excess air before sealing. The tart can stay in the freezer for up to two months.
To reheat, bake the slices straight from the freezer at 350°F (175°C) for 15-20 minutes. This helps the crust stay crisp and the cheese melt smoothly.
Shelf Life
The tart stays fresh for about three days in the fridge. Watch for signs of spoilage: a sour smell, mold, or a change in texture. If you see any of these, it’s best to discard it.
Taking these steps will help you enjoy The BEST Tomato Tart at its best, whether fresh or stored!
FAQs
How to make The BEST Tomato Tart from scratch?
To make The BEST Tomato Tart from scratch, follow these steps:
1. Preheat your oven to 400°F (200°C).
2. Use a pre-made flaky pie crust and fit it into your tart pan.
3. Prick the bottom of the crust with a fork.
4. In a bowl, mix ricotta cheese, mozzarella cheese, basil, oregano, olive oil, salt, and pepper.
5. Spread the cheese mixture evenly on the crust.
6. Layer sliced tomatoes over the cheese.
7. Drizzle olive oil and season with salt and pepper.
8. Bake for 30-35 minutes.
9. Let it cool before slicing. This process yields a savory and beautiful tart.
Can I use store-bought ingredients?
Yes, you can use store-bought ingredients. Pre-made pie crust saves time. You can also choose fresh tomatoes from your local market. Store-bought ricotta and mozzarella work well too. Using high-quality ingredients makes a big difference in taste.
What can I serve with this tomato tart?
This tomato tart pairs well with a crisp green salad. A light vinaigrette enhances the meal. You can also serve it with roasted vegetables. For a more filling option, add grilled chicken or fish. These sides balance the dish and add variety.
How do I prevent the crust from burning?
To prevent the crust from burning, check the oven temperature. If the crust browns too fast, cover it with foil. Make sure you prick the crust to avoid bubbling. Baking on the middle rack allows even cooking.
Is The BEST Tomato Tart suitable for meal prep?
Yes, The BEST Tomato Tart is great for meal prep. You can make it ahead of time and store it in the fridge. It stays fresh for about three days. Reheat slices in the oven for the best taste. Enjoy this tart throughout the week!
To make the best tomato tart, gather simple ingredients like a pre-made crust, ripe tomatoes, and cheese. Follow the step-by-step guide to create a dish that impresses. Don’t forget to customize it using fresh herbs and extra veggies. Proper storage keeps leftovers fresh.
In the end, this tart offers flavors and options for all. Enjoy making it your own!
