![- Pizza Dough: Store-bought or Homemade - Cheese: Mozzarella for a cheesy texture - Toppings: Sliced Pepperoni - Seasoning: Garlic Powder, Dried Oregano, Red Pepper Flakes - Garnish: Fresh Basil Leaves (optional) Gathering the right ingredients is key to making the best Cheesy Pepperoni Pizza Roll-Ups. You can choose store-bought pizza dough for speed or make your own for fun. I often opt for fresh mozzarella. Its meltiness adds a great texture to each bite. Sliced pepperoni is a must for that classic pizza flavor. For seasoning, I suggest garlic powder, dried oregano, and red pepper flakes for a little kick. These spices elevate the taste and aroma. Fresh basil leaves make a lovely garnish, bringing color and freshness to your dish. This mix of ingredients creates a tasty, easy snack that everyone will love. You can find the full recipe and instructions to whip these up in no time! 1. First, preheat your oven to 400°F (200°C). This helps the roll-ups bake evenly. 2. Next, prepare a baking sheet. Line it with parchment paper for easy cleanup. 3. On a clean, floured surface, roll out the pizza dough. Aim for a rectangle about 1/4 inch thick. 4. Once rolled out, use a brush to apply olive oil all over the dough. This keeps it moist during baking. 1. Now, evenly spread the shredded mozzarella cheese over the oiled dough. 2. Next, layer the sliced pepperoni on top. Make sure to cover as much surface as you can. 3. In a small bowl, mix garlic powder, dried oregano, and optional red pepper flakes. 4. Sprinkle this mix evenly across the cheese and pepperoni. This adds great flavor. 1. Start rolling the dough tightly. Begin from one end and roll to the other. Keep the filling inside. 2. After rolling, use a sharp knife to cut the log into 1-inch thick pieces. This keeps the filling intact. 1. Arrange the sliced roll-ups on the baking sheet. Place them cut-side up, allowing space between each. 2. Bake in the preheated oven for 15-20 minutes. Look for a golden brown color and bubbling cheese. 3. Once baked, let the roll-ups cool for a few minutes. Serve them warm with pizza sauce for dipping. You can find the full recipe for Cheesy Pepperoni Pizza Roll-Ups [here]. To make the best cheesy pepperoni pizza roll-ups, focus on a few key details. - Ensuring Even Thickness of Dough Roll the dough to about 1/4 inch thick. This helps the roll-ups cook evenly. If your dough is too thick, the inside may remain raw. If it's too thin, it may tear. A good thickness keeps everything just right. - Keeping Fillings Enclosed When you roll the dough, start tight and keep the fillings inside. If the cheese and pepperoni peek out, they can burn or spill during baking. Use your fingers to pinch the ends and seal them well. This step ensures the cheesy goodness stays inside. Serving these roll-ups can be fun and creative! - Pairing with Pizza Sauce A small bowl of pizza sauce makes a great dip. It adds flavor and moisture. You can also try ranch or garlic sauce for a twist. - Creative Presentation Ideas Arrange the roll-ups on a colorful platter. You might add fresh basil leaves around them for color. Place the sauce in the center for easy access. This makes your dish look as good as it tastes! You can take your roll-ups to the next level with some tasty tweaks. - Adding Extra Toppings Feel free to mix in veggies like bell peppers or mushrooms. You can also add more cheese, like cheddar or feta, for a unique flavor. - Adjusting Spiciness with Red Pepper Flakes For those who enjoy heat, sprinkle red pepper flakes over the filling. This simple addition can make your roll-ups kick up a notch! Just remember, not everyone likes spice, so offer plain ones too. For the full recipe and more details, check out the Full Recipe section. {{image_4}} When it comes to Cheesy Pepperoni Pizza Roll-Ups, you can have fun with variations. These roll-ups are easy to customize. Let’s explore some great ideas. - Using Different Cheeses: You can swap mozzarella for cheddar or pepper jack. Cheddar adds a sharp taste, while pepper jack brings a spicy kick. - Alternative Meats: Try using sausage or ham instead of pepperoni. You can even go meatless with veggies like bell peppers or mushrooms. - Different Sauces: Instead of pizza sauce, dip your roll-ups in BBQ or Alfredo sauce. Each sauce gives a new twist to the flavor. - Herbs and Spices: Feel free to add Italian seasoning or crushed garlic to enhance the taste. This adds a nice touch and makes it more exciting. - Gluten-Free Dough Options: If you need gluten-free options, look for gluten-free pizza dough. Many stores sell it ready-made. - Vegan Cheese Alternatives: For a vegan version, use plant-based cheese. It melts well and keeps the cheesy goodness. These variations make your Cheesy Pepperoni Pizza Roll-Ups unique and tasty. You can be creative and find what you like best. For a full recipe, check out the [Full Recipe]. To keep your cheesy pepperoni pizza roll-ups fresh, store them in the fridge. Place them in an airtight container. This helps keep them moist and tasty. If you don't have one, wrap them tightly in plastic wrap. They will stay good for about 3 days. If you want to save them for later, freezing works well. Let the roll-ups cool completely before you freeze them. Wrap each roll securely in plastic wrap. Then, put them in a freezer bag or container. They can last up to 3 months in the freezer. When you're ready to eat them, reheat in the oven. Preheat the oven to 350°F (175°C). Place the frozen roll-ups on a baking sheet. Heat for about 15-20 minutes, or until hot and cheesy again. This way, you enjoy your tasty snack anytime! For the full recipe, check the main article. Bake these roll-ups for 15 to 20 minutes at 400°F (200°C). You want them golden brown. The cheese should be hot and bubbly. Keep an eye on them towards the end to prevent burning. Yes, you can prep these roll-ups ahead. Roll them up, slice them, and then cover with plastic wrap. Store them in the fridge for up to 24 hours. When ready, bake them straight from the fridge. Just check for extra baking time. If you don’t have pizza sauce, try marinara or ranch dressing. You can also use pesto for a fun twist. BBQ sauce adds a nice kick too. Get creative with your favorite sauces for dipping. Absolutely! You can use veggie pepperoni or mushrooms for texture. Try adding bell peppers or spinach for more flavor. Cheese is a must, so keep that for a cheesy bite! In this blog post, we explored how to make delicious Cheesy Pepperoni Pizza Roll-Ups. We covered essential ingredients, preparation steps, and baking tips. I shared creative variations and helpful storage advice. Remember, these roll-ups are perfect for sharing or a quick snack. Have fun experimenting with toppings and flavors. Whether you stick to the classics or get creative, enjoy your tasty creation!](https://tossedflavors.com/wp-content/uploads/2025/05/7caa5662-80e4-4038-b3de-841362e9b0a5.webp)
Looking for a fun and tasty snack? Cheesy Pepperoni Pizza Roll-Ups are your answer! These easy-to-make treats combine classic pizza flavors into a delicious, rollable form. Whether you’re hosting a party or just craving something cheesy, you’ll love how simple and flavorful these snacks are. Let’s dive into the ingredients and steps that will have you rolling out these delights in no time!
Ingredients
List of Essential Ingredients
– Pizza Dough: Store-bought or Homemade
– Cheese: Mozzarella for a cheesy texture
– Toppings: Sliced Pepperoni
– Seasoning: Garlic Powder, Dried Oregano, Red Pepper Flakes
– Garnish: Fresh Basil Leaves (optional)
Gathering the right ingredients is key to making the best Cheesy Pepperoni Pizza Roll-Ups. You can choose store-bought pizza dough for speed or make your own for fun. I often opt for fresh mozzarella. Its meltiness adds a great texture to each bite. Sliced pepperoni is a must for that classic pizza flavor.
For seasoning, I suggest garlic powder, dried oregano, and red pepper flakes for a little kick. These spices elevate the taste and aroma. Fresh basil leaves make a lovely garnish, bringing color and freshness to your dish. This mix of ingredients creates a tasty, easy snack that everyone will love.
You can find the full recipe and instructions to whip these up in no time!
Step-by-Step Instructions
Preparation Steps
1. First, preheat your oven to 400°F (200°C). This helps the roll-ups bake evenly.
2. Next, prepare a baking sheet. Line it with parchment paper for easy cleanup.
3. On a clean, floured surface, roll out the pizza dough. Aim for a rectangle about 1/4 inch thick.
4. Once rolled out, use a brush to apply olive oil all over the dough. This keeps it moist during baking.
Filling the Dough
1. Now, evenly spread the shredded mozzarella cheese over the oiled dough.
2. Next, layer the sliced pepperoni on top. Make sure to cover as much surface as you can.
3. In a small bowl, mix garlic powder, dried oregano, and optional red pepper flakes.
4. Sprinkle this mix evenly across the cheese and pepperoni. This adds great flavor.
Rolling and Slicing
1. Start rolling the dough tightly. Begin from one end and roll to the other. Keep the filling inside.
2. After rolling, use a sharp knife to cut the log into 1-inch thick pieces. This keeps the filling intact.
Baking Process
1. Arrange the sliced roll-ups on the baking sheet. Place them cut-side up, allowing space between each.
2. Bake in the preheated oven for 15-20 minutes. Look for a golden brown color and bubbling cheese.
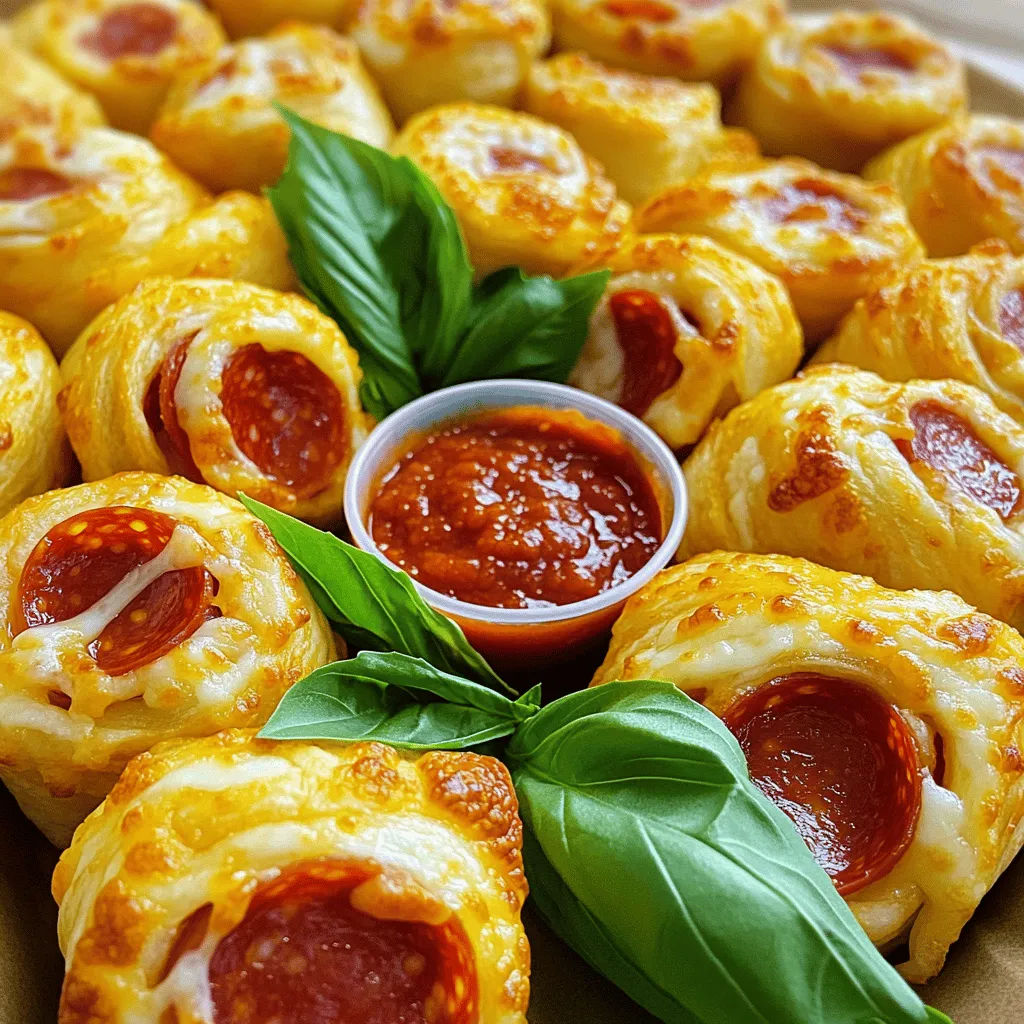
3. Once baked, let the roll-ups cool for a few minutes. Serve them warm with pizza sauce for dipping.
You can find the full recipe for Cheesy Pepperoni Pizza Roll-Ups [here].
Tips & Tricks
Perfecting Your Roll-Ups
To make the best cheesy pepperoni pizza roll-ups, focus on a few key details.
– Ensuring Even Thickness of Dough
Roll the dough to about 1/4 inch thick. This helps the roll-ups cook evenly. If your dough is too thick, the inside may remain raw. If it’s too thin, it may tear. A good thickness keeps everything just right.
– Keeping Fillings Enclosed
When you roll the dough, start tight and keep the fillings inside. If the cheese and pepperoni peek out, they can burn or spill during baking. Use your fingers to pinch the ends and seal them well. This step ensures the cheesy goodness stays inside.
Serving Suggestions
Serving these roll-ups can be fun and creative!
– Pairing with Pizza Sauce
A small bowl of pizza sauce makes a great dip. It adds flavor and moisture. You can also try ranch or garlic sauce for a twist.
– Creative Presentation Ideas
Arrange the roll-ups on a colorful platter. You might add fresh basil leaves around them for color. Place the sauce in the center for easy access. This makes your dish look as good as it tastes!
Enhancements
You can take your roll-ups to the next level with some tasty tweaks.
– Adding Extra Toppings
Feel free to mix in veggies like bell peppers or mushrooms. You can also add more cheese, like cheddar or feta, for a unique flavor.
– Adjusting Spiciness with Red Pepper Flakes
For those who enjoy heat, sprinkle red pepper flakes over the filling. This simple addition can make your roll-ups kick up a notch! Just remember, not everyone likes spice, so offer plain ones too.
For the full recipe and more details, check out the Full Recipe section.
Variations
When it comes to Cheesy Pepperoni Pizza Roll-Ups, you can have fun with variations. These roll-ups are easy to customize. Let’s explore some great ideas.
Ingredient Swaps
– Using Different Cheeses: You can swap mozzarella for cheddar or pepper jack. Cheddar adds a sharp taste, while pepper jack brings a spicy kick.
– Alternative Meats: Try using sausage or ham instead of pepperoni. You can even go meatless with veggies like bell peppers or mushrooms.
Flavor Profiles
– Different Sauces: Instead of pizza sauce, dip your roll-ups in BBQ or Alfredo sauce. Each sauce gives a new twist to the flavor.
– Herbs and Spices: Feel free to add Italian seasoning or crushed garlic to enhance the taste. This adds a nice touch and makes it more exciting.
Dietary Modifications
– Gluten-Free Dough Options: If you need gluten-free options, look for gluten-free pizza dough. Many stores sell it ready-made.
– Vegan Cheese Alternatives: For a vegan version, use plant-based cheese. It melts well and keeps the cheesy goodness.
These variations make your Cheesy Pepperoni Pizza Roll-Ups unique and tasty. You can be creative and find what you like best. For a full recipe, check out the [Full Recipe].
Storage Info
Short-Term Storage
To keep your cheesy pepperoni pizza roll-ups fresh, store them in the fridge. Place them in an airtight container. This helps keep them moist and tasty. If you don’t have one, wrap them tightly in plastic wrap. They will stay good for about 3 days.
Long-Term Storage
If you want to save them for later, freezing works well. Let the roll-ups cool completely before you freeze them. Wrap each roll securely in plastic wrap. Then, put them in a freezer bag or container. They can last up to 3 months in the freezer.
When you’re ready to eat them, reheat in the oven. Preheat the oven to 350°F (175°C). Place the frozen roll-ups on a baking sheet. Heat for about 15-20 minutes, or until hot and cheesy again. This way, you enjoy your tasty snack anytime! For the full recipe, check the main article.
FAQs
How long to bake Cheesy Pepperoni Pizza Roll-Ups?
Bake these roll-ups for 15 to 20 minutes at 400°F (200°C). You want them golden brown. The cheese should be hot and bubbly. Keep an eye on them towards the end to prevent burning.
Can I make these roll-ups ahead of time?
Yes, you can prep these roll-ups ahead. Roll them up, slice them, and then cover with plastic wrap. Store them in the fridge for up to 24 hours. When ready, bake them straight from the fridge. Just check for extra baking time.
What can I substitute for pizza sauce?
If you don’t have pizza sauce, try marinara or ranch dressing. You can also use pesto for a fun twist. BBQ sauce adds a nice kick too. Get creative with your favorite sauces for dipping.
Are there any vegetarian options for this recipe?
Absolutely! You can use veggie pepperoni or mushrooms for texture. Try adding bell peppers or spinach for more flavor. Cheese is a must, so keep that for a cheesy bite!
In this blog post, we explored how to make delicious Cheesy Pepperoni Pizza Roll-Ups. We covered essential ingredients, preparation steps, and baking tips. I shared creative variations and helpful storage advice. Remember, these roll-ups are perfect for sharing or a quick snack. Have fun experimenting with toppings and flavors. Whether you stick to the classics or get creative, enjoy your tasty creation!
![- Pizza Dough: Store-bought or Homemade - Cheese: Mozzarella for a cheesy texture - Toppings: Sliced Pepperoni - Seasoning: Garlic Powder, Dried Oregano, Red Pepper Flakes - Garnish: Fresh Basil Leaves (optional) Gathering the right ingredients is key to making the best Cheesy Pepperoni Pizza Roll-Ups. You can choose store-bought pizza dough for speed or make your own for fun. I often opt for fresh mozzarella. Its meltiness adds a great texture to each bite. Sliced pepperoni is a must for that classic pizza flavor. For seasoning, I suggest garlic powder, dried oregano, and red pepper flakes for a little kick. These spices elevate the taste and aroma. Fresh basil leaves make a lovely garnish, bringing color and freshness to your dish. This mix of ingredients creates a tasty, easy snack that everyone will love. You can find the full recipe and instructions to whip these up in no time! 1. First, preheat your oven to 400°F (200°C). This helps the roll-ups bake evenly. 2. Next, prepare a baking sheet. Line it with parchment paper for easy cleanup. 3. On a clean, floured surface, roll out the pizza dough. Aim for a rectangle about 1/4 inch thick. 4. Once rolled out, use a brush to apply olive oil all over the dough. This keeps it moist during baking. 1. Now, evenly spread the shredded mozzarella cheese over the oiled dough. 2. Next, layer the sliced pepperoni on top. Make sure to cover as much surface as you can. 3. In a small bowl, mix garlic powder, dried oregano, and optional red pepper flakes. 4. Sprinkle this mix evenly across the cheese and pepperoni. This adds great flavor. 1. Start rolling the dough tightly. Begin from one end and roll to the other. Keep the filling inside. 2. After rolling, use a sharp knife to cut the log into 1-inch thick pieces. This keeps the filling intact. 1. Arrange the sliced roll-ups on the baking sheet. Place them cut-side up, allowing space between each. 2. Bake in the preheated oven for 15-20 minutes. Look for a golden brown color and bubbling cheese. 3. Once baked, let the roll-ups cool for a few minutes. Serve them warm with pizza sauce for dipping. You can find the full recipe for Cheesy Pepperoni Pizza Roll-Ups [here]. To make the best cheesy pepperoni pizza roll-ups, focus on a few key details. - Ensuring Even Thickness of Dough Roll the dough to about 1/4 inch thick. This helps the roll-ups cook evenly. If your dough is too thick, the inside may remain raw. If it's too thin, it may tear. A good thickness keeps everything just right. - Keeping Fillings Enclosed When you roll the dough, start tight and keep the fillings inside. If the cheese and pepperoni peek out, they can burn or spill during baking. Use your fingers to pinch the ends and seal them well. This step ensures the cheesy goodness stays inside. Serving these roll-ups can be fun and creative! - Pairing with Pizza Sauce A small bowl of pizza sauce makes a great dip. It adds flavor and moisture. You can also try ranch or garlic sauce for a twist. - Creative Presentation Ideas Arrange the roll-ups on a colorful platter. You might add fresh basil leaves around them for color. Place the sauce in the center for easy access. This makes your dish look as good as it tastes! You can take your roll-ups to the next level with some tasty tweaks. - Adding Extra Toppings Feel free to mix in veggies like bell peppers or mushrooms. You can also add more cheese, like cheddar or feta, for a unique flavor. - Adjusting Spiciness with Red Pepper Flakes For those who enjoy heat, sprinkle red pepper flakes over the filling. This simple addition can make your roll-ups kick up a notch! Just remember, not everyone likes spice, so offer plain ones too. For the full recipe and more details, check out the Full Recipe section. {{image_4}} When it comes to Cheesy Pepperoni Pizza Roll-Ups, you can have fun with variations. These roll-ups are easy to customize. Let’s explore some great ideas. - Using Different Cheeses: You can swap mozzarella for cheddar or pepper jack. Cheddar adds a sharp taste, while pepper jack brings a spicy kick. - Alternative Meats: Try using sausage or ham instead of pepperoni. You can even go meatless with veggies like bell peppers or mushrooms. - Different Sauces: Instead of pizza sauce, dip your roll-ups in BBQ or Alfredo sauce. Each sauce gives a new twist to the flavor. - Herbs and Spices: Feel free to add Italian seasoning or crushed garlic to enhance the taste. This adds a nice touch and makes it more exciting. - Gluten-Free Dough Options: If you need gluten-free options, look for gluten-free pizza dough. Many stores sell it ready-made. - Vegan Cheese Alternatives: For a vegan version, use plant-based cheese. It melts well and keeps the cheesy goodness. These variations make your Cheesy Pepperoni Pizza Roll-Ups unique and tasty. You can be creative and find what you like best. For a full recipe, check out the [Full Recipe]. To keep your cheesy pepperoni pizza roll-ups fresh, store them in the fridge. Place them in an airtight container. This helps keep them moist and tasty. If you don't have one, wrap them tightly in plastic wrap. They will stay good for about 3 days. If you want to save them for later, freezing works well. Let the roll-ups cool completely before you freeze them. Wrap each roll securely in plastic wrap. Then, put them in a freezer bag or container. They can last up to 3 months in the freezer. When you're ready to eat them, reheat in the oven. Preheat the oven to 350°F (175°C). Place the frozen roll-ups on a baking sheet. Heat for about 15-20 minutes, or until hot and cheesy again. This way, you enjoy your tasty snack anytime! For the full recipe, check the main article. Bake these roll-ups for 15 to 20 minutes at 400°F (200°C). You want them golden brown. The cheese should be hot and bubbly. Keep an eye on them towards the end to prevent burning. Yes, you can prep these roll-ups ahead. Roll them up, slice them, and then cover with plastic wrap. Store them in the fridge for up to 24 hours. When ready, bake them straight from the fridge. Just check for extra baking time. If you don’t have pizza sauce, try marinara or ranch dressing. You can also use pesto for a fun twist. BBQ sauce adds a nice kick too. Get creative with your favorite sauces for dipping. Absolutely! You can use veggie pepperoni or mushrooms for texture. Try adding bell peppers or spinach for more flavor. Cheese is a must, so keep that for a cheesy bite! In this blog post, we explored how to make delicious Cheesy Pepperoni Pizza Roll-Ups. We covered essential ingredients, preparation steps, and baking tips. I shared creative variations and helpful storage advice. Remember, these roll-ups are perfect for sharing or a quick snack. Have fun experimenting with toppings and flavors. Whether you stick to the classics or get creative, enjoy your tasty creation!](https://tossedflavors.com/wp-content/uploads/2025/05/7caa5662-80e4-4038-b3de-841362e9b0a5-300x300.webp)