![To make delicious mini lemon cheesecakes, gather these key ingredients: - 1 cup graham cracker crumbs - 1/4 cup unsalted butter, melted - 2 tablespoons granulated sugar - 16 oz cream cheese, softened - 1 cup powdered sugar - 2 large eggs - 1 tablespoon fresh lemon zest - 1/4 cup freshly squeezed lemon juice - 1 teaspoon pure vanilla extract These ingredients create a balance of sweet and tart flavors. The cream cheese gives the cheesecake its rich texture, while the lemon adds a bright touch. Remember, using room temperature cream cheese helps blend everything smoothly. You can elevate your mini cheesecakes with these optional garnishes: - Whipped cream - Lemon slices Adding whipped cream gives a light, airy feel. Lemon slices add a fresh look and a hint of extra citrus flavor. Feel free to get creative with toppings! To make your mini cheesecakes, you'll need some basic tools: - Muffin tin - Paper liners - Mixing bowls - Electric mixer - Measuring cups and spoons - Spoon or spatula Having these tools ready will help your cooking process run smoothly. The muffin tin shapes your cheesecakes perfectly, while the electric mixer ensures a creamy filling. Once you have everything, you’re ready to start your baking adventure! First, we need to set the stage for our mini lemon cheesecakes. Preheat your oven to 325°F (160°C). This temperature helps the cheesecakes bake evenly. While the oven warms up, grab a muffin tin and line it with paper liners. The liners stop the cheesecakes from sticking. This step helps make serving easier. Now, let’s create the crust. In a medium mixing bowl, combine: - 1 cup graham cracker crumbs - 1/4 cup unsalted butter, melted - 2 tablespoons granulated sugar Stir the crumbs, butter, and sugar until the crumbs feel moist. Take about 1 tablespoon of this mixture and press it into each muffin liner. Use a spoon or your fingers to pack it tightly. A solid base makes a great foundation for our creamy filling. Next, we’ll prepare the cream cheese filling. In a large mixing bowl, beat: - 16 oz cream cheese, softened Mix it until it’s smooth and creamy. This step is key for a lump-free filling. Gradually add: - 1 cup powdered sugar Blend these until fluffy. Then, add in: - 2 large eggs (one at a time) - 1 tablespoon fresh lemon zest - 1/4 cup freshly squeezed lemon juice - 1 teaspoon pure vanilla extract Mix until all is well combined. The filling should look rich and creamy. Now, let's fill those crusts! Carefully pour the cream cheese mixture over the crusts. Fill each liner about 3/4 full. This space allows the cheesecakes to rise a bit. Place the muffin tin in the preheated oven. Bake for 18-20 minutes. You want the centers to be set but still slightly jiggly. After they bake, take them out and let them cool to room temperature. Once cooled, put them in the fridge for at least 2 hours. This helps them set properly. When ready, feel free to garnish with whipped cream and slices of lemon for a fresh touch. Enjoy your mini lemon cheesecakes! For the complete recipe, check [Full Recipe]. To make the best mini lemon cheesecakes, start with room-temperature cream cheese. Cold cream cheese is hard to mix, and it can lead to lumps. Use an electric mixer to beat the cream cheese until it is smooth and creamy. This step is key. Make sure to scrape the bowl to mix all the cream cheese evenly. The texture of your mini cheesecakes should be light and fluffy. Be careful not to over-mix once you add the eggs. Mix just until combined. If you over-mix, your cheesecakes can become dense. Also, bake your cheesecakes until the centers jiggle slightly. This tells you they are perfectly cooked. One common mistake is not cooling the cheesecakes properly. After baking, let them cool at room temperature first. Chilling right away can cause cracks. Another mistake is filling the crusts too full. Fill them about three-quarters full to allow for rising. Finally, always use fresh lemon juice and zest for the best flavor. Don't skip this step. For the full recipe, check out the details above. {{image_4}} You can switch up the flavor of mini lemon cheesecakes in fun ways. Try using berries, like strawberries or blueberries. Just blend in some berry puree into the cream cheese mix. Chocolate is another great choice. Melt dark chocolate and fold it into the filling for a rich twist. You can even combine flavors, like lemon and raspberry, for a bright treat. Want a lighter version? Consider using Greek yogurt instead of cream cheese. It gives a tangy taste and cuts down on fat. You can swap granulated sugar for honey or maple syrup. This adds sweetness and a unique flavor. For the crust, use almond flour or oats instead of graham crackers. These options are gluten-free and packed with nutrients. Serve your mini cheesecakes with fresh fruit for a vibrant touch. Slices of strawberries, blueberries, or kiwi look beautiful on top. You could also drizzle some berry sauce or chocolate sauce over them. This adds flavor and makes your dessert pop. Try pairing them with a scoop of vanilla ice cream for a creamy contrast. Get the full recipe to make these delicious mini lemon cheesecakes and explore endless variations! To keep your mini lemon cheesecakes fresh, use a sealed container. Place them in the fridge. They will stay good for about five days. Make sure to separate layers with parchment paper. This prevents sticking. If you have toppings, add them right before serving. You can freeze these cheesecakes for later. Wrap each cheesecake in plastic wrap. Then, place them in a freezer bag. This keeps them safe from freezer burn. They will stay fresh for up to three months. When you want to enjoy them, just take them out and thaw in the fridge overnight. These mini cheesecakes taste best cold. However, if you enjoy them warm, you can reheat them gently. Use a microwave and heat for about 10-15 seconds. Avoid overheating, as it can change the texture. Enjoy them fresh from the fridge for a fluffy and tart delight. For the full recipe, refer to the earlier section. You can tell when the mini cheesecakes are done by checking the centers. They should look set but still jiggle slightly when you shake the pan. This slight jiggle means they will firm up as they cool. If they are too wobbly, they need more baking time. Yes, you can use alternative sweeteners like stevia or monk fruit. Keep in mind that these sweeteners can change the taste and texture. Start with half the amount of your chosen sweetener, then adjust to your taste. If you want a dairy-free option, you can use cashew cream or tofu. For a lower-fat choice, try Greek yogurt. Make sure the substitute is thick and creamy to get the right texture. To avoid cracks, do not overmix your batter. Also, bake at a lower temperature and avoid opening the oven during baking. Cooling the cheesecakes slowly in the oven helps too. Yes, you can make these mini cheesecakes a day in advance. Just store them in the fridge after they cool. They taste even better after chilling overnight, as the flavors blend nicely. Check the Full Recipe for more tips! In this blog post, we explored how to make mini cheesecakes from start to finish. We covered key ingredients, step-by-step instructions, and valuable tips for success. We also shared variations to try and essential storage tips. Remember, each cheesecake can be a fun twist on the classic. With practice, you can master this simple yet rewarding dessert. Enjoy the process and happy baking!](https://tossedflavors.com/wp-content/uploads/2025/05/3ac467f2-94b6-4735-b644-3d32d1eb014e.webp)
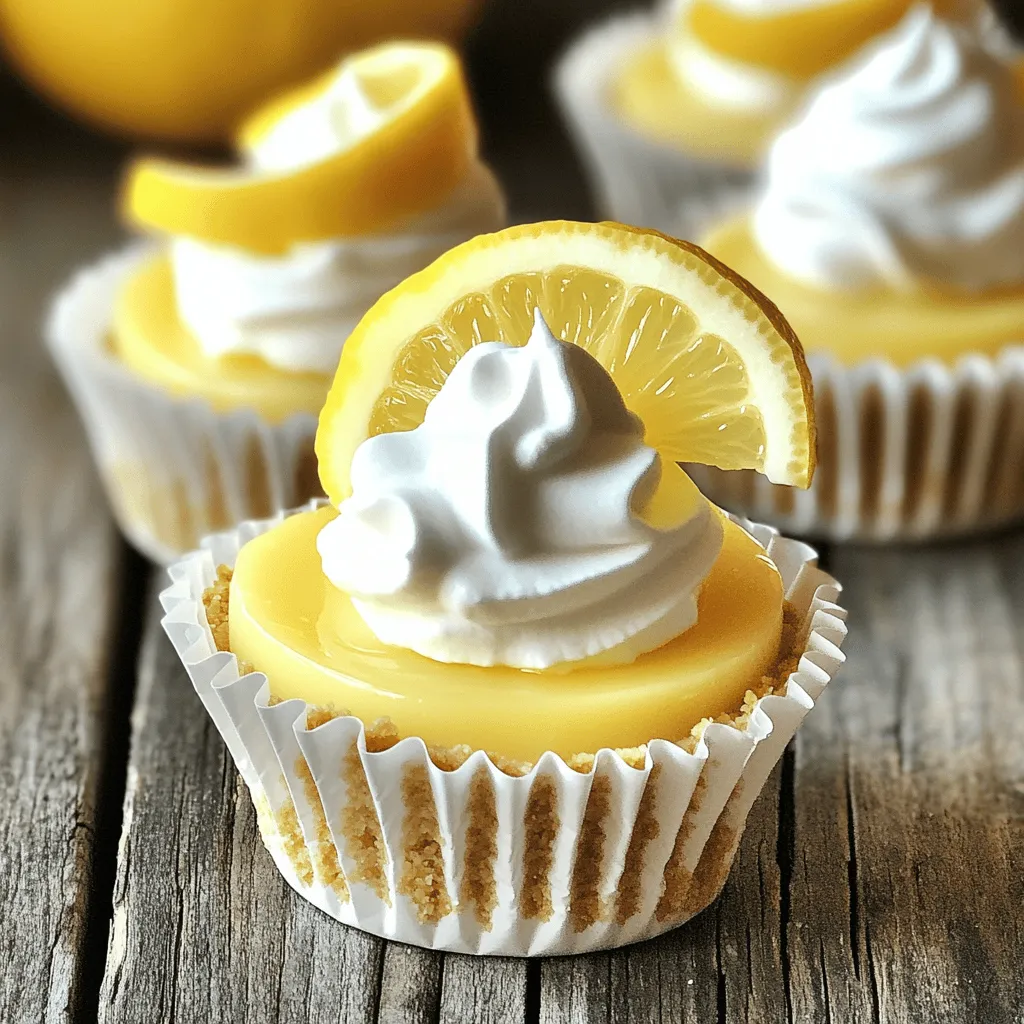
Ready to impress your friends with a delicious dessert? These Mini Lemon Cheesecakes are a fluffy and tart delight that everyone will love! With a simple recipe, you’ll create a creamy filling on a buttery graham cracker crust. Perfect for any occasion, these tiny treats are easy to make and even easier to devour. Let’s dive in and get started on this sweet adventure!
Ingredients
List of Key Ingredients
To make delicious mini lemon cheesecakes, gather these key ingredients:
– 1 cup graham cracker crumbs
– 1/4 cup unsalted butter, melted
– 2 tablespoons granulated sugar
– 16 oz cream cheese, softened
– 1 cup powdered sugar
– 2 large eggs
– 1 tablespoon fresh lemon zest
– 1/4 cup freshly squeezed lemon juice
– 1 teaspoon pure vanilla extract
These ingredients create a balance of sweet and tart flavors. The cream cheese gives the cheesecake its rich texture, while the lemon adds a bright touch. Remember, using room temperature cream cheese helps blend everything smoothly.
Optional Garnishes
You can elevate your mini cheesecakes with these optional garnishes:
– Whipped cream
– Lemon slices
Adding whipped cream gives a light, airy feel. Lemon slices add a fresh look and a hint of extra citrus flavor. Feel free to get creative with toppings!
Tools and Equipment Needed
To make your mini cheesecakes, you’ll need some basic tools:
– Muffin tin
– Paper liners
– Mixing bowls
– Electric mixer
– Measuring cups and spoons
– Spoon or spatula
Having these tools ready will help your cooking process run smoothly. The muffin tin shapes your cheesecakes perfectly, while the electric mixer ensures a creamy filling. Once you have everything, you’re ready to start your baking adventure!
Step-by-Step Instructions
Prepping the Oven and Muffin Tin
First, we need to set the stage for our mini lemon cheesecakes. Preheat your oven to 325°F (160°C). This temperature helps the cheesecakes bake evenly. While the oven warms up, grab a muffin tin and line it with paper liners. The liners stop the cheesecakes from sticking. This step helps make serving easier.
Making the Graham Cracker Crust
Now, let’s create the crust. In a medium mixing bowl, combine:
– 1 cup graham cracker crumbs
– 1/4 cup unsalted butter, melted
– 2 tablespoons granulated sugar
Stir the crumbs, butter, and sugar until the crumbs feel moist. Take about 1 tablespoon of this mixture and press it into each muffin liner. Use a spoon or your fingers to pack it tightly. A solid base makes a great foundation for our creamy filling.
Preparing the Cream Cheese Filling
Next, we’ll prepare the cream cheese filling. In a large mixing bowl, beat:
– 16 oz cream cheese, softened
Mix it until it’s smooth and creamy. This step is key for a lump-free filling. Gradually add:
– 1 cup powdered sugar
Blend these until fluffy. Then, add in:
– 2 large eggs (one at a time)
– 1 tablespoon fresh lemon zest
– 1/4 cup freshly squeezed lemon juice
– 1 teaspoon pure vanilla extract
Mix until all is well combined. The filling should look rich and creamy.
Baking and Cooling the Mini Cheesecakes
Now, let’s fill those crusts! Carefully pour the cream cheese mixture over the crusts. Fill each liner about 3/4 full. This space allows the cheesecakes to rise a bit. Place the muffin tin in the preheated oven. Bake for 18-20 minutes. You want the centers to be set but still slightly jiggly.
After they bake, take them out and let them cool to room temperature. Once cooled, put them in the fridge for at least 2 hours. This helps them set properly. When ready, feel free to garnish with whipped cream and slices of lemon for a fresh touch. Enjoy your mini lemon cheesecakes! For the complete recipe, check [Full Recipe].
Tips & Tricks
Best Practices for Cream Cheese Mixing
To make the best mini lemon cheesecakes, start with room-temperature cream cheese. Cold cream cheese is hard to mix, and it can lead to lumps. Use an electric mixer to beat the cream cheese until it is smooth and creamy. This step is key. Make sure to scrape the bowl to mix all the cream cheese evenly.
Ensuring Perfect Cheesecake Texture
The texture of your mini cheesecakes should be light and fluffy. Be careful not to over-mix once you add the eggs. Mix just until combined. If you over-mix, your cheesecakes can become dense. Also, bake your cheesecakes until the centers jiggle slightly. This tells you they are perfectly cooked.
Common Mistakes to Avoid
One common mistake is not cooling the cheesecakes properly. After baking, let them cool at room temperature first. Chilling right away can cause cracks. Another mistake is filling the crusts too full. Fill them about three-quarters full to allow for rising. Finally, always use fresh lemon juice and zest for the best flavor. Don’t skip this step.
For the full recipe, check out the details above.
Variations
Flavor Alternatives
You can switch up the flavor of mini lemon cheesecakes in fun ways. Try using berries, like strawberries or blueberries. Just blend in some berry puree into the cream cheese mix. Chocolate is another great choice. Melt dark chocolate and fold it into the filling for a rich twist. You can even combine flavors, like lemon and raspberry, for a bright treat.
Healthier Substitutes for Ingredients
Want a lighter version? Consider using Greek yogurt instead of cream cheese. It gives a tangy taste and cuts down on fat. You can swap granulated sugar for honey or maple syrup. This adds sweetness and a unique flavor. For the crust, use almond flour or oats instead of graham crackers. These options are gluten-free and packed with nutrients.
Serving Suggestions
Serve your mini cheesecakes with fresh fruit for a vibrant touch. Slices of strawberries, blueberries, or kiwi look beautiful on top. You could also drizzle some berry sauce or chocolate sauce over them. This adds flavor and makes your dessert pop. Try pairing them with a scoop of vanilla ice cream for a creamy contrast.
Get the full recipe to make these delicious mini lemon cheesecakes and explore endless variations!
Storage Info
How to Store Leftover Mini Cheesecakes
To keep your mini lemon cheesecakes fresh, use a sealed container. Place them in the fridge. They will stay good for about five days. Make sure to separate layers with parchment paper. This prevents sticking. If you have toppings, add them right before serving.
Freezing Options for Later Enjoyment
You can freeze these cheesecakes for later. Wrap each cheesecake in plastic wrap. Then, place them in a freezer bag. This keeps them safe from freezer burn. They will stay fresh for up to three months. When you want to enjoy them, just take them out and thaw in the fridge overnight.
Reheating Guidelines
These mini cheesecakes taste best cold. However, if you enjoy them warm, you can reheat them gently. Use a microwave and heat for about 10-15 seconds. Avoid overheating, as it can change the texture. Enjoy them fresh from the fridge for a fluffy and tart delight. For the full recipe, refer to the earlier section.
FAQs
How do I know when the cheesecakes are done?
You can tell when the mini cheesecakes are done by checking the centers. They should look set but still jiggle slightly when you shake the pan. This slight jiggle means they will firm up as they cool. If they are too wobbly, they need more baking time.
Can I use alternative sweeteners?
Yes, you can use alternative sweeteners like stevia or monk fruit. Keep in mind that these sweeteners can change the taste and texture. Start with half the amount of your chosen sweetener, then adjust to your taste.
What can I substitute for cream cheese?
If you want a dairy-free option, you can use cashew cream or tofu. For a lower-fat choice, try Greek yogurt. Make sure the substitute is thick and creamy to get the right texture.
How do I prevent my cheesecakes from cracking?
To avoid cracks, do not overmix your batter. Also, bake at a lower temperature and avoid opening the oven during baking. Cooling the cheesecakes slowly in the oven helps too.
Can I make these mini cheesecakes ahead of time?
Yes, you can make these mini cheesecakes a day in advance. Just store them in the fridge after they cool. They taste even better after chilling overnight, as the flavors blend nicely. Check the Full Recipe for more tips!
In this blog post, we explored how to make mini cheesecakes from start to finish. We covered key ingredients, step-by-step instructions, and valuable tips for success. We also shared variations to try and essential storage tips. Remember, each cheesecake can be a fun twist on the classic. With practice, you can master this simple yet rewarding dessert. Enjoy the process and happy baking!
![To make delicious mini lemon cheesecakes, gather these key ingredients: - 1 cup graham cracker crumbs - 1/4 cup unsalted butter, melted - 2 tablespoons granulated sugar - 16 oz cream cheese, softened - 1 cup powdered sugar - 2 large eggs - 1 tablespoon fresh lemon zest - 1/4 cup freshly squeezed lemon juice - 1 teaspoon pure vanilla extract These ingredients create a balance of sweet and tart flavors. The cream cheese gives the cheesecake its rich texture, while the lemon adds a bright touch. Remember, using room temperature cream cheese helps blend everything smoothly. You can elevate your mini cheesecakes with these optional garnishes: - Whipped cream - Lemon slices Adding whipped cream gives a light, airy feel. Lemon slices add a fresh look and a hint of extra citrus flavor. Feel free to get creative with toppings! To make your mini cheesecakes, you'll need some basic tools: - Muffin tin - Paper liners - Mixing bowls - Electric mixer - Measuring cups and spoons - Spoon or spatula Having these tools ready will help your cooking process run smoothly. The muffin tin shapes your cheesecakes perfectly, while the electric mixer ensures a creamy filling. Once you have everything, you’re ready to start your baking adventure! First, we need to set the stage for our mini lemon cheesecakes. Preheat your oven to 325°F (160°C). This temperature helps the cheesecakes bake evenly. While the oven warms up, grab a muffin tin and line it with paper liners. The liners stop the cheesecakes from sticking. This step helps make serving easier. Now, let’s create the crust. In a medium mixing bowl, combine: - 1 cup graham cracker crumbs - 1/4 cup unsalted butter, melted - 2 tablespoons granulated sugar Stir the crumbs, butter, and sugar until the crumbs feel moist. Take about 1 tablespoon of this mixture and press it into each muffin liner. Use a spoon or your fingers to pack it tightly. A solid base makes a great foundation for our creamy filling. Next, we’ll prepare the cream cheese filling. In a large mixing bowl, beat: - 16 oz cream cheese, softened Mix it until it’s smooth and creamy. This step is key for a lump-free filling. Gradually add: - 1 cup powdered sugar Blend these until fluffy. Then, add in: - 2 large eggs (one at a time) - 1 tablespoon fresh lemon zest - 1/4 cup freshly squeezed lemon juice - 1 teaspoon pure vanilla extract Mix until all is well combined. The filling should look rich and creamy. Now, let's fill those crusts! Carefully pour the cream cheese mixture over the crusts. Fill each liner about 3/4 full. This space allows the cheesecakes to rise a bit. Place the muffin tin in the preheated oven. Bake for 18-20 minutes. You want the centers to be set but still slightly jiggly. After they bake, take them out and let them cool to room temperature. Once cooled, put them in the fridge for at least 2 hours. This helps them set properly. When ready, feel free to garnish with whipped cream and slices of lemon for a fresh touch. Enjoy your mini lemon cheesecakes! For the complete recipe, check [Full Recipe]. To make the best mini lemon cheesecakes, start with room-temperature cream cheese. Cold cream cheese is hard to mix, and it can lead to lumps. Use an electric mixer to beat the cream cheese until it is smooth and creamy. This step is key. Make sure to scrape the bowl to mix all the cream cheese evenly. The texture of your mini cheesecakes should be light and fluffy. Be careful not to over-mix once you add the eggs. Mix just until combined. If you over-mix, your cheesecakes can become dense. Also, bake your cheesecakes until the centers jiggle slightly. This tells you they are perfectly cooked. One common mistake is not cooling the cheesecakes properly. After baking, let them cool at room temperature first. Chilling right away can cause cracks. Another mistake is filling the crusts too full. Fill them about three-quarters full to allow for rising. Finally, always use fresh lemon juice and zest for the best flavor. Don't skip this step. For the full recipe, check out the details above. {{image_4}} You can switch up the flavor of mini lemon cheesecakes in fun ways. Try using berries, like strawberries or blueberries. Just blend in some berry puree into the cream cheese mix. Chocolate is another great choice. Melt dark chocolate and fold it into the filling for a rich twist. You can even combine flavors, like lemon and raspberry, for a bright treat. Want a lighter version? Consider using Greek yogurt instead of cream cheese. It gives a tangy taste and cuts down on fat. You can swap granulated sugar for honey or maple syrup. This adds sweetness and a unique flavor. For the crust, use almond flour or oats instead of graham crackers. These options are gluten-free and packed with nutrients. Serve your mini cheesecakes with fresh fruit for a vibrant touch. Slices of strawberries, blueberries, or kiwi look beautiful on top. You could also drizzle some berry sauce or chocolate sauce over them. This adds flavor and makes your dessert pop. Try pairing them with a scoop of vanilla ice cream for a creamy contrast. Get the full recipe to make these delicious mini lemon cheesecakes and explore endless variations! To keep your mini lemon cheesecakes fresh, use a sealed container. Place them in the fridge. They will stay good for about five days. Make sure to separate layers with parchment paper. This prevents sticking. If you have toppings, add them right before serving. You can freeze these cheesecakes for later. Wrap each cheesecake in plastic wrap. Then, place them in a freezer bag. This keeps them safe from freezer burn. They will stay fresh for up to three months. When you want to enjoy them, just take them out and thaw in the fridge overnight. These mini cheesecakes taste best cold. However, if you enjoy them warm, you can reheat them gently. Use a microwave and heat for about 10-15 seconds. Avoid overheating, as it can change the texture. Enjoy them fresh from the fridge for a fluffy and tart delight. For the full recipe, refer to the earlier section. You can tell when the mini cheesecakes are done by checking the centers. They should look set but still jiggle slightly when you shake the pan. This slight jiggle means they will firm up as they cool. If they are too wobbly, they need more baking time. Yes, you can use alternative sweeteners like stevia or monk fruit. Keep in mind that these sweeteners can change the taste and texture. Start with half the amount of your chosen sweetener, then adjust to your taste. If you want a dairy-free option, you can use cashew cream or tofu. For a lower-fat choice, try Greek yogurt. Make sure the substitute is thick and creamy to get the right texture. To avoid cracks, do not overmix your batter. Also, bake at a lower temperature and avoid opening the oven during baking. Cooling the cheesecakes slowly in the oven helps too. Yes, you can make these mini cheesecakes a day in advance. Just store them in the fridge after they cool. They taste even better after chilling overnight, as the flavors blend nicely. Check the Full Recipe for more tips! In this blog post, we explored how to make mini cheesecakes from start to finish. We covered key ingredients, step-by-step instructions, and valuable tips for success. We also shared variations to try and essential storage tips. Remember, each cheesecake can be a fun twist on the classic. With practice, you can master this simple yet rewarding dessert. Enjoy the process and happy baking!](https://tossedflavors.com/wp-content/uploads/2025/05/3ac467f2-94b6-4735-b644-3d32d1eb014e-300x300.webp)