TOSSED FLAVORS
Where flavors are fresh, vibrant, and ready to toss! 🥗
BEST CATEGORIES
TRENDING
![Here’s everything you need to make One Pan Cajun Dirty Orzo. Gather these simple items: - 1 cup orzo pasta - 2 tablespoons olive oil - 1 medium onion, finely diced - 3 cloves garlic, minced - 1 red bell pepper, finely diced - 1 green bell pepper, finely diced - 1 stalk celery, finely diced - 1 teaspoon Cajun seasoning - 1/2 teaspoon smoked paprika - 1 can (14 oz) diced tomatoes, with juice - 3 cups vegetable broth - 1 cup frozen okra, sliced - 1 1/2 cups cooked chicken, shredded (or a plant-based alternative) - Salt and pepper to taste - Fresh parsley, chopped, for garnish Using fresh and quality ingredients makes a big difference. The orzo pasta serves as the base and soaks up all the flavors. The Cajun seasoning and smoked paprika add warmth and depth. You can easily swap the chicken for a plant-based option, keeping the dish friendly for everyone. For the best taste, use fresh vegetables. Fresh parsley adds a bright pop at the end. Check out the [Full Recipe] for step-by-step cooking details. - Heat olive oil in a large skillet. - Sauté diced onions until translucent. - Add minced garlic and sauté until fragrant. First, I heat the olive oil in a large skillet over medium heat. This helps the oil become nice and hot. Next, I add the finely diced onion to the skillet. I sauté it for about 3-4 minutes. I wait until the onion turns translucent. This means it looks clear and shiny. Then, I add the minced garlic. I stir it for another minute. The garlic should smell great by now. - Incorporate diced bell peppers and celery. - Stir in Cajun seasoning and smoked paprika. After the garlic is fragrant, I toss in the diced red and green bell peppers along with the celery. I sauté the mixture for about 5 minutes. I want the veggies to soften a bit. Then, I sprinkle in the Cajun seasoning and smoked paprika. I stir well to mix everything. Let the spices bloom for a minute. This makes the flavors pop. - Add orzo and toast for 2 minutes. - Mix in diced tomatoes and vegetable broth. - Simmer until orzo is tender. Now, I add the orzo pasta to the skillet. I mix it with the veggies and toast it for about 2 minutes. This step adds a nice nutty flavor. Then, I pour in the diced tomatoes along with their juice and the vegetable broth. I stir everything to combine it well. I bring the mixture to a gentle simmer. I cover the skillet and cook for about 10-12 minutes. I stir occasionally until the orzo is tender and has absorbed most of the liquid. - Incorporate okra and chicken or plant-based alternative. - Season with salt and pepper. - Garnish with parsley before serving. Once the orzo is cooked, I add the sliced okra and shredded chicken. If I want a plant-based dish, I can use a plant-based protein instead. I mix everything thoroughly. I continue to cook for another 5 minutes until everything is heated through. Then, I season the dish with salt and pepper to taste. Finally, I remove the skillet from heat. I garnish with freshly chopped parsley before serving warm. For the full recipe, check out the details. Toasting orzo is easy and adds a great taste. Heat a little olive oil in your pan. Add the orzo and stir for about 2 minutes. You want it to get a light golden color. This step brings out the nutty flavor. To enhance flavor with spices, always bloom your seasonings first. When you add spices like Cajun seasoning and smoked paprika, make sure to stir them in with the veggies. Let them cook for a minute. This helps the spices release their full flavor. Serve your One Pan Cajun Dirty Orzo in shallow bowls. This makes it look nice and lets the colors shine. For a fun twist, add a few slices of fresh bell pepper on top. Pair this dish with a crisp salad or some garlic bread. These sides balance the rich flavors and add freshness. You can also serve it with a light vegetable dish for more variety. One common mistake is overcooking the orzo. Keep an eye on the cooking time. Stir it often to prevent it from sticking. You want it tender, not mushy. Another mistake is skipping the seasoning bloom. This step is key for a tasty dish. Without it, the spices won’t reach their full potential. Always take that moment to let your spices shine before mixing in the orzo and other ingredients. For more details, check out the Full Recipe! {{image_4}} You can switch proteins easily in this dish. Chicken works great, but plant-based proteins shine just as well. Try using shredded jackfruit or tofu for a tasty twist. If you're feeling adventurous, add shrimp or spicy sausage. Both options bring a great flavor boost. Feel free to mix in other vegetables. Zucchini, corn, or spinach fit nicely in the dish. You can also swap in seasonal veggies. In summer, fresh tomatoes or bell peppers shine. In fall, try butternut squash for a warm touch. The goal is to use what you have on hand. You can adjust the spice to suit your taste. If you prefer a milder dish, reduce the Cajun seasoning. Adding a touch of honey can help balance the heat. For more spice, try adding cayenne pepper or hot sauce. These small changes can make a big difference in flavor. For the Full Recipe, you can find all the details needed to create this delicious meal. To keep your One Pan Cajun Dirty Orzo fresh, store it in an airtight container. This helps to keep out air and moisture. Let the dish cool to room temperature before sealing it up. You can keep leftovers in the fridge for about 3 to 4 days. For best results, use glass or BPA-free plastic containers. They are sturdy and help keep the flavors intact. To reheat your orzo, use a microwave or stovetop. If using a microwave, place the orzo in a bowl and add a splash of water. This will help keep it moist. Heat in short bursts, stirring in between. If using the stovetop, add a little broth or water to a pan. Heat gently, stirring until warm. This keeps the texture nice and creamy. Yes, you can freeze Cajun dirty orzo. To do this, let it cool completely first. Then, scoop it into freezer-safe bags or containers. Remove as much air as possible before sealing. This helps prevent freezer burn. When you're ready to eat it, thaw in the fridge overnight. Then, reheat using the tips above to enjoy your meal again! Cajun dirty orzo is a one-pan dish with bold flavors. It combines orzo pasta with spices, vegetables, and protein. The term "dirty" refers to the mix of ingredients that create a rich and hearty meal. You get a taste of Cajun spice from the seasoning, which adds warmth and depth. The dish often features smoky notes from paprika and savory richness from tomatoes. It’s colorful, filling, and perfect for any meal. Yes, you can easily make Cajun dirty orzo vegetarian. Simply swap the chicken for a plant-based protein, like chickpeas or tofu. You can also add more veggies. Try zucchini, mushrooms, or spinach for extra texture and flavor. Use vegetable broth instead of chicken broth to keep it vegetarian. This dish is quick to prepare. The total time is about 30 minutes. Prep time takes around 10 minutes, while cooking takes 20 minutes. You can have a delicious meal ready in no time, perfect for busy days or weeknight dinners. Absolutely! You can adjust the spice level to fit your taste. If you like it mild, use less Cajun seasoning. For more heat, add cayenne pepper or hot sauce. Start with a small amount and taste as you go. This way, you can find the perfect balance for your palate. Yes, Cajun dirty orzo can be made gluten-free. Look for gluten-free orzo made from rice or corn. You can also use other gluten-free pasta shapes like quinoa or rice. Just make sure to check the labels to ensure they meet your dietary needs. Enjoy this tasty dish without worry! In this article, we explored the ingredients and steps for making Cajun dirty orzo. You learned about the key components, like orzo, veggies, and spices, that bring flavor. I shared tips on storage and reheating to keep your dish fresh. Remember, you can customize this meal with different proteins and veggies to suit your taste. Enjoy creating your own version, and don’t forget to share your results. Cooking should be fun and delicious, so dive in!](https://tossedflavors.com/wp-content/uploads/2025/06/dfc295f4-2e67-4e2c-8656-f337c1fcfd1a.webp)

NEW RECIPES
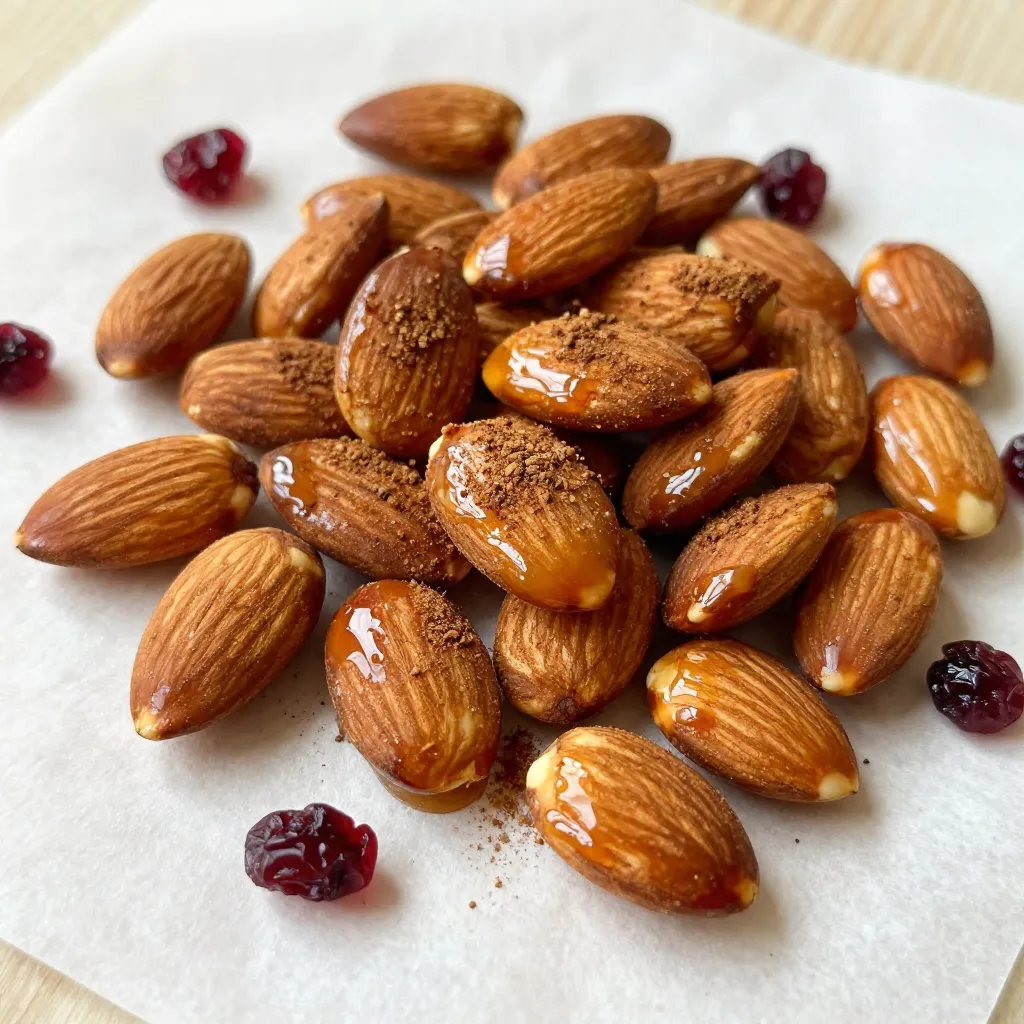
Maple Cinnamon Roasted Almonds Tasty and Healthy Snack
Looking for a tasty and healthy snack? Try making Maple Cinnamon Roasted Almonds! This easy recipe combines creamy almonds with warm maple and cinnamon flavors.

Spinach Artichoke Stuffed Chicken Flavorful Delight
Are you ready to impress at your next dinner? Spinach Artichoke Stuffed Chicken is a tasty dish that combines creamy flavors and a juicy chicken

Strawberry Cheesecake Stuffed French Toast Delight
Welcome to a breakfast dream that will delight your taste buds! Today, we’re diving into Strawberry Cheesecake Stuffed French Toast. This sweet twist on a
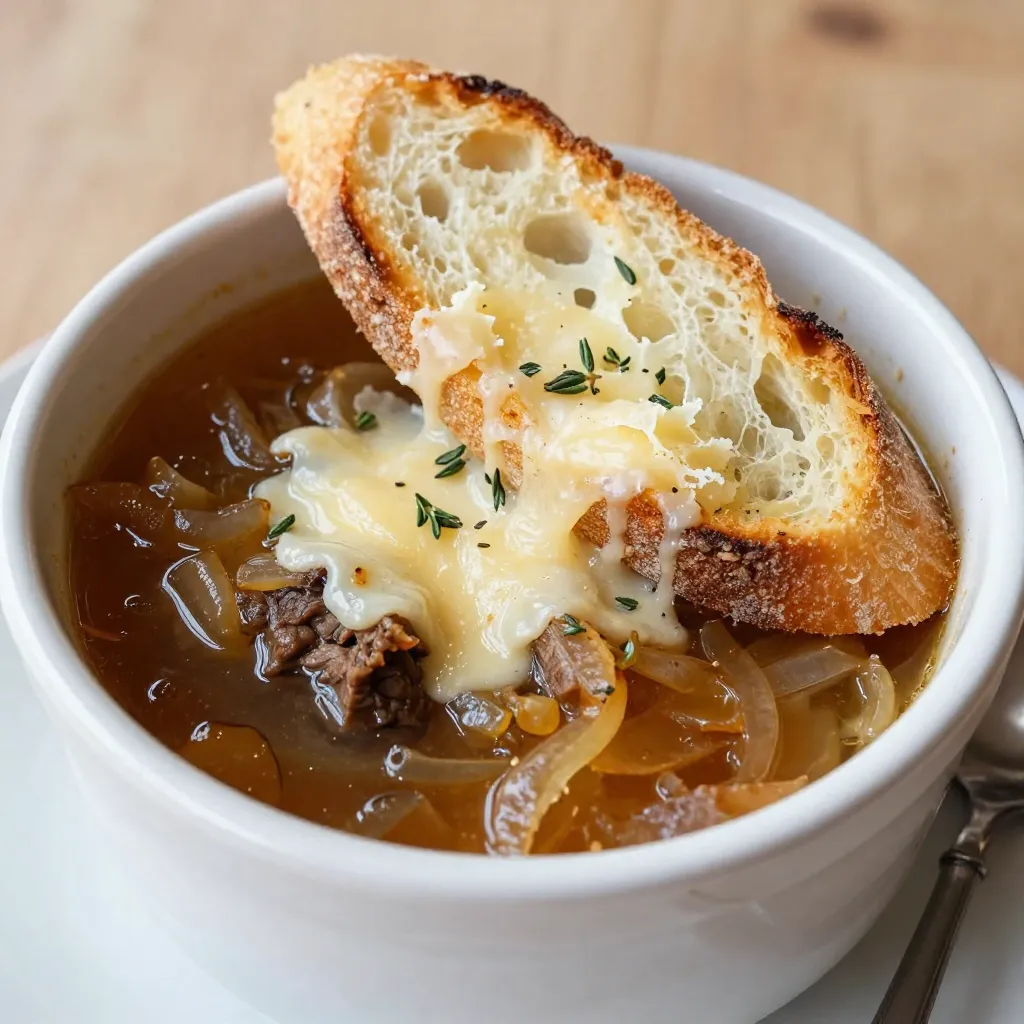
Classic French Onion Soup Irresistible Flavor Delight
Are you ready to savor the delightful taste of Classic French Onion Soup? This rich, warm dish combines sweet caramelized onions with savory broth and
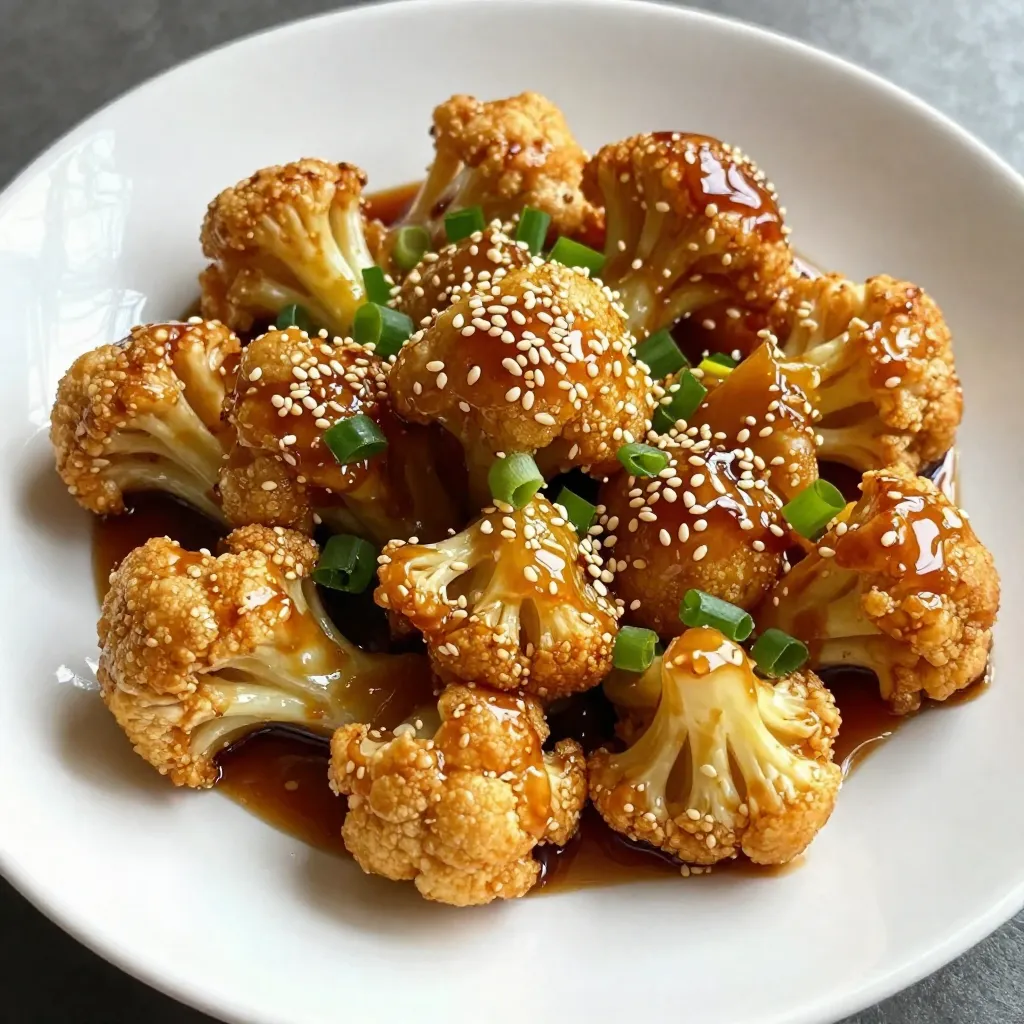
Sticky Sesame Cauliflower Crispy and Flavorful Dish
If you crave a dish that’s both crispy and packed with flavor, you’re in for a treat! My Sticky Sesame Cauliflower is your new go-to

Greek Chicken Gyro Bowls Flavorful Meal Idea
Are you ready to spice up your dinner routine? Greek Chicken Gyro Bowls are a flavorful meal idea that packs a punch! With juicy chicken,
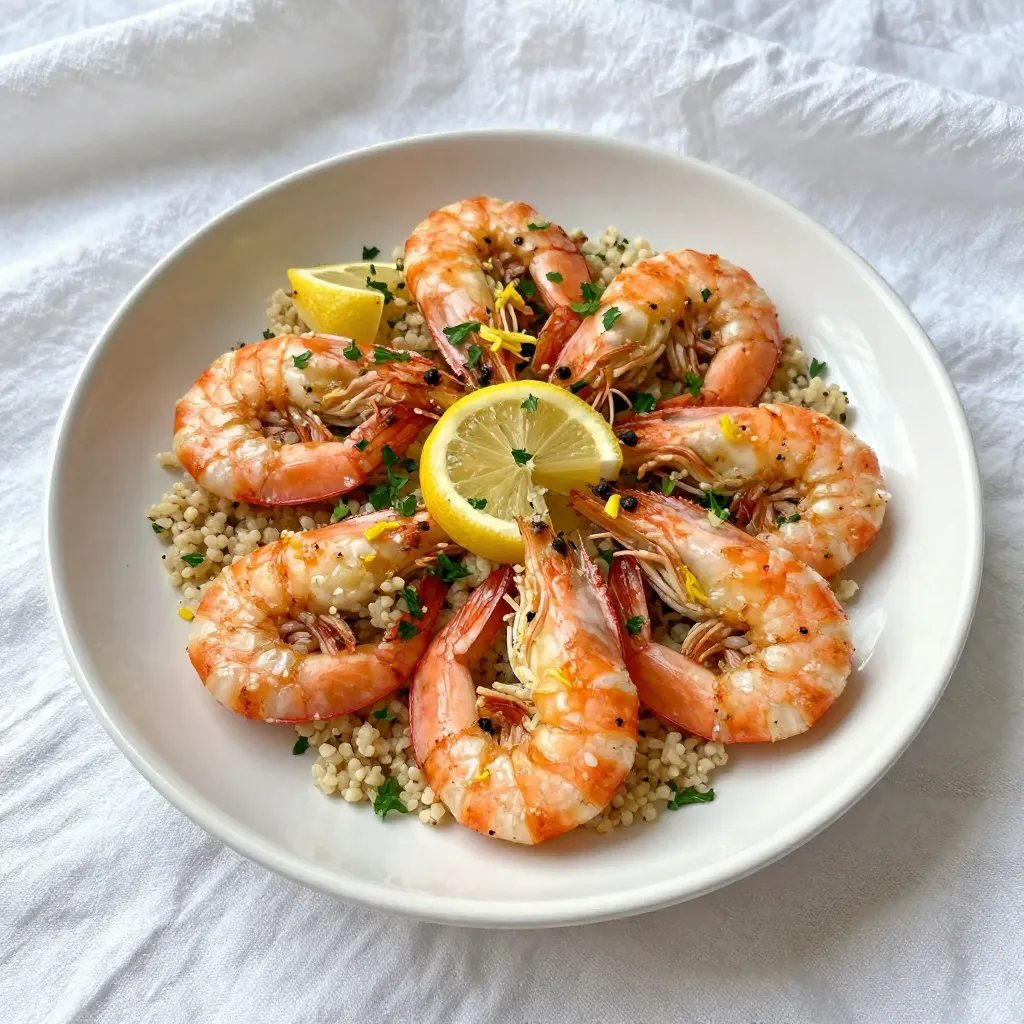
Lemon Garlic Roasted Shrimp Simple and Flavorful Dish
If you’re looking for a quick and tasty meal, Lemon Garlic Roasted Shrimp is the answer. This dish combines fresh shrimp with bright flavors, making

Chocolate Dipped Coconut Macaroons Irresistible Treat
Welcome to the world of Chocolate Dipped Coconut Macaroons—an irresistible treat! If you love sweet, chewy coconut surrounded by rich chocolate, then this recipe is